background image

44     Gebruiksaanwijzing 

Titan 


Nadat de accu is opgeladen hoeft de lader niet uitgeschakeld te worden en kan de accu op de 
lader aangesloten blijven. 

3.3 Onderhoud 

De Titan lader vereist geen specifiek onderhoud. Wel is een jaarlijkse controle van de accu 
aansluitingen aan te bevelen. 
Houd de lader droog, schoon en stofvrij. Wanneer zich problemen met de Titan lader 
voordoen, kunt u aan de hand van het foutzoekschema in hoofdstuk 5 de storing opsporen. 

Содержание SKYLLA-TG 24/100

Страница 1: ...USER MANUAL GEBRUIKSAANWIJZING GEBRAUCHSANWEISUNG SKYLLA TG 24 80 SKYLLA TG 24 100 SKYLLA TG 24 100 3 Phase TITAN 48 50 Victron Energy ...

Страница 2: ......

Страница 3: ...Manual Titan 1 SECTIONS Page English 3 Nederlands 31 Deutsch 59 ...

Страница 4: ...ABLE TO ANYONE FOR SPECIAL COLLATERAL INCIDENTAL OR CONSEQUENTIAL DAMAGES IN CONNECTION WITH OR ARISING OUT OF PURCHASE OR USE OF THESE VICTRON ENERGY PRODUCTS THE SOLE AND EXCLUSIVE LIABILITY TO VICTRON ENERGY B V REGARDLESS OF THE FORM OF ACTION SHALL NOT EXCEED THE PURCHASE PRICE OF THE VICTRON ENERGY PRODUCTS DESCRIBED HEREIN For conditions of use and permission to use this manual for publicat...

Страница 5: ...Manual Titan 3 USER MANUAL SKYLLA TG 24 80 SKYLLA TG 24 100 SKYLLA TG 24 100 3 Phase TITAN 48 50 Victron Energy ...

Страница 6: ...e 18 4 3 Adjusting the equalize charging mode time 19 4 4 Diode splitter charge voltage compensation 19 4 5 Traction battery compensation 20 4 6 Use as a power supply 20 4 7 Use of a temperature sensor 20 4 8 Charging batteries with voltage sensing 21 4 9 Intelligent startup 21 4 10 Connecting the output voltage alarm 22 4 11 Connecting remote panels 22 4 12 Connecting a remote on off switch 23 4 ...

Страница 7: ...ions in the field on ships and in other places where mobile power is indispensable Victron Energy equipment can be used for all kinds of electrical appliances for household technical and administrative purposes and instruments susceptible to interference 1 2 The Titan Generation chargers This manual contains directions for installing the following chargers Skylla TG 24 80 Skylla TG 24 100 Skylla T...

Страница 8: ...attery polarity There is a dangerous voltage present on some of the metal parts inside the battery charger The on off switch at the front of the cabinet does not switch off the mains supply Disconnect the mains supply before making or breaking the connections to the battery Do not use the voltage sense facility in combination with the diode splitter compensation This will raise the output voltage ...

Страница 9: ... this mode the battery is charged until the battery voltage reaches the boost voltage At this point the battery is charged to approximately 80 of its maximum capacity This is the end of the boost charge mode and the Titan charger automatically switches to the equalize charge mode During the equalize charge mode the charging voltage stays the same as the boost voltage but the charge current slowly ...

Страница 10: ...y You can use this battery for starting machines like a boat engine for this application The Titan charger has a stabilised output voltage Therefore the Titan charger can also be used as a DC power supply in applications where no battery is present 2 2 The battery The Titan charger can charge various batteries The recommended battery capacity is indicated in the table below Type Recommended capaci...

Страница 11: ...ches 0 Volt The battery charger resumes normal operation when the short circuit is removed The short circuit current can also be reduced by the Victron Energy COV panel Input protection The charger mains input is protected with a fuse The charger will not be damaged by using input voltage between 0 and 300 Vac The charger will not be damaged by using input voltage frequency between 0 and 65 Hz Ove...

Страница 12: ...inates continuously The charger resumes operation when the internal temperature is restored within limits Voltage sense protection When the voltage sense facility is used the charger automatically decreases the output voltage when the voltage loss over the battery cables is more than 2 Volt in total Battery watchdog timer The charger is equipped with a battery watchdog timer This timer measures th...

Страница 13: ...the earth plate or to the hull of the ship On land Connect the earth screw to the earth of the mains Mobile applications a vehicle a car or a caravan Connect the earth screw to the frame of the vehicle Connecting the battery The connections between the Titan charger and the battery are essential for a good operation of the charger Therefore the battery connections need tightening well It is import...

Страница 14: ...ry cable to the connection tool see illustration 3 Check if the green led illuminates see illustration 3 If not the positive and negative battery cables have been reversed Disconnect the connection tool and connect the negative battery cable The battery disconnection sequence Switch off the charger Disconnect the mains supply Disconnect the negative battery cable Disconnect the positive battery ca...

Страница 15: ...move the front of the battery charger to access the AC input connector Connect the mains PE cable green yellow to the AC input connector located on the circuit board see illustration 4 Connect the mains neutral cable blue to the AC input connector Connect the mains line cable brown to the AC input connector Plug the mains cable into the mains socket Make sure that the mains socket is connected to ...

Страница 16: ...tor Connect the mains PE cable green yellow to the AC input connector located next to the Magnetic Circuit Breaker see illustration 4b Connect the 3 mains line cables to the Magnetic Circuit Breaker Plug the mains cable into the mains socket Make sure that the mains socket is connected to earth The connection to the earth of the mains has to be according to applicable safety standards ...

Страница 17: ... led illuminates According to the condition of the battery the charger will start in the boost charge mode or at float charge mode If the battery is not full the boost led illuminates and the charger will start boost charging the battery A dip switch can be used to set the charger so that it will always start charging in the boost mode irrespective of the condition of the battery When the battery ...

Страница 18: ...s can stay connected to the battery charger 3 3 Maintenance The Titan charger does not require any specific maintenance However an annual check of the battery connections is recommended Keep the charger dry clean and free of dust If any problems arise use the fault finding procedure to trace the fault see chapter 5 ...

Страница 19: ...ry charger Adjustments can be made by means of turning a potentiometer or by changing the position of a switch on the DIP switch See illustration 7 for the location of the DIP switch and the potentiometers Illustration 6 Removing the front The cover of the Titan may only be removed by a qualified technician Before obtaining access to the Titan the mains supply circuit must be disconnected There is...

Страница 20: ...and boost voltage The boost voltage is always higher than the float voltage These charging voltages are the recommended values from almost every battery manufacturer Before adjusting the charge voltage disconnect the temperature sensor and or the voltage sense wires To change the float voltage Remove all batteries and other users that are connected to the output of the battery charger Plug the AC ...

Страница 21: ...of the equalize charge mode can be changed to fit the specifications of the battery The duration of the equalize charge mode can be set to 0 4 8 or 12 hours When selecting 0 hours the charger will skip the equalize charge mode and will directly switch into the float charge mode The standard equalize time is 4 hours According to the table below the duration of the equalize charge mode can be set by...

Страница 22: ...mentioned procedure the output voltage range is limited When the full output voltage range is required please contact your Victron Energy dealer See chapter 6 3 for details 4 7 Use of a temperature sensor The temperature sensor supplied with the charger can be connected to the charger by using the 3 meter cable with stripped and tinned cable ends This sensor should be mounted on the battery The te...

Страница 23: ...a red 0 75 mm2 wire to the positive battery pole and the Vse connector of the charger see illustration 8 Connect a black 0 75 mm2 wire between the negative pole of the battery and the Vse connector of the charger see illustration 8 For properly functioning both wires have to be connected Switch on the mains The VSE OK led on the printed circuit board illuminates when connected correctly If this le...

Страница 24: ...ging current of 50A 80A or 100A according to the model can be limited with an external panel This panel the Victron Energy COV panel contains an adjustable potentiometer Limiting the maximum charging current can be useful to meet the batteries specifications or to make sure the shore fuse does not blow To connect the panel Disconnect the mains Connect the panel to the pot and pot connector The CMV...

Страница 25: ... be connected to the charger so the charger can be switched on and off from a remote location To operate the switch first switch the charger on with the on off switch located on the charger To connect the remote on off switch Disconnect the mains Connect the switch in between the REM and the GND connector 4 13 Connecting a remote boost switch A remote switch can be connected to the charger so the ...

Страница 26: ...e between the connection of the voltmeter and VM at the remote connector Connect the mains voltage 4 15 Connecting a ampèremeter The remote connector offers a possibility to connect an ampèremeter which indicates the output current of the charger For the 50A charger an ampèremeter which indicates 50A at 60mV input voltage is required For the 80A charger an ampèremeter which indicates 80A at 60mV i...

Страница 27: ... battery is being overcharged The battery charger is set into the permanent boost charge mode Deselect the permanent boost DIP switch Rboost The boost charge voltage is set to a wrong value Adjust the boost charge voltage to the right value The float charge voltage is set to a wrong value Adjust the float charge voltage to right value A bad battery Check the battery The battery is located in a war...

Страница 28: ...tput power available Frequency range 45 65 Hz full output power available Maximum Input current model 24 80 24 100 24 100 3 Ph 48 50 At 230V ac input voltage 12A at 30V 80A 16A at 30V 100A 3x 3A at 30V 100A 16A at 60V 50A Input fuse model 24 80 24 100 48 50 24 100 3 Ph 250Vac 8A and 12A fast 6 3x32mm or equivalent 2 x 250Vac 12A fast 6 3x32mm or equivalent 2 x 250Vac 12A fast 6 3x32mm or equivalen...

Страница 29: ...fuse 6 x 20A 8 x 20A other Leakage current from battery when the battery charger is turned off 6 4 mA 6 4 mA 6 4 mA 6 3mm x 32mm fuse 30A slow 6 4 Mechanical TG 24 80 TG24 100 TG48 50 TG 24 100 3 Ph Cabinet Aluminium sea water resistant Aluminium sea water resistant Protection IP 21 IP 21 Colour Blue RAL5012 epoxy coated Blue RAL5012 epoxy coated Dimensions 368 x 250 x 257mm 515 x 260 x 265mm Dime...

Страница 30: ...28 Manual Titan connection wires up to 1 5mm wires up to 1 5mm Cooling Forced air cooling Forced air cooling Noise 45dB A 45dB A Relative humidity 95 maximal 95 maximal ...

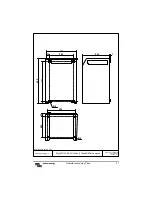
Страница 31: ...Manual Titan 29 victron energy b v Skylla TG 24 80 24 100 and Titan 48 50 dimensions drawing no TI020000 date 220703 revision 01 220 Ø 8 Ø 6 250 200 250 25 25 23 365 309 200 All measurements in mm 7 ...

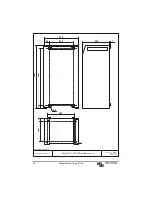
Страница 32: ...30 Manual Titan victron energy b v Skylla TG 24 100 3 Phase dimensions drawing no TI030000 date 130504 revision 00 220 Ø 8 Ø 6 258 200 250 29 2 5 2 3 5 1 5 4 5 9 2 0 0 All measurements in 7 ...

Страница 33: ...Gebruiksaanwijzing Titan 31 GEBRUIKSAANWIJZING SKYLLA TG 24 80 SKYLLA TG 24 100 SKYLLA TG 24 100 3 Phase TITAN 48 50 ...

Страница 34: ...n 46 4 3 Afregelen van de equalize tijd 47 4 4 Diodesplitter compensatie 47 4 5 Tractie compensatie 48 4 6 Gebruik als voeding 48 4 7 De temperatuursensor 48 4 8 Accu s laden met voltage sense 49 4 9 Intelligent Startup 49 4 10 Aansluiten van het uitgangspannings alarm 50 4 11 Aansluiten van de remote panelen 50 4 12 Aansluiten van de remote aan uit schakelaar 51 4 13 Aansluiten van de remote boos...

Страница 35: ... Victron Energy apparatuur is te gebruiken voor alle soorten elektrische apparaten waarvoor een energievoorziening van hoge kwaliteit vereist is Dit kan zowel huishoudelijke technische of administratieve apparatuur zijn maar ook een storingsgevoelig instrument 1 2 De Titan Generatie laders Deze gebruiksaanwijzing bevat de aanwijzingen voor het installeren van de volgende types accu laders de Skyll...

Страница 36: ...ke spanning op sommige metalen delen in de acculader De aan uit schakelaar op het front van de acculader schakelt niet de netspanning uit De voltage sense voorziening mag niet in combinatie met de diodesplitter compensatie gebruikt worden Hierdoor stijgt de uitgangspanning tot een te hoge waarde welke schadelijk kan zijn voor de aangesloten accu De acculader mag niet op de netspanning zijn aangesl...

Страница 37: ... accu eerst in de boostfase geladen De accu wordt geladen totdat de accuspanning gelijk is aan de boostspanning De accu is dan tot ongeveer 80 van zijn capaciteit geladen en de lader schakelt automatisch naar de equalize fase In de equalize fase blijft de laadspanning hetzelfde als de boostspanning maar de laadstroom neemt geleidelijk af De tijdsduur van deze fase is instelbaar op 4 8 of 12 uur De...

Страница 38: ...eze extra accu kan gebruikt worden voor het opstarten van machines zoals een bootmotor De Titan lader heeft een gestabiliseerde uitgangspanning Hierdoor kan de lader als een gelijkspanningsvoeding gebruikt worden ook als er geen accu aanwezig is 2 2 De accu Voor de verschillende modellen Titan laders is de aanbevolen accu capaciteit aangegeven in onderstaande tabel Type Aanbevolen capaciteit 24 80...

Страница 39: ...odra de kortsluiting wordt opgeheven De kortsluitstroom kan ook begrensd worden door een extern potentiometer paneel het Victron Energy COV paneel of het SKC paneel Ingangsbeveiliging De netspanningsingang van de lader is beveiligd door een zekering De lader wordt niet beschadigd door een netspanning tussen 0 en 300 Vac De lader wordt niet beschadigd door een netspanning met een frequentie tussen ...

Страница 40: ...ader uit en de failure led brandt continu De lader hervat zijn werking zodra de temperatuur voldoende is gedaald Voltage sense beveiliging Wanneer de voltage sense optie gebruikt wordt vermindert de lader automatisch de laadspanning zodra het totale spanningsverlies over de accukabels meer dan 2 Volt is Accu watchdog timer De lader is uitgerust met een accu watchdog timer Deze meet de duur van de ...

Страница 41: ...t of de scheepshuid Aan land moet de aardschroef verbonden worden met de aarde van het elektriciteitsnet Bij mobiele toepassingen auto caravan etc moet de aardschroef verbonden worden met het chassis van het voertuig Aansluiten van de accu De verbindingen tussen de Titan lader en de accu zijn essentieel voor een goede werking van de lader Draai daarom de kabelverbindingen goed aan en gebruik zo ko...

Страница 42: ... of de groene led brandt zie figuur 3 Als deze niet brandt wissel dan de positieve en de negatieve accukabel om Verwijder de aansluithulp en sluit de negatieve accukabel aan op de negatieve accuaansluiting van de lader zie figuur 3 Accu afsluitprocedure Schakel de lader uit Sluit de netspanning af Verwijder de negatieve accukabel Verwijder de positieve accukabel Figuur 3 Positie van de accu aanslu...

Страница 43: ...esloten Verwijder het front van de lader om bij de netspanningsaansluiting te kunnen komen Sluit de net PE kabel geel groen aan op de netspanningsaansluiting op de print zie figuur 4 Sluit de net N kabel blauw aan op de netspanningsaansluiting Sluit de net P kabel bruin aan op de netspanningsaansluiting Sluit het netsnoer aan op de netspanning controleer of de aarde van het net is aangesloten op a...

Страница 44: ...ing te kunnen komen Sluit de net PE kabel geel groen aan op de netspanningsaansluiting op de print naast de Magnetische Circuit Verbreker zie figuur 4b Sluit de 3 net kabels aan op de Magnetische Circuit Verbreker Sluit het netsnoer aan op de netspanning controleer of de aarde van het net is aangesloten op aarde Aardaansluitingen moeten in overeenstemming zijn met de geldende veiligheidseisen ...

Страница 45: ...oat fase de accu te laden Als aangenomen wordt dat de accu leeg is begint de lader in de boostfase de accu te laden en de boost led gaat aan Met een dipswitch is in te stellen dat de lader onafhankelijk van de conditie van de accu altijd in de boost fase begint te laden Zodra de boostspanning is bereikt schakelt de lader automatisch naar de equalize fase de boost led gaat uit en de equalize led ga...

Страница 46: ...der aangesloten blijven 3 3 Onderhoud De Titan lader vereist geen specifiek onderhoud Wel is een jaarlijkse controle van de accu aansluitingen aan te bevelen Houd de lader droog schoon en stofvrij Wanneer zich problemen met de Titan lader voordoen kunt u aan de hand van het foutzoekschema in hoofdstuk 5 de storing opsporen ...

Страница 47: ...ontpaneel van de lader De waarden kunnen veranderd worden door potmeters te verdraaien of door posities van een DIP switch te veranderen Zie figuur 7 voor de posities van de potentiometers en de DIP switch Figuur 6 Verwijderen van het frontpaneel De behuizing van de acculader mag alleen geopend worden door een bevoegd elektriciën Voordat de behuizing geopend wordt moet de verbinding met de netspan...

Страница 48: ...d hoger dan de floatspanning Deze spanningen zijn aangeraden door de meeste accufabrikanten Informeer voor de exacte afstelwaarde van uw accu bij uw acculeverancier Voordat de laadspanning wordt aangepast moet altijd eerst de temperatuur sensor en of de voltage sense worden verwijderd Veranderen van de floatspanning Verwijder de accu s en alle andere gebruikers welke aangesloten zijn op de uitgang...

Страница 49: ...alize fase kan veranderd worden dit om de specificaties van de accu tegemoet te komen De tijd kan op 0 4 8 of 12 uur gezet worden Als 0 uur gekozen word betekent dit dat de lader de equalize fase overslaat en dus direct doorschakelt naar de float fase De standaard instelling van de equalize tijd bedraagt 4 uur De equalize tijd kan worden ingesteld door de DIP switches 7 Eq2 en Eq1 te verschuiven z...

Страница 50: ...n de uitgangsspanning beperkt Indien het volledige instelbereik gewenst is dient u contact op te nemen met uw Victron Energy dealer Voor specificaties zie hoofdstuk 6 3 4 7 De temperatuursensor Op de lader kan de meegeleverde temperatuur sensor aangesloten worden met een 3 meter lange kabel met gestripte en vertinde kabeluiteinden De sensor moet op de accu gemonteerd worden De sensor regelt afhank...

Страница 51: ...uit de netspanning af Sluit een rode 0 75mm2 draad aan tussen de positieve accu pool en de vse connector zie figuur 8 Sluit een zwarte 0 75mm2 draad aan tussen de negatieve accu pool en de vse connector zie figuur 8 Sluit de netspanning aan De VSE OK led op de print gaat aan als alles goed is aangesloten als de led uit blijft dan zijn de voltage sense draden fout aangesloten 4 9 Intelligent Startu...

Страница 52: ...len op kunnen worden aangesloten Het COV paneel Dit paneel heeft een potentiometer Hiermee kan de maximale laadstroom verminderd worden Dit kan gebruikt worden om de accu volgens zijn specificaties op te laden of om te zorgen dat de walzekering niet doorsmelt Aansluiten van het paneel Schakel de netspanning van de lader uit Sluit de current control aan tussen de pot en pot connector Het CMV paneel...

Страница 53: ...t schakelaar Op de lader kan een remote aan uit schakelaar aangesloten worden Met deze schakelaar kan de lader op een afstand aan en uit geschakeld worden Deze schakelaar werkt alleen als de on off schakelaar op de kast van de lader op on staat Aansluiten van de schakelaar Schakel de netspanning van de lader uit Sluit de schakelaar aan tussen de REM en de GND connector 4 13 Aansluiten van de remot...

Страница 54: ...aan tussen de aansluiting van de Voltmeter en VM op de remote connector Sluit een rode draad aan tussen de aansluiting van de Voltmeter en VM op de remote connector Schakel de netspanning weer in 4 15 Aansluiten van een Ampère meter Op de remote connector kan een millivolt meter worden aangesloten die de uitgangsstroom van de lader weergeeft Voor de 80A lader is een meter nodig die bij 60mV ingang...

Страница 55: ...re lader De uitgangszekeringen zijn kapot Vervang de uitgangszekeringen De accu wordt overladen De continue boost optie is ingeschakeld Schakel de continue boost optie uit DIP switch Rboost De boostspanning is op een verkeerde waarde ingesteld Regel de boostspanning af op een goede waarde De floatspanning is op een verkeerde waarde ingesteld Regel de floatspanning af op een goede waarde Een slecht...

Страница 56: ...ik 3 Ph 320 460 Vac 3 Ph vol uitgangsvermogen beschikbaar Frequentiebereik 45 65 Hz vol uitgangsvermogen beschikbaar Maximale ingangsstroom model 24 80 24 100 24 100 3 Ph 48 50 Bij 230Vac ingangsspanning 13A bij 30V 80A 16A bij 30V 100A 3x 3A bij 30V 100A 16A bij 60V 50A Ingangszekering model 24 80 24 100 48 50 24 100 3 Ph 250Vac 8A en 12A snel 6 3x32mm of equivalent 2 x 250Vac 12A snel 6 3x32mm o...

Страница 57: ...dc 1 6Vdc alarm relais High battery 33 5Vdc 0 8Vdc 33 5Vdc 0 8Vdc 67 Vdc 1 6Vdc Uitgangszekering platte auto zekering 6 x 20A 8 x 20A anders Acculekstroom wanneer de acculader is uitgeschakeld 6 4 mA 6 4 mA 6 4 mA 6 3mm x 32mm zekering 30A traag 6 4 Mechanisch TG 24 80 TG24 100 TG48 50 TG 24 100 3 Ph Kast Aluminium zeewaterbestendig Aluminium zeewaterbestendig Bescherming IP 21 IP 21 Kleur Blauw R...

Страница 58: ...tblok Aansluitblok Startaccu aansluiting Aansluitblok geschikt voor draden tot 1 5 mm Aansluitblok geschikt voor draden tot 1 5 mm Koeling Geforceerde luchtkoeling Geforceerde luchtkoeling Geluid 45dB A 45dB A Relatieve vochtigheid 95 maximaal 95 maximaal ...

Страница 59: ...uiksaanwijzing Titan 57 victron energy b v Skylla TG 24 80 24 100 and Titan 48 50 dimensions drawing no TI020000 date 220703 revision 01 220 Ø 8 Ø 6 250 200 250 25 25 23 365 309 200 All measurements in mm 7 ...

Страница 60: ...58 Gebruiksaanwijzing Titan victron energy b v Skylla TG 24 100 3 Phase dimensions drawing no TI030000 date 130504 revision 00 220 Ø 8 Ø 6 258 200 250 29 2 5 2 3 5 1 5 4 5 9 2 0 0 All measurements in 7 ...

Страница 61: ...Gebrauchsanweisung Titan 59 GEBRAUCHSANWEISUNG SKYLLA TG 24 80 SKYLLA TG 24 100 SKYLLA TG 24 100 3 Phase TITAN 48 50 ...

Страница 62: ...iges Boost Laden 74 4 3 Abstimmen der Ausgleichszeit 75 4 4 Diodenverteiler Kompensation 75 4 6 Einsatz zur Stromversorgung 76 4 7 Der Temperaturfühler 76 4 8 Batterien mit Spannungsfühler laden 77 4 9 Intelligenter Start 77 4 10 Anschließen des Ausgangsspannungsalarms 78 4 11 Anschließen der Fernbedienungstafeln 78 4 12 Anschließen des Fern Ein Ausschalters 79 4 13 Anschließen des Fern Boost Scha...

Страница 63: ... Energy Geräte können für alle Arten von elektrischen Apparaten verwendet werden für die eine Energieversorgung hoher Qualität erforderlich ist Dabei kann es sich sowohl um technische Haushalt oder Verwaltungsgeräte jedoch auch um ein störungsanfälliges Instrument handeln 1 2 Das Ladegerät der Titan Generation Dieses Benutzerhandbuch enthält die Anweisungen für die Installation folgender Typen von...

Страница 64: ... unter gefährlicher Spannung Der Ein Aus Schalter an der Vorderseite des Batterie Ladegeräts schaltet die Netzspannung nicht aus Die Spannungsfühlereinrichtung darf nicht in Kombination mit der Diodenverteiler Kompensation benutzt werden Dadurch steigt die Ausgangsspannung auf einen zu hohen Wert an der sich schädlich auf die angeschlossene Batterie auswirken kann Das Batterie Ladegerät darf nicht...

Страница 65: ...ß die Batterie leer ist wird die Batterie zuerst in der Boost Phase geladen Die Batterie wird geladen bis die Batteriespannung gleich der Boostspannung ist Die Batterie ist dann bis zu 80 ihrer Kapazität geladen und das Ladegerät schaltet automatisch auf die Ausgleichsphase um In der Ausgleichsphase bleibt die Ladespannung die gleiche wie die Boostspannung aber der Ladestrom nimmt allmählich ab Di...

Страница 66: ...tterie kann zum Starten von Maschinen wie zum Beispiel eines Bootsmotors benutzt werden Das Titan Ladegerät hat eine stabilisierte Ausgangsspannung Dadurch kann das Ladegerät wie eine Gleichspannungsversorgung benutzt werden auch wenn keine Batterie vorhanden ist 2 2 Die Batterie Für die verschiedenen Modelle von Titan Ladegeräten ist die empfohlene Batterie Kapazität in nachstehender Tabelle ange...

Страница 67: ...nktion wieder auf sobald der Kurzschluß aufgehoben wird Der Kurzschlußstrom kann auch durch eine externe Potentiometertafel die Victron Energy COV Tafel oder die SKC Tafel begrenzt werden Eingangsschutz Der Netzspannungseingang des Ladegeräts ist durch eine Sicherung geschützt Das Ladegerät wird durch eine Netzspannung zwischen 0 und 300 Vac nicht beschädigt Das Ladegerät wird durch eine Netzspann...

Страница 68: ...Störung leuchtet ständig auf Das Ladegerät nimmt seine Funktion wieder auf sobald die Temperatur ausreichend abgesunken ist Spannungsfühlerschutz Wenn die Spannungsfühleroption benutzt wird verringert das Ladegerät automatisch die Ladespannung sobald der Gesamtspannungsverlust an den Batteriekabeln mehr als 2 Volt beträgt Akku Watchdog Timer Das Ladegerät ist mit einem Akku Watchdog Timer ausgesta...

Страница 69: ...tzes verbunden werden Bei mobilen Anwendungen Auto Caravan usw muß die Erdungsschraube mit dem Fahrgestell des Fahrzeugs verbunden werden Anschließen der Batterie Die Verbindungen zwischen dem Titan Ladegerät und der Batterie sind für eine einwandfreie Funktion des Ladegeräts von wesentlicher Bedeutung Ziehen Sie deshalb die Kabelverbindungen gut fest und verwenden Sie möglichst kurze und dicke Ka...

Страница 70: ...aufleuchtet siehe Abbildung 3 Wenn dies nicht der Fall ist vertauschen Sie bitte Plus und Minuskabel der Batterie Entfernen Sie die Anschlußhilfe und schließen Sie das Batterie Minuskabel an den Batterie Minusanschluß des Ladegeräts an siehe Abbildung 3 Batterie Abklemmprozedur Schalten Sie das Ladegerät aus Schalten Sie die Netzspannung ab Entfernen Sie das Batterie Minuskabel Entfernen Sie das B...

Страница 71: ...degerät angeschlossen ist Entfernen Sie die Frontplatte des Ladegeräts um an den Netzspannungsanschluß zu gelangen Schließen Sie das PE Netzkabel gelb grün an den Netzspannungsanschluß der Platine an siehe Abbildung 4 Schließen Sie das N Netzkabel blau an den Netzspannungsanschluß an Schließen Sie das P Netzkabel braun an den Netzspannungsanschluß an Schließen Sie die Netzschnur an die Netzspannun...

Страница 72: ...ingangsanschluss zu gelangen Schließen Sie die Netzerde PE grün gelb an den Wechselstromeingangsanschluss direkt neben dem Sicherungsautomaten an Siehe Abbildung 4b Schließen Sie die drei Kabel der Phasen am Sicherungsautomaten an Stecken Sie das Netzkabel in den Netzstecker Überprüfen Sie ob der Netzstecker geerdet ist Die Erdung des Netzanschlusses muss den Sicherheitsrichtlinien der zur Anwendu...

Страница 73: ...chaltet das Ladegerät ein und leuchtet die On Leuchtdiode auf Je nach Zustand der Batterie beginnt das Ladegerät in der Boostspannungs oder der Leerlaufspannungsphase die Batterie zu laden Wenn angenommen wird daß die Batterie leer ist beginnt das Ladegerät in der Boostspannungsphase mit dem Laden der Batterie und die Boost Leuchtdiode leuchtet auf Mit einem DIP Schalter können Sie einstellen daß ...

Страница 74: ... braucht das Ladegerät nicht ausgeschaltet zu werden und kann die Batterie am Ladegerät angeschlossen bleiben 3 3 Wartung Das Titan Ladegerät erfordert keine besondere Wartung Allerdings ist eine jährliche Überprüfung der Batterie Anschlüsse zu empfehlen Halten Sie das Ladegerät trocken sauber und staubfrei Wenn Probleme mit dem Titan Ladegerät auftreten können Sie die Störung anhand der Fehlersuc...

Страница 75: ...en Sie die Frontplatte des Ladegeräts Die Werte können dadurch verändert werden daß man Potentiometer verstellt oder die Stellungen eines DIP Schalters verändert Bezüglich der Stellungen der Potentiometer und des DIP Schalters siehe Abildung 7 Das Gehäuse des Batterie Ladegeräts darf nur durch einen dazu befugten Elektriker geöffnet werden Vor dem Öffnen des Gehäuses muß die Verbindung zum Netz un...

Страница 76: ...espannungen Die Leerlauf und Boostspannung sind auf Standardwerte eingestellt Die Boostspannung ist immer höher als die Leerlaufspannung Diese Spannungen werden von den meisten Batterie Herstellern empfohlen Informieren Sie sich bei Ihrem Batterie Lieferanten über den genauen Abstimmwert für Ihre Batterie Ändern der Leerlaufspannung Entfernen Sie die Batterien und alle anderen Verbraucher die an d...

Страница 77: ...hwankungen 4 3 Abstimmen der Ausgleichszeit Die Zeit der Ausgleichsphase kann verändert werden um den Batterie Spezifikationen entgegenzukommen Die Zeit kann auf 0 4 8 oder 12 Stunden eingestellt werden Wenn 0 Stunde gewählt wird bedeutet dies daß das Ladegerät die Ausgleichsphase überspringt und somit direkt auf die Leerlaufspannungsphase weiterschaltet Die Ausgleichszeit kann eingestellt werden ...

Страница 78: ...nte Verfahren beschränkt das Abstimmungbereich von der Ausgangsspannung In Fall sie das vollständige Abstimmungbereich Wunschen bitte kontaktieren sie ihren Victron Energy B V Verteiler Fur weitere Spezifikationen siehen sie Kapitel 6 3 4 7 Der Temperaturfühler Der mitgelieferte Temperaturfühler kann mit einem 3 Meter langen Kabel mit abisolierten und verzinnten Kabelenden an das Ladegerät angesch...

Страница 79: ...Draht 0 75mm zwischen dem Batterie Pluspol und dem Verbinder vse an siehe Abbildung 8 Schließen Sie einen schwarzen Draht 0 75mm zwischen dem Batterie Minuspol und dem Verbinder vse an siehe Abbildung 8 Schließen Sie die Netzspannung an Die Leuchtdiode VSE OK auf der Platine leuchtet auf wenn alles richtig angeschlossen ist wenn die Leuchtdiode nicht aufleuchtet oder blinkt sind die Spannungsfühle...

Страница 80: ...Die COV Tafel Diese Tafel besitzt ein Potentiometer Damit kann der max Ladestroom verringert werden Sie kann benutzt werden um die Batterie entsprechend den Spezifikationen aufzuladen oder dafür zu sorgen daß die Wallsicherung nicht durchbrennt Anschließen der Tafel Schalten Sie die Netzspannung des Ladegeräts aus Schließen Sie die Stromregeleinheit zwischen den Verbindern pot und pot an Die CMV T...

Страница 81: ...romregeleinheit zwischen den Verbindern POT und POT an 4 12 Anschließen des Fern Ein Ausschalters An das Ladegerät kann ein Fern Ein Ausschalter angeschlossen werden Mit diesem Schalter kann das Ladegerät aus der Entfernung ein und ausgeschaltet werden Dieser Schalter funktioniert nur wenn der On Off Schalter am Gehäuse des Ladegeräts auf On steht Anschließen des Schalters Schalten Sie die Netzspa...

Страница 82: ...4 8 Schließen sie ein schwarze Draht auf der Anschluß von die Voltmeter und VM an Schließen Sie ein rotes Draht auf der Anschluß von die Voltmeter und VM an Schalten Sie die Netzspannung wieder ein 4 15 Anschließen des Ampère meter An das Ladegerät kann ein millivolt Meter angeschlossen werden die der Ausgangsstrom von dass Ladegerät anzeigt Fur alle 80A Geräten benutigen Sie ein Meter die bei 60m...

Страница 83: ...rsetzen Sie die Ausgangssicherungen Die Batterie wird überladen Die Dauer Boost Option ist eingeschaltet Schalten Sie die Dauer Boost Option aus DIP Schalter Rboost Die Boostspannung ist auf einen falschen Wert eingestellt Stimmen Sie die Boostspannung auf einen richtigen Wert ab Die Leerlaufspannung ist auf einen falschen Wert eingestellt Stimmen Sie die Leerlaufspannung auf einen richtigen Wert ...

Страница 84: ...quenzbereich 45 65 Hz volle Ausgangsleistung verfügbar Max Eingangsstrom Modell 24 80 24 100 24 100 3 Ph 48 50 Bei 230Vac Eingangsspannung 13 A bei 30 V 80 A 16 A bei 30 V 100 A 3x 3A bei 30V 100A 16 A bei 60 V 50 A Eingangssicherung Modell 24 80 24 100 48 50 24 100 3 Ph 250 Vac 8 A und 12A flink 6 3x32mm o gleichwertig 2 x 250 Vac 12 A flink 6 3x32mm o Gleichwertig 2 x 250 Vac 12 A flink 6 3x32mm...

Страница 85: ...Gebrauchsanweisung Titan 83 Strom Spannungsstabilität 1 1 1 ...

Страница 86: ...rieladung 33 5 Vdc 0 8 Vdc 33 5 Vdc 0 8 Vdc 67 Vdc 1 6 Vdc Ausgangssicherung Auto Flachsicherung 6 x 20 A 8 x 20 A sonstiges Batterieleckstrom wenn das Batterieladegerät ausgeschaltet ist 6 4 mA 6 4 mA 6 4 mA Sicherung 6 3mm x 32mm 30 A träge 6 4 Mechanisch TG 24 80 TG24 100 TG48 50 TG 24 100 3 Ph Gehäuse Aluminium salzwasserbeständig Aluminium salzwasserbeständig Schutzart IP 21 IP 21 Farbe Blau ...

Страница 87: ...aturfühl er Anschlußblock Anschlußblock Starterbatterie Anschluß Anschlußblock geeignet für Drähte bis 1 5 mm Anschlußblock geeignet für Drähte bis 1 5 mm Kühlung Fremdkühlung Fremdkühlung Lärm 45dB A 45dB A Rel Feuchtigkeit 95 max 95 max ...

Страница 88: ...ebrauchsanweisung Titan victron energy b v Skylla TG 24 80 24 100 and Titan 48 50 dimensions drawing no TI020000 date 220703 revision 01 220 Ø 8 Ø 6 250 200 250 25 25 23 365 309 200 All measurements in mm 7 ...

Страница 89: ...Gebrauchsanweisung Titan 87 victron energy b v Skylla TG 24 100 3 Phase dimensions drawing no TI030000 date 130504 revision 00 220 Ø 8 Ø 6 258 200 250 29 2 5 2 3 5 1 5 4 5 9 2 0 0 All measurements in 7 ...

Страница 90: ...Energy B V The Netherlands Phone 31 0 36 535 97 00 Fax 31 0 36 531 16 66 E mail sales victronenergy com Internet site http www victronenergy com Article number ISM010027000 Doc no TI02170 Version rev03 Date 30 09 2004 Stock number Dealer ...

Отзывы: