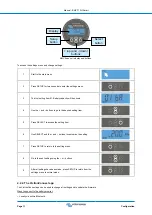
Loads
&
Chargers
Battery bank
Basic battery monitor installation.
3.6. Programmable relay
The battery monitor is equipped with a programable relay. This relay can be used as an alarm relay, to start a generator or
for other applications. For more information on the various relay modes and how to configure the relay, see chapter
A usage example of the relay is to start a generator when the battery state of charge has dropped too low, and then to stop the
generator when the batteries have been recharged.
By default, the relay is set to energise when the battery state of charge falls below 50% and to de-energise when the battery state
of charge has risen to 90%. However, the relay can be configured to also trigger on other conditions, like battery voltage.
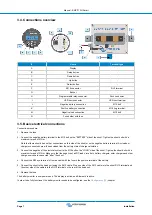
The relay has 3 contacts: COM (common), NO (normally open), and NC (normally closed) and are located on the back of the
head unit.
When the relay contact is open, the coil is de-energised; there is no contact between COM and NO. When the relay is energised,
the relay closes, and contact between COM and NO is made. The relay function can be inverted: de-energised becomes
energised and vice versa. See setting
.
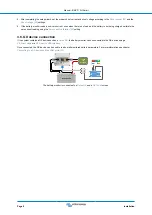
The internal wiring diagram of the battery monitor with the relay in a de-energised state connected to an external alarm or
generator start circuit.
3.7. Use of alternative shunts
The battery monitor is supplied with a 500A, 50mV shunt. This shunt is suitable for most applications. However, a larger shunt will
be required if system currents above 500A are expected.
The battery monitor can be configured to work with a wide range of different shunts. Shunts of up to 9999A and up to 75mV can
be used. For a selection of larger shunts, i.e. 1000A, 2000A or 6000A, see our
.
When using a shunt other than the one supplied with the battery monitor, please proceed as follows:
1. Unscrew the circuit board from the shunt.
2. Mount the circuit board on the new shunt, and ensure that there is good electrical contact between the circuit board and the
shunt.
3. Connect the new shunt to the electrical system and battery monitor head unit as shown in chapter
connections.
4. Follow the setup wizard; see the
Manual - BMV-710H Smart
Page 8
Installation


