background image

CT-X User’s Guide

22137813, Rev. 000

Feb 2020

10

About this Guide

Symbol conventions (continued)

Safety definitions

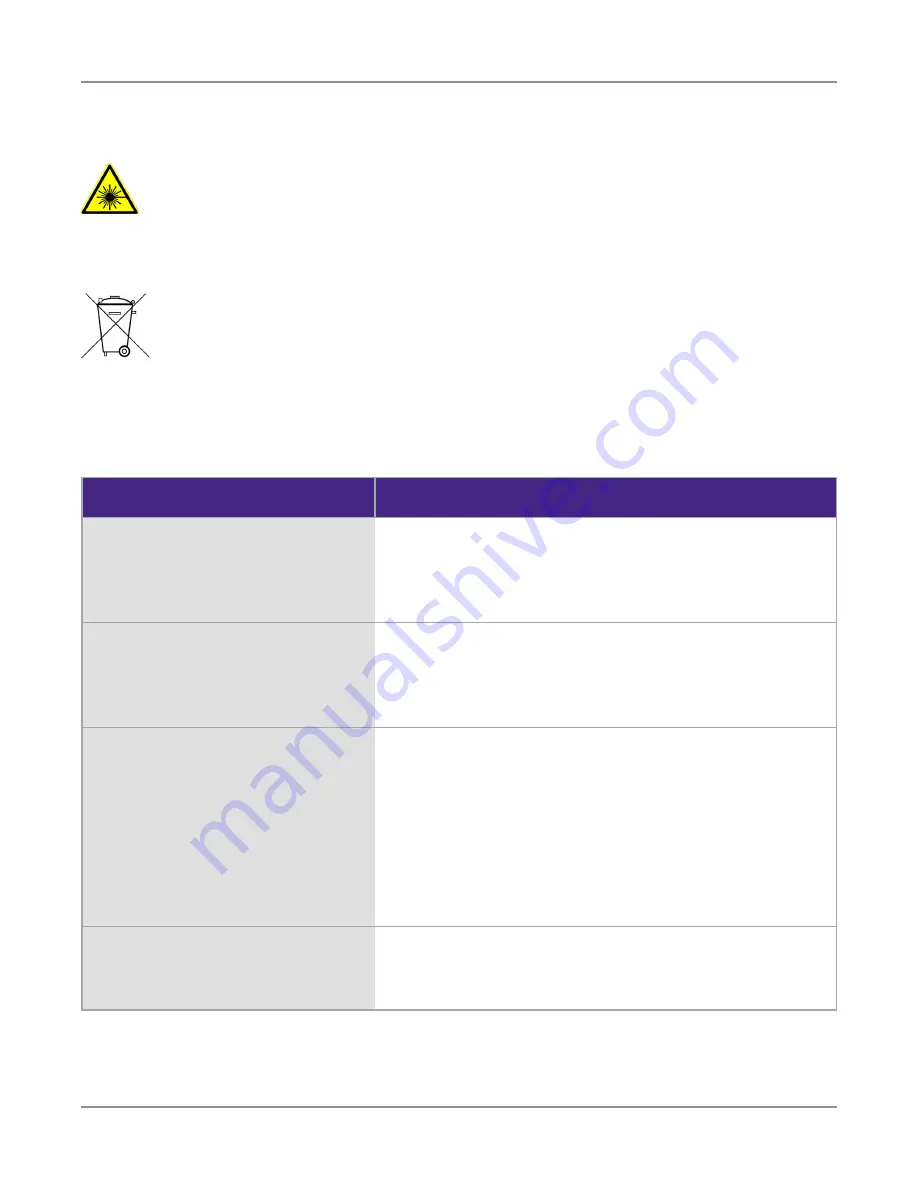
This symbol represents a risk associated with fiber optic lasers. It may be 

associated with either a DANGER, WARNING, CAUTION or ALERT message. See 

the 

Safety Definitions 

below for more information.

This symbol, located on the equipment, battery, or the packaging indicates 

that the equipment or battery must not be disposed of in a land-fill site or 

as municipal waste, and should be disposed of according to your national 

regulations.

Term

Description

DANGER

Indicates a potentially hazardous situation that, if 

not avoided, will result in death or serious injury. It 

may be associated with either a general hazard, high 

voltage, or other symbol.

WARNING

Indicates a potentially hazardous situation that, if 

not avoided, could result in death or serious injury. It 

may be associated with either a general hazard, high 

voltage, or other symbol.

CAUTION

Indicates a potentially hazardous situation that, if not 

avoided, could result in minor or moderate injury and/

or damage to equipment.
It may be associated with either a general hazard, 

high voltage, or risk of explosion symbol.
When applied to software actions, indicates a 

situation that, if not avoided, could result in loss of 

data or a disruption of software operation.

ALERT

Indicates that there is an action that must be 

performed in order to protect equipment and data or 

to avoid software damage and service interruption.

Содержание CT-X

Страница 1: ...CT X Advanced Leakage Tagger User s Guide ...

Страница 2: ...shed guide is Catalog Number printed The catalog number for an electronic guide on USB is Catalog Number electronic Terms and conditions Specifications terms and conditions are subject to change without notice The provision of hardware services and or software are subject to VIAVI standard terms and conditions available at www viavisolutions com en terms and conditions Federal Communications Commi...

Страница 3: ...ain threshold For information on the presence of REACH SVHCs in VIAVI products see the Hazardous Substance Control section of the VIAVI Standards and Policies web page EU CE Marking Directives LV EMC RoHS This product conforms with all applicable CE marking directives For details please see the EU Declaration of Conformity included in the shipping package China RoHS China RoHS documentation is inc...

Страница 4: ...CT X User s Guide 22137813 Rev 000 Feb 2020 4 ...

Страница 5: ...d and menu conventions 9 Symbol conventions 9 Safety definitions 10 Precautions 11 Periodic calibration 11 What ships with the CT X 12 Preparation for use 12 Chapter 1 Quick Tour 13 About the CT X 14 Features 14 A guided tour of your CT X 15 Front view 15 Rear view 15 Navigating the menus 16 Main menu 16 Status menu 17 Setup menu 18 Signal configuration 19 Network menu 20 SFP info 21 General notes...

Страница 6: ...ring adjacent channels 30 Injecting signals 31 Remeasuring adjacent channels 32 Ethernet setup 32 System menu 33 Status menu 33 Remotely configuring your CT X 34 Logging in to the CT X 34 Administration menu 35 Rebooting the unit 35 Updating the firmware 35 Loading settings 36 Saving settings 37 Resetting the factory defaults 37 Network menu 38 Resetting the login information 38 Output menu 39 Cha...

Страница 7: ...e VIAVI warranty services and repair information Assumptions This guide is intended for novice intermediate and experienced users who want to use the product effectively and efficiently We are assuming that you have basic computer and mouse track ball experience and are familiar with basic telecommunication concepts and terminology Technical assistance If you require technical assistance call 1 84...

Страница 8: ...as described in the following tables Description Example User interface actions On the Status bar click Start Buttons or switches that you press on a unit Press the ON switch Code and output messages All results okay Text you must type exactly as shown Type a set exe in the dialog box Variables Type the new hostname Book references Refer to Newton s Telecom Dictionary A vertical bar means or only ...

Страница 9: ...ee the Safety definitions on page 10 for more information This symbol represents an alert It indicates that there is an action that must be performed in order to protect equipment and data or to avoid software damage and service interruption This symbol represents hazardous voltages It may be associated with either a DANGER WARNING CAUTION or ALERT message See the Safety definitions on page 10 for...

Страница 10: ... result in death or serious injury It may be associated with either a general hazard high voltage or other symbol WARNING Indicates a potentially hazardous situation that if not avoided could result in death or serious injury It may be associated with either a general hazard high voltage or other symbol CAUTION Indicates a potentially hazardous situation that if not avoided could result in minor o...

Страница 11: ...nd void the FCC authorization to operate this product CAUTION Do not use the instrument in any manner not specified by the manufacturer the protection provided by the equipment may be impaired Periodic calibration To maintain system accuracy and peak functionality VIAVI recommends the CT X is recalibrated every 2 years Return the unit to VIAVI or a VIAVI authorized repair center for recalibration ...

Страница 12: ... back in the box and contact VIAVI customer service see Technical assistance on page 7 y If undamaged save the box and packing materials in case you need to ship the instrument in the future y Remove the protective film from the LCD This film is in place to protect the LCD during shipment Use the tab in the lower right corner to easily remove the film Before using the CT X for the first time do th...

Страница 13: ...uick Tour This chapter provides an overview of the unit status indicators connectors and user interface including the following y About the CT X on page 14 y Features on page 14 y A guided tour of your CT X on page 15 y Navigating the menus on page 16 ...

Страница 14: ...s to utilize the new Seeker X and existing detectors using a single CT X transmitter When several CATV systems operate in the same area it is often difficult to determine which system is the source of a detected leak The CT X is designed to deal with the problem of leakage identification in overbuilt situations Whether using the push button front panel or web interface the CT X is very simple and ...

Страница 15: ...setup can be adjusted here using the front panel 2 Select Scrolls through the main menus scrolls through the options in the submenus and adjusts settings 3 Enter Enters the menus submenus and selects options to adjust settings Rear view 1 RF output 2 Ethernet Used to remotely configure the unit and update firmware through your network 3 SFP SFP optical port 4 AC Power input 1 2 3 4 ...

Страница 16: ... appears for approximately 10 seconds Press the Select button to cycle through options Press the Enter button to enter a selected submenu TO STATUS MENU TO SETUP MENU TO NETWORK MENU TO SYSTEM MENU Select Select Select Select Select Enter Enter Enter Enter STATUS MAIN MAIN MENU This screen shows the overall state of the CT X The device will either be on or off TX ON meaning on And the 4 Carriers w...

Страница 17: ...UP MENU This will be a list of all triggered errors in the system If no errors are present the enter button shouldn t lead us in here er er f the off s will ing a CT X ERRORS 2 CT X PKG 0 2 214 CT X APP 0 1 214 CT X FPGA 1 0 27 CT X WEB 1 0 18 Select Select Select NOTE To change a setting in the menus select ENTER to edit a setting use SELECT to toggle the setting and then press ENTER to confirm a...

Страница 18: ...ter SIGNAL 2 CONFIG Select Select Enter SIGNAL 4 CONFIG Select SETUP MODE OFF Select Select SIGNAL 3 CONFIG Enter Enter Enter Enter SETUP MODE ON TO SIGNAL CONFIGURATION ered errors in the esent the enter us in here TO SIGNAL CONFIGURATION TO SIGNAL CONFIGURATION TO SIGNAL CONFIGURATION CHIRP STYLE 1 DUAL CHAN STYLE 1 UNITS dBmV Select Select Select Enter CHIRP STYLE 4 Enter DUAL CHAN STYLE 8 Ente...

Страница 19: ...136 000000 MHZ Select SIGNAL CONFIGURATION SIGNAL N STATUS ON SETUP MENU SIGNAL CONFIGURATION Enter SIGNAL N LEVEL 10 0 dBmV Select CARRIER N TYPE CHIRP Enter Select SIGNAL N FREQ 236 000000 MHZ Enter Enter Select SIGNAL N LEVEL 35 0 dBmV Enter Press the Select button to cycle through options CARRIER N TYPE DUAL CARRIER Select ...

Страница 20: ... Applicable fields are only configurable when in Static addressing mode Enter Select Select Enter TO SFP INFO LOAD DEFA SYSTEM MENU MAIN MENU MNFR NAME SFP INFO RESET AND CT X DEVICE OFF Enter Enter Enter Enter Enter Enter SETUP MODE ON TO SIGNAL CONFIGURATION S SIGNAL N STATUS ON Enter Select Press the Select button to cycle through options Press the Select button to cycle through options TO SIGN...

Страница 21: ...formation will be periodically refreshed on screen due to changes ex IP address is pulled while looking at the IP address screen These live update pieces will be outlined in red as shown below INFORMATION P SOME INFORMAT MAY TAKE UP MULTIPLE LINE TO ALLOW FOR VIEWING THIS SCROLLABLE WINDOW MAY HE Select IPV6 Handling Ideas LOAD NETWORK DEFAULTS SELECT CONFIRM ENTER CANCEL Enter Applicable fields a...

Страница 22: ...Rev 000 Feb 2020 22 Chapter 1 Quick Tour System menu ect LOAD FACTORY DEFAULT Select SYSTEM MENU MAIN MENU SYSTEM MENU SELECT CONFIRM ENTER CANCEL Enter Select RESET USERNAME AND PASSWORD SELECT CONFIRM ENTER CANCEL Enter Select ...

Страница 23: ... Feb 2020 23 2 Setting up Your CT X This chapter provides an overview of how to configure and operate the unit including the following y CT X setup on page 24 y Setting up your CT X on page 27 y Remotely configuring your CT X on page 34 ...

Страница 24: ...ou want a good mix of low mid high and ultra high frequencies to provide good coverage across the start and stop frequencies of your channel lineup In all cases the two carriers should be injected in the guard band between QAMs or analog carriers based on which type of channel resides at each frequency Overview Over the next few pages we ll cover each of the following steps y Locating positions fo...

Страница 25: ...etection If yes note the following PLC location in MHz subchannel spacing in KHz and cyclic prefix in µs for use in setting up the Seeker X meter No CT X settings are required for DOCSIS 3 1 OFDM leakage measurements y Spread remaining signals across the spectrum used by the channel plan to assure good coverage and eliminate ingress near the most important channels in the lineup Measuring metrics ...

Страница 26: ...r Channel power measurement ONX 620 Level MER measurement Note that any cable and equipment between the CT X and your instrument will affect the absolute level you measure for the CT X In this case we are concerned primarily with the relative level of the signal so there will be an unknown offset that will need to be adjusted for To set the level you can do one of the following y Estimate the loss...

Страница 27: ...DEVICE menu and enable the device by selecting ON 4 Next configure your signals You can configure global or individual signals y For global signals navigate to the SETUP MODE menu and select ON This turns all tags into CWs for ease of use with mid grade spectrum analyzers y For individual signals navigate to the desired SIGNAL CONFIG 1 4 menu Select ON to enable the signal then set the following i...

Страница 28: ... these steps as necessary until all the signals are configured Measuring adjacent channels To ensure that the signals are not interfering with the channels nearest them repeat the measurement of the adjacent channels MER and compare to the original measurements NOTE These values must be rounded up to the nearest whole dB and will be entered into either of the setup venues for the Seeker X StrataSy...

Страница 29: ... 750 MHz NOTE The Seeker X is only capable of measuring 4 frequencies at a time during drive out monitoring If 2 Seeker D frequencies and the OFDM PLC is used only one of the above frequencies would be useable so you may only want to set up 3 total frequencies in addition to the OFDM Otherwise you can set them all up and rotate your monitoring frequencies over time NOTE When choosing signal locati...

Страница 30: ...9 135 138 25 9 35 1 141 2 26 0 34 9 381 384 3 26 2 531 540 4 750 25 3 38 4 753 1 Signals 2 and 4 only had one adjacent channel That channel will be used for proving no interference 2 Signal 3 had no adjacent channels so we will use the closest channel but skip the interference check NOTE If a signal is set up without any adjacent signals and at a later time additional signals are placed into the c...

Страница 31: ...1 Dual CW 30 25 4 4 6 16 11 4 2 Chirp 24 26 2 16 18 3 Chirp 24 26 2 2 2 16 18 2 4 Chirp 24 25 3 1 3 16 17 3 Sig ID Tag type Desired level dBmV Measured level dBmV Error dB Old setting dBmV New setting dBmV 1 Dual CW 4 6 4 0 6 11 4 10 8 2 Chirp 2 2 5 0 5 18 17 5 3 Chirp 2 2 2 6 0 4 18 2 17 8 4 Chirp 1 3 1 6 0 3 17 3 17 The CT X was configured to transmit in Setup mode and the output was configured ...

Страница 32: ...and select DHCP or STATIC y If DHCP is selected you can continue navigating through the Ethernet settings screens to view the network information that is assigned by the DHCP server y If STATIC is selected you can adjust the following Ethernet settings IP ADDRESS Enter the IP address from this menu GATEWAY Enter the gateway address from this menu NETMASK Enter the netmask address from this menu DN...

Страница 33: ... factory default select LOAD FACTORY DEFAULTS Choose SELECT to confirm 3 To reset the user name and password select RESET USER NAME AND PASSWORD Choose SELECT to confirm The password will be reset to admin Status menu The CT X STATUS menu allows you to see the application version information as well as any errors From the front panel of the CT X navigate to the CT X STATUS menu and view the status...

Страница 34: ...n to the CT X First use the front panel to find the IP address of your CT X Navigate to the CT X NETWORK menu then navigate to the IP ADDRESS menu and note the address Next type the IP address into the browser on your computer and press return to bring up the CT X web login screen Enter your Username and Password then select the Login button The default login for a new install is Username admin Pa...

Страница 35: ...tory defaults Rebooting the unit Select Reboot to reboot the CT X A pop up asks you to confirm click Reboot again and the device will restart Updating the firmware If you have a firmware file from VIAVI you can update your unit Select Update firmware from file then select the firmware file on your computer Select Update Now from the pop up The update process could take several minutes When finishe...

Страница 36: ...gs to your CT X Select Load settings from file then select the settings file on your computer A pop up confirms the settings were loaded and that you need to save the settings to the CT X Select the Output tab to bring up the Output menu then select the Enable output checkbox and click Save to CT X at the top The settings will be saved to the CT X CT X Output menu Save to CT X ...

Страница 37: ...he file on your computer Resetting the factory defaults You can reset the unit to factory defaults including all currents settings network address and login information Select Factory reset A pop up asks you to confirm Please note the warning that you may not be able to connect to the unit through the browser once it is reset Enter the serial number of the unit and select Reset The unit is reset t...

Страница 38: ...the front panel You can also change the login information See Ethernet setup on page 32 for more information Select the Network tab to bring up the Network menu Resetting the login information Select Edit administrator login and enter the new user name and password When finished select Update to confirm You will need to log in again with the new password Edit administration login CT X Network menu...

Страница 39: ... similarly to how you configure them from the front panel See Setting up your CT X on page 27 for more information Select the Output tab to bring up the Output menu Adjust the settings as needed When finished select the Enable output checkbox and click Save to CT X at the top The settings will be saved to the CT X CT X Output menu Save to CT X ...

Страница 40: ...CT X User s Guide 22137813 Rev 000 Feb 2020 40 Chapter 2 Setting up Your CT X ...

Страница 41: ...endix This appendix includes troubleshooting and supplemental information including the following y Specifications on page 42 y Error messages on page 43 y Limited warranty on page 44 y Technical assistance on page 44 y Additional information on page 44 ...

Страница 42: ...ing Temperature 32 to 104 F 0 to 40 C Storage Temperature 4 to 140º F 20 to 60 C CT X Operation Mode Compatibility Seeker X Seeker D and Seeker D Lite leakage detectors Carrier Types Chirp and dual CW digital leakage carriers Tag Signatures Chirp carrier 4 unique signatures Dual CW carrier 8 unique signatures Carrier Frequency 130 1220 MHz Carrier Output Level 10 00 to 35 00 dBmV 0 5 dB Spurious O...

Страница 43: ...missing unable to load FPGA CONFIG ERR FPGA failed to receive image PLL LOCK ERR PLL failed to lock DAC LINK ERR DAC JESD204B link failed to initialize CAL EXPIRED Calibration is out of date Error messages You may see the following error messages in the Status menu Some errors may be corrected through a power cycle or a software update All other errors will require returning the device to the fact...

Страница 44: ...ature viavi manufacturer warranty nse products en pdf Technical assistance If you require technical assistance call 1 844 GO VIAVI 1 844 468 4284 For the latest TAC information visit http www viavisolutions com en services andsupport support technical assistance Additional information For more detailed information contact us at Trilithic support viavisolutions com for these additional documents CT...

Страница 45: ......

Страница 46: ...rica 1 844 GO VIAVI 1 844 468 4284 Latin America 52 55 5543 6644 EMEA 49 7121 862273 APAC 1 512 201 6534 All Other Regions viavisolutions com contacts email Trilithic support viavisolutions com 22137813 Rev 000 Feb 2020 English ...

Отзывы: