background image

English

   - 31 -

To change channel: 

Press the middle of the button, 

the information banner will appear on the screen. 

Scroll through the stored channels by pushing the 

button up or down.

To change source:

 Press the middle of the button 

twice (for the second time in total), the source list will 

appear on the  screen. Scroll through the available 

sources by pushing the button up or down.

To turn the TV off: 

Press the middle of the button 

down and hold it down for a few seconds, the TV will 

turn into standby mode.

Notes:

• 

If you turn the TV off, this circle starts again 

beginning with the volume setting.

• 

Main menu OSD cannot be displayed via control 

buttons.

Operation with the Remote Control

Press the 

Menu

 button on your remote control to 

display the main menu screen. Use the 

Left

 or 

Right


button to select a menu tab and press the 

OK 

to enter. 

Use 

Left / Right / Up / Down

 buttons to select or set 

an item. Press

 Return/Back

 or 

Menu

 button to quit 

a menu screen.

Input Selection

Once you have connected external systems to your 

TV, you can switch to different input sources. Press the 

Source

 button on your remote control consecutively 

to select the different inputs.

Changing Channels and Volume

You can change the channel and adjust the volume 

by using the 

/-

 and 

Pro/-

 buttons 

on the remote. 

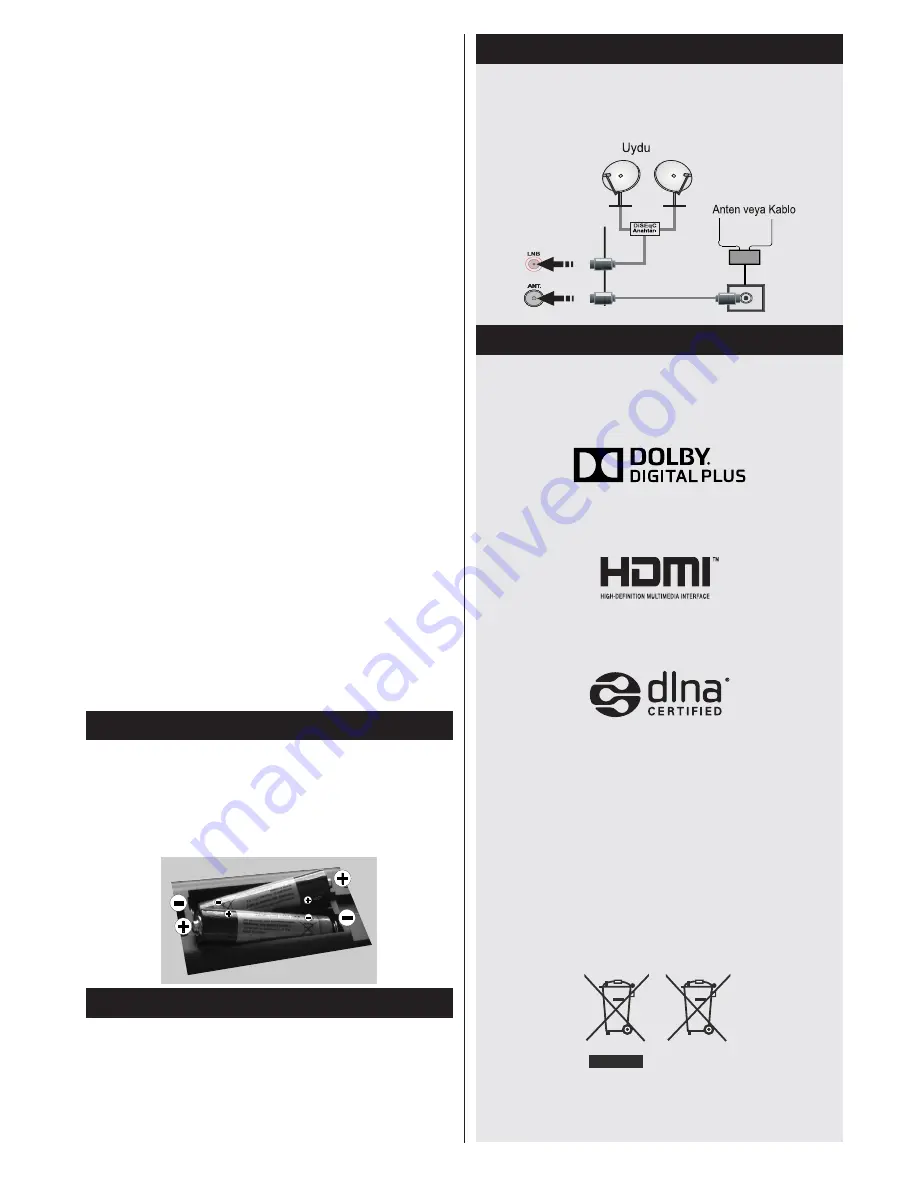
Inserting the Batteries into the Remote

Lift the cover on the back of the remote upward 

gently. Install two 

AAA

 batteries. Make sure to 

match the + and - ends of the batteries in the 

battery compartment (observe the correct polarity) 

Replace the cover.

Connect Power 

IMPORTANT

: The TV set is designed to operate on 

220-240V AC, 50 Hz

 socket. After unpacking, allow 

the TV set to reach the ambient room temperature 

before you connect the set to the mains. Plug the 

power cable to the mains socket outlet.

Antenna/Cable/Satellite Connection

Connect the aerial or cable TV plug to AERIAL INPUT 

(ANT-TV) or satellite lead to LNB INPUT(ANT SAT) 

socket located on the rear bottom side of the TV.

Notification

Manufactured under license from Dolby Laboratories.

TRADEMARK ACKNOWLEDGMENT

“Dolby” and the double-D symbol are trademarks of 

Dolby Laboratories.

“HDMI, the HDMI logo and High-Definition Multimedia 

Interface are trademarks or registered trademarks of 

HDMI Licensing LLC.” 

“DLNA, the DLNA Logo and DLNA CERTIFIED are 

trademarks, service marks, or certification marks of 

the Digital Living Network Alliance.”  

“YouTube and the YouTube logo are trademarks of 

Google Inc.”

Information for Users on Disposal of Old 

Equipment and Batteries

These symbols indicate that equipment with these 

symbols should not be disposed of as general 

household waste. If you want to dispose of the 

product or battery, please consider the collection 

systems or facilities for appropriate recycling.

Caution

: “Pb” sign will occur below the crossed-out 

wheelie bin symbol if the battery contains lead

.

Products

Battery

Содержание 65FA7500

Страница 1: ...TELEViZYON KULLANIM KILAVUZU SMART 32HA7000 32 LED TV OPERATING INSTRUCTIONS...

Страница 2: ...eki nlem i areti kullan c y ayg tla birlikte verilen k lavuzlar n i inde nemli al t rma ve bak m servis talimatlar bulundu u konusunda uyarmak i in konmu tur NEML Kurulum veya al t rma ncesinde bu tal...

Страница 3: ...i TV a k b rak ld ve ayarlanan s re kadar i lem yap lmad takdirde ayarl s re doldu unda TV bekleme moduna ge er Bir sonraki a l ta a a daki mesaj g r nt lenecektir Uzun bir s re boyunca i lem yap lmad...

Страница 4: ...e i tirebilirsiniz Pilleri Uzaktan Kumandan za Yerle tiriniz Kumandan n arkas ndaki kapak yava a yukar do ru kald r n z ki adet AAA pil yerle tiriniz Pilin ve u lar ile pil b lmesindekilerin e le ti i...

Страница 5: ...s cakl ve nemi 0 C ila 40 C maks 85 ba l nem Teletekst Girmek i in tu una bas n z Kar k modunu etkinle tirmek i in yeniden bas n z kmak i in bir kez daha bas n z Dijital teletekst ekran nda g r nt le...

Страница 6: ...klanan ekilde buna ayarlayabilirsiniz lk kurulumu yap yorsan z TU UM 2 in varsay lan fonksiyonuna geri d nece ini unutmay n z TV 1 Bekleme A ma 2 Kanal listesi Channel List 3 Sesi azalt artt r 4 Men a...

Страница 7: ...z neririz CI mod l n sadece TV KAPALI konumdayken tak n z veya kart n z Ayarlarla ilgili ayr nt lar i in mod l talimatlar k l a v u z u n a b a v u r u n u z Televizyonunuzun her USB giri i 500mA ya k...

Страница 8: ...rlar n yapmak isteyip istemedi inizi soran bir mesaj g r nt lenecektir Evet se imini yapt n zda A Ayarlar men s g r nt lenecektir Kablolu veya kablosuz bir ba lant yap land rmak i in l tfen Ba lanabil...

Страница 9: ...am ederken kanallar LCN ye g re s ralamak isteyip istemedi inizi soran bir mesaj g r nt lenir Evet se imini yap n z ve OK tu u ile onaylay n z Not lk kurulum ba lat l rken TV yi kapatmay n z lke se im...

Страница 10: ...uygulama t m mobil cihazlar ile uyumlu de ildir FollowMe TV den DMR ye Opsiyonel Bu zellik uygun uygulamalar kullanarak rn BubbleUPnP gibi UPnP Evrensel Tak al t r uygulamalar TV nizden mobil cihazla...

Страница 11: ...s k lar nda oldu u gibi Ba lanm cihaz n ses seviyesini de i tirmek isterseniz cihaz kaynak listesinden se meniz gereklidir Bu durumda ses kontrol tu lar ba lanm olan ses cihaz na y nlendirilir Sistem...

Страница 12: ...modundaveyaresim modu Oyun olarak ayarlanm sa etkinle tirilemez G r lt Azaltma E er yay n sinyali zay fsa ve g r nt karl ise d zeltmek i in G r lt Azaltma ayar n kullan n z Geli mi Ayarlar Dinamik Ko...

Страница 13: ...larak TV nize ba layabilirsiniz AVL Otomatik Ses S n rlama Bu zellik programlar aras nda sabit bir ses k elde edilebilmesine olanak sa lar Kulakl k Ses k Kulakl k jak n kullanarak televizyona harici b...

Страница 14: ...etkin oldu unda TV men s nde bulunan baz eler kullan lamayabilir Media leyici DLNA i leyici zelli i ak ll telefonlar n zda veya Tablet PC nizde saklanan dosyalar payla man z sa lar E er DLNAuyumlu bi...

Страница 15: ...n ve analog kanallar arar ve haf zaya al r Uydu Uydu kanallar n arar ve haf zaya al r El ile Kanal Tarama Bu zellik do rudan yay n giri i i in kullan labilir Uydu Kanallar n Tarama Yay n sistemindeki...

Страница 16: ...se ilen kanal a abilirsiniz Genel TV levi Kanal Listesinin Kullan lmas Zamanlay c Ayar Zamanlay c y Sil EPG men s nde program se tikten sonra OK tu una bas n z Zaman veya Program Ayarlay c se ene ini...

Страница 17: ...de kaydetmek i in OK iptal etmek i in BACK tu una bas n z Kablosuz Ba lant Bir Kablosuz A a Ba lanmak Modeminizin SSID sini g r n r yapmak i in SSID ayarlar n modemin yaz l m arac l yla de i tirmelisi...

Страница 18: ...nlendirici ile ba lay n z ve cep telefonunuzdaki payla m yaz l m n al t r n Sonra TV nizilepayla makistedi inizdosyalar se iniz E er ba lant d zg n bir ekilde kurulursa TV nizin Ortam Taray c s arac...

Страница 19: ...eri e ba lanma zelli i ekler Portal zelli i belirlenmi k sa yollarla m zik video klip veya web i eri ini g r nt lemenizi sa lar Bu i eri i kesintisiz g r nt leyebilmeniz nternet hizmet sa lay c n z n...

Страница 20: ...V uygulamas etkinken k rm z tu simgesi modunda veya tam Aray z modunda kullan c ba ka bir kanala ge erse a a daki senaryolar ortaya kabilir Uygulama al maya devam edebilir Uygulama sonland r labilir U...

Страница 21: ...pabilirsiniz Sayfalar a man n ba ka bir yolu da web sayfalar nda bulunan ba lant lara t klamakt r Bunu yapt n zda ilgili sayfalar a l r mleci ekran n ortas na do ru kayd rd n zda uzaktan kumandan n k...

Страница 22: ...sekme arac l yla se ilen kanal listelerinin yay n programlar n g r nt leyebilirsiniz EPG tablosunda se ilen kanala gelerek kanallar aras nda gezinti de yapabilirsiniz A n z n ve a hizmetleri sa lay c...

Страница 23: ...iz Not Bu zellik sadece android i letim sistemine sahip cihazlar i indir Klavye Sayfas Klavye sayfas iki ekilde a labilir uygulama ekran ndaki Klavye simgesi zerine dokunarak veya TV den al nan bir ko...

Страница 24: ...ablolar n ve ba lant lar kontrol ediniz Nero Media Home Kurulumu Nero Media Home yaz l m n y klemek i in l tfen a a daki ekilde ilerleyiniz Not DLNA fonksiyonunu kullanmak i in bu yaz l m bilgisayar n...

Страница 25: ...bir rne idir TV niz t m z n rl kleri desteklemiyor olabilir TV niz 1920x1200 e kadar desteklemektedir Dizin z n rl k Frekans 1 640x400 70Hz 2 640x350 85Hz 3 640x400 85Hz 4 640x480 60Hz 5 640x480 66Hz...

Страница 26: ...4 mov MPEG1 2 Katman 3 AAC HEAAC AC3 EAC3 LPCM ADPCM H 264 1080Px2 25fps1080P 50fps Di er 1080P 30fps 50Mbit sn avi MPEG1 2 4 Xvid H 264 VC1 WMV3 Sorenson H 263 Hareketli JPEG MPEG1 2 Katman 1 2 3 AAC...

Страница 27: ...recinde de kar la labilinir Alt piksel hatalar 2 ana e ittir Tip 1 S rekli yanan alt piksel k rm z ye il veya mavi olabilir Tip 2 S rekli s n k alt piksel siyah bir ekilde g r n r ISO 13406 2 standard...

Страница 28: ...l c lar ndan al nan yay nlarda DVD oynat c larda ya da kablolu televizyon yay nlar nda beklenen performans elde edilemeyebilir g r nt de mozaikle me olu abilir g r nt n n keskinli i ve z n rl d k olab...

Страница 29: ...ana m s resi i inde 1 Sat lan geri vermeye haz r oldu unu bildirerek s zle meden d nme 2 Sat lan al koyup ay p oran nda sat bedelinden indirim isteme se imlik haklar ndan birini Sat c ya kar 3 A r bir...

Страница 30: ...ls may appear on the screen as a fixed blue green or red point Please note that this does not affect the performance of your product Take care not to scratch the screen with fingernails or other hard...

Страница 31: ...been operated during the set time it will switch into standby mode after the set time has expired When you next switch on the following message will be displayed TV switched to stand by mode automati...

Страница 32: ...Lift the cover on the back of the remote upward gently Install two AAA batteries Make sure to match the and ends of the batteries in the battery compartment observe the correct polarity Replace the c...

Страница 33: ...Operation temperature and operation humidity 0 C up to 40 C 85 humidity max Teletext Press button to enter Press again to activate mix mode Press once more to exit Follow the instructions displayed on...

Страница 34: ...econds you can set a function to it as described in My Button 1 Notethatifyouperformfirsttimeinstallation MYBUTTON 2 will return to its default function 1 Standby On 2 Channel list 3 Volume up down 4...

Страница 35: ...before mounting on the wall Insert or remove the CI module only when the TV is SWITCHED OFF You should refer to the module instruction manual for details of the settings Each USB input of your TV sup...

Страница 36: ...refer to Connectivity section to configure a wired or a wireless connection After the settings are completed press OK button to continue Aerial Installation If you select Aerial option from the search...

Страница 37: ...ing on the country selection In the TKGS system channels can be blocked by the service provider and Audio Video transmission will not be available from these channels Using SatcoDX Feature SatcoDX opt...

Страница 38: ...ce in it Media Renderer option in the More menu should be set as Enabled HD channels are not supported and both of the devices must be connected to the same network E Manual Optional You can find inst...

Страница 39: ...Media Browser mode or while the picture mode is set to Game Noise Reduction If the broadcast signal is weak and the picture is noisy use the Noise Reduction setting to reduce the amount of noise Adva...

Страница 40: ...nect the sound devices to your TV wirelessly via Bluetooth AVL Automatic Volume Limiting This function sets the sound to obtain fixed output level between programmes Headphone Lineout When you connect...

Страница 41: ...list will be updated and changed after this process Store Mode If you are displaying the TV in a store you can activate this mode Whilst Store Mode is enabled some items in the TV menu may not be avai...

Страница 42: ...Satellite Searches and stores satellite channels Manual Channel Scan This feature can be used for direct broadcast entry Network Channel Scan Searches for the linked channels in the broadcast system...

Страница 43: ...l Set Timer Delete Timer After you have selected a programme in the EPG menu press the OK button Select the Set Timer on General TV Operation Using the Channel List Event option and press the OK butto...

Страница 44: ...on the Advanced mode will be available While in Advanced Mode press the RED button to edit settings When finished press OK to save Press BACK to cancel Wireless Connectivity To Connect to a Wireless N...

Страница 45: ...nformation Configuration Status Displays Wi Fi status as Connected or Not Connected IP Address Displays the current IP address Network Name Connected networks name will be displayed Delete Saved Wi Fi...

Страница 46: ...one television with DLNA to the same network If a problem occurs with the DLNA network please switch your television off at the wall socket and back on again Trick mode and jump are not supported wit...

Страница 47: ...initial red button icon state by pressing the red button again The user can toggle between the red button icon mode and full UI mode of the application via pressing red button It should be noted that...

Страница 48: ...earch keywords by clicking the search button in the address dialog box or another way to navigate to pages is by clicking on links on web pages and these will take you to the appropriate pages When yo...

Страница 49: ...roadcast schedules of selected channel lists through this tab You can also navigate through channels by pressing on the selected channel on the EPG grid Please note that updating refreshing the EPG in...

Страница 50: ...cess the portal page by tapping on the Portal Launcher widget Note Internet connection is required This function will not work if a portal page is not in use Smart Remote Feature You can use your mobi...

Страница 51: ...on Software Upgrade YourTV is capable of finding and updating automatically via the broadcast signal or via Internet Software upgrade search via user interface On the main menu select System Settings...

Страница 52: ...is an illustration of some of the typical video display modes Your TV may not support all resolutions Your TV supports up to 1920x1200 Index Resolution Frequency 1 640x400 70Hz 2 640x350 85Hz 3 640x40...

Страница 53: ...MPEG1 2 Layer 3 AAC HEAAC AC3 EAC3 LPCM ADPCM H 264 1080Px2 25fps 1080P 50fpsOther 1080P 30fps50Mbit sec avi MPEG1 2 4 Xvid H 264 VC1 WMV3 Sorenson H 263 Motion JPEG MPEG1 2 Layer 1 2 3 AAC HEAAC AC3...

Страница 54: ...els may cause sub pixel errors by way of lighting continuously or remaining dim continuously Please consider the following explanation about a possible sub pixel error This problem can be encountered...

Страница 55: ...pported by other sources in terms of high definition DVD players or cable television and in these broadcasts mosaic images may occur sharpness and resolution of the image may be low some effects may a...

Страница 56: ......

Страница 57: ......

Страница 58: ......

Страница 59: ...el 44 44 123 Web www vestel com tr destek E posta vmh vestel com tr Cihaz n z n T C G mr k ve Ticaret Bakanl T keticinin Korunmas ve Piyasa G zetimi Genel M d rl nce tespit ve ilan edilen kullan m mr...

Отзывы: