background image

Notes for professional electricians

Installation and start-up:

1. Switch off the power supply.

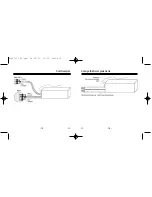
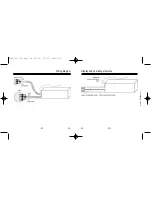
2. Connect the cables according to the wiring diagram (see page 31).

Attention: Currently valid VDE standards must be observed

when connecting the device, in particular DIN VDE
0100/0700 as well as the currently valid regulations
of your local power company and accident preven-
tion regulations.

3. Mount the device in a suitable location using the installation equip-

ment.

4. Switch on the power supply and check if the red LED on the front

side of the device is flashing.

5. Program the buttons of the radio transmitter (see page 27). Make

sure to program retract and extend button separately.

6. Press the retract and extend button to check if the rotational direc-

tion of the motor corresponds with the direction buttons. If not,
exchange the brown with the black wire of the motor connection
cable.

G

- 25 -

Notes for professional electricians

Important: Parallel control of several drive motors with a 

Vestamatic

VestaFunk MS 16

can only be implemented by means of

isolating relays.
When operating several 

Vestamatic

VestaFunk MS 16

radio transmitters, a minimum distance of 30 cm must be
observed between the individual radio transmitters.

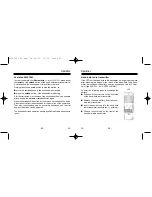
The following suitable radio transmitters are available:

Hand-held radio transmitter      2-channel, article-no. 01097010
Hand-held radio transmitter      4-channel, article-no. 01097110
Wall-mounted radio transmitter 4-channel, article-no. 01099010

When controlling 2 drives, please use our:
Isolating relay TR N2A,

article-no. 01054120.

G

- 26 -

83201911 H1.qxd  04.04.01  11:20  Seite 25

Содержание VestaFunk MS16 Series

Страница 1: ...n gefahrloser Betrieb der Steuerung nicht gew hr leistet ist so ist diese unverz glich au er Betrieb zu nehmen und gegen unbe absichtigten Betrieb zu sichern Dasselbe gilt wenn Arbeiten an den Fenster...

Страница 2: ...lemente Seite 16 D 3 Einleitung Allgemeines Der Kauf der Vestamatic VestaFunk MS 16M bzw VestaFunk MS 16R war eine gute Entscheidung Sie haben damit ein hochwertiges Produkt erworben das ber eine Viel...

Страница 3: ...taste d h Fahren die Rolladen gerade aus dr cken Sie die Einfahr Taste Fahren die Rolladen gerade ein dr cken Sie die Ausfahr Taste Ein weiteres Ein bzw Ausfahren der Rolladen ist erst nach erneutem D...

Страница 4: ...Sie eine Vestamatic VestaFunk MS 16M erworben haben so bet tigen Sie die Einfahr Taste bzw die Ausfahr Taste des Funk Handsenders f r die Dauer von 2 Sekunden um Ihre Beschattung vollst ndig ein bzw...

Страница 5: ...bau und Inbetriebnahme 1 Betriebsspannung abschalten 2 Anschlussleitungen der Steuerung gem Anschlussplan siehe Seite 15 anschlie en Achtung Beim Anschluss sind die geltenden VDE Bestim mungen insbeso...

Страница 6: ...stamatic VestaFunk MS 16 zugeordnet werden Es ist grunds tzlich nur die Programmierung von 1 Bedientaste je Einschalten der Betriebs spannung m glich Zur Programmierung jeder weiteren Bedientaste ist...

Страница 7: ...iebstemperaturbereich 10 65 C Schutzart IP65 Sendefrequenz 433 92 MHz Sendeleistung 10 mW Batterie Funk Handsender 12 V Typ 23A 23L EL12 VR22 MN21 Der Funk Handsender enth lt eine schadstoffhaltige Ba...

Страница 8: ...D Anschlussplan 15 Anzeige Bedienungselemente D 16 83201911 H1 qxd 04 04 01 11 20 Seite 15...

Страница 9: ...the control must be turned off immediately and protected against unintentional operation The same applies for work on windows or roller shutters that are operated by this control Constructional chara...

Страница 10: ...g elements page 32 G 19 Introduction General Congratulations for buying the Vestamatic VestaFunk MS 16M VestaFunk MS 16R You have purchased a high quality product that features many practical programm...

Страница 11: ...l radio transmitter you can operate your sunshade according your requirements In order to operate your Vestamatic VestaFunk MS 16R press either the retract or the extend button of the hand held radio...

Страница 12: ...way the sunhades can be accurately positioned and the slat angle of the blinds can be adjusted The above described operation equally applies to all radio transmitters in use G 23 G Operation Hand held...

Страница 13: ...tract and extend button to check if the rotational direc tion of the motor corresponds with the direction buttons If not exchange the brown with the black wire of the motor connection cable G 25 Notes...

Страница 14: ...o transmitter Press the retract button of a remote control which is programmed already and keep it pressed Switch on the operating voltage of the Vestamatic VestaFunk MS 16 G 27 Programming the radio...

Страница 15: ...F 65 C 149 F IP class IP65 Transmitter frequency 433 92 MHz Transmitter power 10 mW Hand held radio transmitter battery 12 V type 23A 23L EL 12 VR22 MN21 The radio transmitter contains a pollutant ba...

Страница 16: ...G Wiring diagram 31 Display and operating elements G 32 Art Nr 83201911 H1 83201911 H1 qxd 04 04 01 11 20 Seite 31...

Отзывы: