background image

12 


kind of loads is too big. 

3)    If the UPS is overload, the buzzer will beep twice every second. 

4)    When the UPS is overload, please remove some loads immediately. It is recommended to have the 

total loads connected to the UPS less than 80% of its nominal power capacity to prevent overload for 
system safety.   

5)    If  the  overload  time  is  over  acceptable  time  listed  in  spec  at  AC  mode,  the  UPS  will  automatically 

transfer to Bypass mode.    After the overload is removed, it will return to AC mode. If the overload 
time is over acceptable time listed in spec at Battery mode, the UPS will become fault status. At this 
time, if bypass is enabled, the UPS will power to the load via bypass. If bypass function is disabled or 
the input power is not within bypass acceptable range, it will cut off output directly. 

4. Charge the batteries 

1)    After  the  UPS  is  connected  to  the  utility  power,  the  charger  will  charge  the  batteries  automatically 

except in Battery mode or during battery self-test.   

2)    Suggest to charge batteries at least 10 hours before use. Otherwise, the backup time may be shorter 

than expected time. 

3)    Make  sure  the  battery  number  setting  on  the  control  board  (Please  refer  to  the  section  3-4-12


Operation of changing battery numbers 

for detailed setting) is consistent to real connection. 

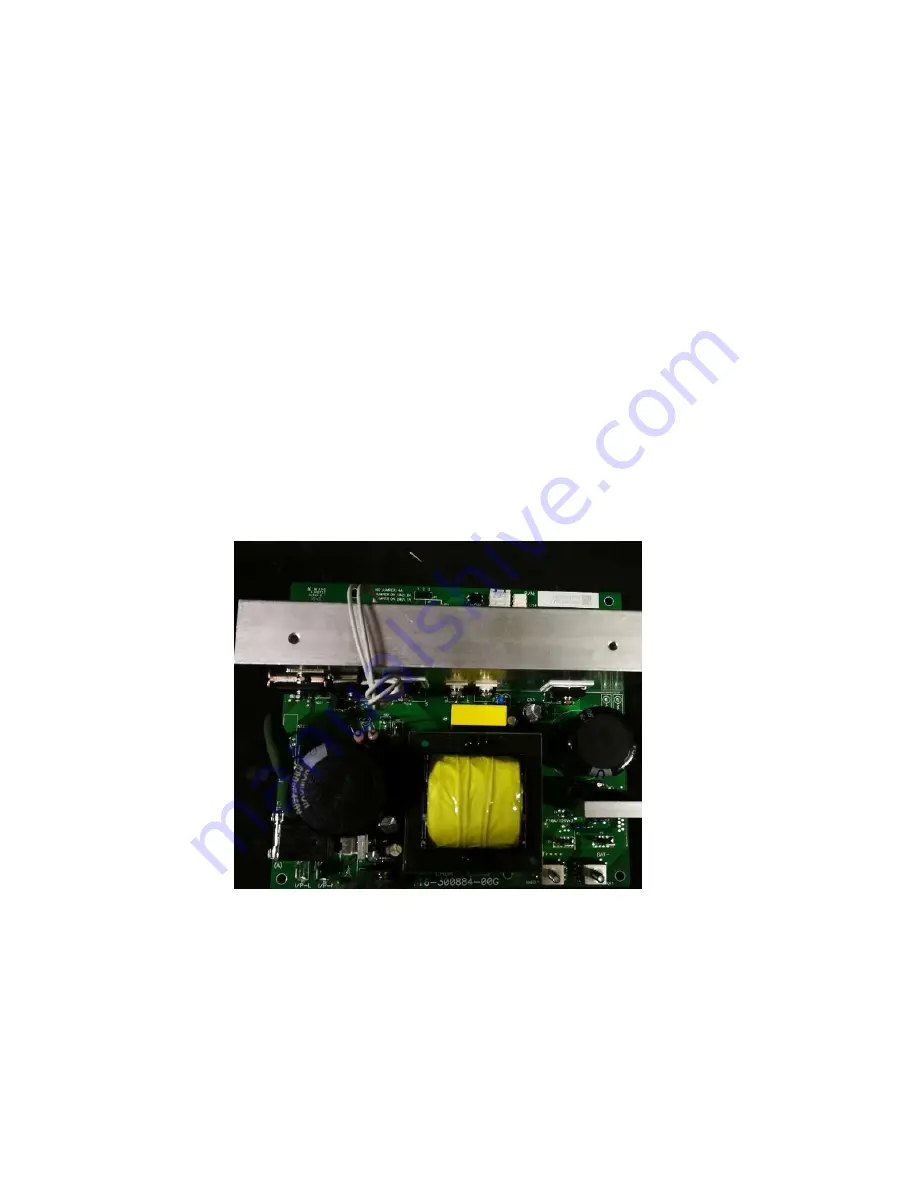
4)    Check charger current of the charger board 


It’s  necessary  to  open  the  UPS  case  to  check  charger  current  setting  in  this  step.  There  is  a  JP1 
located on charger board. If there is no jumper on JP1, it means 4A charger current.    If there is one 

jumper on Pin1&Pin2 on JP1, it means 2A charger current. If there is one jumper on Pin2&Pin3 of JP1, 

it means 1A charger current. 


Charger board overlook 

Содержание Liebert GXT-MT+10KVA

Страница 1: ......

Страница 2: ...instructions in this manual strictly Save this manual properly and read carefully the following instructions before installing the unit Do not operate this unit before reading through all safety info...

Страница 3: ...2 4 UPS INSTALLATION FOR PARALLEL SYSTEM 7 2 5 SOFTWARE INSTALLATION 8 3 OPERATIONS 9 3 1 BUTTON OPERATION 9 3 2 LED INDICATORS AND LCD PANEL 9 3 3 AUDIBLE ALARM 11 3 4 SINGLE UPS OPERATION 11 3 5 PAR...

Страница 4: ...nect appliances or devices which would overload the UPS e g big motor type equipment to the UPS output sockets or terminal Place cables in such a way that no one can step on or trip over them Do not b...

Страница 5: ...ipment can reasonably be expected to cause the failure of the life support equipment or to significantly affect its safety or effectiveness is not recommended Do not use this equipment in the presence...

Страница 6: ...mains Ensure that no liquid or other foreign objects can enter into the UPS system The UPS can be operated by any individuals with no previous experience 1 6 Standards Safety IEC EN 62040 1 EMI Condu...

Страница 7: ...s The shipping package contains One UPS One user manual One monitoring software CD One RS 232 cable option One USB cable One parallel cable only available for parallel model One share current cable on...

Страница 8: ...for parallel model 5 Parallel port only available for parallel model 6 Intelligent slot 7 Power stage fan 8 External battery connector 9 Bypass Input Circuit Breaker Only available for dual input uni...

Страница 9: ...x3 LB 10 10 8 8 8 NOTE 1 The cable should be able to withstand over 40A current It is recommended to use AWG 10 or thicker wire for Phase and AWG 8 or thicker wire for Neutral for safety and efficienc...

Страница 10: ...ake sure the voltage of the battery pack is correct Pay highly attention to the polarity marking on external battery terminal block and make sure the correct battery polarity is connected Wrong connec...

Страница 11: ...8 Wiring diagram of parallel system 2 5 Software Installation For optimal computer system protection install UPS monitoring software to fully configure UPS shutdown...

Страница 12: ...play next selection in setting menu Mute Down Button Mute the alarm Press and hold the button more than 0 5s to mute the buzzer Please refer to section 3 4 9 for details Down key Press this button to...

Страница 13: ...put and output voltage frequency battery voltage load information and internal temperature Vac input output voltage Vdc battery voltage Hz frequency load level C F temperature Load information Indicat...

Страница 14: ...rotect your precious devices you should turn on the UPS Refer to next step 2 Press and hold the ON button for 0 5s to turn on the UPS and the buzzer will beep once 3 A few seconds later the UPS will e...

Страница 15: ...n bypass acceptable range it will cut off output directly 4 Charge the batteries 1 After the UPS is connected to the utility power the charger will charge the batteries automatically except in Battery...

Страница 16: ...section 6 Test the batteries 1 If you need to check the battery status when the UPS is running in AC mode CVCF mode you could press the Test button to let the UPS do battery self test 2 Users also can...

Страница 17: ...urn off the UPS If the load couldn t be cut off you should remove the cover of maintenance bypass switch on the rear panel and turn the maintenance switch to BPS position first 3 Switch off the line i...

Страница 18: ...tion 3 4 7 Then follow the wiring procedure in section 2 4 4 Remove the cover of parallel share current cable port on the UPS connect each UPS one by one with the parallel cable and share current cabl...

Страница 19: ...If the bypass is abnormal you can not remove the UPS without interruption You must cut off the load and shut down the system first 2 Make sure the bypass setting is enabled in each UPS and then turn o...

Страница 20: ...BD Not allowed OPN Allow CHE Check RES Reserved L1 The first line L2 The second line L3 The third line 3 7 LCD Setting 3 7 1 LCD Main Interface A Single model Press up and down key to select the displ...

Страница 21: ...unit 3 7 2 LCD Setting At the main interface press and hold the up and down buttons simultaneous for more than 1 second to enter or escape from setting menu Parameter 1 Parameter 2 There are two param...

Страница 22: ...ptions 18 Reserved 19 Reserved 20 Neutral loss detection Y Y Y Y Y Y 21 Battery voltage calibration Y Y Y Y Y Y 22 Charger voltage adjustment Y Y Y Y Y Y 23 L1 inverter voltage adjustment Y Y Y 24 L2...

Страница 23: ...uency is not within 46 54 Hz If 60 Hz is selected in Output frequency setting UPS will transfer to battery mode when input frequency is not within 56 64 Hz Note For single unit it will have bypass out...

Страница 24: ...ss mode Interface Setting Parameter 2 Set the acceptable high frequency for bypass 50 Hz Setting range is from 51 0Hz to 54 0 Hz 60 Hz Setting range is from 61 0Hz to 64 0Hz The default value is 54 0H...

Страница 25: ...ble disable Interface Setting Parameter 2 Enable or disable phase auto adapt function You may choose following two options DIS disable phase auto adapt function Then the UPS only can accept one condit...

Страница 26: ...or example pressing OFF button in AC mode to turn into Bypass mode 16 Maximum battery discharge time setting Interface Setting Parameter 2 001 999 Set the maximum backup time from 1 min to 999 min UPS...

Страница 27: ...enerated If the UPS is turned on it will transfer to battery mode When neutral is restored the alarm will NOT be muted automatically and the UPS will NOT go back to normal mode automatically Here you...

Страница 28: ...ng the default value 0 Any modification should be suitable to battery specifications 23 L1 inverter voltage adjustment Interface Setting Parameter 2 The voltage range is from 9 9V to 9 9V the default...

Страница 29: ...meter The calibration result will be effective by pressing Enter The calibration range is limited within 9V This function is normally used for parallel operation 28 L3 output voltage calibration Inter...

Страница 30: ...able AC power to output The UPS will also charge the battery at AC mode ECO mode When the input voltage frequency is within acceptable range and ECO mode is enabled UPS will bypass voltage to output f...

Страница 31: ...t start failure None 29 Battery fuse broken in Battery mode None 12 High inverter voltage None 36 Parallel output current unbalance None 13 Low inverter voltage None 41 Over temperature None 14 Invert...

Страница 32: ...ode Warning event 01 Battery unconnected 10 L1 IP fuse broken 02 IP Neutral loss 11 L2 IP fuse broken 04 IP phase abnormal 12 L3 IP fuse broken 05 Bypass phase abnormal 21 Line situations are differen...

Страница 33: ...ly by the electrical network via the Bypass Remove excess loads from UPS output After repetitive overloads the UPS is locked in the Bypass mode Connected devices are fed directly by the mains Remove e...

Страница 34: ...the connection is ok and the alarm is still displaying please refer to the LCD setting section to enter the neutral loss check menu to see if the parameter3 is CHE if it is please press the Enter key...

Страница 35: ...required precautionary measures may replace batteries and supervise operations Unauthorized persons must be kept well away from the batteries Verify that no voltage between the battery terminals and...

Страница 36: ...ortion 2 100 Linear Load 5 100 Non linear Load Transfer Time Line Battery 0 ms Inverter Bypass 0 ms When phase lock fails 4ms interruption occurs from inverter to bypass Inverter ECO 10 ms EFFICIENCY...

Страница 37: ......

Отзывы: