background image

Page 22

VX-1700 O

PERATING

 M

ANUAL

The 

VX-1700

’s ALE (Automatic Link Establishment) fea-

ture allows you to select the channel with the best LQA
(Link Quality Analysis) score from the programmed chan-
nels automatically.

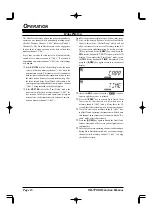
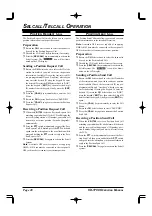
Sending an ALE Call

Press the [

7

(

V/M

)] key, as needed, to select the Memory

Channel mode.

Press the [

AEL

] key momentarily to activate the ALE

feature. The 

VX-1700

 will display the last-activated

network. After five seconds from the initial pressing
of the [

AEL

] key, the 

VX-1700

 will initiate the ALE

scanner.

If you wish to change the current ALE network, rotate
the 

CH

 Selector knob to select the desired network.

Press the [

CALL

] key momentarily to open the station

list.

Rotate the 

CH

 Selector knob to select the station name

to which you wish to direct an ALE Call. Available
stations are: the last-received station, 100 pre-pro-
grammed stations, and ALL CALL, which is a broad-
cast message which your radio uses to establish a con-
nection with all other stations simultaneously.

Press the [

CALL

] key again to transmit the ALE Call.

ALE O

PERATION  

(

R

EQUIRES

 O

PTIONAL

 ALE-1 U

NIT

)

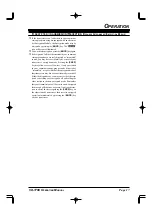
Sending an ALE Call

with an Imbedded Message

Press the [

7

(

V/M

)] key, as needed, to select the Memory

Channel mode.

Press the [

ALE

] key momentarily to activate the ALE

feature. The 

VX-1700

 will display the last-activated

network. After five seconds from the initial pressing
of the [

ALE

] key, the 

VX-1700

 will initiate the ALE

scanner.

If you wish to change the current ALE network, rotate
the 

CH

 Selector knob to select the desired network.

Press the [

CALL

] key momentarily to open the station

list.

Rotate the 

CH

 Selector knob to select the station name

to which you wish to direct the ALE Call. Available
stations are: the last-received station, 100 pre-pro-
grammed stations, and ALL CALL, which is a broad-
cast message which your radio uses to establish a con-
nection with all other stations simultaneously.

Press the keypad’s [

F

] key, then press the [

CALL

] key

to display the ten pre-programmed messages.

Rotate the 

CH

 Selector knob to select the desired mes-

sage. If you wish to edit the message:

Press the [

ENT

] key again, then press the keypad

to select the first digit of the message.

Example 1

: Press the [

1

(

MODE

)] key repeatedly

to select the character “

1

” and any of the 27 avail-

able characters.

Example 2

: Press the [

2

(

NB

)] key repeatedly to

toggle among the available characters associated
with that key: 

 A 

 B 

 C 

 2


Example 3

: Press the [

0

(

DIM

)] key to toggle the

characters “

0

” and “space.”

Rotate the 

CH

 Selector knob one click clockwise

to move on to the next character.

If you make a mistake, press the [

1

(

MODE

)] key

to back-space the cursor, then re-enter the correct
letter, number, or symbol.

Repeat the above steps to program the remaining

letters or numbers of the desired message. A total
of 90 characters may be used in the message.

Press and hold the [

1

(

MODE

)] key to delete the

previously-stored data after the cursor.

Press the keypad’s [

ENT

] key to terminate the mes-

sage.

If you select the “None” option, you may send just the
ALE Call instead of the ALE Call with the imbedded
message.

Press the [

CALL

] key again to transmit the ALE Call

with the imbedded message.

Содержание VX-1700 Series

Страница 1: ...S Headquarters 10900 Walker Street Cypress CA 90630 U S A YAESU EUROPE B V P O Box 75525 1118 ZN Schiphol The Netherlands YAESU UK LTD Unit 12 Sun Valley Business Park Winnall Close Winchester Hampshire SO23 0LB U K VERTEX STANDARD HK LTD Unit 5 20 F Seaview Centre 139 141 Hoi Bun Road Kwun Tong Kowloon Hong Kong ...

Страница 2: ...Encrypted Transmission Reception 17 Selcall Telcall Operation 18 SelCall 18 Message Call 19 Position Request Call 20 Position Send Call 20 Beacon Request Call 21 Telcall23 ALEOperation 22 Sending anALE Call 22 Sending an ALE Call with an Imbedded Message 22 ProgrammableFunction PF Keys 24 SUPPLIED ACCESSORIES MH 31A8J Hand Microphone DC Power Cord T9023725 Spare Fuse 25 A Blade Type Q0000074 Opera...

Страница 3: ...s manual thor oughly before installing or operating this transceiver SAFETY WARNING INFORMATION The antenna s used for this transmitter must be fixed mounted on outdoor permanent structures with a separation distance of at least 2 3 m from all persons during normal operation and must not exceed an antenna gain of 0 dBd This device must be restricted to work related operations in an Occupational Co...

Страница 4: ... clock wise rotation of this control allows progressively weaker signals to be heard When a signal or noise breaks through the squelch threshold the icon on the display will be illuminated FRONT PANEL CONTROLS SWITCHES P1 P4 Keys PROGRAMMABLE FUNCTION KEYS These four keys functions can be customized via pro gramming by your Vertex Standard dealer The fac tory defaults are shown below P1 Key Press ...

Страница 5: ...hen the channel display format is set to the Alpha numeric Display mode None Selects the Scan Resume mode None Engages the Set Menu mode None Disables the Alternate key function Key Primary Function Press Key None Toggles the Noise Blanker on and off Activates the Antenna Tuning process None None Indicates the memory channel with the channel frequency and channel s Alpha numeric Tag alternately wh...

Страница 6: ...e such as a WeatherFax demodulator TUNER Jack This 8 pin mini DIN jack is for interconnection to the optional FC 30 or FC 40 External Antenna Tuner ACC Jack This 10 pin mini DIN jack is for interconnection to the optional VL 1000 Linear Amplifier KEY Jack This 3 5 mm miniature phone jack accepts a CW Morse Code key or output from an electronic CW keyer unit Key up voltage is 5 0 V and key down cur...

Страница 7: ...hen you attempt to remove the object Unsupervised children should be kept away from any elec trical apparatus such as the VX 1700 Transceiver and its accessories INSTALLATION Antenna Precautions Always locate antennas such that they can never come in contact with outdoor power lines in the event of a cata strophic antenna support or power line support structure failure Ground the support structure...

Страница 8: ...tion Inspect the transceiver visually immediately upon open ing the packing carton Confirm that all controls and switches work freely and inspect the cabinet for any dam age Gently shake the transceiver to verify that no internal components have been shaken loose due to rough han dling during shipping If any evidence of damage is discovered document it thor oughly and contact the shipping company ...

Страница 9: ... Be abso lutely certain to solder the connections at the splice se curely and provide ample insulation for the soldered splice heat shrink tubing plus black electrical tape work well Use the following procedure to connect the DC cable Before connecting the DC cable to the battery mea sure the voltage across the battery terminals with the engine running fast enough to show a charge If the voltage i...

Страница 10: ... the desired 50 ohm impedance via a sophisticated microprocessor controlled impedance matching circuit The FC 40 and VX 1700 pro vide memory of antenna matching settings sufficient for all channels on Memory Bank 1 In marine applications the FC 40 is also ideal for the use with a backstay an tenna or marine mobile whip The FC 40 should be located at or near the base of the antenna so as to minimiz...

Страница 11: ...gnal unintended scanning blinking or blank ing of the frequency display or loss of memory Note that these conditions may occur in any communica tions installation The VX 1700 includes extensive filter ing designed to minimize the chance of such problems however random currents set up by insufficient RF ground ing can nullify such filtering Bonding the rear panel GND terminal of the VX 1700 transce...

Страница 12: ... the FP 1030A which indicates the AC mains voltage for which the supply is currently set CAUTION Permanent damage can result if improper sup ply voltage is applied to this transceiver Your warranty does not cover damage caused by application of AC re versed polarity DC or DC outside of the specified range of 13 8 V 15 If using a power supply other than the FP 1030A ensure that the DC supply connec...

Страница 13: ...f the support plus the length of any antenna or guy wires attached to the support When installing a balanced antenna such as a dipole re member that the VX 1700 transceiver is designed for use with an unbalanced coaxial feedline Always use a balun or other balancing device so as to ensure proper antenna system performance Vertical antennas usually provide excellent coverage be yond about 1000 km 6...

Страница 14: ...he ground connection consists of one or more 2 4m 8 copper clad steel rods driven into the ground If multiple ground rods are used they should be config ured in a V configuration and bonded together at the apex of the V which is nearest the station location Use a heavy braided cable such as the discarded shield from type RG 213 coaxial cable and strong cable clamps to secure the braided cables to ...

Страница 15: ...Page 13 VX 1700 OPERATING MANUAL NOTE ...

Страница 16: ...omentarily will cause the Memory Channel to increment or decrement one step respectively Pressing and holding the UP or DWN button in for 1 2 second will initiate upward or down ward scanning on the Memory Channels respectively Releasing the UP or DWN button halts the scan If you want to select the operating channel from a dif ferent Memory Channel Bank press the front panel s UP or DWN button to ...

Страница 17: ...nd key board or similar computer driven data transmission devices transmit receive control is exercised by the software which accompanies the data transmission equipment in use See the User s Manual for your ter minal equipment for operating instructions Remem ber to follow the maximum power output guidelines during continuous duty operation such as RTTY Ra dio Teletype in the J2B mode Adjust the ...

Страница 18: ...atus of any sta tions on memory channel 1 001 Dual Watch operation is simple to use Follow these steps First set the desired Resume mode for Dual Watch Usually this will be Carrier Drop which will not allow the transceiver to move off memory channel 1 01 if someone is still transmitting To do this press the F key followed by the 8 DW key then rotate the CH Selector knob until CARR is shown in the ...

Страница 19: ...e activated your transceiver s encryption mode Pressing the ENCR key may allow recovery However if only one station in your communications group sounds distorted or scrambled it is possible that the encryption mode of that transceiver may have been accidentally turned off Either the dispatcher or you may advise the other sta tion by switching your encryption off and calling the other station in th...

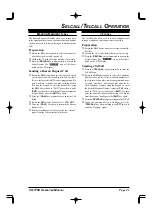
Страница 20: ... fleet Preparation Rotate the CH Selector knob to select the channel to be used for Selcall Disable the VOX and Clarifier features if necessary Press the SELCALL key momentarily to activate the Selcall system The icon will be illumi nated on the LCD display Sending a Selcall Rotate the CH Selector knob to select the ID number of the station to be called using Selcall Available IDs are the last rec...

Страница 21: ...the 1 MODE key repeatedly to select the character 1 and any of the 27 avail able characters Example 2 Press the 2 NB key repeatedly to toggle among the available characters associated with that key 2 A B C 2 Example 3 Press the 0 DIM key to toggle the characters 0 and space Rotate the CH Selector knob one click clockwise to move on to the next character If you make a mistake press the 1 MODE key t...

Страница 22: ...receiver capable of supplying NMEA 0183 data must be connected to the rear panel s GPS jack in order to transmit your current position SELCALL TELCALL OPERATION POSITION SEND CALL The Position Send Call mode allows you to send your own position information to the intended ID station Note A suitable GPS receiver capable of supplying NMEA 0183 data must be connected to the rear panel s GPS jack in o...

Страница 23: ...knob to select BCN REQ Press the CALL key again to transmit the Beacon Request Call If the Beacon Request call is successful the Answer signal from the called station will be heard TELCALL The Telcall mode allows you to make a telephone call through a telephone interconnect service provider Preparation Rotate the CH Selector knob to select the channel for Tel Call Disable the VOX and Clarifier fea...

Страница 24: ... the CH Selector knob to select the desired network Press the CALL key momentarily to open the station list Rotate the CH Selector knob to select the station name to which you wish to direct the ALE Call Available stations are the last received station 100 pre pro grammed stations and ALL CALL which is a broad cast message which your radio uses to establish a con nection with all other stations si...

Страница 25: ...Page 23 VX 1700 OPERATING MANUAL NOTE ...

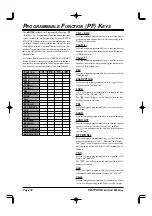
Страница 26: ... CLAR Press the assigned programmable key to tune the receiver frequency downward without changing the transmit fre quency Clarifier function DW Press the assigned programmable key to activate the Dual Watch feature ENCRYPTION Press the assigned programmable key to toggle the En cryption feature on and off LOCK Press the assigned programmable key to toggle the Key Lockout feature on and off The ic...

Страница 27: ... the last received Selcall or ALE Message SELCALL Press the assigned programmable key to toggle the SELCALL feature on and off TELCALL Press the assigned programmable key to transmit a Telcall while operating in the Selcall mode AUX TOGGLE Press the assigned programmable key to toggle the op tional accessory port 3 on and off AUX PRS TO H Press the assigned programmable key to turn the optional ac...

Страница 28: ...Page 26 VX 1700 OPERATING MANUAL NOTE ...

Страница 29: ...Page 27 VX 1700 OPERATING MANUAL NOTE ...

Страница 30: ...Page 28 VX 1700 OPERATING MANUAL NOTE ...

Страница 31: ...Part 15 21 Changes or modifications to this device not expressly approved by Vertex Standard could void the user s authorization to operate this device ...

Страница 32: ...Copyright 2005 VERTEX STANDARD CO LTD All rights reserved No portion of this manual may be reproduced without the permission of VERTEX STANDARD CO LTD Printed in Japan 0512I 0E E C 0 5 1 H 2 0 0 ...

Отзывы: