5
Reattaching the Dome Cover
Once you have adjusted the lens and the field of view
and focus have been set, you can now reattach the
lens hood and dome cover.
►
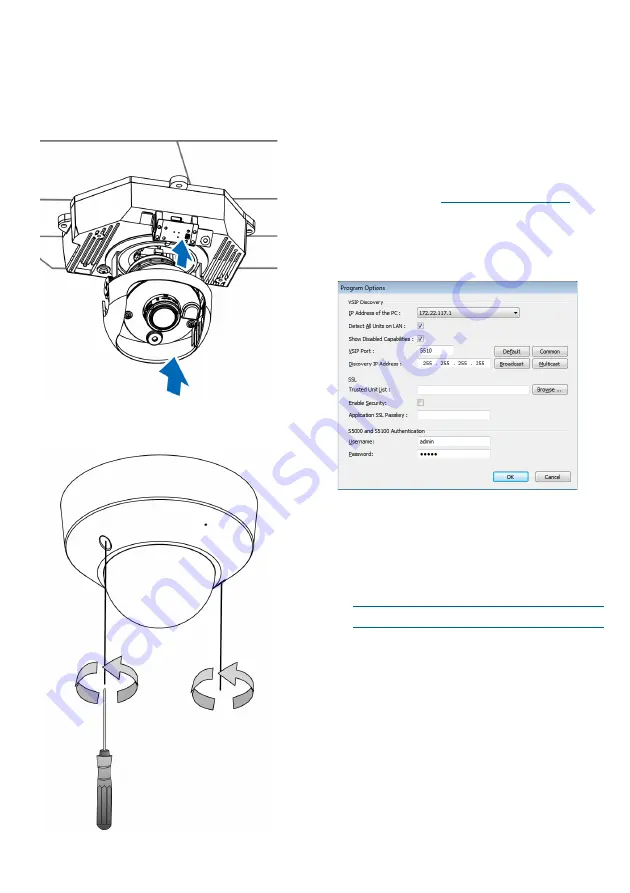
To reattach the dome cover:
1. Reattach the lens hood.
2. Attach the dome cover to the camera.
3. Secure the dome screws with a screwdriver. Make
sure all parts of the camera are securely installed.
Setting the IP Address
Once the IP camera is installed, you need to set the
IP address from a computer. By default, all Nextiva
S5100 series IP cameras are Dynamic Host
Configuration Protocol (DHCP) enabled. If you have a
DHCP server, the IP camera automatically obtains a
valid IP configuration. If the DHCP configuration fails,
the IP camera assigns itself a temporary IP address
based on the Automatic Private IP Addressing
(APIPA) format.
►
To configure SConfigurator:
1. On a computer, download the latest version of
SConfigurator from
2. Extract the executable file
(
SConfigurator.exe
) to the desktop.
3. Double-click
SConfigurator.exe
to start
SConfigurator.
4. In the
General
tab, click
Program Options
.
5. Select the IP address of the correct LAN interface
from
IP Address of the PC
list.
6. Select
Detect All Units on LAN
.
7. Ensure that the
Discovery IP Address
is
255.255.255.255; otherwise, click
Broadcast
.
8. In the S5100 Authentication section, type the
username and password for the Nextiva S5100.
NOTE:
The default username and password is
admin
.
9. Click
OK
.


