background image


2.


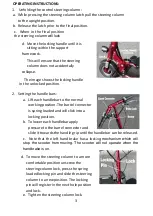
Setting the handle bars: 

a.


Lift each handlebar to the normal 
working position. The barrel connector 
is spring loaded and will click into a 
locking position. 

b.


To lower each handlebar apply 
pressure to the barrel connector and 
slide it towards the handle grip until the handlebar can be released. 


This


will


ensure


that


the


steering


column


does


not


accidentally


collapse.


!"#$%&'()


'(*&$+,&'!(*-

!"


#$%&'()$*


+,-


.&$+/&'


0+--/)$*


.&'12$3

!"


#$%&'


()'**%+,


-$'


*-'')%+,


./&01+


&!-.$


(0&&


-$'


*-'')%+,


./&01+


-/


-$'


0()%,$-


(/*%-%/+"


!"


#$%&


'&


($%


)'&*+


,-.'('-&


($%


.(%%/'&0


column will lock

!"


#$%$&'$


()$


%&(*)


+,-.,


(.


()$


/-0&%


+.'-(-.0"

!"


#$%&


'(&


)$*+,-.


(/-!)&


0-',)


,'


,1


1,'',-.


2,'(,-


'(&


1033$4'


54/6&2$4+"


!"#


$%&'#


(")*(


+"#


,)-.$/'


"&/0,#


$/


+"#


1/,)-.#0


2)($+$)/3


!"


#$%&


%'(%


%'&


)&*%


'(+,


-.(/&


'(0


(


)$!

/1+

g mechanism which will 

stop  the  scooter  from  moving.  The  scooter  will  not  operate  when  the 

handbrake is on.

e.


Tighten


the


steering


column


lock.

d.


To


move


the


steering


column


to


a


more


comfortable


position


unscrew


the


steering


column


lock,


press


the


spring


loaded


locking


pin


and


slide


the


steering


column


to


a


new


position.


The


locking


pin


will


register


in


the


next


hole


position


and


lock.

Содержание CTS350

Страница 1: ...VENTURE CTS350 FOLDING MOBILITY SCOOTER USER MANUAL...

Страница 2: ......

Страница 3: ......

Страница 4: ...oduct in slippery conditions 5 Do not leave the product uncovered when raining 8 Do not charge the battery when the home is unattended 16 Use genuine product accessories 10 Check the tyre pressure eve...

Страница 5: ...at the steering column does not accidentally collapse 0 12 3 01 0 01 0 0 column will lock 0 0 0 1 1 2 1033 4 54 6 2 4 0 1 0 2 3 0 1 g mechanism which will stop the scooter from moving The scooter will...

Страница 6: ...e speed control switch has 3 positions labelled 1 2 3 a To install the seat slide the seat rods into the associated tubes on the main frame 4 Identifying the controls 0 123456 7 8 9 0 0 9 ii The lowes...

Страница 7: ...The battery indicator gives a visual display of the condition of the battery ii When fully charger all lamps will be lit As the battery is used the green lamps will be extinguished 5 Accelerator i The...

Страница 8: ...the battery indicator will pulse red purple and the internal fan will hum e When fully charged the lamp will turn solid red and the fan will stop f When fully charged turn the 240V power OFF and remov...

Страница 9: ...A LARGE RANGE OF SPARE PARTS FOR THE CTS350 Please contact us for any parts required VENTURE SCOOTERS Rex Thorley 0211115400 WWW VENTURESCOOTERS CO NZ info venturescooters co nz The Venture CTS350 is...

Страница 10: ...8 7kg...

Отзывы: