24
.
w w w . v e l o d y n e . c o m
Digital Drive User’s Manual
AND REMEMBER: Use the UP, DOWN, RIGHT and LEFT directional arrow buttons that
surround SELECT to move through the fields of the setup screen, and change settings by using
the SELECT button, then the UP and DOWN arrow keys. Or, you can skip the SELECT button
and change values using the SET +/
-
buttons.
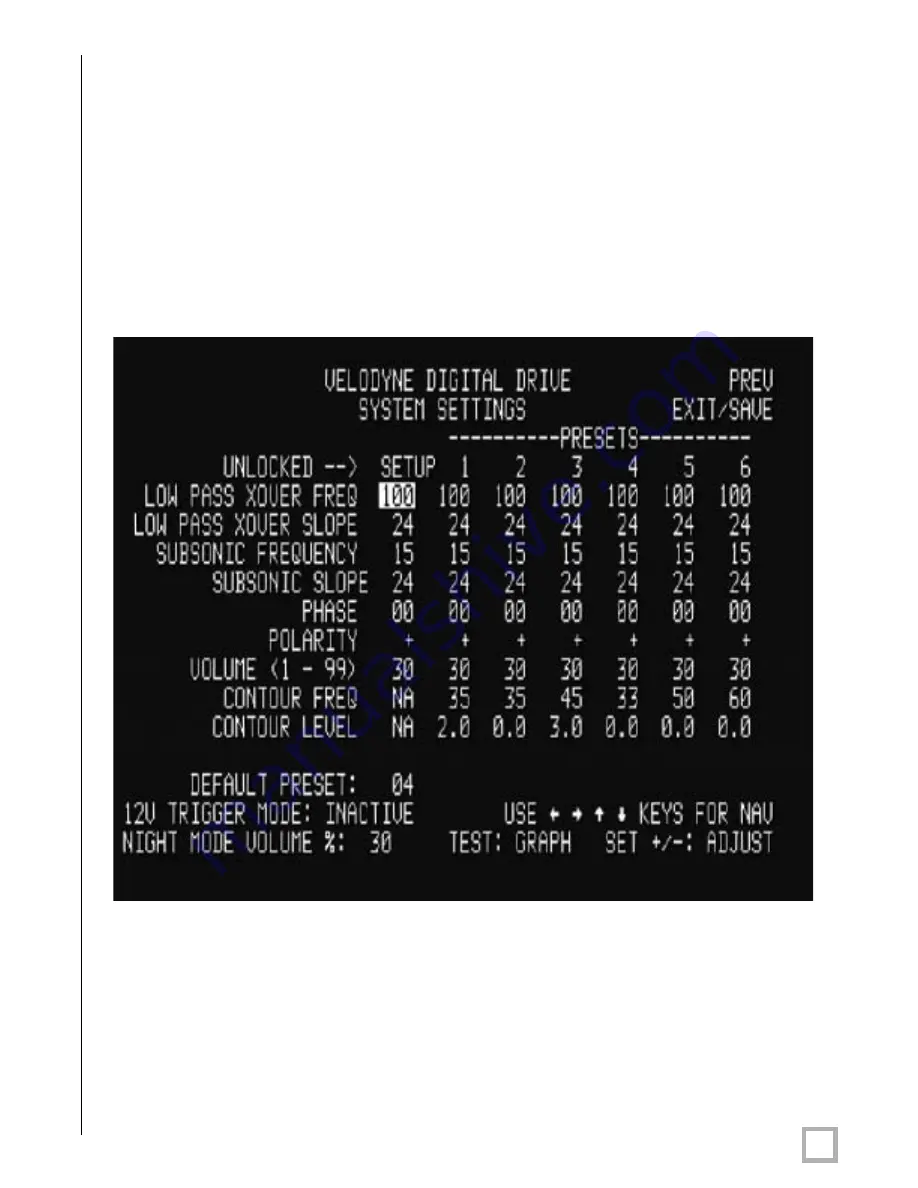
14. When setting the low pass crossover, begin by setting the frequency and slope to the same
values as the crossover settings on your receiver/processor (for example, many units have
a large/small satellite setting). Again, consult your receiver/processor owner’s manual for
more information. You will notice that changing these values “cascades” the values out to
all the presets. That is because once these values are set, they will not normally change
from preset to preset, but if later you wish to customize a specific preset you can. An
example of a crossover changed to 100 Hz is shown below:
Содержание SMSTM -1
Страница 1: ...Digital Drive SMS 1 Subwoofer Management System U S E R S M A N U A L Featuring Software Version 2 1...
Страница 2: ...Caution i w w w v e l o d y n e c o m Digital Drive User s Manual...
Страница 3: ...Attention ii w w w v e l o d y n e c o m Digital Drive User s Manual...
Страница 4: ...Vorsicht iii w w w v e l o d y n e c o m Digital Drive User s Manual...
Страница 5: ...Attenzione iv w w w v e l o d y n e c o m Digital Drive User s Manual...
Страница 9: ...3 w w w v e l o d y n e c o m Digital Drive User s Manual Remote Contr ol...
Страница 27: ...21 w w w v e l o d y n e c o m Digital Drive User s Manual The screen should now look something like this...


