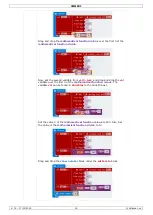
VMM501
V. 01 – 17/01/2019
7
©Velleman nv
Testing on micro:bit
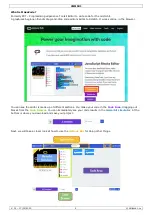
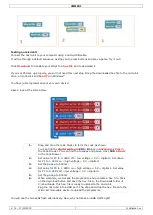
Connect the micro;bit to your computer using a micro-USB cable.
It will go through a default sequence, asking you to press buttons and play a game. Try it out!
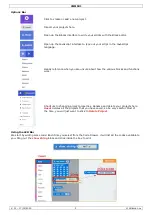
Click
Download
to translate your script to a
hex file
and to download it.
If you set Chrome up properly, you will not need this next step. Drag the downloaded hex file to the micro:bit
drive, or right-click and
Send To
in Windows
®
.
You have just programmed your very own device!
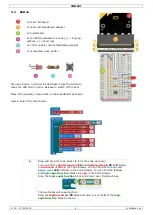
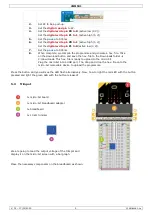
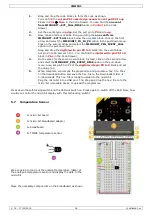
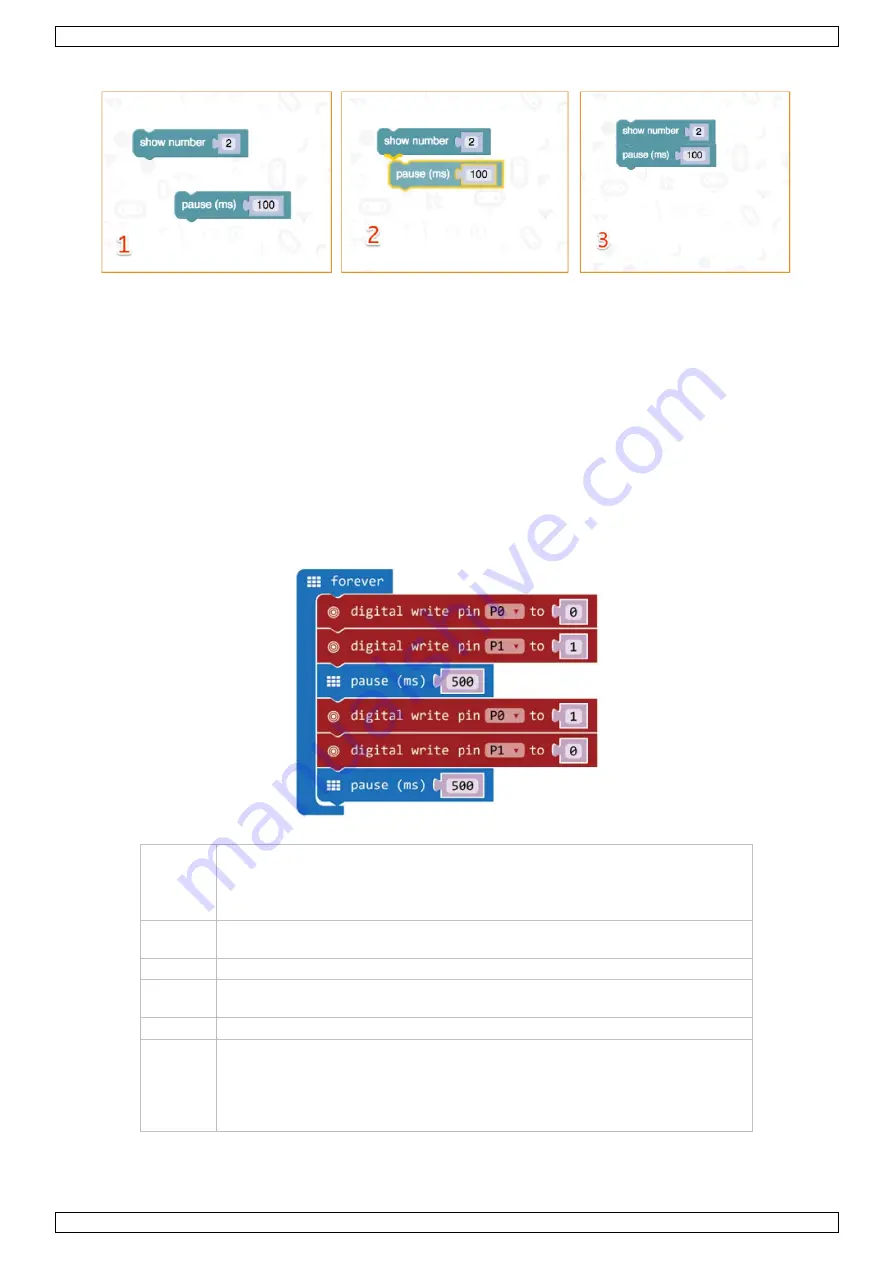
Have a look at the code below.
1.
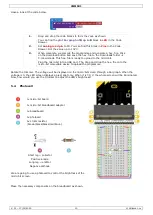
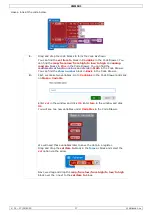
Drag and drop the code blocks to form the code as shown.
You can find the
digital write pin
P0
to
0
block in
Advanced
Pins
in
the Code Drawer. You can find the
forever
and
pause (ms)
100
in
Basic
in the Code Drawer.
2.
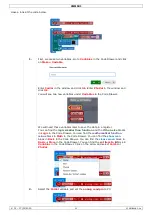
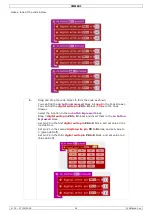
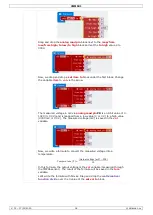
Set value for P0 to 0. LED0 off = low voltage = 0 V = digital 0. Set value
for P1 to 1. LED1 on = high voltage = 5 V = digital 1.
3.
Set the
pause
to 500 ms.
4.
Set value for P0 to 1. LED0 on = high voltage = 5 V = digital 1. Set value
for P1 to 0. LED1 off = low voltage = 0 V = digital 0.
5.
Set the
pause
to 500 ms.
6.
When complete, we compile the programme and generate a hex. file. Click
on the download button and save the hex. file to the Downloads folder
C:\downloads. This hex. file is ready to upload to the micro:bit.
Plug the micro:bit into a USB port. The, drag and drop the hex. file onto the
micro:bit removable device to upload the programme.
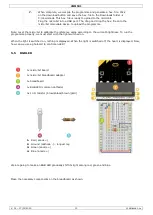
You will see the two LEDs flash alternatively. Now, why not make an RGB traffic light?


