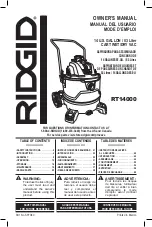
background image

1 Handle

2 Clean water tank release latch

3 Carry handle

4 Clean water tank

5 Dirty water tank release latch

6 Dirty water tank handle

7 Fixed brushbar

8 Dirty water tank

9 Dirty water tank lid

10 Power cord

11 Quick cord release

12 Handle release pedal

13 On/off switch

14 Upper cord clip

15 Solution release trigger

16 1 x Upper handle screw

17 2 x Right and left base screws

18 1 x Middle base screw

19 3 x Nuts

20 1 x Vax AAA Carpet Cleaner 750ml

1. Diagram

Parts Overview

2

Fig.1/1

1

2

3

4

5
6

8

7

9

16

17

18

19

15

14

10

13

11

12

20

Vax V-022(Q).qxd  23/8/06  11:47  Page 2

Содержание Rapide Spruce Duo V-022Q

Страница 1: ...061248 Instruction Manual Please read carefully before using this cleaner Always fully extend the mains cable before use www vax co uk CARPET WASHER Vax Model Number V 022 V 022Q Duo Vax V 022 Q qxd 2...

Страница 2: ...nk lid 10 Power cord 11 Quick cord release 12 Handle release pedal 13 On off switch 14 Upper cord clip 15 Solution release trigger 16 1 x Upper handle screw 17 2 x Right and left base screws 18 1 x Mi...

Страница 3: ...vacuum up harmful or toxic material chlorine bleach ammonia drain cleaner etc 14 Do not vacuum up hard or sharp objects such as glass nails screws coins etc 15 Do not use without the filters in place...

Страница 4: ...pper and lower cord wraps Fig 3 5 Clip plug to cord to secure for storage 4 Preparing the Carpet IMPORTANT The carpet washer is not a dry vacuum cleaner 1 Vacuum carpet thoroughly Use a vacuum cleaner...

Страница 5: ...ing and filling the clean and dirty water tanks IMPORTANT Vacuum carpets thoroughly with a dry vacuum cleaner before washing 1 Press the clean water tank release latch and tilt away from the machine F...

Страница 6: ...lution release trigger push the carpet washer forward Release the trigger and pull the washer back to remove the dirty water and solution from the carpet Fig 5 8 Repeat if necessary when the dirty wat...

Страница 7: ...ll result in poor dirt water pick up Fig 6 7 Fig 6 7 2a 2b Fig 6 6 Fig 6 5 8 While making sure the dirty water tank is resting on the base place the rear of the tank into the base of the cleaner and p...

Страница 8: ...er Flip the cleaner on its side to expose the nozzle base Fig 8 1 2 To remove the brush access cover use a Phillips screwdriver to remove the two 2 screws Fig 8 2 3 Lift out the floating brushbar Fig...

Страница 9: ...The dirty water passage clogged Solution Clean the dirty water tank PROBLEM Water escaping from carpet washer Cause The dirty water tank is full Solution Empty the dirty water tank Cause The dirty wat...

Страница 10: ...e Help Vax Care 0870 6061248 Monday Friday 9 00am to 5 00pm An answerphone is available out of these hours Any queries or concerns about using the Vax call the Vax Careline Calls are charged at the UK...

Страница 11: ...This page has been intentionally left blank 11 Vax V 022 Q qxd 23 8 06 11 47 Page 11...

Страница 12: ...fety 73 23 EEC Low Voltage Directive EMC 89 336 EEC Electromagnetic Compatibility Directive Waste electrical products should not be disposed of with household waste Please recycle where facilities exi...

Отзывы: