background image


EN


21)


Contact of guide bar tip with any object should be avoided. Tip contact may cause the guide 

bar to suddenly move upward or backwards which may cause serious injury to user. 

22)


Do not operate in rain. 

23)


Disconnect the saw from power supply when not in use, and before performing maintenance 

or adjustments. 

24)


Pull out the power plug before you change or adjust the bar and chain. Use only suitable bar 

Oregon 160SEDA074 and chain Oregon 91PJ056X. 

25)


Never leave the machine unattended in rooms with children. 

26)


Keep the machine out of children’s reach. 

27)


The first-time user should, as a minimum practice, cut logs on a saw-horse or cradle. 

Description of machine parts 

1.


Rear handle 

2.


Safety lock-off button 

3.


Trigger 

4.


Oil filler cap 

5.


Chain bar 

6.


Chain 

7.


Front handle 

8.


Motor and air slots 

9.


Electric power lead 

10.


Chain cover with safety chain brake 

trigger 

11.


Chain tension knob 

12.


Side cover 

13.


Clamp knob 

14.


Small end of chain tension lever 

15.


Locking pin 

16.


Sprocket 


Fig. 3 


Fig. 1 


Fig. 2 

Bar and chain assembly (Fig. 1-4) 

1)


Check that the chain brake (10) is not active, brake trigger in position “1”. 

2)


Remove the side cover (12) and the clamp knob (13). 

3)


Put the chain bar (5) on the locking pin (15) and push it to the sprocket (16). 

4)


Put the chain (6) on the bar, beginning from the top, ensure cutter teeth are facing direction 

of chain rotation. 

5)


Ensure chain fits around sprocket (16) and check that small end of chain tension level (14) fits 

into bottom hole of bar. 

6)


Position the chain side cover (12) and clamp the knob (13) finger tight. 

Содержание VARI 2300 W

Страница 1: ...Electric chain saw VARI 2300 W Instructions for use Original instructions for use 2010...

Страница 2: ...tand the proper use of your unit Keep this manual handy Description of symbols Symbols are used in this manual to attract your attention to possible risks The safety symbols and the explications which...

Страница 3: ...operate power tools in explosive atmospheres such as in the presence of flammable liquids gases or dust Power tools create sparks which may ignite the dust or fumes 3 Keep children and bystanders awa...

Страница 4: ...clothes jewellery or long hair can be caught in moving parts 7 If devices are provided for the connection of dust extraction and collection facilities ensure these are connected and properly used Use...

Страница 5: ...will reduce the likelihood of accidental contact with the moving saw chain 9 Follow instructions for lubricating chain tensioning and changing accessories Improperly tensioned or lubricated chain may...

Страница 6: ...ne parts 1 Rear handle 2 Safety lock off button 3 Trigger 4 Oil filler cap 5 Chain bar 6 Chain 7 Front handle 8 Motor and air slots 9 Electric power lead 10 Chain cover with safety chain brake trigger...

Страница 7: ...witch to cut out the current to the motor stopping the chain immediately 0 position 3 To rest after operation of the chain brake disconnect from power supply and release the brake by pulling the brake...

Страница 8: ...egularities 10 Check the guide bar sprocket condition 11 Ensure that the oil reservoir and the oil filter are clean This chain saw meets all current legislation requirements in order to avoid injuries...

Страница 9: ...cutting with the top of the bar Cutting logs Cutting a log resting on the two extremities First cut 1 3 of a diameter from the top Next cut from below using the top of the bar this will avoid pinching...

Страница 10: ...surrounding trees and obstacles the wind direction and speed Directional cut Cut a wedge 1 3 1 2 of tree diameter out of the trunk on the side which you want the tree to fall Felling cut Cut into the...

Страница 11: ...EN 11 How to cut the ramification and log...

Страница 12: ...recommended values of noise and vibrations you are warned to observe the following instructions when working with the machine a Protect your hearing by using suitable protective aids specified in CSN...

Страница 13: ...hat the product was introduced on the market after 13th September 2005 and shall not be disposed to a waste container or a dustbin Instructions for ordering spare parts The following data are to be us...

Страница 14: ...EN 14 Spare part list...

Страница 15: ...k 1 55 402811 screw ST4 2x25 1 17 452014 pump shaft 1 56 452203 buffer 1 18 B400006F screw ST2 9x13 3 57 411822 screw ST3 5x10 1 19 452013 pump 1 58 B400025F screw st4 2x16 1 20 452202 pin 1 59 452032...

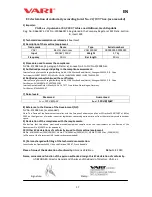
Страница 16: ...4 EC see page 2 of this statement NV No 17 2003 Gaz 2006 95 EC NV No 616 2006 Gaz 2004 108 EEC NV No 176 2008 Gaz 2006 42 EC all Decrees of the Government NV and directives as amended 4 Notified perso...

Страница 17: ...Eyth Str 14 70771 Leinfelden Echterdingen Germany Certificates 07SHW2020 07 7 Noise levels Measured Guaranteed LwA 107 dB 1pW LwA 110 dB 1pW 8 Reference to the Decree of the Government NV NV No 9 200...

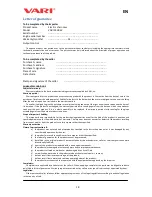
Страница 18: ...ter bears responsibility for the product having properties usual for the kind of the product in question and specified parameters for the whole period of warranty The importer does not answer for defe...

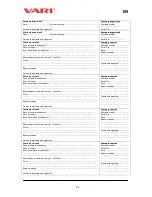
Страница 19: ...ery Date of repair Brief description of the defect Replaced parts new warranty of months Parts Repair made by Service shop stamp and signature Machine model Warranty service 2 Serial No Date Repair ma...

Отзывы: