VARI
❋
LITE - VL1100 LED L
UMINAIRE
Q
UICK
S
TART
G
UIDE
02.1602.0001
24 April 2017
10
Menu Operation
LCD Display and Menu System
The VL1100 LED Luminaire’s LCD Display and Menu System provides local control for accessing the following fixture’s settings:
•
Address – to set the DMX address
•
Setup – to change any modes
•
Configure – various parameter settings, set luminaire ID
•
Fixture – fixture status, recalibrate, reboot, software version, view fixtures hours, etc.
•
DMX – change the map, set address, invert pan/tilt
•
Manual – manual control of parameters
•
Test – test functions of parameters
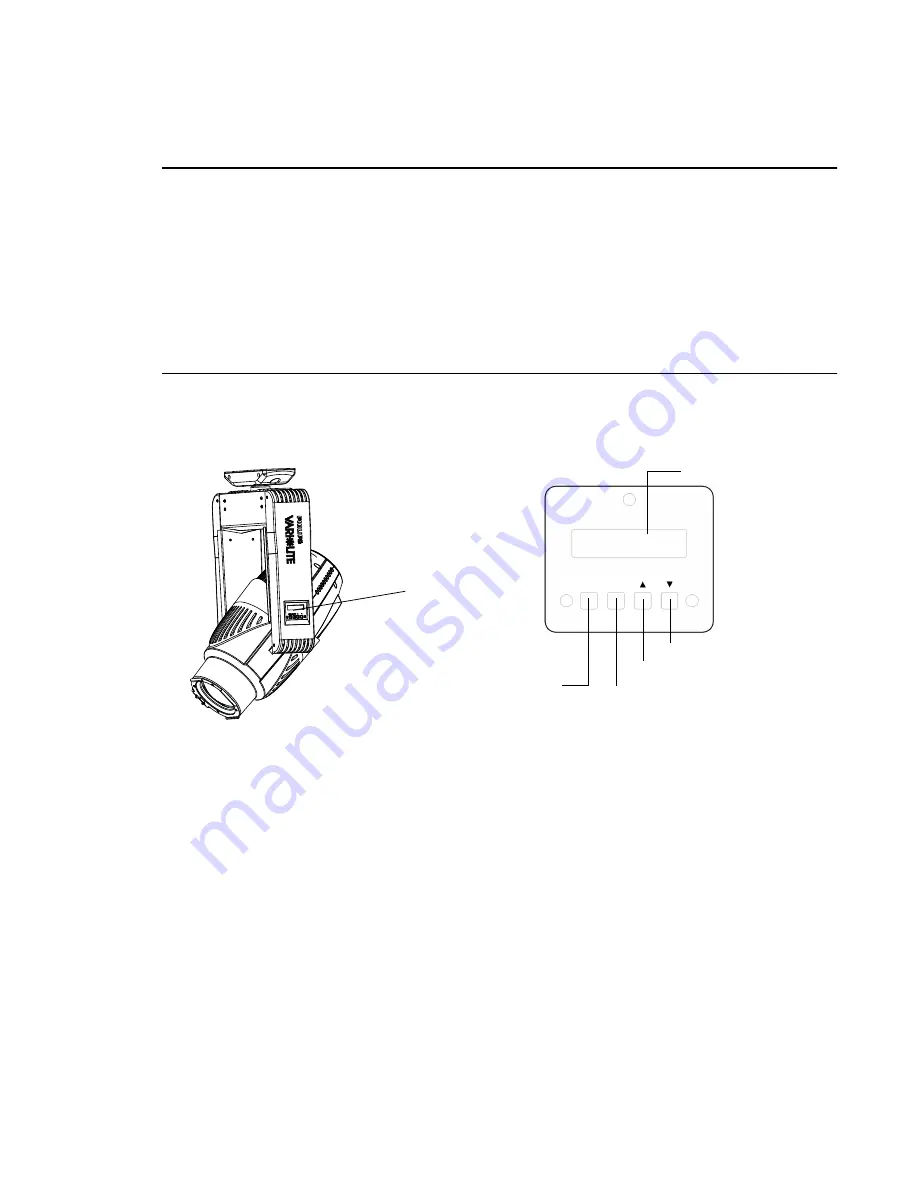
The menu system is controlled at the Menu Display available at the enclosure input panel. If there are multiple luminaires in a system, any
settings or changes would need to be made at each LCD Menu as desired.
Menu Controls
The menu system is controlled by an OK (Enter), ESC (Escape), and four Arrow (
) buttons. These buttons function are shown in
Figure 6: Menu Control
LCD Display and Menu System Operation
The LCD Display Menu system consists of several categories. Use the menu buttons to access and make changes to menu items. When the
desired menu item is reached, press [Menu] button to display the menu options and to navigate and configure options as needed.
The menu system is controlled by four buttons. These buttons function as follows:
•
[Menu] button – Displays the menu, or if at first level, the current address. Can also enable menu to exit a menu level.
•
[Enter] button – Selects the current menu option or stores current data value
•
[
] Down arrow – Scrolls menu options upward or increases current data value.
•
[
] Up arrow – Scrolls menu options downward or decreases current data value.
To navigate and access menu settings/selections:
Step
1. Make sure unit is powered and turned on.
Step
2. Press [Menu] to display1st level functions.
Step
3. Scroll through the 1st level functions by pressing [
] arrows.
Step
4. Once the desired function appears in the display, press OK [Enter] to access 2nd level functions.
Step
5. Use the [
] arrows to scroll through 2nd level functions.
Step
6. Press [Enter] to access 3rd level functions. When the highest level for the function is reached, [
] arrows can be pressed to
select a value or select a toggle activation such as ON/OFF.
Step
7. Press OK [Enter] to store the value or select an action.
Menu
Display
Up / Increase
Down / Decrease
LCD Display
Press to select current menu
option or current data value.
Press to
show menu,
or if at first
level, the
current
address.
Address


