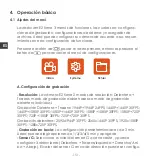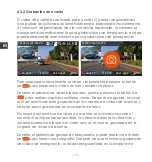
background image

ES

- 164 -

de pregrabado, entonces después de habilitar la detección de 

movimiento, la resolución automáticamente cambiará a 1440p para 

grabar.

Grabación con tasa de bits baja

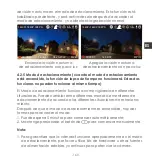
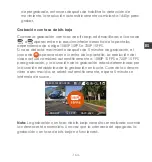
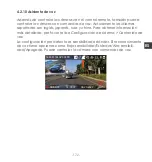
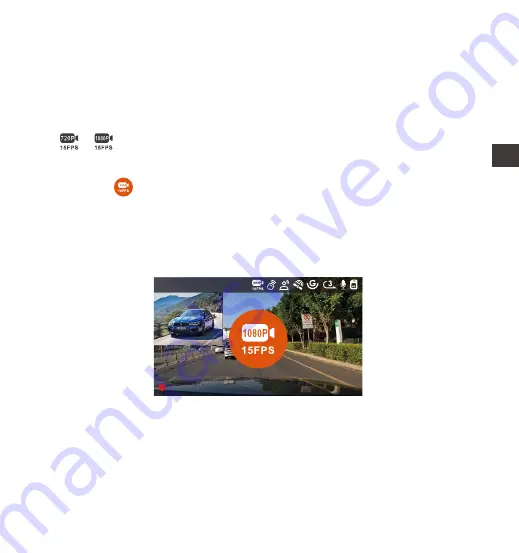
Cuando la grabación con tasa de bits baja esté habilitada, el ícono de  

o       aparecerá en la esquina inferior derecha de la pantalla, 

dependiendo de si elige 1080P 15FPS o 720P 15FPS.

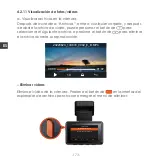
Si no se detecta movimiento después de 5 minutos de grabación, el 

ícono de       aparecerá en el centro de la pantalla. La resolución del 

video actual cambiará automáticamente a 1080P 15 FPS o 720P 15 FPS 

para grabación, y la duración de la grabación estará determinada por 

la duración establecida de la grabación en bucle. Cuando la cámara 

vibre o sea movida, se saldrá automáticamente, espere 5 minutos e 

inténtelo de nuevo.

14:39:07

00:00:37

 MP/H

80

1440P+1440P 30FPS

06-20-2022

Nota: 

La grabación con tasa de bits baja necesita ser realizada cuando 

la cámara esté encendida. Una vez que la cámara esté apagada, la 

grabación con tasa de bits baja no funcionará.

Содержание E2

Страница 1: ...Element 2 User Manual 122mmX130mm 70g Voice Controlled Dual Dash Cam ...

Страница 2: ......

Страница 3: ...Hey find us here www vantrue net contact facebook com vantrue live ...

Страница 4: ...Installation Installation Installation Instalación Instalacja 取り付け方法 安装及使用说明 3 94 139 184 228 270 Camera Overview Die Übersicht über Kamera Vue d ensemble de la caméra Descripción de la cámara Budowa kamery ドラレコの概要 机身部件说明 2 45 90 134 180 224 267 2 1 44 89 133 179 223 266 What s in the box Was ist in der Box Qu y a t il dans la boîte Qué hay en la caja Co znajdziemy w pudełku 同梱内容 盒内物品清单 1 ...

Страница 5: ...录 42 87 131 177 220 263 302 Specifications Spezifikation Specification Especificaciones Dane techniczne 製品仕様 产品规格参数 5 43 88 132 178 221 264 303 Warranty Support Garantie und Support Garantie Support Garantía y Soporte Gwarancja wsparcie 保証とアフターサービス 售后服务 6 ...

Страница 6: ... Adhesive Mount I M B R03 Rear Camera G User Manual K D Crowbar C Type C Data Cable 3 3ft for transferring files only F Car Charger with Built in Type C Cable 11 5ft Cable for Rear Camera 20ft Warning Stickers J Electrostatic stickers EN Optional Accessories Element 2 User Manual Voice Controlled Dual Dash Cam ...

Страница 7: ...long press to turn off the screen and short press to stop recording and enter standby mode you can confirm the selected option in the menu when playing back a file press the button to play pause the file 1 Button EN 9 VTE1E0001 8 1 2 3 4 5 6 15 16 10 13 14 12 11 17 18 19 7 ...

Страница 8: ... to display file short press to display the next file in playback mode short press to pop up the delete file menu in WiFi mode press any key to exit WiFi During video recording long press to turn on off WiFi In standby state short press to enter the menu or return and long press to turn on or off WiFi in WiFi mode press any key to exit WiFi Button 4 5 3 Button Button Serial Number Serial number fo...

Страница 9: ...ar camera is connected to power 19 Rear Camera connector Connection port for rear camera cable 15 SD Card Slot Supports Micro SD Card up to 512GB in FAT32 Class 10 Description LED Steady green light Blinking green light In standby status or the REC light is set to off Camera is recording EN During the video recording short press will lock the current video and take a picture long press to shut dow...

Страница 10: ...or ON G Sensor OFF Recorded Driving Speed KMH or MPH Parking Mode Recording Time Current Clip Video Resolution Snapshot Remote control is connected Time Lapse On Collision Detection ON Motion Detection ON 1080P Low Bitrate Recording ON 15FPS 720P Low Bitrate Recording ON 15FPS Low Framerate Parking Mode GPS Signal Connecting GPS Signal Locked Voice control is off Voice control is on MP H 80 Curren...

Страница 11: ...Vantrue U3 high speed microSD card Please insert a memory card memory card capacity 32GB 512GB card speed U3 Class10 A2 The dashcam has certain requirements on the card speed of the memory card For reliable operation we recommend using a VANTRUE SD card sold separately Memory Card Installation There is an icon indicating the insertion direction of the memory card Please push the memory card into t...

Страница 12: ...the normal operation of the dash cam Do not remove or insert the memory card during recording to avoid losing important videos Please do not use bad cards or low speed cards on the dash cam as it is easy to stop or lose the recording due to the failure of a memory card Before formatting the memory card please check the event video folder in the SD card to see if there are any videos that need to b...

Страница 13: ... the dash cam mount interface then push in until the mount is installed 1 Installation of car charger Connect one end of the car charger to the car cigarette lighter and the other end to the Type C port on the front camera GPS mount When the green light of car charger is on it means it is powered on 2 ...

Страница 14: ...pe it with a dry cloth Stick the electro static sticker behind the rear view mirror which is the recommended position to prevent blocking your view while driving 3 After installing the main camera and rear camera please arrange the car charger cable in the direction shown in the figure Electrostatic sticker ...

Страница 15: ... from No 2 Remove the 3M tape from the mount then fix the mount and camera on the electrostatics stickers Take out the rear camera cable connect the main camera and the rear camera and take out the car charger to connect it After the camera is powered on choose a suitable location and install it 4 Please peel off this mask AFTER application completed Please peel off this mask BEFORE application ...

Страница 16: ...indshield so as not to affect the video effect Remove the protection film of the sticky pad and rear camera lens Fix the rear camera in the selected position and adjust the angle then use the rear camera cable to connect the rear camera with the main front camera 5 The angle of the window glass of each model is different please adjust the recording angle of the main camera and rear camera up and d...

Страница 17: ...tall it on your phone Note After this camera is successfully connected to your mobile phone through WiFi it can perform real time video preview change camera settings download files without internet connection and play back videos on the mobile phone However the GPS track playback and video sharing functions will depend on the internet or telecom value added services requires you to turn off disco...

Страница 18: ... WiFi Connection Turn on the WiFi function of the camera enter the WiFi settings of the mobile phone then find the WiFi name such as E2_VANTRUE_XXXX and enter the WiFi default password 12345678 to connect to WiFi ...

Страница 19: ... 3 5 APP Connection Note If you do not connect to WiFi before opening the app the app will prompt you by saying Please connect to WiFi first and will automati cally jump to the WiFi settings Please complete the steps to connect to WiFi first If the WiFi is already connected but the app jumps to the application permissions of the APP after selecting the model please check whether the wireless netwo...

Страница 20: ...e WiFi password you can restore the default setting of the device and the Wi Fi password of the device will also be restored to the default password 12345678 If the connected WiFi name does not match your dash cam model the app will prompt you Please select the correct model and automatically jump back to the model selection interface If there is no connection with the mobile phone after the WiFi ...

Страница 21: ...ly connected to the camera enter the real time preview page click the full screen icon or place the phone horizontally and the real time screen will automatically switch to the full screen preview mode Click the window switch icon to switch the front and rear video windows but only multi channel dash cams can use this feature Video playback The video and photo files recorded on the SD card can be ...

Страница 22: ... the video if you play it in the local file of the app interface you can view the GPS track of the video Video snapshot You can capture the current screen in the real time preview interface of the app Open the Vantrue Cam App connect to the Wi Fi and enter Settings About Detect New Version The App will automatically detect whether its version is the latest version If there is a new version of the ...

Страница 23: ...recording mode Front Rear Camera 1944P 1944P 24FPS 1440P 1440P 30FPS 1440P 1080P 30FPS 1080P 1440P 30FPS 1080P 1080P 30FPS 1080P 720P 30FPS 720P 1080P 30FPS 720P 720P 30FPS Front Camera only 2592x1944P 30FPS 2560x1440P 30FPS 1920x1080P 30FPS 1280x720P 30FPS Loop Recording Default setting is 3 min You can choose the options among 1 3 5 min and OFF G Sensor Select the level of G sensor you need then...

Страница 24: ...orded video Stamp Enable or disable the watermark stamp on video and photos The watermark stamp includes time and date label VANTRUE label license plate number GPS location information and speed label All enabled by default Time Lapse The default value is disabled You can choose to enable 1FPS 5FPS 10FPS 15FPS Low light Night Vision in Parking Mode Default is on When turned on it can optimize the ...

Страница 25: ...OK to format or choose Next Note If you changing the format reminder option the timing will restart as soon as the option is changed Date Time There are two ways to set the time and date 1 GPS automatic update 2 Manual date time setting GPS automatic update is enabled by default GPS automatically updates the date and time based on your time zone so you need to select the calibrate time zone first ...

Страница 26: ...o files recorded by the camera Event Critical event videos detected by G Sensor activity or manually locked by user The file name format is 20300128_140633_0008_E_A MP4 Normal Standard videos recorded This folder saves loop recording video parking mode video and time lapse video The file name format of Loop Recording video is 20300128_140633_0008_N_A MP4 20300128_140633_0008_N_B MP4 the file name ...

Страница 27: ... as not to stop recording during the driving process Note 2 1 3 4 The normal operation of the loop recording function is very dependent on the speed of the memory card so please format the memory card regularly to avoid problems such as excessive memory card files and card aging that affect the normal loop recording Please check the loop recording video regularly to avoid the necessary videos bein...

Страница 28: ...ple times After recording the video will be automatically saved in the event video folder and the photo will be saved in the photo folder Automatic locking event video is triggered when the car is hit shaken The dash cam detects the vibration and automatically locks the current video which is saved in the event video folder During the locked recording period you can also press the button to take a...

Страница 29: ...0 of the total capacity of the current memory card When the event video file reaches the upper limit the new event video file will automatically overwrite the old event video file It is recommended to periodically check and save your event video files to avoid loss Lock recording will not trigger in either of the following situations Loop recording is off or Time lapse recording is on 1 2 3 Note 1...

Страница 30: ...ision technology to improve the night vision effect in parking mode This function is in the open mode by default It will be triggered only after entering the parking mode and will not affect normal recording 14 39 07 06 20 2022 00 00 37 MP H 80 1440P 1440P 30FPS 14 39 07 06 20 2022 00 00 37 MP H 80 1440P 1440P 30FPS 14 39 07 06 20 2022 00 00 37 MP H 80 1440P 1440P 30FPS 14 39 07 06 20 2022 00 00 3...

Страница 31: ...ong press the button to begin manually 14 39 07 06 20 2022 00 00 37 MP H 80 1440P 1440P 30FPS 14 39 07 06 20 2022 00 00 37 MP H 80 1440P 1440P 30FPS To ensure the camera works properly in park mode please use the hardwire kits or other stable and continuous power supply to power the dash cam When the temperature in the car is as high as 60 C 140 F it is recom mended that you turn off the camera to...

Страница 32: ... icon in the middle of the screen and the camera automatically turn off When the dash cam is turned off it will start to record for 1 minute after being shaken then turn off the dash cam again 4 detection motion detection low bitrate recording and low framerate mode can only be enabled one at a time When one is enabled the other will be automatically disabled All videos recorded in parking mode Co...

Страница 33: ... that the dash cam is currently in motion detection mode Motion detection has three levels low medi um high that can be adjusted and the corresponding detection ranges for motion detection is 6 6ft 13ft 19 7ft When the motion Detection is turned on and no movement is detected after 5 minutes of recording then an orange icon will appear in the center of the screen and the screen will turn off after...

Страница 34: ...t appears in the center of the screen The resolution of all current video will be automatically switched to 1080P 15FPS or 720P 15FPS for recording and the recording duration will be determined according to the currently set loop recording duration When the camera is vibrates or is moved it will automatically exit wait 5 minutes and enter again Video recording process When the camera detects objec...

Страница 35: ... according to your selection among 1FPS 5FPS 10FPS 15FPS For example if you select 1FPS and the current video resolution frame rate is 30FPS the camera will generate a 30FPS video per second Low framer ate mode can greatly preserve the integrity of the video and save space on the memory card Normal Recording Time Low Framerate Recording Time Sec x Recording Frame Rate FPS x Low Framerate Option Ti...

Страница 36: ...ecording Time Sec x Recording Frame Rate FPS x Time Lapse Option Time should be converted into seconds To ensure the camera works properly in park mode please use the hardwire kits or other stable and continuous power supply to power the dash cam The low framerate mode is similar to the time lapse recording function but the difference is that there is no 5 minute entry mechanism for time lapse rec...

Страница 37: ...fecting the reception of GPS signal GPS information is recorded along with the video To view it please download and install the VANTRUE Cam App and VANTRUE GPS Player available for download at www vantrue net 1 2 Note 40 46 39 43 48 GPS Information 4 2 7 GPS Function The GPS function is one of the important functions of the dash cam GPS is enabled by default and the camera receives GPS signals thr...

Страница 38: ...urned on 4 2 9 Wireless Remote Control The camera is equipped with a remote control which can be used to quickly control the camera to snapshot take event video set audio on off and perform other functions Remote control connection Remove the insulating strip on the remote control and the camera will automatically match the remote control No manual pairing with the dash cam is required When the ic...

Страница 39: ...l is matched with the camera please select a suitable location on your car then tear off the adhesive sticker from the remote control and stick it to your selected location Note The remote control needs to be installed in a position that does not affect safe driving ...

Страница 40: ...s of the remote control After successful connection short press the button to lock the current file and take a snapshot continue to short press during the locked video and continue to capture the photo 2 14 39 07 06 20 2022 00 00 37 MP H 80 1440P 1440P 30FPS 14 39 07 06 20 2022 00 00 37 MP H 80 1440P 1440P 30FPS ...

Страница 41: ...gently pry the battery out of the notch in front of the battery compartment then remove the old battery then put the new battery in and put the back cover of the remote control in place 2 Replacing the remote control battery Note When the power is low the battery needs to be replaced The battery model of the remote control is a CR2032 battery It does not support charging ...

Страница 42: ...ra with the remote control you can also control the camera with voice command Currently supported languages are English Japanese Russian and Chinese For more detailed voice commands please check System Settings Voice Content The default setting is standard sensitivity Voice recognition has options such as low sensitivity standard high sensitivity off You can control the camera with voice commands ...

Страница 43: ...camera Press the button in the file browsing interface to pop up the delete menu 38 EN Connect the included TYPE C USB data cable to the camera and the computer b Viewing files on a Computer 1 Event Video Delete This File Delete All Files OK ...

Страница 44: ...puter folder 2 3 4 5 Depending on the computer systems of different users after the camera is connected to the computer it will be displayed as a removable drive or a removable folder To view the files on the computer you can directly access right click to open the menu and delete them You can also use a USB card reader to read the memory card informa tion ...

Страница 45: ...I of the dash cam otherwise the map information will be blank 1 2 c View on the Vantrue Cam App After the camera is successfully connected to the mobile phone through WiFi it can play back download and delete files in the mobile app 20220620_115036_0079_N_A MP4 06 20 2022 11 5 35 E2 000 000000 000 000000 36MK H To view GPS information you need to download the video file to the local folder of the ...

Страница 46: ...cause the camera upgrade unsuccessful or damage the camera If the upgrade fails due to a sudden power failure please contact our customer service team and we will solve the problem for you as soon as possible 4 2 13 Working Temperature The camera is designed to operate in temperatures from 4 to 158 F 20 to 70 C Temperatures outside this range risk degrading the camera s performance work and causin...

Страница 47: ... WiFi Front 160 wide viewing angle Rear 160 wide viewing angle Aperture Front Rear recording mode 1944P 1944P 24FPS 1440P 1440P 30FPS 1440P 1080P 30FPS 1080P 1440P 30FPS 1080P 1080P 30FPS 1080P 720P 30FPS 720P 1080P 30FPS 720P 720P 30FPS Single front recording mode 2592x1944P 30FPS 2560x1440P 30FPS 1920x1080P 30FPS 1280x720P 30FPS Video Resolution External 32GB 512GB Micro SD Card U3 Class 10 not ...

Страница 48: ...anty to 18 months Support new If you have any questions regarding your product please do not hesitate to contact us at support vantrue net or drop us a message through the live chat box at www vantrue net Queries are typically answered within 12 24hours Your opinion matters VANTRUE is firmly committed to always improving our products services and user experience If you have any thoughts on how we ...

Страница 49: ...erung I B R03 Rückkamera G Benutzer handbuch K D Brechstange C USB C Daten Kabel 1Meter F Auto Ladegerät mit mitgeliefertes USB C Kabel 3 5Meter Kable für Rückkamera 6 Meter Warnaufkleber J Elektrostatische Aufkleber Element 2 User Manual Voice Controlled Dual Dash Cam CPL Fliter M Optionales Zubehör EN ...

Страница 50: ...m den Bildschirm auszuschalten kurz drücken um die Aufnahme zu stoppen und in den Standby Modus zu wechseln Bestätigen die ausgewählte Option im Menü OK Bei der Wiedergabe von Dateien können die Dateien abspielen anhalten 1 Taste 9 VTE1E0001 8 1 2 3 4 5 6 10 13 14 15 16 12 11 7 17 18 19 45 ...

Страница 51: ...e drücken während des Videos oder Standby Status um WLAN ein auszuschalten kurz drücken um das Menü aufzurufen Taste 4 5 3 Taste Taste 7 6 10 Screen 11 REC Rotes Dauerlicht bedeutet dass die Kamera aufzeichnet Typ C USB Anschluss zum Laden 2 45 LCD Screen 12 13 Kamerasanschluss USB C Anschluss für Rückkamera Verbindet die hintere Kamera mit diesem schließt das Datenkabel für die Datenübertragung a...

Страница 52: ...DKarten steckplatz Bietet erweiterbaren Speicher bis zu 512 GB in FAT32 Beschreibung LED Grünes Dauerlicht Im Standby Status oder die REC LED ist ausgeschaltet Kamera zeichnet auf Während der Videoaufnahme kurz drücken um die aktuelle Datei zu sperren und ein Bild aufzunehmen lange drücken zum Ausschalten im Standby Modus kurz drücken um ein Bild aufzunehmen lange drücken um herunterzu fahren im W...

Страница 53: ... Karte eingelegt G Sensor AUS G Sensor AN Geschwindigkeit KM H oder MPH Parkmodus Zeit Aktuelles Clip Video Auflösung Snappschuß Fernbedienung angeschlossen Zeitraffer AN Kollisionserkennung AN Bewegungserkennung AN 1080P Niedrige Bitraten Modus 15FPS 720P Niedrige Bitraten Modus 15FP Parkmodus mit niedriger Framerate GPS Signal durchsuchen GPS Signal Gesperrt Sprachassistent MP H 80 Urzeit Und Da...

Страница 54: ...enkapazität 32GB 512GB Kartengeschwindigkeit U3 Klasse10 A2 da die Dashcam bestimmte Anforderungen an die Kartengeschwindigkeit der Speicherk arte stellt Für einen zuverlässigen Betrieb empfehlen wir die Verwendung einer VANTRUE SD Karte separat erhältlich Wie zu installieren Ein Symbol zeigt die Einschubrichtung der Speicherk arte an Bitte schieben Sie die Speicherkarte in der durch das Symbol an...

Страница 55: ...DE Wir empfehlen die Karte einmal im Monat zu formatieren um die normale Verwendung der Dashcam sicherzustellen Entfernen oder stecken Sie die Speicherkarte nicht während der Aufnahme um den Verlust wichtiger Videos zu vermeiden Bitte verwenden Sie keine schlechten Karten oder Karten mit niedriger Geschwindigkeit auf der Dashcam da die Aufnahme aufgrund des Ausfalls der Speicherkarte leicht angeha...

Страница 56: ...n Sie die Saughalterung mit der Montagesockel der Kamera und drücken Sie sie hinein bis sie einrastet 1 Installation des Autoladegeräts Schließen Sie das Autoladegerät und den Zigarettenanzünder an das Licht am Autoladegerät leuchtet was bedeutet dass es normal funktioniert 2 ...

Страница 57: ...m trockenen Tuch ab Kleben Sie den elektrostatischen Aufkleber hinter den Rückspiegel Dies ist die empfohlene Position um unsere Sicht während der Fahrt nicht zu beeinträchtigen 3 Verbinden Sie die Hauptkamera und Autoladegerät und die Verdrahtungsrichtung des Autoladegeräts ist wie folgt Electrostatic sticker ...

Страница 58: ...o statischen Aufkleber auf die Windschutzscheibe und entfernen Sie dann die Schutzfolie von Nr 2 Mithilfe der Rückkamera Kabel schließen Sie die Hauptkamera und die Rückkamera an dann wählen Sie einen geeigneten Ort um die Kamera zu installieren 4 Please peel off this mask AFTER application completed Please peel off this mask BEFORE application ...

Страница 59: ...r empfehlen eine Position nahe der Mitte der Heckscheibe zu wählen und die Entnebelungslinie auf der Heckscheibe zu vermeiden um den Videoeffekt nicht zu beeinträchti gen Der Winkel des Objektivs kann nach Bedarf eingestellt werden 5 ...

Страница 60: ...ieren Sie sie auf Ihrem Telefon Hinweis Nachdem diese Kamera erfolgreich über WLAN mit dem Mobiltelefon verbunden wurde kann sie eine Echtzeit Videovorschau realisieren Kameraeinstellungen ändern Dateien ohne Internetverbind ung herunterladen und Videos auf dem Mobiltelefon wiedergeben Die Wiedergabe von GPS Tracks und die Video Sharing Funktionen hängen jedoch vom Internet oder den Mehrwertdienst...

Страница 61: ...Sie die WLAN Funktion der Kamera ein geben Sie die WLAN Ein stellungen des Mobiltelefons ein und suchen Sie dann den WLAN Namen z B E2_VANTRUE_XXXX und geben Sie das WLAN Stan dardpasswort ein 12345678 um eine WLAN Verbindung herzustellen ...

Страница 62: ...ung Notiz Wenn Sie sich vor dem Öffnen der APP nicht mit dem WLAN verbinden fordert die APP Sie auf Bitte zuerst mit WLAN verbinden und springt automatisch zu den WLAN Einstellungen Bitte führen Sie zuerst die Schritte aus um sich mit dem WLAN zu verbinden Wenn das WLAN bereits verbunden ist aber die APP nach der Auswahl des Modells zur Anwendungsberechtigung der APP springt überprüfen Sie bitte o...

Страница 63: ... in Ihr Gerät einloggen oder andere nachteilige Folgen haben Wenn Sie das WLAN Passwort vergessen können Sie die Standardein stellung des Geräts wiederherstellen und das WLAN Passwort des Geräts wird ebenfalls auf das Standardpasswort 12345678 zurückge setzt Wenn der verbundene WLAN Name nicht mit Ihrem Dashcam Modell übereinstimmt fordert die APP auf Bitte wählen Sie das richtige Modell aus und s...

Страница 64: ...nd en wurde rufen Sie die Echtzeit Vorschauseite auf klicken Sie auf die Vollbild Schaltfläche oder platzieren Sie das Telefon horizontal und der Echtzeit Bildschirm wechselt automatisch in den Vollbild Vorschaumodus Klicken Sie auf die Fensterwechsel Schaltfläche um das vordere und hintere Videofenster umzuschalten Videowiedergabe Die auf der SD Karte aufgezeichneten Video und Fotodateien können ...

Страница 65: ...pp und aktualisieren Sie die Version Vantrue Ltd Zurück Vantrue Cam VantrueCam 9 41 Heute Spiele Apps Suche Video Download Sie können das Video oder Bild das Sie herunterladen möchten in der Benutzeroberfläche zum Durchsuchen der SD Karte oder in der Videowiedergabe auswählen Wenn Sie das Video nach dem Herunterladen in der lokalen Datei der App abspielen können Sie den GPS Track des Videos sehen ...

Страница 66: ...ront Aufnahmemodus Front Rück 1944P 1944P 24FPS 1440P 1440P 30FPS 1440P 1080P 30FPS 1080P 1440P 30FPS 1080P 1080P 30FPS 1080P 720P 30FPS 720P 1080P 30FPS 720P 720P 30FPS Front Nur 2592x1944P 30FPS 2560x1440P 30FPS 1920x1080P 30FPS 1280x720P 30FPS Daueraufnahme Die Standardeinstellung ist 3 Minuten Drücken Sie die Abwärts Aufwärtstaste um 1 Min 3 Min 5Min oder Aus zu wählen G Sensor Wählen Sie die ...

Страница 67: ...n Buchstaben auszuwählen Nach der Einstellung kann Ihr Kennzeichen im aufgezeichneten Video angezeigt werden Stempel Aktivieren oder deaktivieren Sie den Wasserzeichenstempel des Videos und der Fotos Der Wasserzeichenstempel enthält Datums und Uhrzeitetikett VANTRUE Etikett Nummernschildnummer GPS Stan dort Geschwindigkeitsetikett Alle standardmäßig aktiviert Zeitraffer Der Standardwert ist deakti...

Страница 68: ...ormatierungsmeldung Wählen Sie die Erinnerungsoptionen 15 Tage 1 Monat und Aus Standard ist aus Um zu verhindern dass Sie vergessen die Speicherkarte regelmäßig zu formatieren haben wir eine Formaterinnerungszeiteinstellung hinzuge fügt Sie können wählen ob Sie nach 15 Tagen oder 1 Monat erinnert werden möchten und 15 Tage oder 1 Monat ab dem festgelegten Datum berechnen Wenn die Zeit abgelaufen i...

Страница 69: ... Geräteton Stellen Sie die Lautstärke des Geräts ein Die Standardlaut stärke ist 3 die niedrigste 0 und die höchste 5 Warnton Je nach Situation ist die Dashcam mit 5 Arten von Aufforderungstönen eingestellt nämlich Ein Ausschaltton Tastenton Sperrton Formatierungston und ungewöhnlicher Aufnahmeton Alle Eingabeaufforderungstöne sind standardmäßig aktiviert Frequenz Verschiedene Länder haben untersc...

Страница 70: ...33_0008_N_A MP4 20300128_140633_0008_N_B MP4 das Dateinamenformat des Parkmodus Videos ist 20300128_140633_0007_P_A MP4 20300128_140633_0007_N_B MP4 Das Dateinamenformat des Zeitraffervideos ist 20300128_140633_0006_T_A MP4 20300128_140633_0006_N_B MP4 Foto Fotodatei Das format ist 20300128_140633_0005A JPEG 20300128_140633_0005B JPEG Alle Alle Standardvideos und Videos von kritischen Ereignissen ...

Страница 71: ...utomatisch die Schleife um die Aufzeichnung während des Fahrvorgangs nicht zu stoppen Notiz 2 1 3 4 Der normale Betrieb der Daueraufnhamefunktion hängt stark von der Geschwindigkeit der Speicherkarte ab Formatieren Sie die Speicherk arte daher regelmäßig um Probleme wie übermäßige Speicherkarten dateien und Kartenalterung zu vermeiden die sich auf die normale Daueraufnhame auswirken Bitte überprüf...

Страница 72: ...löst wenn das Auto getroffen gerüttelt wird die Dashcam erkennt die Vibration und sperrt automatisch das aktuelle Video das im Ereignisvideoordner gespeichert ist Während der Sperrvideoperiode können Sie die Notfall Taste drück en um mehrmals aufzunehmen Nach der Aufnahme wird das Video automatisch im Ereignisvideoordner und das Foto im Fotoordner gespe ichert 14 39 07 06 20 2022 00 00 37 MP H 80 ...

Страница 73: ...ei automatisch die ursprüngliche Ereignisvideodatei Es wird empfohlen Ihre Notfall Videodateien regelmäßig zu überprüfen und zu speichern um Verluste zu vermeiden Die Sperraufnahme wird in keiner der folgenden Situationen ausgelöst Schalten Sie die Daueraufnahme aus oder schalten Sie die Zeitraffer Aufnahme ein 1 2 3 Notiz 4 2 3 Schalten Sie die Anzeige der Front und Rückkamera um Sie können auf T...

Страница 74: ...eistung in Kombination mit der Sternenlicht Nachtsichttechnologie voll aus um den Nachtsichteffekt im Parkmodus zu verbessern Diese Funktion ist standardmäßig aktiviert sie wird nur nach dem Aufrufen des Parkmodus ausgelöst und hat keinen Einfluss auf die normale Aufnahme Daueraufnahme 14 39 07 06 20 2022 00 00 37 MP H 80 1440P 1440P 30FPS 14 39 07 06 20 2022 00 00 37 MP H 80 1440P 1440P 30FPS Ste...

Страница 75: ...dwire Kits oder eine andere stabile und kontinuierliche Stromversorgung um die Dashcam mit Strom zu versorgen In heißer und sonniger Umgebung im Sommer empfehlen wir Ihnen den Kollisionserkennungsmodus zu verwenden Wenn die Umgebungs temperatur im Auto bis zu 60 C beträgt wird empfohlen die Kamera auszuschalten um einen anormalen Betrieb des Rekorders aufgrund der hohen Temperatur zu vermeiden Zei...

Страница 76: ...lichkeit der Kollisionserkennung kann von 1 bis 5 Stufen eingestellt werden Sie können sie entsprechend der Gewohnheit sowie der Umgebung des Autos anpassen Wenn die Kollisionserkennung eingeschaltet wurde und nach 5 Minuten Aufzeichnung keine Bewegung erkannt wird kurz 5 Minuten Eingabe mechanismus wird die Kollisionserkennung mit einem Kollisionserken nungssymbol in der unteren rechten Ecke des ...

Страница 77: ... die Bewegungserkennung eingeschaltet ist wird das Bewegung serkennungssymbol auf der Aufnahmeoberfläche angezeigt und zeigt an dass sich die Dashcam derzeit im Bewegungserkennungsmodus befindet Die Bewegungserkennung hat drei einstellbare Stufen niedrig mittel hoch und der entsprechende Erfassungsbereich der Bewegungserkennung beträgt 2 Meter 4Meter 6 Meter 14 39 07 06 20 2022 00 00 37 MP H 80 14...

Страница 78: ...ie Front oder Rückkamera die Bewegung des Objekts erkennt beginnt sie automatisch 30 Sekunden lang mit der Aufnahme und einige Sekunden Video vor der Bewegung speichert die Aufnahme im Ordner Normal Notiz Der Bewegungserkennungsmodus muss ausgeführt werden wenn die Kamera eingeschaltet wird Sobald die Kamera ausgeschaltet ist funktioniert der Bewegungserkennungsmodus nicht 14 39 07 06 20 2022 00 0...

Страница 79: ... umgeschaltet und die Aufnahmedauer wird entsprechend der aktuell eingestellten Daueraufnhamedauer bestimmt Wenn die Kamera vibriert oder bewegt wird wird sie automatisch den Modus verlassen 5 Minuten warten und wieder eintreten 14 39 07 00 00 37 MP H 80 1440P 1440P 30FPS 06 20 2022 Notiz Die Aufzeichnung mit niedriger Bitrate muss durchgeführt werden wenn die Kamera eingeschaltet ist Sobald die K...

Страница 80: ...r Zeitrafferaufnahmefunktion aber der Unterschied besteht darin dass es keinen 5 Minuten Eingabemech anismus für die Zeitrafferaufnahme gibt der nach der Einstellung direkt aktiviert wird Im Modus mit niedriger Bildrate benötigt die Kamera außerdem eine stabile Stromversorgung Sobald die Stromversorgung ausgeschaltet oder erschöpft ist wird die Kamera heruntergefahren 1 2 3 Notiz Wenn Sie beispiel...

Страница 81: ... generiert der Rekorder ein Video mit 30 FPS pro Sekunde Der Modus mit niedriger Bildrate kann die Integrität des Videos erheblich bewahren und Speicherplatz auf der Speicherkarte sparen Normale Aufnahmezeit Zeitrafferaufnahmezeit Sek x Aufnahmebil drate FPS x Zeitrafferoption Die Zeit sollte in Sekunden umgerechnet werden Note Gleich wie der Modus mit niedriger Framerate 14 39 07 00 00 37 MP H 80...

Страница 82: ...dem Einschalten des Geräts hergestellt Wenn die GPS Verbindung nicht innerhalb von 1 Minute erfolgreich ist überprüfen Sie bitte ob die GPS Funktion des Gerätes eingeschaltet hat ob die GPS Halterung richtig angeschlossen ist und Ihre Umgebung Tiefgarage dicht besiedeltes Wohngebiet U Bahn Tunnel usw wirkt sich auch auf den Empfang des GPS Signals aus GPS Informationen werden in dem von Ihnen aufg...

Страница 83: ...n der APP aktiviert ist 4 2 9 Wireless Fernbedienung Die Kamera ist mit einer Fernbedienung ausgestattet mit der die Kamera schnell auf Schnappschuss Notfallvideo Aufnahme ein aus und andere Funktionen gesteuert werden kann Fernbedienungsanschluss Entfernen Sie den Batterieabstandshalter an der Fernbedienung die Kamera passt sich automatisch der Fernbedienung an Es ist keine manuelle Kopplung mit ...

Страница 84: ...bgeglichen wurde wählen Sie bitte eine geeignete Stelle an Ihrem Auto aus reißen Sie dann den Aufkleber der Fernbedienung ab und kleben Sie ihn auf die ausgewählte Stelle Hinweis Die Fernbedienung muss in einer Position installiert werden die das sichere Fahren nicht beeinträchtigt ...

Страница 85: ...n der Fernbedienung Nachdem die Verbindung erfolgreich hergestellt wurde drücken Sie kurz die Notfall Taste sperrt die Kamera die aktuelle Datei und macht einen Video Schnappschuss drücken Sie weiter kurz und nehmen Sie das Foto auf 2 14 39 07 06 20 2022 00 00 37 MP H 80 1440P 1440P 30FPS 14 39 07 06 20 2022 00 00 37 MP H 80 1440P 1440P 30FPS ...

Страница 86: ...en Sie nach dem Öffnen die alte Batterie legen Sie die neue Batterie ein und schließen Sie die hintere Abdeckung der Fernbedi enung 2 Batterie der Fernbedienung ersetzen Notiz Wenn das Batterie Status niedrig ist muss die Batterie ausgetauscht werden Das Batteriemodell der Fernbedienung ist eine CR2032 Batterie Das Aufladen wird nicht unterstützt DE ...

Страница 87: ...chen sind Englisch Japanisch Russisch Chine sisch Detailliertere Sprachbefehle finden Sie unter System Einstellungen Sprachinhalt Die Standardeinstellung ist Standardempfindlichkeit Die Spracherkennung hat Optionen wie niedrige Empfindlichkeit Standard hohe Empfindlich keit aus Sie können die Kamera mit Sprachbefehlen steuern 14 39 07 06 20 2022 00 00 37 MP H 80 1440P 1440P 30FPS DE ...

Страница 88: ... Ordner ein nachdem Sie den Videoordner geöffnet haben können Sie die drücken um die nächste Datei auszuwählen und drücken um die Datei während der Wiedergabe zu löschen Videos löschen Löschen Sie das Video auf der Kamera Drücken Sie die Notfallstaste in der Benutzeroberfläche zum Durchsuchen von Dateien um das Menü Löschen aufzurufen Normal Video Diese Datei Löschen Alle Dateien löschen OK DE ...

Страница 89: ...Kamera und dem Computer b Anzeigen von Dateien auf einem Computer 1 Nachdem die Verbindung erfolgreich hergestellt wurde erscheint das Symbol auf dem Display der Kamera um Daten zu übertragen und dann können Sie die Videodateien im Computerordner durchsuchen 2 DE ...

Страница 90: ...nnen auch einen USB Kartenleser verwenden um die Speicherk arteninformationen zu lesen 3 4 5 c View auf Vantrue Cam APP Nachdem die Kamera erfolgreich über WLAN mit dem Mobiltelefon verbunden wurde kann sie Dateien in der mobilen APP wiedergeben herunterladen und löschen 20220620_115036_0079_N_A MP4 06 20 2022 11 5 35 E2 000 000000 000 000000 36MK H Hinweis 9 41 Um GPS Informationen anzuzeigen müs...

Страница 91: ...158 F ausgelegt Temperaturen außerhalb dieses Bereichs können die Leistung der Kamera beeinträchtigen und Schäden verursachen Um Schäden zu vermeiden Setzen Sie die Kamera bei heißem Wetter nicht direkt der Sonne aus wenn das Auto geparkt ist Bei extremen Winterbedingungen d h 20 C 4 F oder niedriger nehmen Sie die Kamera von der Windschutzscheibe ab wenn sie nicht verwendet wird und bewahren Sie ...

Страница 92: ...gswinkel F1 8Linse Rückseite 160 breiter Betrachtungswinkel F1 8Linse Sprache Front Rück 1944P 1944P 24FPS 1440P 1440P 30FPS 1440P 1080P 30FPS 1080P 1440P 30FPS 1080P 1080P 30FPS 1080P 720P 30FPS 720P 1080P 30FPS 720P 720P 30FPS Single Front 2592x1944P 30FPS 2560x1440P 30FPS 1920x1080P 30FPS 1280x720P 30FPS Extern 32 GB 512 GB Micro SD Karte U3 Klasse 10 nicht im Lieferumfang enthalten Speicher En...

Страница 93: ... Sie Fragen zu Ihrem Produkt haben zögern Sie bitte nicht uns unter support vantrue net zu kontaktieren oder uns eine Nachricht über die Live Chat Box auf www vantrue net zu senden Anfragen werden in der Regel innerhalb von 12 24 Stunden beantwortet Ihre Meinung zählt VANTRUE ist fest entschlossen unsere Produkte Dienstleistungen und Benutzererfahrung ständig zu verbessern Wenn Sie Ideen haben wie...

Страница 94: ...upport adhésif GPS I M B Caméra arrière G Manuel de l utilisateur K D Pied de biche C Câble de données USB C 1m F Chargeur de voiture avec câble USB C 3 5 m Câble pour caméra arrière 6m Avertissement stickers J Autocollants électrostatiques Accessoires Optionnels Element 2 User Manual Voice Controlled Dual Dash Cam DE ...

Страница 95: ...ng you can long press to turn off the screen and short press to stop recording and enter standby mode you can confirm the selected option in the menu when playing back a file press the button to play pause the file 1 Bouton 9 VTE1E0001 8 1 2 3 4 5 6 10 13 14 15 16 12 11 17 18 19 7 ...

Страница 96: ...igation des fichiers Appui long pour faire défiler les options Appui court pour afficher l option suivante Appui court pour le supprimer lors de la lecture de fichiers En mode Wi Fi appuyez sur n importe quelle touche pour quitter le Wi Fi Pendant l enregistrement vidéo et le mode veille appuyez longuement pour activer désactiver le WiFi Bouton 4 5 3 Bouton Bouton Numéro de Série Numéro de série p...

Страница 97: ...Indicateurs pour la caméra arrière Un voyant vert indique que la caméra arrière est connectée à l alimentation 19 Connecteur de caméra arrière Port de connexion pour le câble de la caméra arrière 15 Slot pour carte MicroSD Prise en charge de la carte Micro SD jusqu à 512 Go en FAT32 classe 10 Description LED Lumière verte fixe En état de veille ou le voyant d enregistrement est désactivé La caméra...

Страница 98: ...esse de conduite enregistrée KMH ou MPH Durée d enregistrement clip actuel Résolution vidéo instantané La télécommande est connectée Enregistrement en accéléré activé Détection de collision activé Détection de mouvement activée Enregistrement à bas débit 1080P 15FPS activé Enregistrement à bas débit 720P 15FPS activé Mode Parking à faible fréquence d images Connexion du signal GPS Signal GPS verro...

Страница 99: ...ue séparément Installation de la carte mémoire Une icône indique le sens d insertion de la carte mémoire Veuillez pousser la carte mémoire dans la fente pour carte selon la direction indiquée par l icône jusqu à ce qu un clic se fasse entendre dans la fente pour carte indiquant que la carte mémoire est correctement insérée Avant d utiliser cette carte veuillez suivre les étapes ci dessous pour la ...

Страница 100: ...ire Avant de formater la carte mémoire veuillez vérifier le dossier vidéo d urgence sur la carte SD pour voir s il y a des vidéos qui doivent être enregistrées séparément afin de ne pas supprimer des vidéos impor tantes par erreur RAPPEL 1 2 3 4 dans le menu puis entrez dans le Système sélectionnez la carte de formatage et confirmez pour formater la carte mémoire jusqu à ce qu il vous demande Form...

Страница 101: ... caméra Alignez le support avec l interface de montage de la caméra puis poussez jusqu à ce que le support soit installé 1 Installation du chargeur de voiture Connectez le chargeur de voiture à l allume cigare de la voiture Le voyant allumé indique que l alimen tation est normale 2 ...

Страница 102: ...ère le rétroviseur qui est la position recommandée pour éviter de bloquer notre vue pendant la conduite Il est recommandé de connecter d abord l alimentation pour observer l écran de l objectif afin de choisir la meilleure position d installation 3 Connectez d abord les caméras avant et arrière puis disposez le câble du chargeur de voiture comme indiqué sur la figure Électrostatique autocollant ...

Страница 103: ...se puis retirer le film protecteur du n 2 Connectez les caméras avant et arrière et allumez les via le câble de charge de la voiture sélectionnez d abord un emplacement appro prié pour installer la caméra avant à l emplacement où l autocollant électrostatique est installé 4 Please peel off this mask AFTER application completed Please peel off this mask BEFORE application ...

Страница 104: ...on proche du centre du pare brise arrière Veuillez éviter la position où la lunette arrière a des lignes de grille pour éviter que l écran ne soit bloqué et nettoyez la position avant l installation Fixez la caméra arrière à l emplacement sélectionné et réglez l objectif selon vos besions 5 ...

Страница 105: ... la et installez la sur votre téléphone Remarque Une fois la caméra connectée au téléphone mobile via WiFi vous pouvez prévisualiser la vidéo en temps réel modifier les paramètres de l enregistreur télécharger le fichier avec 0 trafic et lire la vidéo sur le téléphone mobile Cependant les fonctions de lecture de piste GPS et de partage vidéo dépendront des services à valeur ajoutée Internet ou tél...

Страница 106: ... fonction WiFi de la dashcam puis ouvrez les paramètres WiFi du téléphone mobile recherchez le nom WiFi tel que E2_VANTRUE_XXXX entrez le mot de passe par défaut du WiFi 12345678 et le téléphone mobile peut se connecter avec succès au WiFi ...

Страница 107: ...nnexion APP Noter Si vous ne vous êtes pas connecté au WiFi avant d ouvrir l APP l APP vous demandera Veuillez d abord vous connecter au WiFi et passera automatiquement aux paramètres WiFi veuillez d abord suivre les étapes pour vous connecter au WiFi Si vous vous êtes connecté au Wi Fi mais passez à l autorisation d application de l APP après avoir sélectionné le modèle dans l APP veuillez vérifi...

Страница 108: ...d autres conséquences néfastes Si vous oubliez le mot de passe Wi Fi vous pouvez restaurer les paramètres d usine et le mot de passe sera également restauré par défaut Si le nom Wi Fi connecté ne correspond pas au modèle l application demandera Veuillez sélectionner le bon modèle et reviendra automa tiquement à l interface de sélection du modèle Si vous ne le connectez pas à votre téléphone après ...

Страница 109: ...ec succès à l APP l enreg istreur accède à la page d aperçu en temps réel cliquez sur le bouton plein écran ou placez le téléphone horizontalement l image en temps réel passera automatiquement mode aperçu plein écran Cliquez sur le bouton commutation pour basculer les fenêtres vidéo avant et arrière Lecture vidéo vous pouvez visualiser le fichier vidéo ou photo enregistré sur la carte SD dans l AP...

Страница 110: ...z la à niveau des images dans l interface de navigation des fichiers de la carte SD ou dans la lecture vidéo Après avoir téléchargé la vidéo elle peut être lue dans le fichier local de l application et la trace GPS de la vidéo peut être visualisée Capture vidéo vous pouvez capturer l image actuelle dans l interface de prévisualisation en temps réel de l application Veuillez cliquer sur le bouton d...

Страница 111: ...ettez d abord la vidéo en pause puis appuyez sur le bouton pour accéder aux paramètres du menu 4 Opération de base 4 1 Paramètres de Menu Vidéo Système Fichier A Paramètres d enregistrement Résolution Mode d enregistrement Avant Arrière 2592x1944P 30FPS 2560x1440P 30FPS 1920x1080P 30FPS 1280x720P 30FPS 1944P 1944P 24FPS 1440P 1440P 30FPS 1440P 1080P 30FPS 1080P 1440P 30FPS 1080P 1080P 30FPS 1080P ...

Страница 112: ... équilibrer l effet vidéo vous pouvez choisir de désactiver Rotation de l écran Désactive par défaut Vous pouvez choisir de faire pivoter la caméra avant ou arrière l écran vidéo sera inversé de 180 Image miroir arrière Activée par défaut Une fois activée l image de la caméra arrière s affiche en mode miroir Plaque d immatriculation Après le réglage votre numéro de plaque d immatriculation peut êt...

Страница 113: ...naissance vocale Vous pouvez utiliser différentes commandes pour contrôler à distance la caméra pour qu elle fonctionne Formater la carte mémoire Choisir de formater la carte micro SD Rappel de format Désactivé par défaut Sélectionner les options de rappel 15 jours 1 mois et désactivé Heure Date Il existe deux méthodes de réglage Mise à jour automatique du GPS Réglage manuel de la date heure Mise ...

Страница 114: ...ouvez restaurer les paramètres d usine C Parcourir les Documents Passez en revue et supprimez les vidéos stockées dans des dossiers de fichiers Vidéo d urgence Les fichiers vidéo d urgence sont enregistrés dans ce dossier Le nom du fichier est 20300128_140633_0008_E_A MP4 Vidéo Normal Ce dossier enregistre la vidéo en boucle courants la vidéo en mode parking la vidéo en accéléré Les noms de fichie...

Страница 115: ...uer 2 1 3 4 Le fonctionnement normal de cette fonction dépend en grande partie de la vitesse de la carte mémoire Veuillez donc formater la carte mémoire régulièrement pour éviter des problèmes tels qu un trop grand nombre de fichiers sur la carte mémoire et le vieillissement de la carte qui affectent le cycle d enregistrement normal Veuillez vérifier régulièrement la vidéo d enregistrement en bouc...

Страница 116: ...a voiture est heurtée par une collision le capteur G détecte la vibration et verrouille automatiquement la vidéo actuelle et l enregistre dans le dossier vidéo d urgence Pendant la période de verrouillage de la vidéo vous pouvez appuyer sur le bouton pour capturer plusieurs fois Après l enregistrement la vidéo sera automatiquement enregistrée dans le dossier vidéo de l événement et la photo sera e...

Страница 117: ...éo d événement atteint la limite supérieure le nouveau fichier vidéo d événement écrasera automatiquement le fichier vidéo d événement d origine Il est recommandé de vérifier et d enregistrer périodiquement vos fichiers vidéo d événement pour éviter toute perte La situation qui ne déclenchera pas l enregistrement verrouillé désactivez le mode d enregistrement en boucle ou activez le mode d enregis...

Страница 118: ...e de vision nocturne à faible luminosité pour améliorer l effet de vision nocturne en mode stationnement Cette fonction est activée par défaut elle ne sera déclenchée qu après être entrée en mode parking et n affectera pas l enregistrement normal 14 39 07 06 20 2022 00 00 37 MP H 80 1440P 1440P 30FPS 14 39 07 06 20 2022 00 00 37 MP H 80 1440P 1440P 30FPS 14 39 07 06 20 2022 00 00 37 MP H 80 1440P ...

Страница 119: ...0 37 MP H 80 MP H 80 1440P 1440P 30FPS 14 39 07 06 20 2022 00 00 37 MP H 1440P 1440P 30FPS Pour vous assurer que la caméra fonctionne correctement en mode parc veuillez utiliser les kits de câblage ou une autre alimentation stable et continue pour alimenter la caméra de tableau de bord Dans un environnement chaud et ensoleillé en été nous vous recom mandons de sélectionner la détection de collisio...

Страница 120: ...uis la dashcam s éteint automatiquement Pendant cette période si des 3 4 14 39 07 06 20 2022 00 00 37 MP H 80 1440P 1440P 30FPS L enregistrement en accéléré et le mode de stationnement y compris la détection de collision la détection de mouvement l enregistrement à faible débit binaire et le mode à faible fréquence d images ne peuvent être activés que pour l un d entre eux Lorsque l un est activé ...

Страница 121: ...strer le fichier de détection de collision requis pour éviter toute perte 116 FR 14 39 07 06 20 2022 00 00 37 MP H 80 1440P 1440P 30FPS B Détection de Mouvement Lorsque la détection de mouvement est activée son icône s affiche à l écran indiquant que la caméra utilise actuellement le mode de détection de mouvement La détection de mouvement est réglable avec 3 réglages faible Moyen et élevé et la p...

Страница 122: ... déclenche automatiquement l enregistrement vidéo E2 est livré avec une fonction de pré enregistrement Lorsque l enregistrement de détection de mouvement est terminé la caméra charge la vidéo préenregistrée dans la vidéo de détection de mouvement et l enregistre dans le dossier normal 14 39 07 06 20 2022 00 00 37 MP H 80 1440P 1440P 30FPS 14 39 07 06 20 2022 00 00 37 MP H 80 1440P 1440P 30FPS Rema...

Страница 123: ... tous les objectifs actuels sera automatiquement commutée sur 1080P 15FPS ou 720P 15FPS et la durée d enregistrement est déterminée en fonction de la durée d enregistrement en boucle définie Lorsque la dashcam détecte des vibrations ou des mouvements il quitte ce mode et passe à l enregistrement normal Après 5 minutes d absence de mouvement ou de vibration il passe à nouveau en mode faible débit 1...

Страница 124: ...convertir par vous même Le mode de fréquence d images faible est similaire à la fonction vidéo 1 2 Remarque D Mode à faible fréquence d images Lorsque Mode à faible fréquence d images est avtivé la dashcam enregistrera selon la sélection de 1FPS 5FPS 10FPS 15FPS Par exemple si vous sélectionnez 1FPS et que la résolution vidéo actuelle est de 30FPS l enregistreur générera une vidéo de 30FPS toutes ...

Страница 125: ...éléré Frame d enregistrement en Accéléré Frame de résolution Durée réelle du fichier d enregis trement Le temps doit être converti en secondes 14 39 07 00 00 37 MP H 80 1440P 1440P 30FPS 2022 06 20 accélérée La différence entre les deux est le mécanisme d entrée de 5 minutes Le mode de fréquence d images faible attendra cinq minutes après le réglage puis entrera dans ce mode Le mode vidéo accéléré...

Страница 126: ...du signal GPS Les informations GPS sont enregistrées dans la vidéo que vous avez enregistrée Pour le voir veuillez télécharger et installer VANTRUE Cam APP et VANTRUE GPS Player disponibles en téléchargement sur www vantrue net 1 2 Remarque FR 4 2 7 Fonction GPS La fonction GPS est également l une des fonctions importantes de la caméra de tableau de bord Le GPS est activé par défaut et la caméra r...

Страница 127: ...fuseau horaire du l enregistreur sera corrigé de force en fonction du fuseau horaire de votre téléphone mobile 4 2 9 Télécommande sans Fil La caméra est équipée d une télécommande qui peut être utilisée pour contrôler rapidement la caméra pour un instantané une vidéo d urgence l enregistrement marche arrêt et d autres fonctions Connexion de la télécommande Retirer la feuille isolante de la télécom...

Страница 128: ...ppareil veuillez sélectionner un emplacement approprié sur votre voiture puis retirez l autocollant adhésif de la télécommande et collez le à l emplacement sélectionné Remarque la télécommande doit être installée dans une position qui n affecte pas la sécurité de la conduite FR ...

Страница 129: ...e fois la connexion établie lorsque vous appuyez brièvement sur le bouton d urgence la caméra verrouille le fichier actuel et prend un instantané vidéo continuez à appuyer brièvement pendant la vidéo verrouillée et continuez à capturer la photo 2 14 39 07 06 20 2022 00 00 37 MP H 80 1440P 1440P 30FPS 14 39 07 06 20 2022 00 00 37 MP H 80 1440P 1440P 30FPS FR ...

Страница 130: ...délicatement la pile de la rainure située à l avant du compartiment de la pile puis retirez l ancienne pile insérez la nouvelle pile et couvrez le couvercle arrière de la télécommande 2 Remplacement de la pile de la télécommande Remarque Lorsque la puissance est faible la batterie doit être remplacée le modèle de batterie de la télécommande est une batterie CR2032 Il ne prend pas en charge la char...

Страница 131: ... le japonais le russe et le chinois Pour des commandes vocales plus détaillées veuillez vérifier Paramètres système Contenu vocal Le réglage par défaut est la sensibilité standard La reconnaissance vocale propose des options telles que faible sensibilité standard haute sensibilité désactivé Vous pouvez contrôler la caméra avec des commandes vocales 14 39 07 06 20 2022 00 00 37 MP H 80 1440P 1440P ...

Страница 132: ...rimer tous les fichiers OK 4 2 11 Lecture et Suppression de Fichiers a Regarder sur la caméra Lire les vidéos Après avoir cliqué sur Fichiers entrez dans n importe quel dossier après avoir ouvert le dossier vidéo vous pouvez appuyer sur le bouton pour sélectionner le fichier suivant et appuyez sur le bouton pour supprim er le fichier pendant la lecture 00 30 01 07 20220620_140633_0002_E_B MP4 1X 1...

Страница 133: ...appareil et à l ordina teur b Regarder sur l ordinateur 1 Une fois la connexion réussie l icône apparaîtra sur l écran de l appareil pour transférer les données puis vous pourrez visualiser les fichiers vidéo dans le dossier de l ordinateur 2 128 FR ...

Страница 134: ...rd télécharger le fichier vidéo dans le dossier local de l APP puis le lire dans le dossier local Remarque 9 41 Selon le système informatique des différents utilisateurs une fois l appar eil connecté à l ordinateur il s affichera en tant que lecteur amovible ou dossier amovible sur l ordinateur Pour afficher le fichier sur l ordinateur vous pouvez directement cliquer avec le bouton droit pour ouvr...

Страница 135: ...officiel et mettre à niveau selon les invites du site officiel www vantrue net Remarque pendant le processus de mise à niveau ne mettez pas hors tension sinon la mise à niveau échouera ou la dashcam sera endom magé Si vous rencontrez une panne de courant soudaine qui entraîne l échec de la mise à niveau n hésitez pas à contacter le service clientèle pour résoudre le problème pour vous 4 2 13 Tempé...

Страница 136: ...ant arrière 1944P 1944P 24FPS 1440P 1440P 30FPS 1440P 1080P 30FPS 1080P 1440P 30FPS 1080P 1080P 30FPS 1080P 720P 30FPS 720P 1080P 70FPS 30FPS Résolution avant 2592x1944P 30FPS 2560x1440P 30FPS 1920x1080P 30FPS 1280x720P 30FPS Résolution vidéo Langues Audio Lentille Dans des conditions hivernales extrêmes c est à dire 4 F 20 C ou moins détachez la caméra du pare brise lorsqu elle n est pas utilisée...

Страница 137: ... notre e mail officiel support vantrue net pour nous contacter Le personnel spécialisé répondra aux questions dans les 12 à 24 heures Votre opinion compte VANTRUE s engage fermement à toujours améliorer notre produits services et expérience utilisateur Si tu as quelque réflexions sur la façon dont nous pouvons faire encore mieux nous apprécions vos commen taires et suggestions constructifs Connect...

Страница 138: ...trasera R03 G Manual de usuario K D Palanquilla C Cable de datos Tipo C 1m solo para transferencia de archivos F Cargador de auto con cable Tipo C incorporado 3 5m Cable para cámara trasera 6m Pegatinas electroestáticas J Pegatinas electroestáticas Accesorios opcionales Element 2 User Manual Voice Controlled Dual Dash Cam Filtro CPL M FR ...

Страница 139: ...ación de video presionar brevemente el botón bloqueará el archivo actual y realizará una captura de imagen mantenga presionado el botón para apagar el dispositivo en estado de espera una pulsación corta 1 Botón 9 VTE1E0001 8 1 2 3 4 5 6 15 16 10 13 14 12 11 17 18 19 7 FR ...

Страница 140: ...otón para encender apagar el micrófono en el menú de ajustes mantenga presionado el botón para desplazarse a través de las opciones del menú y presione el botón brevemente para mostrar la siguiente opción del menú durante la exploración de archivo mantenga presionado el botón para desplazarse al archivo de visualización presione el botón brevemente para ver el siguiente archivo en el modo de repro...

Страница 141: ... de 2 45 11 REC Luz roja fija significa que la cámara está graband 12 Interfaz de montaje Ubicación para instalar la montura 13 Puerto Tipo C para la cámara trasera Conecte la cámara trasera a este puerto conecte el cable de datos para transferir datos 8 Cámara delantera Cámara delantera para grabar video de eventos en la vía 9 Puerto de alimentación Conecte a un cable Tipo C o cargador de automóv...

Страница 142: ...ámara trasera está conectada a la alimentación 19 Conector de la cámara trasera Puerto de conexión para el cable de la cámara trasera 15 Ranura de tarjeta SD Compatible con tarjetas Micro SD hasta 512GB en FAT32 Clase 10 LED indicadora Descripción LED Luz verde estática En modo de espera o la luz de REC está configurada como apagada Estatus de luz LED REC Luz verde intermitente La cámara está grab...

Страница 143: ...n bucle apagada Grabación en bucle por 1 min Grabación en bucle por 3 mins Grabación en bucle por 5 mins Sensor G apagado Sensor G encendido Conectando a señal GPS Señal GPS bloqueada Asistente de voz Tarjeta de memoria NO insertada Tarjeta de memoria insertada Modo de estacionamiento con velocidad de fotogramas baja Lapso de tiempo encendido Detección de colisiones encendido Detección de movimien...

Страница 144: ...idad de la tarjeta U3 Clase10 A2 debido a que la cámara tiene ciertos requerimientos para la velocidad de la tarjeta de memoria Para una operación confiable nosotros recomendamos usar la tarjeta SD VANTRUE se vende por separado Instalación de la tarjeta de memoria Hay un ícono indicando la dirección de inserción de la tarjeta de memoria Por favor introduzca la tarjeta de memoria en la ranura de ta...

Страница 145: ...rchivo de videos de emergencia en la tarjeta SD para ver si hay algún video que deba ser guardado en otro lado para así no perder videos importantes por error RECORDATORIO 1 2 3 4 pausar la grabación entonces presione el ícono de para acceder al menú entonces entre a Sistema seleccione la opción de Formatear la tarjeta SD y confirme el formateo de la tarjeta de memoria hasta que vea en pantalla Fo...

Страница 146: ...s empuje hacia adentro hasta que la montura esté alineada 1 Instalación del cargador de auto Conecte un extremo del cargador de auto al encendedor de cigarrillos del automóvil y el otro extremo al puerto Tipo C en la montura de GPS de la cámara delantera Cuando la luz verde del cargador de auto esté encendida significa que el dispositivo está encendido ...

Страница 147: ... paño seco Pegue la pegatina electroestática detrás del retrovisor la cual es la posición recomendada para evitar el bloquear su visión mientras conduce 3 Después de instalar la cámara principal y la cámara trasera por favor arregle el cable del cargador del auto en la dirección mostrada en la imagen Pegatinas electroestáticas ...

Страница 148: ...o 2 Remueva la cinta 3M de la montura entonc es fije la montura y la cámara en la pegatina electroestática Saque el cable de la cámara trasera conecte la cámara principal y la cámara trasera y saque el cargador del automóvil para conectar la Después de que la cámara esté encendida elija una ubicación apropiada e instálela 4 Please peel off this mask AFTER application completed Please peel off this...

Страница 149: ...ar la calidad del video Remueva la lámina protectora de la almohadilla adhesiva y lente de la cámara trasera Fije la cámara trasera en la posición seleccionada y ajuste el ángulo entonces utilice el cable de la cámara trasera para conectar la cámara trasera con la cámara delantera principal 5 El ángulo del cristal de la ventana de cada modelo es diferente por favor ajuste el ángulo de grabación de...

Страница 150: ... móvil Nota Después de que esta cámara haya sido satisfactoriamente conectada al teléfono móvil a través de WiFi puede previsualizar video en tiempo real cambiar los ajustes de la cámara descargar archivos sin conexión a Internet y reproducir videos en el teléfono móvil Sin embar go las funciones de reproducción de rastreo GPS y compartir video dependerán de los servicios de Internet o telecomunic...

Страница 151: ...nda la función WiFi de la cámara acceda a los ajustes WiFi del teléfono móvil y entonces encuentre el nombre del WiFi como por ejemplo E2_VANTRUE_XXXX e introduzca la contraseña predeterminada de WiFi 12345678 para conectarse al WiFi ...

Страница 152: ...ra 3 5 Conexión con la app Nota Si no se conecta al WiFi antes de abrir la app la app le mostrará Por favor conéctese al WiFi primero y automáticamente le llevará a los ajustes de WiFi Por favor complete los pasos para conectarse primero al WiFi Si ya está conectado al WiFi pero la app le lleva a la ventana de permisos de aplicación después de seleccionar el modelo por favor verifique si el permis...

Страница 153: ...a contraseña WiFi puede restaurar el ajuste predeter minado del dispositivo y la contraseña Wi Fi del dispositivo también será restaurada a la contraseña predeterminada 12345678 Si el nombre del WiFi conectado no coincide con el modelo de su cámara la app le mostrará Por favor seleccione el modelo correc to y automáticamente le llevará a la interfaz de selección de modelo Si no hay conexión con el...

Страница 154: ...ión horizontal y la pantalla en tiempo real cambiará automáticamente al modo de previsualización en pantalla completa Haga clic en el botón de cambiar de ventana para cambiar entre las ventanas de video delantero y trasero pero solo las cámaras de múltiples lentes pueden usar esta función Reproducción de video Los archivos de video y fotografía guardados en la tarjeta SD pueden ser vistos en la ap...

Страница 155: ... do después de hacer clic en el archivo Descarga de video Puede seleccionar el video o imagen que quiere descargar en la tarjeta SD navegando en la interfaz o en la reproducción de video Después de descargar el video si lo reproduce en el archivo local de la app puede visualizar el rastreo GPS del video Captura de video Puede realizar una captura en la pantalla actual en la interfaz de previsualiz...

Страница 156: ... Delantera Trasera modo de grabación doble trasera o modo de grabación delantero individual Grabación Delantera Trasera 1944P 1944P 24FPS 1440P 1440P 30FPS 1440P 1080P 30FPS 1080P 1440P 30FPS 1080P 1080P 30FPS 1080P 720P 30FPS 720P 1080P 30FPS 720P 720P 30FPS Grabación delantera 2592x1944P 30FPS 2560x1440P 30FPS 1920x1080P 30FPS 1280x720P 30FPS Grabación en bucle La configuración predeterminada es...

Страница 157: ...recerá en el video grabado Sello Habilita o deshabilita el sello de marca de agua de los videos y fotografías El sello de marca de agua incluye etiqueta de fecha y hora etiqueta VANTRUE número de placa información de ubicación GPS y etiqueta de velocidad Todo está habilitado por defecto Lapso de tiempo El valor predeterminado es deshabilitado Usted puede decidir habilitar 1FPS 5FPS 10FPS 15FPS Vis...

Страница 158: ...de memoria Configuración de recordatorio de formateo Selecciona las opciones de recordatorio 15 días 1 mes y apagado La configuración por defecto es apagado Para evitar que olvide formatear la tarjeta de memoria regularmente hemos añadido una configuración de recordatorio de formateo Usted puede elegir recordatorios de 15 días o 1 mes y calcular 15 días o 1 mes desde la fecha establecida Cuando ac...

Страница 159: ... 3min y Apagado Sonido del dispositivo Establece el volumen del dispositivo El nivel de volumen por defecto es 3 el más bajo es 0 y el más alto es 5 Tono de advertencia De acuerdo a diferentes situaciones la cámara está configurada con 5 tonos de advertencia los cuales son Sonido de encendido apagado Sonido de teclas Bloquear tono Formatear sonido y Tono de grabación anormal Todos los tonos de adv...

Страница 160: ...e los videos de grabación en bucle es 20300128_140633_0008_N_A MP4 el formato de nombre de archivo de los videos de Modo de estacionamiento es 20300128_140633_0007_P_A MP4 el formato de nombre de archivo de los videos de Lapso de tiempo es 20300128_140633_0006_T_A MP4 Foto Archivos de foto El formato de nombre de archivo del video de Grabación en bucle es 20300128_140633_0005A JPEG 20300128_140633...

Страница 161: ...sí la grabación no se detenga mientras conduce 2 1 3 4 La operación normal de la función de grabación en bucle es muy dependiente de la velocidad de la tarjeta de memoria así que por favor formatee la tarjeta de memoria regularmente para evitar problemas como por ejemplo archivos excesivos y deterioración de la tarjeta que afecten la grabación en bucle normal Por favor revise el video de grabación...

Страница 162: ...ar el botón de para realizar capturas múltiples veces Después de grabar el video será automáticamente guardado en la carpeta de videos de eventos y las fotos serán guardadas en la carpeta de fotos El bloqueo automático de video de eventos es activado cuando el automóvil es impactado sacudido la cámara detecta la vibración y automáticamente bloquea el video actual el cual es guardado en la carpeta ...

Страница 163: ...ndo el archivo de video de evento alcanza su límite un nuevo archivo de video de evento automáticamente sobrescribirá el archivo de video de evento original Se recomienda revisar y guardar periódicamente sus archivos de video de eventos para evitar pérdidas La grabación bloqueada no se activará en ninguna de las siguientes situaciones Grabación en bucle apagada o grabación de lapso de tiempo encen...

Страница 164: ...P 30FPS 14 39 07 06 20 2022 00 00 37 MP H 80 1440P 1440P 30FPS 14 39 07 06 20 2022 00 00 37 MP H 80 1440P 1440P 30FPS Visualización de grabación delantera individual Visualización de grabación trasera individual Picture in Picture trasera delantera Picture in Picture delantera trasera 4 2 4 Visión nocturna estacionado en luz baja Para poder mejorar la seguridad del estacionamiento de noche aprovec...

Страница 165: ... de estacionamiento de acuerdo a las diferentes situaciones de estaciona miento Después de que el modo de estacionamiento es encendido hay dos formas para acceder al modo 1 Puede esperar 5 minutos para comenzar automáticamente 2 Mantenga presionado el botón de para comenzar manualmente 14 39 07 06 20 2022 00 00 37 MP H 80 MP H 80 1440P 1440P 30FPS 14 39 07 00 00 37 Para garantizar que la cámara fu...

Страница 166: ...olisiones detección de movimiento grabación de tasa baja de bits y modo de velocidad baja de fotogramas serán guardados en la carpeta de videos normales Para prevenir que el video en el modo de estacionamiento sea sobreescrito en un bucle por favor revise y guarde los archivos requeridos a tiempo para prevenir pérdidas Detección de colisiones Cuando la detección de colisiones está habilitada el íc...

Страница 167: ...pagará nuevamente Nota Si la cámara continúa siendo impactada durante la grabación de detección de colisiones saldrá del modo de detección de colisiones y entrará a la grabación normal reiniciando el mecanismo de entrada de 5 minutos Detección de movimiento Cuando la detección de movimiento esté encendida el ícono de detección de movimiento aparecerá en la interfaz de grabación indicando que la cá...

Страница 168: ...bar automáticamente por 30 segundos y guardará la grabación en la carpeta Normal 14 39 07 06 20 2022 00 00 37 MP H 80 1440P 1440P 30FPS 14 39 07 06 20 2022 00 00 37 MP H 80 1440P 1440P 30FPS Nota El modo de detección de movimiento debe ser utilizado cuando la cámara esté encendida Una vez que la cámara se apague el modo de detección de movimiento no funcionará Las resoluciones de 1944P y 1440P HDR...

Страница 169: ...e grabación el ícono de aparecerá en el centro de la pantalla La resolución del video actual cambiará automáticamente a 1080P 15 FPS o 720P 15 FPS para grabación y la duración de la grabación estará determinada por la duración establecida de la grabación en bucle Cuando la cámara vibre o sea movida se saldrá automáticamente espere 5 minutos e inténtelo de nuevo 14 39 07 00 00 37 MP H 80 1440P 1440...

Страница 170: ...so de tiempo seg x Tasa de fotogramas de la grabación x opción de lapso de tiempo El tiempo debe ser convertido en segundos 14 39 07 00 00 37 MP H 80 1440P 1440P 30FPS 06 20 2022 Nota La unidad de tiempo de la fórmula de cálculo es segundos así que el tiempo de grabación normal final calculado también es en segundos Si necesita convertirlo en otras unidades de tiempo por favor realice la conversió...

Страница 171: ...rvar mucho la integridad del video y ahorrar espacio en la tarjeta de memoria La fórmula para calcular la duración del video es Tiempo de grabación normal Tiempo de grabación de lapso de tiempo seg x Tasa de fotogramas de la grabación x opción de lapso de tiempo El tiempo debe ser convertido en segundos 14 39 07 00 00 37 MP H 80 1440P 1440P 30FPS 2022 06 20 ES En el modo de tasa baja de fotogramas...

Страница 172: ...menos de 1 minuto después de que encienda el dispositivo Si la conexión GPS no es exitosa en menos de 1 minuto por favor revise si el DISPOSITIVO tiene la función de GPS encendida si el soporte del GPS está conectado apropiada mente y su ambiente estacionamiento subterráneo área residencial densamente poblada metro túnel etc también afectará la recepción de la señal GPS La información del GPS es g...

Страница 173: ...tá encendida 4 2 9 Control remoto inalámbrico La cámara está equipada con un control remoto que puede ser usado para controlar rápidamente la cámara y tomar fotos grabar videos de emergencia encender apagar la grabación y otras funciones Conexión del control remoto Remueva el espaciador de las baterías en el control remoto la cámara automáticamente se sincronizará con el control remoto No se requi...

Страница 174: ... conectado a la cámara por favor seleccione la ubicación apropiada en su automóvil entonces remueva la pegatina adhesiva del control remoto y péguela en la ubicación seleccionada Nota El control remoto debe ser instalado en una posición que no afecte la conducción segura ES ...

Страница 175: ... remoto Después de que la conexión sea exitosa cuando presione el botón de SOS la cámara bloqueará el archivo actual y realizará una captura de video continúe presionando durante el video bloqueado para capturar fotografías 2 14 39 07 06 20 2022 00 00 37 MP H 80 1440P 1440P 30FPS 14 39 07 06 20 2022 00 00 37 MP H 80 1440P 1440P 30FPS ES ...

Страница 176: ...s de abrirlo delicadamente retire la batería de la ranura al frente del compartimiento de la batería entonces reemplace la batería por una nueva y ponga de vuelta la tapa trasera del control remoto 2 Reemplazar la batería del control remoto Nota Cuando tiene poca energía la batería debe ser reemplazada el modelo de la batería del control remoto es CR2032 No es compatible con cargado ES ...

Страница 177: ...lés japonés ruso y chino Para obtener información más detallada por favor revise Configuración de sistema Contenido de voz La configuración por defecto es sensibilidad estándar El reconocimiento de voz tiene opciones como Baja sensibilidad Estándar Alta sensibili dad Apagado Puede controlar la cámara con comandos de voz 14 39 07 06 20 2022 00 00 37 MP H 80 1440P 1440P 30FPS ES ...

Страница 178: ...onar el botón de para seleccionar el siguiente archivo o presione el botón de para eliminar el archivo durante su reproducción 00 30 01 07 20220620_140633_0002_E_B MP4 1X Eliminar videos Elimina el video de la cámara Presione el botón de en la interfaz del explorador de archivos para hacer emerger el menú de eliminar Video normal Eliminar este archivo Borrar todos los archivos OK ES ...

Страница 179: ...osa aparecerá el ícono de en la pantalla de la cámara para transferir datos y entonces puede ver los archivos de video en una carpeta de computadora Dependiendo del sistema de la computadora de los diferentes usuarios después de que la cámara esté conectada a la computadora aparecerá como un disco removible o una carpeta removible en la computadora 2 3 ES ...

Страница 180: ...tada al teléfono móvil por WiFi puede reproducir descargar y eliminar videos en la app móvil 20220620_115036_0079_N_A MP4 06 20 2022 11 5 35 E2 000 000000 000 000000 36MK H Nota 9 41 Para mostrar la información del GPS primero debe descargar el archivo de video a la carpeta local de la APLICACIÓN y luego reproducirlo en la carpeta local Para ver el archivo en la computadora puede hacer clic derech...

Страница 181: ...ación cuando haya una nueva actual ización de firmware disponible 4 2 13 Temperatura de funcionamiento La cámara está diseñada para operar en temperaturas de 20 a 70 C 4 a 158 F temperaturas fuera de este rango pueden degradar del rendimiento de la cámara y pueden causar daños Para evitar daños En clima caliente no exponga la cámara directamente al sol cuando el automóvil esté estacionado En condi...

Страница 182: ...ntero Ángulo de visión amplio de 160 Trasero 160 wide viewing angle Apertura Modo de grabación delantera trasera 1944P 1944P 24FPS 1440P 1440P 30FPS 1440P 1080P 30FPS 1080P 1440P 30FPS 1080P 1080P 30FPS 1080P 720P 30FPS 720P 1080P 30FPS 720P 720P 30FPS Modo de grabación delantera individual 2592x1944P 30FPS 2560x1440P 30FPS 1920x1080P 30FPS 1280x720P 30FPS Resolución de video Externa Tarjeta Micro...

Страница 183: ...nder la garantía a 18 meses Soporte Si tiene preguntas relacionadas a su producto por favor no dude en contactarnos a través de support vantrue net o envíenos un mensaje a través de la casilla de chat en vivo en www vantrue net Las consultas son normalmente respondidas en 12 24 horas Su opinión importa VANTRUE está firmemente comprometido a siempre mejorar nuestros productos servicio y experiencia...

Страница 184: ...hwyt GPS I M Filtr CPL B R03 tylna kamera G Instrukcja użytkownika K D Szpatułka C Kabel USB C 3 m tylko do transferu plików F Ładowarka samochodowa 350 cm Kabel do tylnej kamery 6m Naklejki ostrzegawcze J Naklejki elektrostatyczne Opcjonalne akcesoria Element 2 User Manual Voice Controlled Dual Dash Cam ...

Страница 185: ...cy plik i zrobi zdjęcie długie naciśnięcie spowoduje wyłączenie zasilania W stanie gotowości krótkie naciśnięcie zrobi zdjęcie długie naciśnięcie wyłączy W stanie Wi Fi naciśnij krótko aby wyjść z Wi Fi naciśnij długo aby wyłączyć 1 Przycisk 9 VTE1E0001 8 1 2 3 4 5 6 15 16 10 13 14 12 11 17 18 19 7 ...

Страница 186: ... gotowości naciśnij i przytrzymaj aby włączyć wyłączyć Wi Fi W stanie gotowości krótkie naciśnięcie powoduje wejście do menu lub powrót a długie naciśnięcie włącza lub wyłącza WiFi w trybie Wi Fi naciśnij dowolny klawisz aby wyjść z Wi Fi Przycisk 3 Podczas nagrywania wideo i czuwania długie naciśnięcie powoduje szybkie przejście do trybu parkowania a krótkie naciśnięcie włącza wyłącza mikrofon w ...

Страница 187: ...z wyłącz długie naciśnięcie aby włączyć wyłączyć kamerę krótkie naciśnięcie podczas nagrywania aby przejść do trybu nagrywania zdarzeń krótkie naciśnięcie umożliwia robienie zdjęć podczas nagrywania zdarzenia Przycisk PL Uchwyt mocujący Miejsce na kabel od tylnej kamery miejsce na kabel do transmisji danych 13 Port UsbC do tylnej kamery 15 Slot kart pamięci Wskaźnik tylnej kamery Obsługuje Micro S...

Страница 188: ...wanie w pętli 1 min Nagrywanie w pętli 3 min Nagrywanie w pętli 5 min Mikrofon WŁ Mikrofon WYŁ Brak karty pamięci Karta pamięci włożona G Sensor WYŁ G Sensor WŁ Czas nagrywania Bieżący klip Zdjęcie Pilot połączony Tryb poklatkowy WŁ Detekcja kolizji WŁ Detekcja ruchu WŁ 1080P Low Bitrate WŁ 15FPS 720P Low Bitrate WŁ 15FPS Tryb poklatkowy WŁ GPS łączenie GPS sygnał zablokowany Asystent głosowy Bież...

Страница 189: ...a microSD Vantrue U3 Proszę włożyć kartę pamięci pojemność karty pamięci 32 GB 512 GB szybkość karty U3 Class10 A2 Kamera ma pewne wymagania dotyczące szybkości karty pamięci Aby zapewnić niezawodne działanie zalecamy użycie karty SD VANTRUE sprzedawanej oddzielnie lub SAMSUNG PRO ENDURANCE Instalacja karty pamięci Jest ikona wskazująca kierunek wkładania karty pamięci Wsuń kartę pamięci do gniazd...

Страница 190: ... zapewnić normalne działanie kamery Nie wyjmuj ani nie wkładaj karty pamięci podczas nagrywania aby uniknąć utraty ważnych filmów Nie używaj złych kart lub kart o niskiej prędkości w kamerze samocho dowej ponieważ łatwo jest zatrzymać lub utracić nagranie z powodu awarii karty pamięci Przed sformatowaniem karty pamięci sprawdź folder wideo wydarzenia na karcie SD aby sprawdzić czy nie ma żadnych f...

Страница 191: ... następnie wciśnij aż uchwyt zostanie zainstalowany 1 Instalacja ładowarki samochodowej Podłącz jeden koniec ładowarki samochodowej do zapalniczki samochodowej a drugi koniec do portu typu C na przednim uchwycie GPS kamery Gdy świeci się zielona kontrolka ładowarki samochodowej oznacza to że jest ona włączona 2 ...

Страница 192: ...ie wytrzyj suchą szmatką Przyklej naklejkę elektrostatyczną za lusterkiem wstecznym co jest zalecanym miejscem aby zapobiec blokowaniu widoku podczas jazdy 3 Po zamontowaniu kamery głównej i kamery tylnej należy ułożyć kabel ładowarki samochodowej w kierunku pokazanym na rysunku Naklejka elektrostatyczna ...

Страница 193: ... z nr 2 Usuń taśmę 3M z uchwytu a następnie przymocuj uchwyt i kamerę do naklejek elektrostatycznych Wyjmij kabel kamery tylnej podłącz kamerę główną i kamerę tylną i wyjmij ładowarkę samochodową aby ją podłączyć Po włączeniu kamery wybierz odpowiednią lokalizację i zainstaluj ją 4 Please peel off this mask AFTER application completed Please peel off this mask BEFORE application ...

Страница 194: ...wpływać na efekt wideo Usuń folię ochronną z podkładki samoprzylepnej i tylnego obiektywu kamery Ustaw tylną kamerę w wybranej pozycji i wyreguluj kąt a następnie użyj kabla tylnej kamery aby połączyć tylną kamerę z główną przednią kamerą 5 Kąt szyby okiennej każdego modelu jest inny należy dostosować kąt nagrywania kamery głównej i kamery tylnej w górę iw dół zgodnie z rzeczywistymi potrzebami 6 ...

Страница 195: ...j na swoim telefonie UWAGA Po pomyślnym połączeniu tej kamery z telefonem komórkowym przez Wi Fi może on wykonywać podgląd wideo w czasie rzeczywistym zmieniać ustawienia kamery pobierać pliki bez połączenia z Internetem i odtwarzać filmy na telefonie komórkowym Jednak funkcje odtwarzania śladów GPS i udostępniania wideo będą zależeć od usług dodanych do Internetu lub usług telekomunikacyjnych wym...

Страница 196: ... Połączenie WiFi Włącz funkcję Wi Fi kamery wprowadź ustawienia Wi Fi telefonu komórko wego a następnie znajdź nazwę Wi Fi taką jak E2_VANTRUE_XXXX i wprowadź domyślne hasło Wi Fi 12345678 aby połączyć się z Wi Fi ...

Страница 197: ... w czasie rzeczywistym 3 5 APP Łączenie UWAGA Jeśli nie połączysz się z Wi Fi przed otwarciem aplikacji aplikacja wyświetli monit Najpierw połącz się z Wi Fi i automatycznie przejdzie do ustawień Wi Fi Najpierw wykonaj czynności aby połączyć się z Wi Fi eśli Wi Fi jest już podłączone ale aplikacja przeskakuje do uprawnień aplikacji APP po wybraniu modelu sprawdź czy uprawnienia aplikacji sieci bez...

Страница 198: ... kwencji Jeśli zapomnisz hasła Wi Fi możesz przywrócić domyślne ustawienia urządzenia a hasło Wi Fi urządzenia również zostanie przywrócone do hasła domyślnego 12345678 Jeśli nazwa podłączonego Wi Fi nie pasuje do Twojego modelu kamery samochodowej aplikacja wyświetli monit Wybierz właściwy model i automatycznie przeskoczy z powrotem do interfejsu wyboru modelu W przypadku braku połączenia z telef...

Страница 199: ...mo a ekran czasu rzeczywistego automatycznie przełączy się w tryb podglądu pełnoekranowego Kliknij ikonę przełączni ka okien aby przełączyć przednie i tylne okna wideo ale tylko wielo kanałowe kamery samochodowe mogą korzystać z tej funkcji Odtwarzanie wideo Pliki wideo i zdjęcia nagrane na karcie SD można oglądać w aplikacji a wideo można odtworzyć po kliknięciu pliku Ustawienia kamery Tryb pełno...

Страница 200: ...ukcjami i uaktualnij wersję Pobieranie wideo Możesz wybrać wideo lub zdjęcie które chcesz pobrać w interfejsie przeglądania karty SD lub w obszarze odtwarzania wideo Po pobraniu filmu jeśli odtworzysz go w lokalnym pliku interfejsu aplikacji możesz wyświetlić ścieżkę GPS filmu Migawka wideo możesz przechwycić bieżący ekran w interfejsie podglą du aplikacji w czasie rzeczywistym Vantrue Ltd Vantrue...

Страница 201: ...przód Nagrywanie z przodu z tyłu 1944P 1944P 24FPS 1440P 1440P 30FPS 1440 P 1080 P 30 FPS 1080P 1440P 30FPS 1080 P 1080 P 30 FPS 1080 P 720 P 30 FPS 720 P 1080 P 30 FPS 720 P 720 P 30 FPS Nagrywanie z przodu 2592x1944P 30FPS 2560x1440P 30FPS 1920x1080P 30FPS 1280x720P 30FPS Nagrywanie w pętli Ustawienie domyślne to 3 min Możesz wybrać opcje pomiędzy 1 3 5 min i OFF G Sensor Wybierz poziom G sensor...

Страница 202: ...one domyślnie Tryb poklatkowy domyślna wartość jest wyłączona Możesz włączyć 1FPS 5FPS 10FPS 15FPS Widzenie w nocy przy słabym oświetleniu w trybie parkowania Domyśl nie włączone Po włączeniu może zoptymalizować efekt nagrywania filmów w trybie parkowania Tryb parkowania możesz wybrać tryb parkowania którego potrzebujesz w tym wykrywanie kolizji wykrywanie ruchu nagrywanie z niską szybkością trans...

Страница 203: ...tanie wznowione natychmiast po zmianie opcji Data i godzina Istnieją dwa sposoby ustawienia godziny i daty 1 Automatyczna aktualizacja GPS 2 Ręczne ustawienie daty czasu Automatyczna aktualizacja GPS jest domyślnie włączona GPS automatycznie aktualizuje datę i godzinę na podstawie Twojej strefy czasowej więc najpierw musisz wybrać prawidłową strefę czasową możesz także wyłączyć automatyczną aktual...

Страница 204: ...ządzenie z powrotem do ustawień fabrycznych C Pliki Przejrzyj pliki wideo i zdjęcia nagrane przez E2 Zdarzenia filmy o zdarzeniach krytycznych wykryte przez aktywność G Sensor lub ręcznie zablokowane przez użytkownika Format nazwy pliku to 20300128_140633_0008_E_A MP4 Normalny nagrane standardowe filmy Ten folder zapisuje nagrania wideo w pętli wideo z trybu parkowania i wideo poklatkowe Format na...

Страница 205: ...ginalne pliki nagrywania w pętli Po włączeniu tej funkcji plik wideo automatycznie nadpisze pętlę aby nie zatrzymywać nagrywania podczas procesu jazdy UWAGA 2 1 3 4 Normalne działanie funkcji nagrywania w pętli jest bardzo zależne od szybkości karty pamięci dlatego należy regularnie formatować kartę pamięci aby uniknąć problemów takich jak nadmierne pliki na karcie pamięci i starzenie się karty kt...

Страница 206: ...dy wideo możesz nacisnąć aby przechwycić wielokrot nie Po nagraniu wideo zostanie automatycznie zapisane w folderze wideo z wydarzenia a zdjęcie zostanie zapisane w folderze zdjęć Wideo zdarzenia automatycznego blokowania jest wyzwalane gdy samochód zostanie uderzony wstrząśnięty Kamera wykrywa wibracje i automatycznie blokuje bieżące wideo które jest zapisywane w folderze wideo zdarzeń Podczas za...

Страница 207: ...karty pamięci Gdy plik wideo wydarzenia osiągnie górny limit nowy plik wideo wydarzenia automatycznie zastąpi stary plik wideo wydarzenia Zaleca się okresowe sprawdzanie i zapisywanie plików wideo z wydarzenia aby uniknąć ich utraty Nagrywanie z blokadą nie zostanie uruchomione w żadnej z następują cych sytuacji Nagrywanie w pętli jest wyłączone lub Nagrywanie poklatkowe jest włączone 1 2 3 UWAGA ...

Страница 208: ...technologią noktowizyjną przy słabym oświetleniu aby poprawić efekt widzenia w nocy w trybie parkow ania Ta funkcja jest domyślnie w trybie otwartym Zostanie wyzwolony dopiero po wejściu w tryb parkowania i nie wpłynie na normalne nagry wanie 14 39 07 06 20 2022 00 00 37 MP H 80 1440P 1440P 30FPS 14 39 07 06 20 2022 00 00 37 MP H 80 1440P 1440P 30FPS 14 39 07 06 20 2022 00 00 37 MP H 80 1440P 1440...

Страница 209: ...ciśnij aby rozpocząć manualnie 14 39 07 06 20 2022 00 00 37 MP H 80 1440P 1440P 30FPS 14 39 07 06 20 2022 00 00 37 MP H 80 1440P 1440P 30FPS Aby upewnić się że kamera działa poprawnie w trybie parkowania użyj zestawów przewodowych lub innego stabilnego i ciągłego źródła zasilania do zasilania kamery samochodowej Gdy temperatura w samochodzie osiąga 60 C 140 F zaleca się wyłączenie kamery aby unikn...

Страница 210: ... detekcja kolizji jest włączona na interfejsie nagrywania zostanie wyświetlona ikona wskazująca że rejestrator aktualnie korzysta z trybu wykrywania kolizji Czułość wykrywania kolizji można regulować w zakresie od 1 do 5 poziomów Możesz dostosować się do swoich przyzwyczajeń a także otoczenia samochodu Gdy funkcja Collision Detection jest włączona i po 5 minutach nagrywan ia nie zostanie wykryty ż...

Страница 211: ...interfejsie nagrywania wskazując że kamera na deskę rozdzielczą jest aktualnie w trybie wykrywania ruchu Wykrywanie ruchu ma trzy poziomy niski średni wysoki które można regulować a odpowiednie zakresy wykrywania ruchu to 2m 4m 6m 14 39 07 06 20 2022 00 00 37 MP H 80 1440P 1440P 30FPS 14 39 07 06 20 2022 00 00 37 MP H 80 1440P 1440P 30FPS Gdy wykrywanie ruchu jest włączone i po 5 minutach nagrywan...

Страница 212: ...a 1080P 15FPS lub 720P 15FPS do nagrywania a czas nagrywania zostanie określony zgodnie z aktualnie ustawionym czasem nagrywania w pętli Gdy kamera wibruje lub zostanie przesunięta automatycznie wyjdzie odczeka 5 minut i wejdzie ponownie 14 39 07 06 20 2022 00 00 37 MP H 80 1440P 1440P 30FPS UWAGA Tryb wykrywania ruchu można włączyć tylko wtedy gdy kamera jest włączona Po wyłączeniu kamery tryb wy...

Страница 213: ...grywać zgodnie z wyborem spośród 1FPS 5FPS 10FPS 15FPS Na przykład jeśli wybierzesz 1 kl s a bieżąca rozdzielczość wideo wynosi 30 kl s kamera wygeneruje wideo 30 kl s na sekundę Tryb niskiej liczby klatek na sekundę może znacznie zachować integralność wideo i zaoszczędzić miejsce na karcie pamięci 14 39 07 00 00 37 MP H 80 1440P 1440P 30FPS 06 20 2022 Normalny czas nagrywania Czas nagrywania pokl...

Страница 214: ...ony bezpośrednio po ustawieniu W trybie niskiej liczby klatek na sekundę kamera potrzebuje również stabilnego zasilania Gdy zasilanie zostanie wyłączone lub wyczerpane kamera wyłączy się 1 2 3 Notatka 4 2 6 Tryb poklatkowy Po wybraniu trybu poklatkowego kamera będzie nagrywać zgodnie z wybranym ustawieniem 1FPS 5FPS 10FPS 15FPS Na przykład jeśli wybierzesz 1 kl s a bieżąca rozdzielczość wideo wyno...

Страница 215: ... lokalizację w której nagranie zostało nagrane oraz prędkość samochodu w tym czasie Połączenie GPS zostanie zakończone w ciągu 1 minuty od włączenia urządzenia Jeśli połączenie GPS nie powiedzie się w ciągu 1 minuty sprawdź czy URZĄDZENIE włączyło funkcję GPS czy uchwyt GPS jest prawidłowo podłączony i czy Twoje otoczenie parking podziemny gęsto zaludniony obszar mieszkalny metro tunel itp wpływa ...

Страница 216: ...ej regulacji czasu w aplikacji jest włączona 4 2 9 Bezprzewodowy pilot zdalnego sterowania Kamera jest wyposażona w pilota za pomocą którego można szybko sterować kamerą robić zdjęcia nagrywać wideo z wydarzeń włączać wyłączać nagrywanie oraz wykonywać inne funkcje Połączenie zdalnego sterowania Usuń pasek izolacyjny na pilocie a kamera automatycznie dopasuje się do pilota Nie jest wymagane ręczne...

Страница 217: ...waniu pilota do kamery wybierz odpowiednie miejsce w samochodzie a następnie oderwij naklejkę z pilota i przyklej ją w wybra nym miejscu Uwaga pilot musi być zainstalowany w pozycji która nie wpływa na bezpieczną jazdę 212 PL ...

Страница 218: ...myślnym nawiązaniu połączenia po krótkim naciśnięciu przy cisk kamera zablokuje bieżący plik i zrobi migawkę wideo kontynuuj krótkie naciśnięcie podczas zablokowanego wideo i kontynuuj robienie zdjęcia 2 14 39 07 06 20 2022 00 00 37 MP H 80 1440P 1440P 30FPS 14 39 07 06 20 2022 00 00 37 MP H 80 1440P 1440P 30FPS ...

Страница 219: ...rowka tego znaku aby otworzyć 1 Po otwarciu delikatnie podważ baterię z rowka z przodu komory baterii a następnie wyjmij starą baterię włóż nową baterię i zakryj tylną pokrywę pilota 2 Wymiana baterii w pilocie UWAGA Gdy moc jest niska należy wymienić baterię model baterii pilota to bateria CR2032 Nie obsługuje ładowania ...

Страница 220: ...esz również sterować kamerą za pomocą poleceń głosowych Obecnie obsługiwane języki to angielski japoński rosyjski i chiński Aby uzyskać bardziej szczegółowe polecenia głosowe sprawdź Ustawienia systemu Treść głosowa Domyślnym ustawieniem jest standardowa czułość Rozpoznawanie głosu ma opcje takie jak niska czułość standardowa wysoka czułość wyłąc zone Możesz sterować kamerą za pomocą poleceń głoso...

Страница 221: ...ów na kamerze Wciśnij w interfejsie przeglądania plików aby wyświetlić menu usuwania b Przeglądanie plików na komputerze 1 Podłącz dołączony do zestawu kabel USB TYPE C do E2 i komputera Normalne Skasować ten plik Skasować wszystkie pliki OK ...

Страница 222: ... 3 4 5 W zależności od systemów komputerowych różnych użytkowników po podłączeniu E2 do komputera będzie on wyświetlany jako dysk wymien ny lub folder wymienny Aby wyświetlić pliki na komputerze możesz uzyskać bezpośredni dostęp kliknij prawym przyciskiem myszy aby otworzyć menu i je usunąć Możesz także użyć czytnika kart USB do odczytania informacji o karcie pamięci ...

Страница 223: ...I kamery samochodowej w przeciwnym razie informacje o mapie będą puste 1 2 c Wyświetl w aplikacji Vantrue Cam Po pomyślnym połączeniu E2 z telefonem komórkowym przez Wi Fi może odtwarzać pobierać i usuwać pliki w aplikacji mobilnej 20220620_115036_0079_N_A MP4 06 20 2022 11 5 35 E2 000 000000 000 000000 36MK H Uwaga 9 41 Aby wyświetlić informacje GPS musisz najpierw pobrać plik wideo do lokalnego ...

Страница 224: ...r aby otrzymać wiadomość e mail z powiadomieniem gdy dostępna będzie nowa aktualizacja oprogramowania układowego 4 2 13 Temperatura pracy urządzenia Kamera została zaprojektowana do pracy w temperaturach od 20 do 70 C 4 do 158 F Temperatury poza tym zakresem mogą obniżyć wydajność aparatu i spowodować uszkodzenia Aby uniknąć uszkodzeń W czasie upałów nie wystawiaj E2 na bezpośrednie działanie prom...

Страница 225: ...zu Ekran WiFi Przód 160 szerokokątny Tył 160 szerokokątny Jasność obiektywu Przód tył 1944P 1944P 24FPS 1440P 1440P 30FPS 1440P 1080P 30FPS 1080P 1440P 30FPS 1080P 1080P 30FPS 1080P 720P 30FPS 720P 1080P 30FPS 720P 720P 30FPS Przód 2592x1944P 30FPS 2560x1440P 30FPS 1920x1080P 30FPS 1280x720P 30FPS Dostępne rozdzielczości Zewnętrzna 32GB 512GB Micro SD Card U3 Class 10 brak w zestawie Pamięć USB Po...

Страница 226: ...lizacjami Wsparcie Jeśli masz jakiekolwiek pytania dotyczące produktu nie wahaj się skontaktować z nami pod adresem biuro vantrue pl Zapytania są zazwyczaj udzielane w ciągu 12 24 godzin Twoja opinia ma znaczenie Firma VANTRUE jest mocno zaangażowana w ciągłe ulepszanie naszych produktów usług i doświadczeń użytkowników Jeśli masz jakieś przemyśle nia na temat tego jak możemy zrobić jeszcze lepiej...

Страница 227: ... 222 PL www vantrue pl facebook com vantruePolska Skontaktuj się z nami ...

Страница 228: ... 3枚 VANTRUE リモ コン L A E2 ドライブレコ ーダー E GPSマウント I M CPLフィルター B RC03 リアカメラ G 取扱説明書 K D 内張りはがし C USBケーブル 1m F シガーソケット ケーブル 3 5m リアカメラケー ブル 6ⅿ ステッカー 2枚 J H 静電気接着シ ート 2枚 オプション品 Element 2 User Manual Voice Controlled Dual Dash Cam ...

Страница 229: ... 224 JP 2 ドラレコの概要 No はたらき 名称 録画中 長押しでモニター画面をオン 消灯します 録画中 1回短押しで録画を開始 停止します メニューで選択肢を確認します 映像を再生中 短押しで再生を停止 再開します 1 ボタン 9 VTE1E0001 8 1 2 3 4 5 6 15 16 10 13 14 12 11 17 18 19 7 ...

Страница 230: ...メニュー画面で長押しで画面の下方へスクロールします 動画再生中 短押しで再生中の動画ファイルを削除します ボタン 5 6 シリアル番号 マイク スピーカー フロントカメラ スクリーン 保証登録用 音声記録 動画再生中 音の出口です 前方の状況を記録します 電源の入力端子です 2 45インチのIPS液晶画面 7 8 9 10 電源インジケー ター 緑色のインジケーターが点灯していると通電の状態を示 します 11 マウントの 接続口 本体と取り付けます 12 本体のType C 端子 リアカメラと本体の接続口 USBケーブルでパソコンと接続 するとデータを転送できます 13 4 ボタン 3 ボタン 録画中 待機中 長押しでWiFiのオン オフをします 録画待機中 短押してメニューに入り または前の画面 に戻ります マウントの入力 端子 ...

Страница 231: ...リーカー ド挿入口 向きを確認してmicroSDHCカードを挿入します 最大512GBのカードまでサポートします 15 リセットボタン リアカメラ ドラレコを再起動します 後方の状況を記録します 16 リアカメラにある緑色のインジケーターが点灯していると リアカメラの電源が正常に接続していることを示します 17 18 リアカメラの インジケーター 本体と接続用端子 19 リアカメラの Type C 端子 LEDインジケーターの意味 動作 LEDインジケーターの状態 緑色インジケーターが点灯中 通電中 録画待機中 緑色インジケーターが点滅中 録画中 ...

Страница 232: ...H 80 1440P 1440P 30FPS ループ録画オフ ループ録画1分間 ループ録画3分間 ループ録画5分間 音声ON 音声OFF SDカードなし SDカードあり GセンサーOFF GセンサーON 車速 録画時間 設定中の 解像度 スナップショット 無線リモコン 接続成功 タイムラプス撮影 衝撃検知 動体検知 1080P 15FPS 低ビートレート録画オン 720P 15FP 低ビートレート録画オン 駐車監視タイムラプス録画 GPS信号捕捉中 GPS接続済み 音声コントロールON 日付と時刻 ...

Страница 233: ...システム設定 SDカードフォーマット を選択してSDカードのフォーマットを実行してく ださい 228 JP 3 取り付け方法 3 1 メモリーカードの取り付け VANTRUE U3 Micro SDカードをお勧めです C10 U3 A2以上の32GB 512GB microSDカードを使ってください VANTRUEド ラレコはメモリーカードの書き込み速度に要求が高いため VANTRUE MicroSD カードをお勧めです 別売 挿入 microSDメモリーカードの端子面と本機の背面が同じ向きになるようにし て カチッと音がするまでmicroSDメモリーカード挿入口へ差し込みます 取出し microSDメモリーカードを1回押すと取り出すことができます ...

Страница 234: ...るため 1ヶ月 経過したら メモリーカードをフォーマットしてください 電源がONの状態でmicroSDカードの抜き差しをしないでください microSD カード本体やデータ破損の原因となります 必ず電源OFF後 ランプが3秒以 上消灯したことを確認しmiciroSDカードの抜き差しを行ってください VANTRUE MicroSDカードをおすすめです 安定性が弱いメモリカードがドラ イブレコーダーの運行に悪い影響があるので ご了承ください 例えば Sandisk Transcend シリコン TEAM 事故発生時は記録された録画ファイルが上書きされないように 必ず電源を OFFにしてからmicroSDカードを取り出し保管してください 1 2 3 4 ご注意 ...

Страница 235: ... 230 JP 3 2 ドライブレコーダーの取り付け 下記画像の指示通りにマウントを本機のマウント接続口に カチッと音がす るまで差し込んで取り付けてください 1 シガーソケットケーブルのアダプターの端子をシガーライターに差し込んで ください インジケーターが点灯しているなら 電源が繋がっています 2 ...

Страница 236: ...スに取り付けたい場所を水で またはアルコールでキレイにし てください そして静電気接着シートを取り付けたいところに貼り付けてく ださい 3 本体との取り付けとリアカメラの配線が終了した後 また下記画像のように シガーソケットケーブルをフロントガラスの周りに配線してください 静電気接着シート ご注意 静電気接着シートの両側に2枚の保護フィルムを付いています まず は番号 の保護フィルムを剥がし フロントガラスに静電気接着シートを決 ...

Страница 237: ...った後 モニター画面を観察しながら本体を水平 方向で適当な位置に貼り付けてください ご注意 画像が斜めにならないように必ずドラレコ本体を水平方向で貼り付け ることをご注意ください 4 Please peel off this mask AFTER application completed Please peel off this mask BEFORE application められた場所に貼り付けてください そして 番号 の保護フィルムを剥が してから ドラレコ本体を静電気接着シートに貼り付けてください ...

Страница 238: ... 233 JP リアカメラの取り付け 同様にリアカメラに装着したい場所を水で またはア ルコールでキレイにしてください 良い映像を撮れるようにリアカメラをリ アガラスの真ん中のところに貼り付けることを勧めます 5 車のフロントガラスの角度が異なるため 取り付けが終了したあと 二つカ メラの上下の角度も最適に調整してください 6 ...

Страница 239: ... 234 JP 3 3 APPのインストール 下記のQRコードをスキャンしてまたはアプリStoreとGoogle Playで Vantrue Cam を検索して専用アプリをインストールしてください インストールが成 功しましたら アプリを開いて指示通りに登録を行ってください ご注意 ドラレコから映像をスマホにダウンロードする場合 スマホのデータ 通信料は発生しません ぜひご安心ください ...

Страница 240: ... 235 JP 3 4 WiFiの接続 E2ドラレコのWiFi機能をオンにした後 またスマホのWLAN設定でE2ドラレコ のWiFi信号 例 E2 VANTRUE XXXX を見つけて初期パスワード 12345678を入力 して接続を行ってください ...

Страница 241: ...て のアイコンをタ ッチしてドラレコの型番を追加してください そうすればAPPが自動的にドラ レコに接続して スマホでリアルタイムに映像を確認できます 3 5 アプリの接続 ご注意 アプリを開く前にWiFiが接続されていなかった場合に WiFiを接続してく ださい と表示され 自動的にWiFiの設定画面に切り替えます その際 ぜひWiFiの接続を実行してください 接続設定が完了し アプリで型番を選んだ後 アプリの権限が要求された場 合はぜひ権限を許可してください 1 2 ...

Страница 242: ... 237 JP 3 4 5 本製品の初期パスワードは 12345678 となっています アプリでパス ワードを変更できます 安全のため 初回の接続後 パスワードを変更する ことを勧めます 万が一 パスワードを忘れた場合は本機を初期化処理すればパスワードが初 期パスワードに戻ります 本機と違った型番を選んだ場合 正しい型番を選んでください と表示 され 自動的に型番を選ぶ画面に戻ります ...

Страница 243: ...ライブストリーミング WiFiでスマホとドラレコを接続した後 アプリを開いて 録画中の映像をアプリでリアルタイムに確認可能 フルスクリーンアイコンを タッチすれば動画は画面全体に表示されます 動画の再生 アプリでドラレコに装着しているSDカードの中の動画と写真を再生 できます 動画のダウンロード アプリでドラレコから映像ファイルや写真をスマホにダウ ンロードすることが可能です スマホにダウンロードされた映像を再生すると走 行線路も地図で表示されます スナップショット アプリの スナップショット ボタンをタッチすれば静止画 を撮ります ...

Страница 244: ... 239 JP 3 7 アプリのアップデート 専用アプリを開いてWiFiを接続した後 設定 アプリについて アプリバージョン バージョンアップ をタッチしてください 新し いバージョンがあればアプリが自動でアップデートを行います Vantrue Ltd 戻る Vantrue Cam VantrueCam 9 41 トーディ ゲーム アプリ サーチ ...

Страница 245: ...P 24FPS 1440P 1440P 30FPS 1440P 1080P 30FPS 1080P 1440P 30FPS 1080P 1080P 30FPS 1080P 720P 30FPS 720P 1080P 30FPS 720P 720P 30FPS フロント 2592x1944P 30FPS 2560x1440P 30FPS 1920x1080P 30FPS 1280x720P 30FPS b ループ録画設定 初期設定は3分間です 一つビデオの録画時間を設定すること ができます 選択可能な設定 オフ 1分間 2分間 3分間 4分間 5 分間です c G センサー G センサーの感度を 前後 左右 と 上下 それぞれの方 向の感度を設定できます 感度は1 2 3 4 5 オフの6つの選択肢があります 初 期設定の感度は3です 録画設定 システム設定 ファイル管理 ...

Страница 246: ...選 択して確認ボタンを押してください k スタンプ設定 全てのスタンプ 日付と時刻 VANTRUEロゴ 車両登録番号 速度 GPSの情報 を録画ファイルに表示します スタンプを表示させたくない 場合 スタンプをオフに選択してください l タイムラプス撮影 初期設定はオフです 1FPS 5FPS 10FPS 15FPSが選択でき ます m 駐車低照度暗視機能 初期設定はオンです オンに設定すると 駐車監視の暗 視機能が向上されます n 駐車モード 初期設定はオフです 駐車低照度暗視機能 衝撃検知 動体検知 低 ビットレート録画 タイムラプス録画が選択できます 駐車モードを オフ に 設定する場合は 本体はずっと録画し続けるので ご注意ください o GPS設定 初期設定はオンです GPSのオン オフと速度単位を設定でき GPS 受信強度も確認できます B システム設定 a 言語 Engish ...

Страница 247: ...が起動した後 SDカー ドをフォーマットしますか と表示されます こうして SDカードを常に フォーマットします g 日付と時刻 時間の設定 調整は二つの方法があります 手動で時刻を設定す る GPS自動時刻補正 GPSが受信すると日付 時刻が設定されたタイム ゾーンの時刻 GPS自動時刻補正機能はオン オフに設定できます なお 日付 時刻設定に日付形式とGMT設定を行います 日本のタイムゾーンは 9 と なっております h モニター点灯時間 自動 30秒 3分間 5分間の選択肢から選べます 初期設定は 自動 で駐車監視モードに入る時以外 常に点灯する状態です i デバイス音量 初期設定は3です 0 5から選べます j 音声 初期設定はすべてオンです 起動音 ボタン音 ロック録画の音 フォーマットの音 録画異常停止の音をオン オフに設定できます k 周波数 日本国内では 50Hzと60Hz...

Страница 248: ...格式は20300128 140633 0008 N A MP4です 駐車監視録画のファイル名の格式は20300128 140633 0007 P A MP4です タイムラプス撮影のファイル名の格式は20300128 140633 0006 T A MP4です 写真 全ての写真が保存されます 全て 全ての通常の録画ビデオ イベントビデオが保存されます 4 2 重要な機能の紹介 4 2 1 ループ録画 microSDカードが挿入されている状態で電源を入れると 本機が自動的にオン になり 設定した間隔でループ録画を行います 電源が入っていない場合は本 体は起動しません ループ録画の映像ファイルは ノーマル と言うフォルダ ーに保存されます ノーマル のフォルダーの容量はSDカードの総容量の80 となっています ノーマル の動画の容量がSDカードの総容量の80 にな ると古い録画ファイルから順次上...

Страница 249: ...動しなくなります ループ録画をオフにした場合 映像の長さが20分間になり SDカードがいっ ぱいになった後 録画が自動で停止します 1 2 3 4 4 2 2 イベント録画 緊急録画 Gセンサーにより 緊急時にロックされた映像と衝撃を検知した映像は自動的 にイベントフォルダに保存されます Gセンサー感度の設定によって 検知で きる衝撃の感度には違いがあります 緊急時にロックされた映像と衝撃を検知 した映像は自動的にイベントフォルダに保存されます Gセンサー感度の設定 によって 検知できる衝撃の感度には違いがあります 14 39 07 06 20 2022 00 00 37 MP H 80 1440P 1440P 30FPS 14 39 07 06 20 2022 00 00 37 MP H 80 1440P 1440P 30FPS ...

Страница 250: ... 上書きされますので ご注意ください ループ録画がオンに設定された場合 またタイムラプス撮影がオンに設定さ れた場合 イベント録画 の機能は作動しません 1 2 3 手動で動画をロックするため 録画中 ボタンを押して 動画をロックし て 同時に写真を撮ります ロックされた動画が自動的にイベントフォルダに 保存されます 写真が写真ファイルに保存されます 録画中 揺れや衝撃を設定した感度で検知すると自動的に録画ファイルをロッ クします 緊急時にロックされた映像も自動的にイベントフォルダに保存され ます 緊急録画中 ボタンを押して 写真を撮ります 14 39 07 06 20 2022 00 00 37 MP H 80 1440P 1440P 30FPS ...

Страница 251: ...オンです この機 能はドラレコ本体が駐車監視モードに入った時のみ機能しますので 常時録画に は影響はありません 14 39 07 06 20 2022 00 00 37 MP H 80 1440P 1440P 30FPS 14 39 07 06 20 2022 00 00 37 MP H 80 1440P 1440P 30FPS 14 39 07 06 20 2022 00 00 37 MP H 80 1440P 1440P 30FPS 14 39 07 06 20 2022 00 00 37 MP H 80 1440P 1440P 30FPS フロントカメラのみ表示する リアカメラのみ表示する リア 主に フロントを表示する フロント 主に リアを表示する ...

Страница 252: ...ードに入ります なお ボタンを長押ししても手動で駐車監視モー ドに入ることができます 14 39 07 06 20 2022 00 00 37 MP H 80 1440P 1440P 30FPS 14 39 07 06 20 2022 00 00 37 MP H 80 1440P 1440P 30FPS 駐車監視機能をご利用するには 別売の駐車監視ケーブル VANTRUE専用の 直結電源ケーブル が必要となります 夏のような高温環境の場合 衝撃検知 の駐車モードのご利用を勧めま す 車内温度が60 以上になった場合 ドラレコが故障しないように電源を オフにすることを勧めます タイムラプス撮影がオンの状態では 駐車モードは作動しません この二つ の機能を同時に利用できません 1 2 3 ご注意 駐車低照度暗視機能ON 駐車低照度暗視機能OFF ...

Страница 253: ...ば 画面の右下角に衝撃検知のマーク が 表示されます 衝撃検知 の感度は1から5まで設定でき 車の環境によって 適合の感度を選んでください 録画中 約5分間車両への振動を検知せず衝撃検知録画と判断すると 画面の中 央に衝撃検知のマーク が表示されます 本体も自動にオフになります 揺れ や衝撃を発生した場合 本体がオンにして 1分間の録画を開始します 動きを 停止した5分ぐらい 録画は停止になり 本体が自動にオフになります 14 39 07 06 20 2022 00 00 37 MP H 80 1440P 1440P 30FPS 14 39 07 06 20 2022 00 00 37 MP H 80 1440P 1440P 30FPS ...

Страница 254: ...意 動体検知 動体検知を設定すると モニター画面には のアイコンが表示され 動体検 知をご利用中と示します 動体検知は 低 中 高 の三つの感度を設定でき 2m 4m 6mの検知距離をそれぞれ意味します 録画中 約5分間車両への振動を検知せず衝撃 動体検知中と判断すると 画面 の中部にオレンジの マークが表示されます 駐車監視待機状態に入り 3 分後モニターがオフになります 動きを検知してから 自動的に録画を開始し ます 動体検知の信頼性を高めるために 業界初のプリレコード録画機能が搭 載されております 検知前の動画と動体検知後の動画を合わせて ノーマルフ ォルダに保存されます 14 39 07 06 20 2022 00 00 37 MP H 80 1440P 1440P 30FPS 249 ...

Страница 255: ...ドを設定すると お選んだ解像度によりモニター画面 には 或 いはのアイコンが表示されます 停車後 5分間内動きを検知しない場合 低ビットレート録画駐車モードに入り ます 画面の中部に オレンジのマークが表示されます 本機は1080P 15FPS または720P 15FPSの解像度で録画します 動きや衝撃を検知する場合 解像 度設定 に設定された解像度で常時録画に戻ります その後 また 5分間 の ルールで低ビットレートの録画モードに戻ります 14 39 07 00 00 37 MP H 80 1440P 1440P 30FPS 06 20 2022 ご注意 低ビットレート録画の駐車モードも本体の電源がオンの状態でしか利用 できません ...

Страница 256: ...のフレームレートは30FPSのた め 1秒の映像が30フレームが必要するため 1FPSの場合は1秒の映像は30秒 の録画が必要となります つまり 1FPSに設定する場合 30秒の映像は1秒に 短くされます 車が動き出すとタイムラプス録画駐車モードは自動的に解除になります 本体 は常時のループ録画に戻ってまた 5分間のルール でタイムラプス録画の駐 車モードに入ります 通常録画時間 タイムラプス撮影時間 Sec x録画フレームレートFPSxタイムラプ ス総撮影時間 14 39 07 00 00 37 MP H 80 1440P 1440P 30FPS 06 20 2022 駐車監視のタイムラプス録画とタイムラプス撮影は同じく映像を短く撮影し ますが タイムラプス撮影には 5分間のルール はありません 1 ご注意 ...

Страница 257: ...ムラプス撮影モード 一定の間隔を空けて画像を撮影し 連続して再生させ ることで長時間の映像を短時間で確認できる微速度撮影です タイムラプス撮影は1FPSを選択すると 毎秒1つの写真を撮ります 本機の録 画速度は30fpsです タイムラプス撮影1秒で8時間連続録画をすると 16分 8x60x60 30 60 の動画を作成します 通常録画時間 タイムラプス撮影時間 Sec x録画フレームレートFPSxタイムラプ ス総撮影時間 2 14 39 07 00 00 37 MP H 80 1440P 1440P 30FPS 2022 06 20 タイムラプス録画の駐車モードも本体の電源がオンの状態でしか作動しませ ん ...

Страница 258: ...に記録されます 密集した住宅地 地下駐車場 トンネルなどでは GPS信号の受信に影響が 出る場合があります 弊社の専用アプリ Vantrue Cam で または弊社の専用 Vantrue GPS Player で映像を再生すれば GPS情報も同時に再生されます ダウンロー ドリンク www vantrue net 1 2 ご注意 40 46 39 43 48 GPS受信強度 4 2 8 GPS自動時刻補正 GPS自動時刻補正機能の初期設定はオンです GPSが受信すると日付 時刻がタ イムゾーンで設定された時刻に補正されます GPS自動時刻補正機能はオン オ フに設定できます なお 日付 時刻設定に日付形式とGMT設定を行います 日本のタイムゾーンは 9 となっております ...

Страница 259: ...レコにはリモコンでコントロールする機能 も追加されています リモコンで本体のスナップショット 音声のオン オフ 録画のロックするなどの機能をコントロールできます リモコンの接続 リモコンにあるバッテリーの絶縁シートを取り出すと リモコンは自動的にド ラレコと接続します 手動でペアリングの必要がありません 本体と接続した ら モニター画面に アイコンが表示されます 14 39 07 00 00 37 MP H 80 1440P 1440P 30FPS 2022 06 20 ...

Страница 260: ... 255 JP リモコンの取り付け ドラレコに接続した後 最適な取り付け位置を決め リモコンの剥離フィルム を剥がして決められた場所にに取り付けてください 運転の安全性のため 運転に影響がない位置に設置してください ...

Страница 261: ...て 動画をロックして 同時に写真を撮ります ロック録 画中 また ボタンを押すと 写真を撮り続けます リモコンをドラレコに接続したら ボタンを押して 録音をオン オフにす ることができます 1 リモコンの働き 2 14 39 07 06 20 2022 00 00 37 MP H 80 1440P 1440P 30FPS 14 39 07 06 20 2022 00 00 37 MP H 80 1440P 1440P 30FPS ...

Страница 262: ...EN のマークがあります マイナスドライバーもしく は付属の内張りはがしで OPEN マークの側にある溝に沿ってふたを開きま す 1 リモコンに入っているボタン電池を外し 同じ型番の新しい電池と交換しま す 電池交換後 電池カバーを閉めてください 2 リモコンのバッテリーの交換 ご注意 電池残量が不足していると お早めに新しい電池に交換してください 付属の電池は充電に対応していません リモコンに内蔵している電池の型番は CR2032です ...

Страница 263: ... 音声コントロール 運転中で音声でドラレコをコントロールできるので 安心して運転できます 例えば 写真を撮る ビデオをロックなどの言葉でドラレコをコントロールでき ます システム設定 音声認識コマンド を選択して 詳細な音声認識 コマンドを確認できます 初期設定は標準感度です 低感度 標準感度 高感度 オフが選択できます 14 39 07 06 20 2022 00 00 37 MP H 80 1440P 1440P 30FPS ...

Страница 264: ..._140633_0002_E_B MP4 1X 4 2 11 映像の再生と削除 a 本体での再生と削除 動画の再生 メニュー画面で ファイル管理 ノーマル イベント 全て を 選択して動画を選択し 確認ボタンを押して再生します ビデオの再生中に ダウンボタンを押すとビデオを削除できます 動画の削除 本体で動画を削除します ファイル一覧画面に電源 緊急録画ボタンを押して ファイルを削除できます ノーマル この映像を削除しますか 全ての映像を削除しますか OK ...

Страница 265: ... 260 JP パソコンと接続した後 画面に というアイコンが表示されます USB接続 中に本体での操作は受け付けずコンピューター側でのみデータを読み取るこ とができます 正常に接続されるとコンピューターでビデオを再生 削除でき ます b パソコンでの再生と削除 1 付属のUSBケーブルでカメラ本体のUSBポートと接続してください 2 ...

Страница 266: ...S情報を再生する場合や 動画を共有したい場合には スマホが ドラレコとの接続を切ってインターネットに接続する必要があります この 場合には スマホのデータ通信料が発生します 1 2 c Vantrue Cam アプリで再生 削除 WiFi経由でスマホをドラレコに接続した後 専用アプリ Vantrue Cam で映 像ファイルを再生 ダウンロード 削除できます 20220620_115036_0079_N_A MP4 06 20 2022 11 5 35 E2 000 000000 000 000000 36MK H ご注意 9 41 GPS情報も同時に再生したい場合 ぜひ映像ファイルをダウンロード してまた再生してください JP ...

Страница 267: ...w vantrue netに公開されま す バージョンアップしたい場合 ぜひ公式サイトから最新のファームウェア とバージョンアップの方法をダウンロードください ご注意 アップデート中は必ず電源を切らないでください アップデート中 電 源が切れると 本機が不具合になる可能性があります 万が一 アップデート が失敗した場合 ぜひ弊社のサポートセンターまでお問い合わせください 弊社のサポートが対応させていただきます 4 2 12 動作環境温度 本機の動作環境温度範囲は 20 70 です 動作環境温度範囲を超える場合 動作や本体の寿命に影響を及ぼす可能性があります 夏場など車内が非常に高温になることが見込まれる際は長時間放置しないでく ださい 温度が上がりすぎると保護機能により 温度が下がるまで本製品は動 作を停止します JP ...

Страница 268: ...フロント 160 広視野角 絞り値F1 8 リア 160 広視野角 絞り値F1 8 言語 フロント リア 1944P 1944P 24FPS 1440P 1440P 30FPS 1440P 1080P 30FPS 1080P 1440P 30FPS 1080P 1080P 30FPS 1080P 720P 30FPS 720P 1080P 30FPS 720P 720P 30FPS フロント 2592x1944P 30FPS 2560x1440P 30FPS 1920x1080P 30FPS 1280x720P 30FPS microSDカード 32GB 512GB 書き込み速度が U3以上のカードに対応 USB端子 バッテリー種類 解像度 データの保存形式 レンズ Type C スーパーキャパシタ 動作電流 DC 5V 2 4A MP4 JPEG マイク スピーカー内蔵 ビデオ形式 画像...

Страница 269: ...ウェブサ イトで www vantrue net register ご購入いただいた商品のご登録をお願い致し ます サポートについて 製品に何のご質問 問題がございましたら いつでもお気軽にLINE経由 LINE ID vantruecam でお問い合わせいただくかあるいはsupport vantrue netまでお 問い合わせください 営業日の場合 弊社はなるべく24時間以内にご返信を差 し上げます ご意見 当社は製品とサービスの品質 ユーザーエクスペリエンスを向上させるため日 夜全力で取り組んでいます 製品を改善するうえでの貴重な御意見やアドバイ スがございましたらご遠慮なく弊社までご連絡をお願いいたします お客様か らのお声を期待しております 6 保証とアフターサービス JP ...

Страница 270: ... 265 お問合せ先 LINE ID vantruecam メール support vantrue net VANTRUEをご選択いただき 誠にありがとうございます 製品をご購入頂き 誠にありがとうございます お問い合わせ www vantrue net contact facebook com vantrue live LINE ID vantruecam JP ...

Страница 271: ...张 VANTRUE 无线遥控器 L A VANTRUE E2 记录仪 E GPS支架 I M CPL滤镜 选配 B RC03后镜头 G 说明书 K D 撬棒 1个 C TYPE C 数据线 1米 仅用于数据 传输 F Type c 车充 3 5米 后镜头线 双TYPE C 接口6米 警示贴 2张 J H 静电贴 2张 选配配件 Element 2 User Manual Voice Controlled Dual Dash Cam CN ...

Страница 272: ...67 CN 2 机身部件说明 序号 功能 名称 录影中可长按熄灭屏幕 短按可停止录影 进入待机状 态 在菜单中可确认选择的选项 回放文件时 可播放 暂 停播放文件 1 录影键 2 录影状态和待机状态 短按可切换视频窗口 菜单设置和文 件浏览中 短按显示上一个选项 长按滚动向上显示选项 向上键 9 VTE1E0001 8 1 2 3 4 5 6 15 16 10 13 14 12 11 17 18 19 7 ...

Страница 273: ... 记录仪前镜头 用于录制车前行车情况 电源接口 2 45寸IPS显示屏 7 8 9 10 录影指示灯 红灯亮表示通电 11 支架接口 记录仪支架安装位置 12 后镜头接口 使用后镜头线与后镜头连接起来 当与电脑连接时 会展示 为U盘模式 13 开关机 紧急录影键 录影状态中 短按会加锁当前文件并抓拍一张图片 长按 关机 待机状态中 短按会抓拍图片 长按会关机 WiFi状 态中 短按退出WiFi 长按关机 14 4 菜单键 3 录影状态中 长按可开启或者关闭WiFi 待机状态中 短 按进入菜单或者是返回 长按可开启或者关闭WiFi WiFi 模式中 按任意键退出WiFi 支架电源接口 回放模式中 短按快进 WiFi模式中 按任意键退出WiFi 内存卡卡槽 内存卡安装位置 15 复位键 按下后 重启记录仪 16 后镜头 记录仪后镜头 用于录制车后行车情况 17 ...

Страница 274: ... 37 MP H 80 1440P 1440P 30FPS 循环录影已关闭 循环录影1分钟 循环录影3分钟 循环录影5分钟 麦克风已开启 麦克风已关闭 无卡或者内存卡没有被识别 内存卡正常使用中 G sensor已关闭 G sensor已打开 车速显示 录影时间 当前录影分辨率 抓拍中 锁定录影中 遥控器已连接 缩时录影 碰撞侦测 移动侦测 1080P15FPS低比特率停车模式 720P15FPS低比特率停车模式 低帧率模式 GPS定位中 GPS已定位 语音识别已打开 当前时间 当前日期 后镜头指示灯 绿灯亮起表示电源正常 18 后镜头连接口 后镜头与主机连接的接口 19 ...

Страница 275: ...入 系统设置 菜单 选择 格式化 确定格式化内存卡 直 到提示 格式化成功 即可 如您插入内存卡后 提示 卡错误 请格式化 这时候记录仪是不会录影的 可直接按下 菜单键进入 开始格式化流程 3 安装及使用说明 3 1 安装内存卡 请您插入一张内存卡 内存卡容量 32GB 512GB 卡速 U3 Class10 A2 因 为记录仪录影对内存卡的卡速有一定的要求 为了您使用顺利 我们向您推荐 VANTRUE定制高速内存卡 但是需要您另行选购 内存卡安装方法 卡槽位置有内存卡插入方向图标 请根据图标指示方向 将内 存卡推入卡槽内 直到卡槽内发出 咔哒 声音后 表示内存卡已经插好 ...

Страница 276: ... 271 CN 内存卡使用时 建议一个月格式化一次 可以保证记录仪的正常使用 录影中 请勿直接插拔内存卡 以免丢失重要的录影视频 请勿在记录仪上使用不良卡或者是低速卡 会容易因为内存卡故障 导致停录 漏录视频等问题出现 格式化卡前 请检查SD卡内的紧急录影文件夹 是否有需要另外保存的视频 以免误删除重要的视频 1 2 3 4 注意 3 2 安装记录仪 1 将支架对准记录仪支架接口推入 直至支架安装完毕 ...

Страница 277: ...玻璃上选择合适的位置 并清洁干净 先把静电贴装上 建议您先接 电开机 通过观察镜头画面 来选择最佳的安装位置 2 静电贴的安装 静电贴有 面 请先将 的保护膜撕掉后 贴在挡风玻璃 上 您需要安装记录仪时 再将 保护膜撕下 Please peel off this mask AFTER application completed Please peel off this mask BEFORE application 静电贴 ...

Страница 278: ... 273 CN 取出后镜头线 分别连接主机与后镜头 并取出车充接电 通电后 先将主机 摆放在静电贴安装的位置观察 选择一个合适的位置后安装 3 后镜头安装 请您在后车窗玻璃上选择安装位置 我们建议您选择靠近后车窗 中央位置 并且避开后车窗上的除雾线 以免影响录影效果 您也可以通过主 机观察后镜头画面后 再决定安装位置 后镜头粘贴好后 可以上下调整角 度 并且请将后镜头线沿着车顶装饰缝隙塞入 4 ...

Страница 279: ... 274 CN 因为每款车型的车窗玻璃角度不一致 请根据实际需要 上下调整主机以及后 镜头的录影角度 6 5 拔掉车充后 将车充线沿图示方向收纳好后 再通电开机 ...

Страница 280: ... 275 CN 3 3 APP下载 请用手机扫描下方的二维码 下载并安装VANTRUE Cam APP 并根据提示完成 安装 注意 本产品可通过WiFi连接手机后 实现录影实时预览 更改记录仪设置 文 件0流量下载 手机回放视频等功能 但是GPS轨迹回放 视频分享功能将依赖 于互联网或者是电信增值服务 需要您关闭记录仪WiFi ...

Страница 281: ... 276 CN 3 4 WiFi连接 打开记录仪WiFi功能 然后打开手机WiFi设置 找到WiFi名称如 E2_VAN TRUE_XXXX 输入WiFi默认密码 12345678 即可连接到WiFi ...

Страница 282: ...后APP将会自动 连接到记录仪 并显示出记录仪镜头当前实时录影情况 3 5 APP连接 注意 若您打开APP前没有连接WiFi APP将提示您 请先连接WiFi 并会自动跳 转到WiFi设置中 请您先完成连接WiFi的步骤 若您WiFi已经连接 但是APP选择机型后跳转到APP的应用权限 请您检查一 下APP的无线网络权限是否打开 本设备的初始密码仅供初次登录使用 为杜绝安全隐患 请您务必在初次登录 后及时修改初始密码 以防他人未经授权登录您的设备或其他不良后果 1 2 3 ...

Страница 283: ... 278 CN 4 5 6 若您忘记WiFi密码 可以选择恢复记录仪默认出厂设置 设备的Wi Fi密码也 将恢复默认密码12345678 若连接的WiFi名称与机型不匹配 APP会提示 请选择正确的机型 并跳回 到选择机型界面 若您打开WiFi后没有与手机连接 记录仪会在10分钟后关闭WiFi 并回到录影 界面 ...

Страница 284: ...APP连接记录仪成功后 记录仪进入实时预览页面 点击全屏按钮 或者手机横放 实时画面自动切换到全屏预览模式 点击窗口切换按钮切换前 后路视频窗口 但是只有多镜头记录仪可使用此功能 回放视频 APP内可查看SD卡已录制的视频或者照片文件 点击文件后可进行 视频回放 视频下载 在SD卡浏览文件界面或者在视频回放中可选择下载视频或者图片 下载视频后 在App本地文件内播放 可查看视频GPS轨迹 视频抓拍 App实时预览界面可抓拍当前画面 设置 全屏 切换镜头画面开关 抓拍 相册 开始 暂停录影 麦克风开关 ...

Страница 285: ... 280 CN 3 7 APP升级 打开 Vantrue Cam App 连接记录仪Wi Fi 进入 设置 关于 检测新版 本 App会自动检测App版本是否是最新版本 如App有新版 根据App提示 操作 升级版本既可 Vantrue Ltd 返回 Vantrue Cam VantrueCam 9 41 Today 游戏 App 搜索 ...

Страница 286: ...0FPS 1440P 1080P 30FPS 1080P 1440P 30FPS 1080P 1080P 30FPS 1080P 720P 30FPS 720P 1080P 30FPS 720P 720P 30FPS 车前分辨率 2592x1944P 30FPS 2560x1440P 30FPS 1920x1080P 30FPS 1280x720P 30FPS b 循环录影 默认3分钟 此功能包含了4个选项 分别是关闭 1分钟 3分钟 5 分钟 c 碰撞灵敏度 选择您需要的碰撞灵敏度等级 分别有三个方向 前后 左右 上下 六个等级选项1 2 3 4 5 关闭选择 默认3等级 d 录影音频 默认开 这里可设置录音开 关 e 曝光补偿 可以分别设置车前或者是车后的曝光值 默认 0 0 通过此选项可以 调整镜头的曝光度高低 录影设置 系统设置 文件浏览 ...

Страница 287: ... 停车微光夜视 默认打开 打开后可优化停车模式的录影效果 n 停车监控 在这里可设置您所需要的停车模式 分别有碰撞侦测 移动侦测 低比 特率录影 低帧率录影 关 默认关闭 o GPS设置 GPS默认开启 GPS开关 速度单位设置 GPS信息都在此功能下 系统设置包括 a 语言 可设置语言有英语 法语 西班牙语 德语 意大利语 简体中文 俄 语 日语 波兰语 b Wi Fi 默认关闭 打开后可用手机连接WIFI 并通过手机操作记录仪 c 语音识别 默认标准灵敏度 打开后可识别语音指令 有低灵敏 高灵敏 关闭选 项 d 语音内容 语音识别指令 用户可以通过不同的指令去遥控记录仪工作 语音 指令有以下12种 我要拍照 我要录影 打开录音 关闭录音 打开屏幕 关闭屏幕 打 开Wi Fi 关闭Wi Fi 视频加锁 打开前录 打开后录 查看全部 e 格式化 格式化内存卡所有数据 f 格式化提醒设置 默...

Страница 288: ...档 最低是0档 最高是5档 j 提示音 根据不同的情况 记录仪设定了5种提示音 分别是开关机声音 按键 音 加锁提示音 格式化提醒音 异常录音提示音 所有提示音默认打开 k 光源频率 不同国家有不同的光源频率 为了避免影响录影 根据不同的地区 选择50Hz或者60Hz的光源频率 l 系统信息 查看机器型号 软件版本号 VANTRUE官网网址 m 认证信息 可查看E2的认证信息 n 默认设置 恢复系统默认设置 文件浏览包括 在此功能下 您可以查看记录仪记录的视频文件和照片文件 a 紧急视频 此文件夹内保存紧急录影文件 文件名格式为 20300128_140633_0008_E_A MP4 b 普通视频 此文件夹内保存循环录影视频 停车模式视频 缩时录影视频 循环录影文件名为20300128_140633_0008_N_A MP4 停车模式视频文件名为20300128_140633_0007_...

Страница 289: ...0 后 新的循环录影文件会自动覆盖最初一段循环录 影文件 该功能开启后 视频文件自动覆盖循环 以免在行驶过程中卡满停录 4 2 2 紧急录影 在行驶过程中 如遭遇特殊情况 您可手动锁定或者是记录仪自动锁定进行紧急 录影 手动锁定只需按下 紧急录影按键 即可锁定当前录影并抓拍 并且 在锁定录影期间 您可以通过按下 紧急录影按键 多次抓拍 录影结束后 视频会自动保存在紧急视频文件夹内 照片会保存在照片文件夹内 2 1 3 4 循环录影功能的正常运行非常依赖内存卡的卡速 所以请您定期进行内存卡格 式化 以免内存卡文件过多 卡片老化等问题影响循环录影 请您定期检查循环录影视频 避免有必要保留的视频被循环覆盖 如您关闭循环录影后 锁定视频功能将不再起效 关闭循环录影后 每段影片时间为20分钟 录制到卡满后 记录仪会停止录 影 并且提示 卡满 注意 ...

Страница 290: ...撞灵敏度决定 灵敏度越高 触发的几率越大 紧急视频文件的总容量占当前内存卡总容量30 当紧急视频文件达到容量上 限后 新的紧急视频文件会自动覆盖最初的一段紧急视频文件 建议定期查看 并另外保存您的紧急视频文件 以免丢失 锁定录影在以下两种情况中均不会触发 关闭循环录影 开启缩时录影 关闭循 环录影 开启缩时录影只能抓拍图片 注意 14 39 07 06 20 2022 00 00 37 MP H 80 1440P 1440P 30FPS 14 39 07 06 20 2022 00 00 37 MP H 1440P 1440P 30FPS 14 39 07 06 20 2022 00 00 37 MP H 80 1440P 1440P 30FPS MP H 80 ...

Страница 291: ...联合微光夜视技术 提升了停 车模式下的夜视效果 此功能默认为打开模式 只有进入停车模式后才会被触发 不会对正常录影造成影响 14 39 07 06 20 2022 00 00 37 MP H 80 1440P 1440P 30FPS 14 39 07 06 20 2022 00 00 37 MP H 80 1440P 1440P 30FPS 14 39 07 06 20 2022 00 00 37 MP H 80 1440P 1440P 30FPS 14 39 07 06 20 2022 00 00 37 MP H 80 1440P 1440P 30FPS 单前镜头模式 单后镜头模式 后镜头 前镜头画中画模式 前镜头 后镜头画中画模式 ...

Страница 292: ...39 07 06 20 2022 00 00 37 MP H 80 1440P 1440P 30FPS 开启停车微光夜视 关闭停车微光夜视 4 2 5 停车模式 开启停车模式后 缩时录影功能将无法工作 两个功能不能同时 运行 2 1 3 4 为了确保记录仪能正常使用停车模式 请使用降压线或者是其他稳定持续的电 源给记录仪供电 在夏季高温的暴晒环境下 我们建议您使用碰撞侦测模式 当车内环境温度高 达60 时 建议您关闭记录仪 以免高温导致记录仪工作异常 缩时录影与停车模式 包含碰撞侦测 移动侦测 低比特率录影 低帧率模式 两者只能开启其中一个 开启其中一个会自动关闭另外一个 停车模式 含碰撞侦测 移动侦测 低比特率录影 低帧率模式 录影的文件全 部会保存在普通文件夹中 因此为了避免停车模式文件被循环覆盖 请定期查 看 以免遗失 注意 ...

Страница 293: ...节 当记录仪的G sensor检测到汽车在5分钟内没有发生移动或是振动 简称5分钟 进入机制 碰撞侦测模式自动进入 记录仪屏幕中间会显示 碰撞侦测图 标 随后记录仪自动关机 记录仪关机后 当G sensor检测到汽车发生振动或者 移动 自动开机录影1分钟 随后关机 注意 如果记录仪在碰撞侦测录影过程中持续遭到碰撞 将会退出碰撞侦测模式 进入正常录影 重新开始5分钟进入机制 14 39 07 06 20 2022 00 00 37 MP H 80 1440P 1440P 30FPS 14 39 07 06 20 2022 00 00 37 MP H 80 1440P 1440P 30FPS ...

Страница 294: ...侦测2米 4米 6米 的侦测范围 车后 记录仪会开启5分钟进入机制 移动侦测模式自动进入 记录仪屏幕中间会 显示 图标 记录仪进入待机状态 3分钟后屏幕熄灭 录影过程 当记录仪检测到物体移动或者是感受到汽车震动 将会自动触发录影 E2带有预录功能 所以当移动侦测录影结束后 记录仪会将预录的画面加载在移 动侦测视频里 保存至普通文件夹中 14 39 07 06 20 2022 00 00 37 MP H 80 1440P 1440P 30FPS 14 39 07 06 20 2022 00 00 37 MP H 80 1440P 1440P 30FPS ...

Страница 295: ...低比特率录影 低比特率录影开启后 屏幕会显示 或者是 的图标 根据您选择是1080P 15FPS或是720P 15FPS选项而定 停车后 记录仪会开启5分钟进入机制 低比特率模式会自动进入 屏幕中央会显 示低比特率图标 表示进入低比特率模式 当前所有镜头的分辨率会自动切 换为1080P 15FPS或是720P 15FPS进行录影 录影时长是按照当前设定的循环录 影时长决定 当机子受到振动或者是移动后会自动退出 等待五分钟后再次进入 14 39 07 00 00 37 MP H 80 1440P 1440P 30FPS 06 20 2022 注意 低比特率模式需要在开机的情况下进行 记录仪一旦关闭 低比特率模式 将不会起作用 ...

Страница 296: ...低帧率模式下 记录仪也需要有稳定电源供电 一旦电源关闭或者是耗尽 记 录仪将会关机 1 2 3 低帧率模式 当选择开启低帧率模式后 记录仪将会根据选择1FPS 5FPS 10FPS 15FPS进行录 影 例如 您选择的1FPS 当前视频分辨率帧数为30FPS 记录仪将会每秒产生 一段30FPS的视频 停车后 记录仪会开启5分钟进入机制 低帧率模式会自动进入 缩时录影视频可 以很大程度保存视频的完整性 以及节省内存卡空间 14 39 07 00 00 37 MP H 80 1440P 1440P 30FPS 06 20 2022 视频时长的计算公式为 低帧率录影文件时长 低帧率录影帧数 分辨率帧数 录制 文件实际时长 时间须换算成秒 ...

Страница 297: ...的1FPS缩时录影 当前视频分辨率帧数为30FPS 循环录影时 间为1分钟 记录仪将会每秒产生一段30FPS的视频 视频时长的计算公式为 缩时录影文件时长 缩时录影帧数 分辨率帧数 录制文 件实际时长 时间须换算成秒 4 2 7 GPS功能 GPS功能也是记录仪重要的功能之一 GPS默认为打开 并且通过GPS支架接收 GPS信号 它可以自动校正您所在的地区的时间日期 记录视频所在的位置 车 速信息 14 39 07 00 00 37 MP H 80 1440P 1440P 30FPS 2022 06 20 40 46 39 43 48 GPS信息 ...

Страница 298: ...仪也需要有稳定电源供电 一旦电源关闭或者是耗尽 记 录仪将会关机 1 2 3 4 2 8 GPS自动校正时间 E2记录仪默认打开GPS自动校正时间 您可以通过选择您所在的时区 如您所在 地区是洛杉矶 可选择GMT 08 00 如不了解自己所在位置的时区 可用WIFI连 接Vantrue Cam APP 确认APP中的自动校时功能开启 连接成功后 会根据您 手机的时区 强制修正记录仪的时区 4 2 9 遥控器 记录仪出厂配备了遥控器 可以通过遥控器快速操作抓拍 紧急录影 录音开启 关闭等功能 遥控器连接 拆除包装后 取出遥控器 取下遥控器上的电池绝缘片 记录仪会自动与遥控器 匹配 不需要手动与行车记录仪配对 当屏幕显示出现图标后 表示遥控器已匹 配成功 ...

Страница 299: ... 294 CN 遥控器安装 遥控器与记录仪匹配后 请在您车上选取一个合适的位置 然后将遥控器的黏胶 贴纸撕下 粘贴在选择的位置上 注意 遥控器需安装在不影响安全驾驶的位置 上 14 39 07 00 00 37 MP H 80 1440P 1440P 30FPS 2022 06 20 ...

Страница 300: ... 295 CN 连接成功后 使用 SOS按键短按一下 加锁当前文件并抓拍 加锁录影中 继续短按 会继续抓拍照片 1 遥控器连接成功后使用 录音键 可以开启或者关闭录音 遥控器功能 2 14 39 07 06 20 2022 00 00 37 MP H 80 1440P 1440P 30FPS 14 39 07 06 20 2022 00 00 37 MP H 80 1440P 1440P 30FPS ...

Страница 301: ... 296 在遥控器底部有一个 OPEN 标志 请沿着此标志的凹槽位置往周围缝隙慢 慢撬开即可打开 1 打开后 电池仓前面的凹槽轻轻的把电池撬开 然后取出旧电池 再把新电池 放入 把遥控器后盖盖好 2 遥控器更换电池 注意 遥控器电量不足时请更换电池 遥控器不支持充电 遥控器电池的型号是 CR2032纽扣电池 CN ...

Страница 302: ...语音识别 除了遥控器操控记录仪外 您还可以通过语言助手给记录仪下达语音指令 如抓 拍图片 开始录影 打开 关闭WiFi 视频加锁等等 目前支持语种有英语 日 语 俄语 中文 更加详细的语音指令请查看系统设置 语音内容 语音识别有低灵敏 标准 高灵敏 关闭等选项 默认为标准灵敏度 您可以通过语 音指令遥控记录仪 14 39 07 06 20 2022 00 00 37 MP H 80 1440P 1440P 30FPS CN ...

Страница 303: ... 298 00 30 01 07 20220620_140633_0002_E_B MP4 1X 删除视频 记录仪上删除视频 在文件浏览界面 按紧急录影按键可弹出删除菜单 普通视频 刪除这个文件 刪除所有文件 OK 4 2 11 回放 删除文件的途径 a 记录仪上操作 回放视频 进入文件浏览后 任意选择文件夹进入 打开视频文件后 可以按下键选择下一 段文件 播放中可选择删除文件 CN ...

Страница 304: ... 299 连接成功后 记录仪显示屏中会 图标 随后即可在电脑文件夹中查看得 到视频文件 b 在电脑上回放 删除文件 1 使用Type C USB数据线插入电脑 使得记录仪与电脑连接在一起 2 3 根据用户的电脑系统 记录仪连接电脑后会在电脑中显示为可移动驱动器或者 是可移动文件夹 CN ...

Страница 305: ... 但是需要您断开记录仪 WIFI 否者地图信息会显示空白 1 2 c 在APP内回放 删除文件 记录仪通过WiFi与手机连接后 可以在手机APP内相机文件夹中回放 下载 删 除文件 20220620_115036_0079_N_A MP4 06 20 2022 11 5 35 E2 000 000000 000 000000 36MK H 注意 9 41 要显示GPS信息 您必须先将视频文 件下载到APP的本地文件夹 然后在 本地文件夹播放 电脑查看文件可直接右键打开菜单进行删除即可 也可使用USB读卡器读取内存卡信息 CN ...

Страница 306: ...录仪取下放置在扶手箱内 以保证记录仪正常使用 1 2 4 2 12 升级记录仪软件 为了达到更好的用户体验 我们会不定期的更新记录仪软件 您可以通过联系我 们客服人员或者是登录我们官方网站去下载最新的软件版本 软件下载后 请根 据官网提示进行升级即可 注意 记录仪在升级过程中 请勿断电 否则会导致记录仪升级不成功或损坏记 录仪 若突发断电导致升级失败 您可以联系我们客服人员 会有专人为您解决 问题 4 2 13 记录仪工作环境 行车记录仪正常的工作环境为 20 到70 超出此温度范围工作会影响记录仪 的性能 长此以往会损害记录仪的使用寿命 因此 我们建议您 CN ...

Страница 307: ...4 JPEG 内置麦克风和扬声器 Micro SD卡 支持32GB 512GB U3或更高卡速的内存卡 Type C 视频格式 图片格式 音频 储存方式 USB接口 超级电容 电池类型 English 简体中文 日本語 Deutsch Italiano Español Français Русский язык Polski 车前 车后分辨率 1944P 1944P 24FPS 1440P 1440P 30FPS 1440P 1080P 30FPS 1080P 1440P 30FPS 1080P 1080P 30FPS 1080P 720P 30FPS 720P 1080P 30FPS 720P 720P 30FPS 车前分辨率 2592x1944P 30FPS 2560x1440P 30FPS 1920x1080P 30FPS 1280x720P 30FPS 分辨率 CN ...

Страница 308: ...TRUE品牌保修服务周期为12个月 如果您有任何关于产品的问题 可以联系 您购买渠道的客服人员 或者是发送邮件至我们官方邮箱support vantrue net 我们将会有专门人员在12 24小时内回复问题 VANTRUE 品牌一直坚定不移地致力于不断改进产品 提高服务以及用户体验 如果您对于我们如何能做的更好有任何的想法 欢迎您在我们的官方邮箱 support vantrue net留下宝贵的意见及建议 感谢您选择VANTRUE 6 售后服务 京东旗舰店 https vantrue jd com VANTRUE公众号 联系我们 CN ...

Страница 309: ......
Отзывы: