


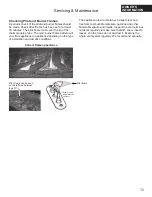


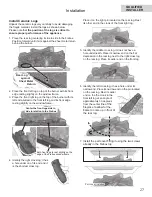

Unpack the appliance
Beware of sharp edges! Wear gloves!
1. Unpack the appliance.
2. Unpack any loose items from around the appliance.
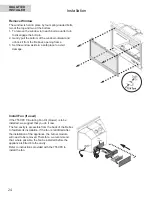
3. Remove the window and set aside in a safe place to
avoid damage—see next page.
4. Verify that you have all the components required
for the installation,
including:
-
logs;
- surround;
- venting components and accessories;
- fan (blower) and electrical components for
installation if used.
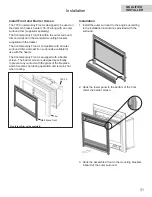
Installation
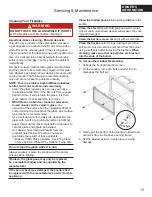
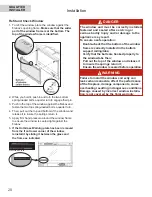
Existing Fireplace Preparation
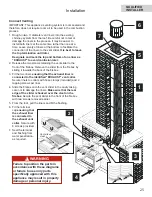
Gas Line Routing
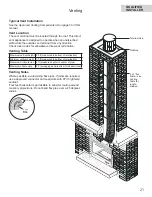
Plan the routing of the gas line before proceeding.
Utilize the existing hole for the gas line. If the factory-
built
fi
replace has no access hole, carefully drill an
access hole of 1.5 inch (38 mm) or less through the
lower sides or bottom of the
fi
rebox. The access hole
must be plugged with non-combustible insulation after
the gas supply line has been installed. See
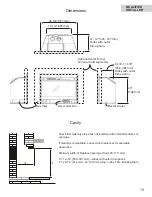
Dimensions
section for detailed location of gas inlet. Also, take into
consideration whether or not a fan or shut-o
ff
valve will
interfere when planning routing of the gas line.
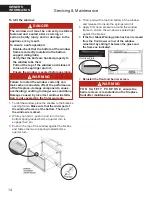
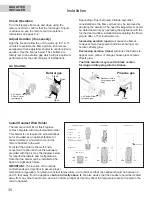
Existing Glass Doors and Wire Screens
Existing glass doors must be permanently removed
prior to installing the 739-72 insert.
Combustible Mantels
Combustible mantel clearances must conform to those
required for the original solid-fuel
fi
replace into which
the 739-72 is being installed.
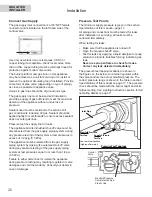
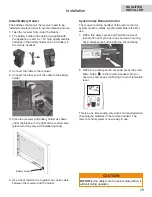
Attach Warning Conversion Plate to Existing
Fireplace (label supplied loose with 739-72
heater)
Attach the “This
fi
replace has been converted...”
label
to the existing
fi
replace
using screws or other
mechanical means and store any removed parts in
back of the existing
fi
replace for future use.
QUALIFIED
INSTALLER
23


