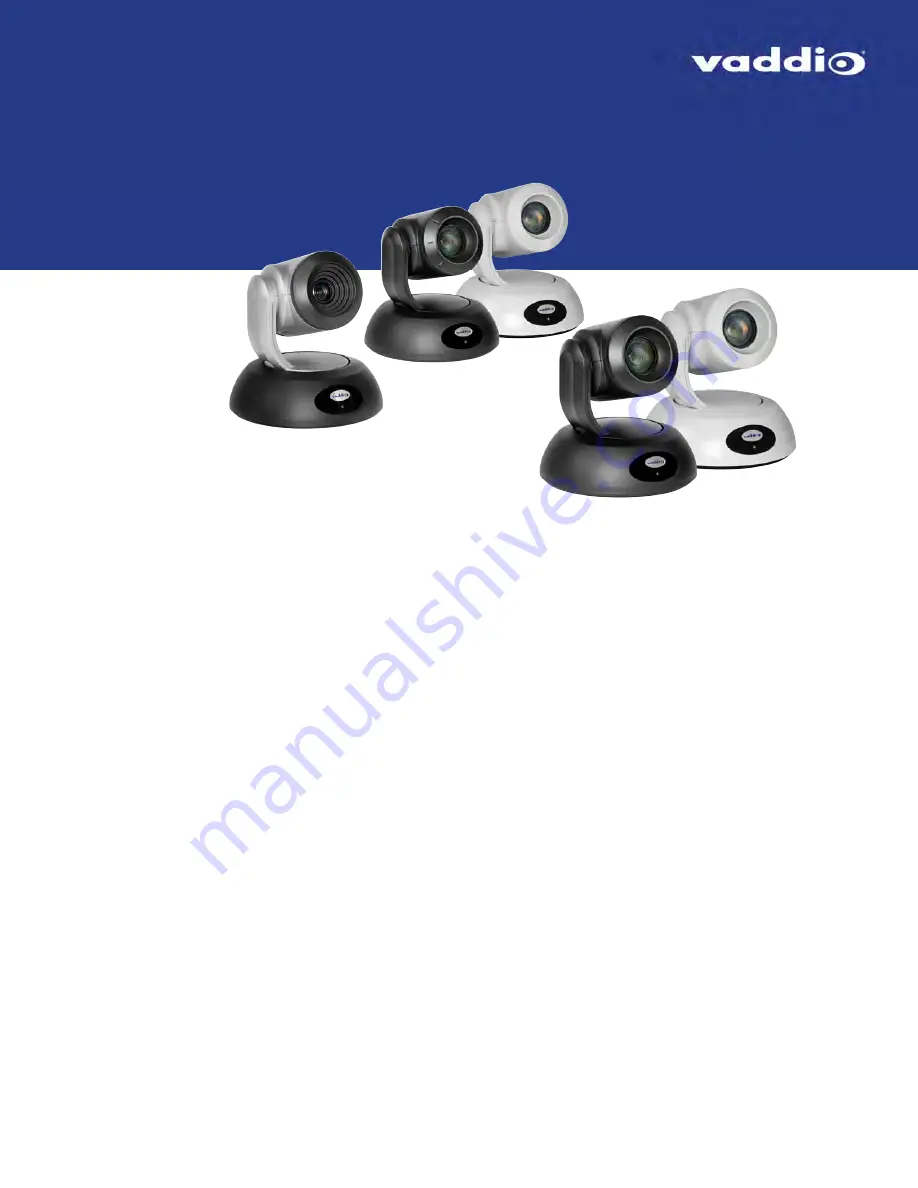
Complete Manual for
RoboSHOT CAT-5 Professional PTZCamera Systems
IncludingRoboSHOT QCCU, RoboSHOT QUSB, RoboSHOT QMini,RoboSHOT QDVI, RoboSHOT QSR, and RoboSHOT AVBMP
Document 411-0025-30 Rev. C
April 2019
Страница 1: ...omplete Manual for RoboSHOT CAT 5 Professional PTZ Camera Systems Including RoboSHOT QCCU RoboSHOT QUSB RoboSHOT QMini RoboSHOT QDVI RoboSHOT QSR and RoboSHOT AVBMP Document 411 0025 30 Rev C April 2019 ...
Страница 2: ... 22 Quick Connect DVI HDMI SR Interface 23 Quick Connect SR Interface 24 Installing the Camera and Quick Connect Device 25 Don t Void Your Warranty 25 Before You Start 26 Installing the Wall Mount 26 About Ceiling Mounted Cameras 26 Video Resolution Setting 27 Camera Behavior Settings RoboSHOT 12 and RoboSHOT 30 28 Switch Settings for the Universal CCU 29 Switch Settings for the Quick Connect USB ...
Страница 3: ...stallation 49 Configuring the Quick Connect USB Device with a Static IP Address 51 Changing the Camera s Hostname 53 Changing the Quick Connect Device s Hostname 53 Optional For DHCP Environments Changing from a DHCP Address to a Static IP Address 54 Specifying Time Zone and NTP Server 55 Managing Access and Passwords 56 Disabling Telnet Access 56 Enabling or Requiring HTTPS 57 Changing the Admin ...
Страница 4: ...mera Settings for RoboSHOT 12E CAT 5 and RoboSHOT 30E CAT 5 77 Additional Camera Behavior Settings 78 Configuring Streaming Quick Connect USB or Quick Connect USB Mini 78 Managing Lighting and Color Adjustments with the Universal CCU 81 A Quick Look at the Menu Controls 81 Adjusting Color 83 Setting the Default Lighting Adjustments 83 Adjusting Light Level and Detail 83 Working with Custom Scenes ...
Страница 5: ...in Limit Values CAM_Gain 107 Color and Light Management Inquiry Commands 108 CCU Scene Commands for the Universal CCU 108 Other Commands 109 Other Inquiry Commands 109 Specifications 110 Cameras 110 Quick Connect Devices 111 Troubleshooting and Care 113 Check the Status Light First 113 Check the Cables Next 113 Power Responsiveness Issues 114 Video Issues 115 Camera Control and Other Issues 116 St...
Страница 6: ... and Conformity Statements for Quick Connect Devices 121 FCC Part 15 Compliance 121 ICES 003 Compliance 121 European Compliance 122 Warranty and Return Policy 123 Photo Credits 127 Index 128 vi Complete Manual for RoboSHOT CAT 5 Professional PTZ Camera Systems ...
Страница 7: ... 999 9919 001W white n RoboSHOT 30 QUSB Australia New Zealand 999 9919 009 black 999 9919 009W white n RoboSHOT 30E QUSB North America 999 99190 000 black 999 99190 000W white n RoboSHOT 30E QUSB Europe UK 999 99190 001 black 999 99190 001W white n RoboSHOT 30E QUSB Australia New Zealand 999 99190 009 black 999 99190 009W white RoboSHOT QMini systems n RoboSHOT 12 QMini North America 999 9901 000 ...
Страница 8: ...n Guide for RoboSHOT CAT 5 Professional PTZ Camera Systems which covers unpacking physical features switch settings installation and initial power up Download manuals dimensional drawings and other information from www vaddio com support Camera Features n Powered by your choice of Quick Connect device or by an AV Bridge MATRIX PRO for maximum flexibility in installation and output connectivity n F...
Страница 9: ...HD SDI HDMI and HD analog component YPbPr outputs n Up to 500 ft 152 m cabling distance n Tally light shows when the camera is on air n Back lit 8 line menu display n 1RU form factor ships with rack mounting brackets Quick Connect USB QUSB Versatile USB 2 0 device for environments using soft conferencing applications Extends HDMI up to 100 ft 30 m n Choice of USB 2 0 MJPEG or IP H 264 streaming n ...
Страница 10: ...to 1080p 60 from the camera n DVI D HDMI and analog component YPbPr outputs n Up to 100 ft 30 m cabling distance n Push button color space selection sRGB for DVI D or YCbCr for HDMI n IR output for codecs n Supports daisy chaining n Half rack form factor mounting brackets available not included Quick Connect SR QSR Basic connectivity for use with legacy equipment n Supports resolutions up to 1080p...
Страница 11: ...BMP worldwide 999 9900 500 silver black n RoboSHOT 12 camera n Thin Profile Wall Mount with mounting hardware black n Vaddio IR Remote Commander n Quick start guide RoboSHOT 30E AVBMP worldwide 999 99100 500 black 999 99100 500W white n RoboSHOT 30E CAT 5 camera black or white n Thin Profile Wall Mount with mounting hardware black or white depending on camera color n Vaddio IR Remote Commander n Q...
Страница 12: ...hown n Quick start guides Note If you need an EZCamera RS 232 Control Adapter for use with this camera please contact Vaddio Technical Support to obtain one RoboSHOT 12 QCCU System North America 999 9907 000 silver black RoboSHOT 12 QCCU System Europe and UK 999 9907 001 silver black RoboSHOT 12 QCCU System Australia and New Zealand 999 9907 009 silver black n RoboSHOT 12 camera n Thin Profile Wal...
Страница 13: ...ed an EZCamera RS 232 Control Adapter for use with this camera please contact Vaddio Technical Support to obtain one RoboSHOT 30 QCCU System North America 999 9917 000 black 999 9917 000W white RoboSHOT 30 QCCU System Europe UK 999 9917 001 black 999 9917 001W white RoboSHOT 30 QCCU System Australia New Zealand 999 9917 009 black 999 9917 009W white n RoboSHOT 30 Camera n Thin Profile Wall Mount w...
Страница 14: ...ot shown n Quick start guides Note If you need an EZCamera RS 232 Control Adapter for use with this camera please contact Vaddio Technical Support to obtain one RoboSHOT 12 QUSB System North America 999 9909 000 silver black RoboSHOT 12 QUSB System Europe UK 999 9909 001 silver black RoboSHOT 12 QUSB System Australia New Zealand 999 9909 009 silver black n RoboSHOT 12 camera n Thin Profile Wall Mo...
Страница 15: ...n EZCamera RS 232 Control Adapter for use with this camera please contact Vaddio Technical Support to obtain one RoboSHOT 30 QUSB System North America 999 9919 000 black 999 9919 000W white RoboSHOT 30 QUSB System Europe UK 999 9919 001 black 999 9919 001W white RoboSHOT 30 QUSB System Australia New Zealand 999 9919 009 black 999 9919 009W white n RoboSHOT 30 camera n Thin Profile Wall Mount with ...
Страница 16: ...tart guides Note If you need an EZCamera RS 232 Control Adapter for use with this camera please contact Vaddio Technical Support to obtain one RoboSHOT 12 QMini System North America 999 9901 000 silver black RoboSHOT 12 QMini System Europe UK 999 9901 001 silver black RoboSHOT 12 QMini System Australia New Zealand 999 9901 009 silver black n RoboSHOT 12 camera n Thin Profile Wall Mount with mounti...
Страница 17: ...n EZCamera RS 232 Control Adapter for use with this camera please contact Vaddio Technical Support to obtain one RoboSHOT 30 QMini System North America 999 9911 000 black 999 9911 000W white RoboSHOT 30 QMini System Europe UK 999 9911 001 black 999 9911 001W white RoboSHOT 30 QMini System Australia New Zealand 999 9911 009 black 999 9911 009W white n RoboSHOT 30 camera n Thin Profile Wall Mount wi...
Страница 18: ... n Quick start guides Note If you need an EZCamera RS 232 Control Adapter for use with this camera please contact Vaddio Technical Support to obtain one RoboSHOT 12 QDVI System North America 999 9906 000 silver black RoboSHOT 12 QDVI System Europe UK 999 9906 001 silver black n RoboSHOT 12 camera n Thin Profile Wall Mount with mounting hardware black n Vaddio IR Remote Commander n Quick Connect DV...
Страница 19: ...n EZCamera RS 232 Control Adapter for use with this camera please contact Vaddio Technical Support to obtain one RoboSHOT 30 QDVI System North America 999 9916 000 black 999 9916 000W white RoboSHOT 30 QDVI System Europe UK 999 9916 001 black 999 9916 001W white n RoboSHOT 30 camera n Thin Profile Wall Mount with mounting hardware black or white depending on camera color n Vaddio IR Remote Command...
Страница 20: ... qty 4 not shown n Quick start guides RoboSHOT 30 QSR System North America 999 9915 000 black 999 9915 000W white RoboSHOT 30 QSR System Europe UK 999 9915 001 black 999 9915 001W white n RoboSHOT 30 camera n Thin Profile Wall Mount with mounting hardware black or white depending on camera color n Vaddio IR Remote Commander n Quick Connect SR interface QSR n 24V power supply with AC cord set s n E...
Страница 21: ...ical zoom in normal mode Recommended for small to medium sized conference rooms n RoboSHOT 12E CAT 5 12x optical zoom recommended for small to medium sized conference rooms n RoboSHOT 30 and RoboSHOT 30E CAT 5 30x optical zoom best suited to larger rooms IR Sensors Sensors in the front of the camera base receive signals from the remote Make sure there s nothing directly in front of the camera base...
Страница 22: ...k Connect device to allow an external device to manage the camera using a modified VISCA protocol See RS 232 Serial Communication Settings for RS 232 settings n EZPower Video RJ 45 connector Supplies power to the camera and delivers HD video back to the Quick Connect interface using high speed differential signaling over Cat 5e cable Connect to the EZPower Video port on the Quick Connect device Co...
Страница 23: ...e camera using a modified VISCA protocol See RS 232 Serial Communication Settings for RS 232 settings n EZPower Video RJ 45 connector supplies power to the camera and delivers HD video back to the Quick Connect interface using high speed differential signaling over Cat 5e cable Connect to the EZPower Video port on the Quick Connect device Color coded orange or yellow depending on the device n 36 V...
Страница 24: ...nect DVI HDMI SR a connectivity solution for legacy equipment provides DVI and analog component video outputs Use with a DVI to HDMI adapter for HDMI output Like the RoboSHOT QSR system this system is typically used with older equipment however it provides more connectivity options This system may be used with a joystick camera controller n QSR system A RoboSHOT 12 or RoboSHOT 30 camera with a Qui...
Страница 25: ...f color and lighting adjustments CCU scenes F n W Bal OPWB One Push White Balance Calibrate the color balance Auto White Balance must be off After the calibration is complete you may want to activate Auto White Balance n W Bal Auto Auto White Balance Manage color levels automatically Use the OPWB button to calibrate the white balance before activating Auto White Balance n Red Gain and Blue Gain co...
Страница 26: ...le connector to use the tally function In a multi camera CCU installation this lights the blue indicator on the front panel when this camera and Universal CCU combination is the live program A tally command is also sent to the RoboSHOT camera via RS 232 illuminating its front indicator n 8 position DIP switch The DIP switch lets you configure the way the camera and Universal CCU behave The default...
Страница 27: ...vity n Network indicator Illuminates when there is a network connection Blinks to shown network activity Back panel features n 24 VDC 2 0 A power connector Connect only the power supply shipped with the Quick Connect n 5 position DIP switch Setting for HDMI color space firmware update configuration factory reset n RS 232 In Camera control input from a Vaddio joystick controller or other controller...
Страница 28: ... the computer running the soft conferencing or video capture application n Power Illuminates when power is connected Back panel features n 24 VDC 2 08 A power connector Connect only the power supply shipped with the Quick Connect n Mode Press to switch between USB streaming mode and web control mode Press and hold to reset the Quick Connect to its factory defaults n EZ Power Video Power to the cam...
Страница 29: ... the camera n Daisy Chain Daisy Chain Control Emulation DCCE output to the next Quick Connect DVI HDMI SR interface n IR Output Forwards IR signals from the camera to third party equipment such as videoconferencing codecs Use the MOD signal if the IR is from a remote or other IR emitter use the NON MOD signal for wired connections n DVI D HDMI HDMI 1 3 and DVI v 1 0 compliant With a DVI to HDMI ad...
Страница 30: ...video output from the camera SD video resolutions Y C and CVBS formats are not supported by the Quick Connect SR Interface however analog component SD high fps format 480p 59 94 and 576p 50 video is supported n IR Output Forwards IR signals from the camera to third party equipment such as videoconferencing codecs Use the MOD signal if the IR is from a remote or other IR emitter use the NON MOD sig...
Страница 31: ...mera s base when picking it up Lifting the camera by its head or mounting arm will damage it Caution This product is for indoor use Use an appropriate protective enclosure if installing it outdoors or in a humid environment Do not install or operate this product if it has been dropped damaged or exposed to liquids If any of these things happen return it to Vaddio for safety and functional testing ...
Страница 32: ...to configure the camera with a static IP address as directed by the network administrator before connecting it to the network Work with the network administrator to determine how to configure the equipment Installing the Wall Mount The camera is shipped with a Thin Profile Wall Mount Other mounting options are available as well Contact us if you don t have the camera mount you need You can install...
Страница 33: ...te series cameras RoboSHOT 12 and RoboSHOT 30 cameras RoboSHOT 12E CAT 5 and RoboSHOT 30E CAT 5 cameras Note The Quick Connect Universal CCU supports frame rates of 50 fps and above Switch selections 9 through C are valid for the camera but not supported on the QCCU Note The Quick Connect USB Mini supports only 720p 60 720p 59 94 and 720p 50 Other resolution settings are valid for the camera but n...
Страница 34: ...at the top of the remote to select the camera you want to control n SW1 and SW2 up IR frequency 1 n SW1 down SW2 up IR frequency 2 n SW1 up SW2 down IR frequency 3 IR Out Leave switch 3 UP if the IR remote will be used If the system will be controlled from another device set the switch DOWN This turns off the IR sensors in the front of the camera so that all control is via the RS 232 connection Im...
Страница 35: ...ted with the camera s Home preset Switch 5 n UP to include the front panel display controls on the menu n DOWN to hide the display controls all other menu items remain available The other switches are not used Switch Settings for the Quick Connect USB The default position for DIP switches on the Quick Connect USB is up as it is on RoboSHOT cameras Switch 3 n UP for HDMI YCbCr color space n DOWN fo...
Страница 36: ...default baud rate is 9600 The 38400 baud setting is optional if the connected device supports it RS 232 Connector Pin Out n Pin 1 Not used n Pin 2 Not used n Pin 3 Not used n Pin 4 IR Output Diff Signal to Quick Connect SR n Pin 5 IR Ground Diff Signal to Quick Connect SR n Pin 6 GND GND of IR Short Range Pin 3 n Pin 7 RXD from TXD of control source n Pin 8 TXD to RXD of control source Caution Che...
Страница 37: ...ut can result in equipment damage and will void the warranty Pro Tip To prevent tragic mishaps label both ends of every cable Connecting the Camera This section provides connection diagrams for each RoboSHOT system n RoboSHOT QCCU includes systems with RoboSHOT Elite cameras n RoboSHOT QUSB includes systems with RoboSHOT Elite cameras n RoboSHOT QMini includes systems with RoboSHOT Elite cameras n...
Страница 38: ...or step by step instructions to configure a static IP address Basic Connections RoboSHOT QCCU System RoboSHOT QCCU systems ship with the camera and a Quick Connect Universal CCU QCCU The QCCU powers the camera and provides fine control over color and lighting CCU adjustments This system is designed for a live production environment and is typically installed with a camera controller and multi view...
Страница 39: ...e Quick Connect USB provides connections for a camera controller or other control device and HDMI and YPbPr analog component video outputs to display video from the camera near end video This diagram shows a RoboSHOT 12 camera The RoboSHOT 30 RoboSHOT 12E CAT 5 and RoboSHOT 30E CAT 5 connect in the same way 33 Complete Manual for RoboSHOT CAT 5 Professional PTZ Camera Systems ...
Страница 40: ...t conferencing application The Quick Connect USB Mini provides power and connectivity to the camera and brings the camera s video to the computer via USB connection This diagram shows a RoboSHOT 12 camera The RoboSHOT 30 RoboSHOT 12E CAT 5 and RoboSHOT 30E CAT 5 connect in the same way 34 Complete Manual for RoboSHOT CAT 5 Professional PTZ Camera Systems ...
Страница 41: ...e MOD and GND pins 1 and 2 for balanced differential IR Because it is a differential signal you can swap the two wires n Use the GND and NON MOD pins 2 and 3 for unbalanced single ended IR for example if connecting to Polycom equipment Because it is not a differential signal pin 2 must go to the GND connection at the other end of the cable This diagram shows a RoboSHOT 12 camera The RoboSHOT 30 Ro...
Страница 42: ...ifferential signal pin 2 must go to the GND connection at the other end of the cable This diagram shows a RoboSHOT 12 camera The RoboSHOT 30camera connects in the same way The Quick Connect SR has been discontinued and is not available for the RoboSHOT 12E CAT 5 and RoboSHOT 30E CAT 5 cameras Basic Connections RoboSHOT AVBMP RoboSHOT AVBMP cameras ship with a remote and a wall mount Connect the ca...
Страница 43: ...e the screws loose enough to adjust the position of the mount 3 Level the mount and tighten the mounting screws 4 Connect the cables to the camera o If using a Quick Connect Universal CCU connect the 36 VDC To Camera output to the camera s 36 VDC From QCCU Only port o If connecting the camera to any other Quick Connect device or to an AV Bridge Matrix Pro connect power to the EZ Power Video port B...
Страница 44: ...zed and ready its front indicator is blue At this point it is ready to accept control information Note Wait until the camera finishes initializing before trying to control it using the IR remote or other command input Status Light The light in the camera s base indicates its current state n Blue Normal operation blinks once when the camera receives a command from the remote n Red On air tally sign...
Страница 45: ...s and hold for 3 seconds Move the camera Arrow buttons and Home button dark red Move the camera to a preset position Position Preset buttons 1 through 6 bottom two rows Focus the camera Auto Focus button near arrow buttons Manual Focus buttons Near and Far below Zoom Speed buttons Control zoom speed Zoom Speed buttons light gray Slow T and W Fast T and W for telephoto zoom in and wide angle zoom o...
Страница 46: ...mera Pan Tilt Reset Not used Auto Focus Switch the camera to Auto Focus mode Zoom Speed Select Slow or Fast movements for telephoto and wide angle shots n T slow and T fast Telephoto zoom in n W slow and W fast Wide angle zoom out Manual Focus Switch the camera to Manual Focus mode Near adjustment Moves the focus nearer when in manual focus mode Far adjustment Moves the focus farther when in manua...
Страница 47: ...s the camera s IP address and MAC address 2 Press the Data Screen button again to dismiss the information If the address is 169 254 1 1 the camera is using its default IP address This usually means one of these things n The network automatically assigns IP addresses but the camera is not connected to the network n The network does not automatically assign IP addresses and you need to configure the...
Страница 48: ...efault user password is password but this can be changed Check with the system administrator if the camera s web interface requires you to log in Only the Controls page is available with user level access Your camera s Controls page will look somewhat different 42 Complete Manual for RoboSHOT CAT 5 Professional PTZ Camera Systems ...
Страница 49: ...able Telnet access n System page View firmware version and switch settings reboot restore factory defaults and update firmware n Room Labels page Information to display on the web interface screens including the conference room name and phone number and the in house number for AV assistance n Help page Tech support contact information and a link to the product information library on the Vaddio web...
Страница 50: ...access the web interface of the Quick Connect USB or Quick Connect USB Mini device you will need to know its IP address n The Quick Connect USB device displays its IP address on its front panel n The Quick Connect USB Mini device s IP address is 169 254 1 1 and is not configurable Note If a RoboSHOT camera is used with a Quick Connect USB or Quick Connect USB Mini device in a non DHCP environment ...
Страница 51: ...he web interface press the Mode button again to return to video mode The Quick Connect USB and Quick Connect USB Mini web interfaces open to the Camera Controls page From this page you can log in as admin to manage the device As admin you have access to administrative and configuration pages similar to those available in the camera s web interface plus a few controls for the camera The camera cont...
Страница 52: ...tings RoboSHOT 12E CAT 5 and RoboSHOT 30E CAT 5 On older RoboSHOT cameras these settings are on the rear panel DIP switches n IR1 IR2 IR3 Frequency Selection for controlling up to 3 cameras independently with the remote n IR on off for enabling disabling control via the remote n Image Flip for inverted camera installation n Baud rate for RS 232 serial communication System DIP switches tab Advanced...
Страница 53: ... date Networking Information about the camera location Help desk phone number for end users Room Labels Vaddio Technical Support contact information Help Diagnostic logs Diagnostics The structure of the Quick Connect USB and Quick Connect USB Mini web interfaces is nearly identical to the structure of the camera s web interface 47 Complete Manual for RoboSHOT CAT 5 Professional PTZ Camera Systems ...
Страница 54: ...s product n Diagnostics Logs to help Vaddio Technical Support troubleshoot issues See Configuring Camera Behavior for information on image adjustments streaming configuration and other items related to camera behavior Note Vaddio s RoboSHOT series cameras all have very similar web interfaces Some of the screen shots in this manual may be from other models in the RoboSHOT series Note Quick Connect ...
Страница 55: ...lt IP address as the camera 169 254 1 1 If you install more than one camera on a network that does not automatically assign IP addresses a non DHCP network follow this procedure to prevent IP address conflicts If you are installing in any of these environments you will need to follow this procedure n Installing cameras with Quick Connect USB devices on a non DHCP network configure each camera and ...
Страница 56: ...iagram but do not connect the camera to the network 2 Connect the network port on the camera to the network port on a computer Depending on the computer you may need a crossover cable 3 On the computer open a browser and access the camera s web interface at http 169 254 1 1 4 Log in as admin The default password is password 5 Navigate to the Networking page 50 Complete Manual for RoboSHOT CAT 5 Pr...
Страница 57: ...to the network Configuring the Quick Connect USB Device with a Static IP Address NETWORKING PAGE QUICK CONNECT USB WEB INTERFACE Caution Consult your IT department before editing network settings Errors in network configuration can make the device inaccessible from the network Do not change DHCP Static addressing IP address subnet mask or gateway unless you are very familiar with the characteristi...
Страница 58: ...ssover cable 3 On the computer open a browser and access the Quick Connect USB device s web interface 4 Log in as admin The default password is password 5 Select Networking from the navigation pane 6 Set IP Address to Static 7 Enter the IP address subnet mask and gateway as directed by the IT staffer then save your work The Quick Connect USB device is now ready to be connected to the network 52 Co...
Страница 59: ...me conforms to the organization s naming conventions Changing the Quick Connect Device s Hostname NETWORKING PAGE QUICK CONNECT WEB INTERFACE If the camera is connected to a Quick Connect USB or Quick Connect USB Mini you can also assign a hostname to Quick Connect device The Networking page in the web interface for the Quick Connect USB Mini is similar to the one for the Quick Connect USB shown h...
Страница 60: ... keep this from happening set the IP address to Static Do not change the IP address subnet mask or gateway unless the network administrator instructs you to do so If you install the camera with a Quick Connect USB device you can make its IP address static also This setting is on the Networking page of the Quick Connect USB web interface 54 Complete Manual for RoboSHOT CAT 5 Professional PTZ Camera...
Страница 61: ...ake it easier to match logged events with other actions and external events 1 To make the time zone and NTP server editable enable Automatic NTP Updating 2 Select the desired time zone from the list 3 If desired specify the NTP server to use Otherwise use the default You may need to refresh the system time display 55 Complete Manual for RoboSHOT CAT 5 Professional PTZ Camera Systems ...
Страница 62: ...ble access via Telnet by default access via Telnet is enabled n Require HTTPS for web access by default HTTP is also permitted n Allow or deny device discovery allowed by default Note Consult your network security specialist before changing any of these settings Note For best security Vaddio strongly recommends changing the user and admin passwords from the default Using the default passwords leav...
Страница 63: ...ization s network security professional 1 Select Show Advanced Settings The advanced options open 2 To switch to a secure HTTPS connection select Switch to HTTPS Note Your browser may present messages warning you that your connection is not secure because the site s certificate is not valid This happens when HTTPS is used but no SSL certificate is installed 3 To require HTTPS connections clear the...
Страница 64: ...his time the User password is not required Note For best security Vaddio strongly recommends changing the user and admin passwords from the default Using the default passwords leaves the product vulnerable to tampering Be sure you have a way to remember the Admin password if you change it 58 Complete Manual for RoboSHOT CAT 5 Professional PTZ Camera Systems ...
Страница 65: ...t Device s Web Interface ROOM LABELS PAGE QUICK CONNECT WEB INTERFACE Use the Room Labels information to help you identify the Quick Connect USB or Quick Connect USB Mini connected to a specific camera The Room Labels page in the web interface for the Quick Connect USB Mini is similar to the one for the Quick Connect USB shown here 59 Complete Manual for RoboSHOT CAT 5 Professional PTZ Camera Syst...
Страница 66: ...re the first camera 2 Export its configuration Export Data button The export downloads to your computer as a dat file The filename is the camera s hostname 3 Import the configuration to the other cameras Import Data button in each camera s web interface The web interface prompts you to browse to the dat file that will be imported Note If the camera is using an older firmware version it may be unab...
Страница 67: ...mware and select it The filename ends with p7m 3 Select Begin Firmware Update 4 Read and understand the information in the Confirm dialog box It s dull but it could save you some time and aggravation 5 Select Continue A progress message box opens and the indicator light on the front of the camera turns yellow If the update process presents warnings or error messages read them carefully The camera ...
Страница 68: ...pdate 4 Read and understand the information in the Confirm dialog box It s dull but it could save you some time and aggravation 5 Select Continue A progress message box opens If the update process presents warnings or error messages read them carefully The Quick Connect device reboots when the update is complete Caution The Quick Connect device must remain connected to power and to the network dur...
Страница 69: ...ect power from the Universal CCU 5 Connect the Universal CCU s RS 232 IN port to your computer s serial port Be sure you know which COM port it is For Windows operating systems this information is available in the Device Manager 6 On the Universal CCU press and hold the recessed button near the power socket while reconnecting power The Tally light will blink once and the LCD screen will be black w...
Страница 70: ...m Utilities section select Reboot Rebooting the Quick Connect Device SYSTEM PAGE QUICK CONNECT WEB INTERFACE You can reboot the Quick Connect USB or Quick Connect USB Mini device the same way you reboot the camera Select Reboot from the System page 64 Complete Manual for RoboSHOT CAT 5 Professional PTZ Camera Systems ...
Страница 71: ...upport information vary depending on the camera model Accessing the Diagnostic Logs DIAGNOSTICS PAGE When you contact Vaddio technical support your support representative may ask you to download and email the log file available from the Diagnostics page If the camera is connected to a Quick Connect USB or Quick Connect USB Mini device you can access the device s diagnostic logs on the Diagnostics ...
Страница 72: ... USB or IP USB device name and color space IP video quality bandwidth and more Note Vaddio s RoboSHOT series cameras all have very similar web interfaces Some of the screen shots in this manual may be from other models in the RoboSHOT series Setting the Custom Home Position and Other Preset Shots CAMERA PAGE The camera s default home position is 0 pan and 0 tilt you can set a different home positi...
Страница 73: ... to move simultaneously from other presets to this position 6 Store the preset Note Tri Synchronous Motion works best for on air shots requiring significant movement It is not useful when moving the camera less than 10 or when the camera is not on the air Renaming Presets and Custom CCU Scenes You can rename presets and custom scenes The process is the same for both Right click the button for the ...
Страница 74: ...e by selecting the CCU scene that best fits your environment Note If the camera is connected to a Universal CCU use the Universal CCU to manage lighting and color adjustments when you are in the same room as the equipment See Managing Lighting and Color Adjustments with the Universal CCU You can still manage lighting and color adjustments from the camera s web interface if you are not in the same ...
Страница 75: ...tails in areas with less intense lighting This setting is only available on the RoboSHOT 12E CAT 5 and RoboSHOT 30E CAT 5 cameras It is on the General tab of the System page The Lighting and Image Quality Cheat Sheet may be helpful Fine Tuning Image Quality and Color CAMERA PAGE Fine tune the color and lighting as needed using the Color Settings controls n Auto White Balance adjusts color automati...
Страница 76: ...Gain Increase Chroma Decrease Gamma The subject is silhouetted against a bright background Enable Backlight Compensation Small sources of bright light point sources make it hard to see details in areas with less intense lighting Enable Point Light Compensation RoboSHOT 12E and 30E CAT 5 only Highlights and shadows look right but mid tones are too dark Increase Gamma Shadows are too dark Enable Wid...
Страница 77: ...for less green n adjust Blue Gain decrease for less blue increase for less yellow Too much red Not enough red Too much blue Not enough blue Balanced Saving Color and Lighting Settings CAMERA PAGE If you are adjusting for lighting conditions that are likely to recur you can save your adjustments as a custom scene 1 Adjust lighting image quality and color 2 When the scene looks the way you want it t...
Страница 78: ...nd zoom speeds used for movements between presets that do not use Tri Synchronous Motion n Tri Synchronous Motion speed Only available when storing a preset with the Store with Tri Sync option selected About Tri Synchronous Motion The Tri Synchronous Motion algorithm calculates the pan tilt and zoom speeds needed for the camera to move to a preset position so that all three movements begin togethe...
Страница 79: ...d of movements that you control with the buttons for pan tilt and zoom For tight shots slower is usually better Setting the Speed of Movements to Presets CAMERA PAGE To set speeds for movements to presets 1 Store presets at several points in the room at different zoom levels saving them without selecting the Tri Sync option 2 Move among the presets using the preset buttons 3 Use the Global Preset ...
Страница 80: ...third of the way along the scale 2 Move the camera to a different pan tilt and zoom position and save this position as another preset Again check Save with Tri Sync but set the speed slider to about the halfway point 3 Move the camera from one preset to the other to evaluate which movement is closer to the speed you want Use the Tri Sync speed associated with that preset or adjust it as needed 4 S...
Страница 81: ...oking the same direction as the camera If a person facing the camera is controlling it with the remote using the right arrow pans the camera to the person s left To make the arrow buttons indicate camera movement from the perspective of a person facing the camera open the Settings control and invert the pan direction 75 Complete Manual for RoboSHOT CAT 5 Professional PTZ Camera Systems ...
Страница 82: ...he camera s current switch settings and configure certain camera behaviors Note Sorry you have to physically move the switch es on the back of the camera if you need to change them This tab only controls the soft DIP switches 76 Complete Manual for RoboSHOT CAT 5 Professional PTZ Camera Systems ...
Страница 83: ...the remote to select the camera you want to control This allows the IR Remote Commander to control them independently n Left and right IR switches up IR frequency 1 n Left IR switch down right IR switch up IR frequency 2 n Left IR switch up right IR switch down IR frequency 3 IR On Off Leave this switch UP if the IR remote will be used Image Flip If mounting the camera upside down set the Image Fl...
Страница 84: ...de it is only on when the camera is active sending video or updating firmware Configuring Streaming Quick Connect USB or Quick Connect USB Mini STREAMING PAGE QUICK CONNECT WEB INTERFACE The Quick Connect USB and Quick Connect USB Mini devices provide streaming capability for RoboSHOT cameras n Quick Connect USB Mini USB 2 0 streaming only n Quick Connect USB USB 2 0 or IP H 264 streaming configur...
Страница 85: ...ct device a device name that helps people to identify and select it when setting up their laptops for conferencing In most cases you do not need to set the color space this is automatically negotiated with the conferencing application 79 Complete Manual for RoboSHOT CAT 5 Professional PTZ Camera Systems ...
Страница 86: ...setting combined with a high quality bandwidth setting requires the most network bandwidth If the network cannot easily support this video errors will be more likely and more obvious than at lower quality and or resolution settings 3 Select the streaming protocol if necessary RTSP on port 554 is the default the port number can be changed Do not change the port number unless your IT staff directs y...
Страница 87: ...nob To work with an item on the home menu 1 Press the front panel button corresponding to the menu item On some older units the Bright button is labeled Pedestal or Ped 2 Turn the menu knob to adjust the selected item Exceptions o When the W Bal Auto button is illuminated automatic white balance is selected and the Red and Blue settings cannot be adjusted Press the W Bal Auto button to deselect au...
Страница 88: ...t be enabled when Backlight Compensation is enabled The next three items are WDR adjustments o Display Brightness Level Range is 0 dark through 6 bright o Brightness Compensation Range is 0 dark through 3 bright o Compensation Level Range is 0 low through 2 high n Skew If the cables from the Universal CCU to the camera are not all the same length video quality may be reduced Change the skew settin...
Страница 89: ...stments The Lighting and Image Quality Cheat Sheet provides information on correcting specific issues The Universal CCU includes six predefined lighting scenes to use as starting points for fine tuning n AUTO automatic lighting management n Incand Lo incandescent low intensity n Incand Hi incandescent bright n Fluor Lo fluorescent low intensity n Fluor Hi fluorescent bright n Outdoor daylight To s...
Страница 90: ...e from the Universal CCU to the camera can result in poor signal quality If the video quality is higher when you connect the camera to the Universal CCU with short cables the skew adjustment may help 1 Open the Cat 5 Adjustments menu 2 Select Skew 3 Change the value as needed to produce the best video output from the Universal CCU Available values range from 1 to 16 higher values correct for longe...
Страница 91: ... version information 2 Work with the settings in the same way you work with the other items that are not on the home menu Available settings are n Display Normal light text on dark background or Invert dark text on light background n Bias Changes the overall brightness Range is 1 9 bright to 1 11 dim n Contrast Changes the brightness of the background settings below about 195 also dim the text Ran...
Страница 92: ...tate n Select a custom lighting adjustment if any have been stored Since the web interface is specific to the camera you are working with it does not offer camera selection Switching the Camera Off or On Standby Use the Standby button to switch between low power standby and ready states On entering standby mode the camera moves to its standby position and stops sending video Stop or Resume Sending...
Страница 93: ... color and speed information as well If no presets are defined the Controls page does not present the Presets section Use the Preset buttons to move the camera to any of its preset positions Adjusting the Color and Lighting If any color and lighting adjustments CCU scenes have been saved they are available in the Scenes area along with the Auto setting In most cases the Auto setting is appropriate...
Страница 94: ... the AV Bridge MATRIX PRO manual for more detailed information Things to know about Telnet n The character is the command prompt n Using a question mark as a command parameter will bring up a list of available subcommands or parameters Example camera focus camera focus near Focus the camera near far Focus the camera far stop Stop the camera focus mode Camera focus mode n CTRL 5 clears the current ...
Страница 95: ...s absolute pan position in degrees as a floating point value between approximately 150 00 left and 150 00 right set position Sets the camera s absolute pan position in degrees as a floating point value between approximately 150 00 and 150 00 This is the minimum range Individual cameras may have an additional degree or two of travel before they reach their physical limits If the value is out of ran...
Страница 96: ...00 to 90 00 if Image Flip is selected set position Sets the camera s absolute tilt position in degrees as a floating point value between approximately 30 00 and 90 00 90 to 30 if the camera is configured for inverted operation This is the minimum range individual cameras may have an additional degree or two of travel before they reach their physical limits If the value is out of range the camera r...
Страница 97: ... set 1 n Sets the zoom level as a floating point value The value of n maximum zoom depends on the camera s capabilities For example the range is 1 00 to 12 00 for a 12x camera If the value is out of range the camera returns an error message and no zoom change occurs Examples camera zoom in OK Zooms the camera in at the default speed camera zoom out 7 OK Zooms the camera out using a speed of 7 came...
Страница 98: ... used when camera is in manual mode speed 1 8 Optional integer 1 to 8 specifies the focus speed stop Stops the camera s focus movement mode get auto manual Returns the current focus mode or specifies automatic or manual focus Examples camera focus near OK Brings the focus near at the default speed camera focus far 7 OK Moves the focus farther from the camera at a speed of 7 camera focus mode get a...
Страница 99: ... 1 16 Stores the current camera position as the specified preset tri sync 1 24 Optional Specifies that the camera uses Tri Synchronous Motion to move to this position using the specified speed save ccu Optional Saves the current CCU settings as part of the preset If not specified the last color settings are used when recalled Examples camera preset recall 3 OK Moves the camera to preset 3 camera p...
Страница 100: ...uto iris state on or off iris Returns the iris value as an integer 0 to 11 gain Returns gain as an integer 0 to 11 detail Returns detail as an integer 0 to 15 chroma Returns chroma as an integer 0 to 14 wide_dynamic_range Returns the current state for Wide Dynamic Range on or off Examples camera ccu get iris iris 6 OK Returns the current iris value camera ccu get red_gain red_gain 201 OK Returns t...
Страница 101: ...ation setting on or off Can only be used when wide dynamic range mode is off iris 0 11 Sets the iris value as an integer 0 to 11 Can only be used when auto iris is off auto_iris on off Sets the auto iris state on or off Auto iris disables manual iris and gain when it is on gain 0 11 Sets gain value as an integer 0 to 11 Can only be used when auto iris is off detail 0 15 Sets the detail value as an...
Страница 102: ...ra to use factory CCU scene 2 camera ccu scene store custom 1 OK Saves the current CCU scene as custom CCU scene 1 camera led Set or change the behavior of the indicator light RoboSHOT AVBMP only Specify camera1 camera2 or camera3 Synopsis camera led get off on Options get Returns the indicator light s current state on or off off Disables the indicator light on Enables the indicator light Examples...
Страница 103: ...andby mode it enters standby if it was in standby mode it wakes up Examples camera standby off OK Brings the camera out of standby mode camera standby get standby on OK Returns the current standby state network settings get Returns the current network settings for MAC address IP address subnet mask and gateway Synopsis network settings get Example network settings get Name eth0 WAN MAC Address 48 ...
Страница 104: ...ackets transmitted 5 packets received 0 packet loss round trip min avg max 0 410 0 964 3 112 ms Sends five ECHO_REQUEST packets of 56 bytes each to the host at 192 168 1 66 network ping count 10 size 100 192 168 1 1 Sends 10 ECHO_REQUEST packets of 100 bytes each to the host at 192 168 1 1 The command returns data in the same form as above system reboot Reboots the system either immediately or aft...
Страница 105: ...received then reads the rear panel DIP switches and returns the status on if they are all in the down position system factory reset on factory reset software on factory reset hardware off OK Enables factory reset upon reboot Note This command does not initiate a factory reset The factory reset takes place on the next reboot version Returns the current firmware version Synopsis version Example vers...
Страница 106: ...ion You can navigate the command history using the up and down arrow keys This command supports the expansion functionality from which previous commands can be recalled from within a single session History expansion is performed immediately after a complete line is read Examples of history expansion Substitute the last command line 4 Substitute the 4th command line absolute as per history command ...
Страница 107: ... Comments CAM_Zoom Stop 8x 01 04 07 00 FF Variable speed p 0 low to 7 high Direct pqrs zoom position 0h 4000h for 12x 0h 7AC0h for 30x Tele std 8x 01 04 07 02 FF Wide std 8x 01 04 07 03 FF Tele variable 8x 01 04 07 2p FF Wide variable 8x 01 04 07 3p FF Direct 8x 01 04 47 0p 0q 0r 0s FF Corresponds to camera zoom in Telnet API CAM_Focus Stop 8x 01 04 08 00 FF Variable speed p 0 low to 7 high Direct...
Страница 108: ...tion 90E2h 6BD8h 0Z0Z0Z0Z Tilt position EB99h 3D59h Pan Tilt ZoomDrive Up 8x 01 06 0A vv ww rr 03 01 03 FF vv Pan speed 01h 18h ww Tilt speed 01h 14h rr Zoom speed 00h 07h Down 8x 01 06 0A vv ww rr 03 02 03 FF Left 8x 01 06 0A vv ww rr 01 03 03 FF Right 8x 01 06 0A vv ww rr 02 03 03 FF In 8x 01 06 0A vv ww rr 03 03 01 FF Out 8x 01 06 0A vv ww rr 03 03 02 FF Stop 8x 01 06 0A vv ww rr 03 03 03 FF Ho...
Страница 109: ...0z 0z 0z 0z FF wwww Pan position zzzz Tilt Position CAM_ZoomPosInq 8x 09 04 47 FF y0 50 0p 0q 0r 0s FF pqrs Zoom position CAM_FocusPosInq 8x 09 04 48 FF y0 50 0p 0q 0r 0s FF pqrs Focus position CAM_FocusModeInq 8x 09 04 38 FF y0 50 02 FF Auto focus y0 50 03 FF Manual focus Corresponds to camera focus mode get in Telnet API CAM_MemoryInq 8x 09 04 3F FF y0 50 pp FF pp Preset number recalled last 00h...
Страница 110: ..._iris in Telnet API CAM_Shutter Reset 8x 01 04 0A 00 FF Shutter setting pq shutter position 00h 15h See Shutter Speed Values CAM_Shutter Command Up 8x 01 04 0A 02 FF Down 8x 01 04 0A 03FF Direct 8x 01 04 4A 00 00 0p 0q FF CAM_Iris Reset 8x 01 04 0B 00 FF Iris setting pq iris position 0h 05h 11h See Iris Values CAM_Iris Command Up 8x 01 04 0B 02 FF Down 8x 01 04 0B 03 FF Direct 8x 01 04 4B 00 00 0p...
Страница 111: ...ion 0h 0fh Up 8x 01 04 02 01 FF Down 8x 01 04 02 02 FF Direct 8x 01 04 42 00 00 0p 0q FF Corresponds to camera ccu set detail in Telnet API CAM_Chroma Direct 8x 01 7E 55 00 00 0p 0q FF pq 00h 14h Corresponds to camera ccu set chroma in Telnet API CAM_ GammaOffset Direct 8x 01 04 1E 00 00 00 0s 0t 0u FF s polarity offset 0 is plus 1 is minus tu offset s 0 00h to 40h offset s 1 00h to 10h Correspond...
Страница 112: ... 1 2000 1 1750 0x10 1 1500 1 1250 0x0F 1 1000 1 1000 0x0E 1 725 1 600 0x0D 1 500 1 425 0x0C 1 350 1 300 0x0B 1 250 1 215 0x0A 1 180 1 150 0x09 1 125 1 120 0x08 1 100 1 100 0x07 1 90 1 75 0x06 1 60 1 50 0x05 1 30 1 25 0x04 1 15 1 12 0x03 1 8 1 6 0x02 1 4 1 3 0x01 1 2 1 2 0x00 1 1 1 1 106 Complete Manual for RoboSHOT CAT 5 Professional PTZ Camera Systems ...
Страница 113: ...s Gain in dB Value Steps Gain in dB 0x0F 28 77 8 0x0F 28 77 8 0x0E 26 44 4 0x0E 26 44 4 0x0D 24 41 0 0x0D 24 41 0 0x0C 22 37 5 0x0C 22 37 5 0x0B 20 34 1 0x0B 20 34 1 0x0A 18 30 7 0x0A 18 30 7 0x09 16 27 3 0x09 16 27 3 0x08 14 23 9 0x08 14 23 9 0x07 12 20 5 0x07 12 20 5 0x06 10 17 1 0x06 10 17 1 0x05 8 13 7 0x05 8 13 7 0x04 6 10 2 0x04 6 10 2 0x03 4 6 8 0x02 2 3 4 0x01 0 0 107 Complete Manual for R...
Страница 114: ...ion CAM_WDModeInq 8x 09 04 3D FF y0 50 02 FF On y0 50 03 FF Off CAM_BackLightModeInq 8x 09 04 33 FF y0 50 02 FF On y0 50 03 FF Off CAM_ApertureInq 8x 09 04 42 FF y0 50 00 00 0p 0q FF pq Aperture gain CAM_ChromaInq 8x 09 7E 55 FF y0 50 05 00 00 00 0p FF p 0 Eh CAM_GammaOffsetInq 8x 09 04 1E FF y0 50 00 00 00 0s 0t 0u FF s Polarity offset 0 is plus 1 is minus tu Offset s 0 00h to 40h Offset s 1 00h ...
Страница 115: ...Corresponds to video mute in Telnet API Other Inquiry Commands Inquiry Command Command Response Packet Comments CAM_PowerInq 8x 09 04 00 FF y0 50 02 FF On y0 50 03 FF Off standby Corresponds to camera standby get in Telnet API CAM_TallyInq 8x 09 7E 01 0A FF y0 50 02 FF On y0 50 03 FF Off CAM_NRInq 8x 09 04 53 FF y0 50 0p FF Noise reduction p 00h to 05h CAM_MuteModeInq 8x 09 04 75 FF y0 50 02 FF On...
Страница 116: ...30 in 0 8 m tele RoboSHOT 30 10 in 0 25 m wide 48 in 1 2 m tele RoboSHOT 12E and 30E CAT 5 3 in 0 08 m wide 31 in 0 8 m tele Min illumination Recommended 100 lux Gain Auto Manual 28 steps Backlight compensation On off Aperture detail 16 steps Focusing system Auto Focus Manual Focus One Push Trigger Mode Infinity Mode Near Limit Mode White balance Auto ATW Indoor Outdoor One push Manual Noise reduc...
Страница 117: ...T 12 RoboSHOT 30 ZoomSHOT WideSHOT SE PowerVIEW series and ClearView series cameras Maximum Cable Length 100 ft 30 m Power 24 VDC 2 08 A Height 1 RU 1 72 in 4 4 cm Width 8 38 in 21 3 cm Depth 6 in 15 2 cm Weight 1 4 lb 0 64 kg Operating storage temperature 0 C to 40 C 32 F to 104 F Operating storage humidity 20 to 80 RH non condensing Quick Connect USB Mini Video Outputs Compatible with RoboSHOT 1...
Страница 118: ...rating storage humidity 20 to 80 RH non condensing Quick Connect SR Video Outputs Compatible with RoboSHOT 12 RoboSHOT 30 PowerVIEW series and ClearView series cameras Maximum Cable Length 100 ft 30 m Power 24 VDC 2 08 A Height 1 6 in 4 1 cm Width 5 5 in 14 cm Depth 3 25 in 8 3 cm Weight 0 45 lb 0 2 kg Operating storage temperature 0 C to 40 C 32 F to 104 F Operating storage humidity 20 to 80 RH n...
Страница 119: ...mera via its web interface or Telnet If so the status light is disabled Check the Cables Next If the equipment behaves in a way that suggests even a remote possibility of a bad cable please try a known good cable with the same pin out Cables can be defective whether they are purchased from a vendor or made at the installation site Crimping tools can crimp unevenly contacts can break internally and...
Страница 120: ...ding out if it powers something else such as a laptop or phone charger Use a different outlet The device providing power is bad Universal CCU Quick Connect USB or AV Bridge MATRIX PRO Buttons and display do not illuminate Quick Connect USB Mini or Quick Connect DVI HDMI SR Power light does not illuminate Contact your reseller or Vaddio Technical Support for help troubleshooting this issue if the c...
Страница 121: ... Mini The Quick Connect device is in control mode Press the white button on the QMini to switch from control mode to video mode Video is not available when the device is in control mode Blue or black video The camera s web interface is available and the camera responds to the directional controls on the remote Video is muted Select the Mute button in the web interface This button is available on e...
Страница 122: ...e remote to see camera information Camera connected to a Quick Connect USB Mini The Quick Connect device is in video mode Press the white button on the QMini to switch from video mode to control mode Web control is not available when the device is in video mode The camera loses all its settings when power is cycled All the DIP switches are in the ON down position Set the DIP switches to their prop...
Страница 123: ...e camera s administrative controls are not accessible you can restore factory defaults using the switches on the back of the camera This procedure is also available for the Quick Connect USB device It is not available for the Universal CCU which stores very little information other than CCU scenes A B and C To restore factory default settings on an older RoboSHOT camera Set all DIP switches DOWN a...
Страница 124: ...humidity condensing or wet environments n Inclement weather n Severe vibration n Lunar environments not pressurized and climate controlled to Earth normal n Dry environments with an excess of static discharge Do not attempt to take this product apart There are no user serviceable components inside And a friendly reminder from our Training department As much as you might love our gear do not attemp...
Страница 125: ... cause harmful interference to radio communications Operation of this equipment in a residential area is likely to cause harmful interference in which case the user will be required to correct the interference at his her own expense Operation is subject to the following two conditions 1 This device may not cause interference and 2 This device must accept any interference including interference tha...
Страница 126: ...ated Immunity EN 61000 4 4 2004 Corrigendum 2006 Electrical Fast Transients EN 61000 4 5 2006 Surge Immunity EN 61000 4 6 2009 Conducted Immunity EN 61000 4 8 2010 Power Frequency Magnetic Field EN 61000 4 11 2004 Voltage Dips Interrupts and Fluctuations KN24 2008 CISPR 24 1997 A1 2000 A2 2002 IT Immunity Characteristics EN 61000 4 2 Electrostatic Discharge EN 61000 4 3 Radiated Immunity EN 61000 ...
Страница 127: ...t installed and used in accordance with the instruction manual may cause harmful interference to radio communications Operation of this equipment in a residential area is likely to cause harmful interference in which case the user will be required to correct the interference at his her own expense Operation is subject to the following two conditions 1 This device may not cause interference and 2 T...
Страница 128: ...004 Corrigendum 2006 Electrical Fast Transients EN 61000 4 5 2006 Surge Immunity EN 61000 4 6 2009 Conducted Immunity EN 61000 4 8 2010 Power Frequency Magnetic Field EN 61000 4 11 2004 Voltage Dips Interrupts and Fluctuations KN22 2008 CISPR 22 2006 Conducted and Radiated Emissions KN24 2008 CISPR 24 1997 A1 2000 A2 2002 IT Immunity Characteristics EN 61000 4 2 Electrostatic Discharge EN 61000 4 ...
Страница 129: ...rt can be contacted by email at support vaddio com or by phone at one of the phone numbers listed on support vaddio com Return Material Authorization RMA number Before returning a product for repair or replacement request an RMA from Vaddio s technical support Provide the technician with a return phone number e mail address shipping address product serial numbers and original purchase order number...
Страница 130: ...subject to restocking charges n The Dealer has up to 60 days from the date of purchase to return Vaddio product for credit for future purchases of Vaddio product only n The Dealer has 61 to 90 days from the date of purchase to return Vaddio product with a 15 restocking fee or 50 00 fee whichever amount is greater n The Dealer has up to 30 days from the date of purchase to return OEM and other manu...
Страница 131: ...iod will be repaired under the non warranty terms if o The equipment has been damaged by negligence accident act of God mishandling used with the incorrect modified or extended power supply or has not been operated in accordance with the procedures described in the operating and technical instructions o The equipment has been altered or repaired by other than the Manufacturer or an authorized serv...
Страница 132: ...nit n Customers requesting an estimate on repair charges must do so up front when they call in for an RMA The RMA team will call or email with the estimate after evaluating the unit and before proceeding with the repair n Any product evaluated for a repair estimate is still subject to the minimum labor charges even if the customer decides not to proceed with the repair n Vaddio does not guarantee ...
Страница 133: ...a2explore 16166230844 Public Domain https commons wikimedia org w index php curid 38931301 European Space Agency astronaut Luca Parmitano Expedition 36 flight engineer outside the International Space Station By NASA http spaceflight nasa gov gallery images station crew 36 html iss036e016704 html Public Domain https commons wikimedia org w index php curid 27263573 Chris Cassidy Luca Parmitano and K...
Страница 134: ...tion 86 capabilities 2 4 110 112 Quick Connect DVI HDMI SR QDVI 4 112 Quick Connect SR QSR 4 112 Quick Connect USB QUSB 3 111 Quick Connect USB Mini QMini 4 111 Universal CCU QCCU 3 111 CCU scenes 66 68 71 82 84 87 96 custom 67 71 96 custom UCCU 84 recalling 96 RS 232 commands for QCCU 108 CCU settings 70 71 93 95 ceiling mounted cameras 26 cheat sheet 39 46 70 71 color adjustment 71 lighting and ...
Страница 135: ...I Image Flip setting 28 77 importing a configuration 60 inactive sessions web interface 56 indicator light 15 38 78 96 113 116 color scheme 78 enabling disabling 96 location 15 meaning of colors 38 113 116 information conference room 59 installation typical 33 36 RoboSHOT QDVI system 35 RoboSHOT QMini system 34 RoboSHOT QSR system 36 RoboSHOT QUSB system 33 inverted installation 26 IP address 31 3...
Страница 136: ...etworking 49 51 53 55 Networking QUSB or QMini 53 Room Labels 59 Security 56 57 Streaming QUSB or QMini 78 80 System 61 64 System QUSB or QMini 62 64 pan 73 75 89 direction 75 speed 73 pan tilt zoom controls 39 40 87 passwords 42 43 45 56 58 admin default 43 admin default QUSB or QMini 45 user default 42 pedestal 81 performance specifications 110 112 physical and environmental specifications 110 1...
Страница 137: ...stment QCCU 82 84 soft DIP switches 77 78 solving problems 84 113 116 specifications 110 112 speed 73 89 92 focus 92 pan tilt zoom 73 89 91 SSL certificate 57 Standard Control Codec Control setting 78 standby low power state 86 97 start up behavior setting 66 static IP address 49 51 54 status light 15 38 78 96 113 116 color scheme 78 enabling disabling 96 location 15 meanings of colors 38 113 116 ...
Страница 138: ... video mode QMini 44 video mute 86 video resolution 27 VISCA commands 101 103 104 106 109 voilà a small cat 116 W wall mounted cameras 37 wall mount 26 warranty 25 123 web browsers supported 41 web interface 41 43 45 49 51 53 57 59 61 62 64 65 68 69 78 80 86 accessing 41 accessing via direct connection 50 Camera page 68 69 Controls page 86 Diagnostics page 65 Help page 65 navigation button labels ...
Страница 139: ...pecifications drawings manuals technical support information and more 2019 Legrand AV Inc Vaddio is a registered trademark of Legrand AV Inc All other brand names or marks are used for identification purposes and are trademarks of their respective owners All patents are protected under existing designations Other patents pending Commercial AV Brands Chief Da Lite Middle Atlantic Projecta Vaddio ...