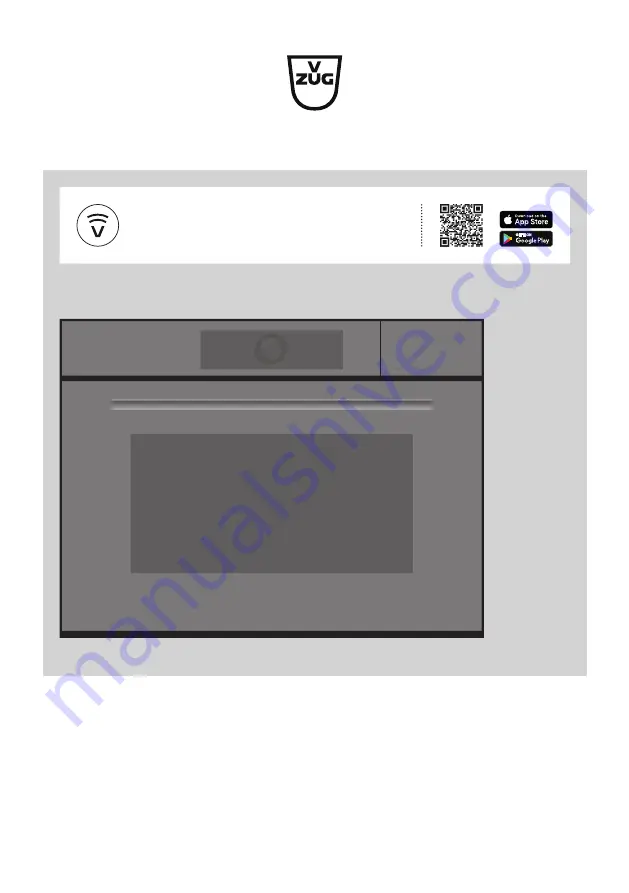
Operating instructions
CombiSteamer V4000
Steamer
V-ZUG-Home
Install the app, network your appliances and benefit from a wide range of useful functions.
Страница 1: ...Operating instructions CombiSteamer V4000 Steamer V ZUG Home Install the app network your appliances and benefit from a wide range of useful functions...
Страница 2: ...fety precautions Modifications Text diagrams and data correspond to the technical standard of the appliance at the time these operating instructions went to press The right to make technical modificat...
Страница 3: ...t mode 27 4 19 Time 28 4 20 Cancelling ending before time 28 4 21 End of operation 29 4 22 Continuing 30 4 23 Switching the appliance off 30 4 24 Emptying the water tank 31 4 25 Appliance tips 31 5 Ap...
Страница 4: ...1 Error messages 56 9 2 Other possible problems 57 9 3 After a power failure 58 10 Accessories and spare parts 59 10 1 Accessories 59 10 2 Special accessories 59 10 3 Spare parts 59 11 Technical data...
Страница 5: ...safe use of the appliance and have understood the haz ards involved Children shall not play with the appliance Cleaning and user mainten ance shall not be undertaken by children without supervi sion...
Страница 6: ...destroy the glass Only use the food probe re commended for this oven Under no circumstances use a steam cleaner to clean the appliance WARNING Before replacing the light bulb ensure the ap pliance is...
Страница 7: ...efore clos ing the appliance door Objects that could pose a danger if the appliance were accidentally switched on should not be stored in the cooking space Do not store food or any temper ature sensit...
Страница 8: ...carefully Do not place any protective insert or aluminium foil on the floor of the cook ing space with appliances with no vis ible bottom heating element Do not use objects that can rust in the cooki...
Страница 9: ...rinsing of the water system If the rinsing is skipped it must be carried out manually Heat the empty cooking space to 100 C for 5 minutes using the Steam ap plication Wait 20 minutes until the applian...
Страница 10: ...3 2 Operating and display elements App view 1 3 5 1 7 2 3 List view OK 1 4 5 1 7 2 6 Steam Here is where you can make all key settings and customize your appliance User settings Favourite for bread 1...
Страница 11: ...ing space illumination List view Open water compartment flap App view Display lock Switch off Quiet mode Clock V ZUG Home Ready to start Start 15min 13 21 Steam 1 2 3 1 Application 3 Start operation 2...
Страница 12: ...5 Climate sensor 12 Hot air fan 6 Cooking space ventilation 13 Door mounted condensate trough 7 Water tank compartment 3 4 Accessories Incorrect handling can cause damage Do not use knives or cutting...
Страница 13: ...nd biscuits on two levels using the Hot air application If not fully covered by the baking its shape can become distorted during baking This is normal As it cools down it will go back to its original...
Страница 14: ...king space of at least 5 cm The food probe has three measuring points for particularly precise temperature measure ment These also help to record the food probe temperature correctly even if the food...
Страница 15: ...settings appears To permanently change the view go in the user settings to Individual settings and select the desired start screen view see page 45 Displaying quick information The app view displays t...
Страница 16: ...p of the water tank compartment opens Take the water tank out of the appliance Fill the water tank with water up to the max mark Only fill with fresh cold drinking water The max mark is in the round o...
Страница 17: ...nd press OK or touch the application again The ready to start screen or another submenu with more applications appears in the display If required repeat the procedure and select the desired applicatio...
Страница 18: ...tically when the set duration is up Setting the operating time Select the desired application see page 16 In the value range touch Operating time see page 21 The colour of the value range changes to a...
Страница 19: ...ating time are hidden in the display 4 6 Delayed start end The delayed start is activated when for the application selected both the operating time and end are set The appliance switches automatically...
Страница 20: ...measure the temperature inside the food referred to as the food probe temperature As soon as the food reaches the desired target temperature the food probe temperature that should be attained at the e...
Страница 21: ...6 Plug in the food probe Press Start to start the application 4 8 Options Overview Each application offers different options Your appliance has the following Options Preheat see page 22 Food probe tem...
Страница 22: ...do not put the food into the cooking space until the acoustic signal is emitted and the corresponding message ap pears With Preheat the cooking space is quickly heated up to the desired temperature O...
Страница 23: ...ce if the Preheat option has not been turned on Starting Start later Press Start to start the application The application starts and the time remaining is displayed If both End and Start later have be...
Страница 24: ...mation for the favourite is displayed The favourite 1 appears in the start screen as an app with a heart 1 Changing favourites Once a favourite has been created it can no longer be changed To adjust i...
Страница 25: ...ygiene and recipe applications as well as plate warmer and descaling cannot be pinned Pinning a main value Select the desired application see page 16 The ready to start screen appears in the display A...
Страница 26: ...rs in the display Press OK to confirm the message Checking and changing Touch the Timer function button The countdown to the time remaining appears in the display Press and hold Stop The timer is inte...
Страница 27: ...layed Turning on the display lock Touch the Display lock function button The following appears in the display Activate Touch Activate appears in the display Turning off the display lock Press and hold...
Страница 28: ...ication the following available options are displayed Confirm the question Do you really want to end the application with Yes Select one of the displayed subsequent steps to continue operation with an...
Страница 29: ...he food probe temperature is displayed The food can be kept warm with residual heat for some time As soon as the tem perature falls below 80 C all the displays go out If at this point the food probe i...
Страница 30: ...ature setting is applied directly from the applica tion that has ended or been cancelled Confirm the selection with OK The ready to start screen with reduced setting options appears in the display If...
Страница 31: ...ching off the appliance the residual water in the boiler is pumped back into the water tank in the display appears The water is being pumped off Once the water has been pumped off Touch the Open water...
Страница 32: ...ing element behind the back wall of the cooking space heats up the air inside the cooking space which is circulated evenly The natural humidity produced is largely re tained in the cooking space The f...
Страница 33: ...s from the food is retained in the cooking space so the food dries out less Uses Roasts gratins savouries and biscuits When baking using this application do not preheat This lowers the energy con sump...
Страница 34: ...is cooked to the same degree of doneness throughout Temperature range 30 95 C Recommended value 60 C Level 1 to 4 Recommended maximum cooking time 72 hours The cooking space is heated simultaneously b...
Страница 35: ...obe into the appliance Long touch the display The appliance starts and the start screen appears Select the Vacuisine application and confirm with OK if required see page 16 The settings for Vacuisine...
Страница 36: ...g Weight of meat 500 2000 g Meat thickness at least 4 cm Quality high quality not too aged meat Select a long cooking time for marbled cuts of meat such as shoulder or neck Soft roasting table for Sof...
Страница 37: ...inserted into the centre of the food The temperature inside the meat is crucial for optimal results at the end of cooking Put the wire shelf with the meat at level 2 and a baking tray which has been l...
Страница 38: ...t 5 9 Keep warm Cooked foods can be kept warm using Keep warm If the cooking space is already hot open the appliance door and allow the cooking space to cool down for about 10 minutes before starting...
Страница 39: ...er and place it directly on the floor of the cooking space Seed cushions Before starting the application Place the cherry stone or grape seed cushions in the perforated cooking tray 5 12 Hygiene Hygie...
Страница 40: ...nd confirm with OK The settings for the recipe appear in the display Set an end time or a delayed start if required see page 19 To view the individual recipe steps open the overview of the steps in th...
Страница 41: ...at to do next To continue the recipe proceed as follows Open the appliance door Carry out the action e g turn over food Close the appliance door and confirm the message with OK The recipe will continu...
Страница 42: ...dietary style The following foods are available Milk Meat Eggs Pork Fish All activated foodstuffs are highlighted in amber They can be deactivated by touching the switch Only where this is clear are...
Страница 43: ...rd for your wireless network at the ready Installing the app Enable bluetooth and location determination on the smartphone or tablet Search the Google PlayTM Store or the App Store for V ZUG Install a...
Страница 44: ...ated after first en tering a code The code is displayed in reverse order when unlocking The childproof lock is activated within 1 minute of the appliance being switched off 7 4 Display Colour scheme I...
Страница 45: ...s can be activated as a package and added to EasyCook Start screen Choose whether the applications should be displayed in the app view or the list view when the start screen is called up Temperature u...
Страница 46: ...n be displayed in the European 24 hour or the US 12 hour format a m p m The date can be displayed in the DD MM YYYY YYYY MM DD or MM DD YYYY format Time in standby It is possible to choose between the...
Страница 47: ...screen Resets the start screen to the app view Favourites remain unchanged Favourites Entering OK clears all existing favourites V ZUG Home Disconnects all connections to mobile devices Factory setti...
Страница 48: ...densate or food particles must be completely removed after each cooking session with steam Place the stainless steel tray under the perforated cooking tray or wire shelf when cooking to catch food par...
Страница 49: ...el shine The practical spray head reaches all surfaces of the cooking space good adhesion Environmentally friendly food friendly No unpleasant odours Fill the water tank with fresh water and slot into...
Страница 50: ...ning process Fill the water tank with fresh water and slot into position in the water tank compart ment Long touch the display The start screen appears Select the Cleaning application group and confir...
Страница 51: ...door as far as its airing position about 30 Lift the appliance door out evenly and at an angle Reinstalling the appliance door Push the appliance door 3 evenly into both hinges 1 as far as it will go...
Страница 52: ...nd away from the hinges Clean the glass panels and dry well 2 3 Reassemble the glass panels as follows Insert the middle door glass 3 into the door frame and gently push it back towards the hinges The...
Страница 53: ...ny abrasive agents If the water tank valve drips descale it Removing the shelf guides Unscrew the knurled nuts 1 in the front of the shelf guides in an anti clockwise direction Pull the shelf guides 2...
Страница 54: ...e The descaler contains highly effective acid Immediately rinse away any splashes with water Follow the manufacturer s instructions See Accessories and spare parts for where to obtain this descaler du...
Страница 55: ...responding message appears in the display remove the water tank pour the rinsing solution away and fill it with 1 l warm water Put the water tank back The rinsing phase starts automatically The follow...
Страница 56: ...he power supply off for about 1 minute Switch the power supply back on If the error appears again note down the error message in full along with the serial number SN of the appli ance see page 60 Disc...
Страница 57: ...lumination is not working Halogen light is de fective Contact Customer Services Cooking time seems longer than usual Appliance only has a one phase connec tion Connect appliance with a two phase conne...
Страница 58: ...Contact Customer Services 9 3 After a power failure The user settings remain unchanged Brief power failure during operation The current operation of the appliance is cancelled The following appears in...
Страница 59: ...ase give the product family of the appliance and exact designation of the accessory or spare part when ordering parts 10 1 Accessories Stainless steel tray Perforated cooking tray Wire shelf Dual enam...
Страница 60: ...ternationally accepted standard Own measurements can be im precise and are not suitable for checking the accuracy of the temperature 11 3 Product fiche In accordance with EU Regulation No 66 2014 Bran...
Страница 61: ...asyCook Next time set a lower temperature and lengthen the operat ing time Stir the cake mixture well When finished bake immediately For whisked sponges beat the egg yolks whites to a foam a little lo...
Страница 62: ...opening the appliance door frequently Only switch the illumination on when needed Use residual heat for cooking times over 30 minutes switch the appliance off 5 10 minutes before the end of the operat...
Страница 63: ...hazardous environmentally harmful materials These appliances are to be handed over to a designated collection point for the recyc ling of electrical and electronic equipment and must not be disposed o...
Страница 64: ...maintenance 48 CircleSlider Reaction 18 Using 16 Cleaning Accessories 53 Appliance door 50 Cooking space 48 Door glass 52 Door seal 52 Food probe 53 Shelf guides 53 Cleaning the exterior 48 Clock 28 H...
Страница 65: ...32 Hot air with steaming 32 Hot massage stones 39 Hot wraps 39 Hygiene 39 I Identification plate 60 Illumination 27 57 Switching off 27 Switching on 27 Individual settings EasyCook cuisines from aroun...
Страница 66: ...starting 37 Soft roasting table 36 Spare parts 59 Special accessories 14 59 Stainless steel tray 13 Start later 23 Setting 23 Starting 23 Start screen 15 Steam cleaning 50 SteamerCleaner 49 Steaming...
Страница 67: ...4 Index Mode 46 Resetting 46 Restarting interface 46 W Warming plates in the cooking space 38 Warranty extensions 71 Water tank 14 Emptying 31 Filling 16 Wellness 39 Wire shelf 14 WLAN connection 43 6...
Страница 68: ...68 15 Notes...
Страница 69: ...69...
Страница 70: ...70...
Страница 71: ...You will require the serial number SN and appliance designation to register your appliance You will find them on the identification plate of your appliance My appliance information SN ________________...
Страница 72: ...he temperature can be set using the CircleSlider Adjustable value On Off Touch the display to switch the appliance on Long press and hold the function button to switch the appliance off Operation The...