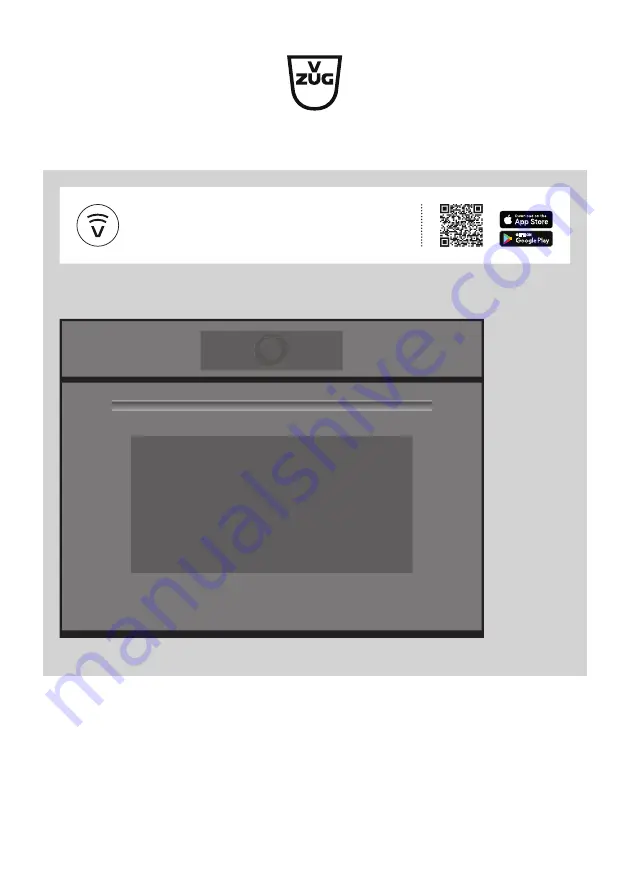
Operating instructions
Combair V2000
Oven
V-ZUG-Home
Install the app, network your appliances and benefit from a wide range of useful functions.
Страница 1: ...Operating instructions Combair V2000 Oven V ZUG Home Install the app network your appliances and benefit from a wide range of useful functions ...
Страница 2: ...ard of the appliance at the time these operating instructions went to press The right to make technical modifications for the purpose of the further development of the appliances is reserved Validity These operating instructions apply to Model designation Type Size system Combair V2000 45 C2T 21048 60 450 Variations depending on the model are noted in the text Download updates to your appliance vi...
Страница 3: ...4 20 Subsequent steps 27 4 21 Switching the appliance off 28 4 22 Appliance tips 28 5 Applications 29 5 1 Top Bottom heat 29 5 2 Top Bottom heat humid 29 5 3 Top bottom heat eco 30 5 4 Bottom heat 30 5 5 PizzaPlus 30 5 6 Grill 31 5 7 Grill forced convection 31 5 8 Hot air 31 5 9 Hot air humid 32 5 10 Hot air eco 32 5 11 Sabbath applications 33 5 12 Keep warm 35 5 13 Warming plates in the cooking s...
Страница 4: ...ower failure 48 10 Accessories and spare parts 49 10 1 Accessories 49 10 2 Special accessories 49 10 3 Spare parts 49 11 Technical data 49 11 1 Light sources 49 11 2 Note for testing institutes 50 11 3 Temperature measurement 50 11 4 Product fiche 50 11 5 EcoStandby 50 12 Tips and tricks 51 12 1 Unsatisfactory cooking result 51 12 2 Saving energy 51 13 Disposal 52 14 Index 53 15 Notes 56 16 Servic...
Страница 5: ...e safe use of the appliance and have understood the haz ards involved Children shall not play with the appliance Cleaning and user mainten ance shall not be undertaken by children without supervi sion If an appliance is not equipped with a mains cable and a plug or other means for disconnecting from the mains with a contact opening on each pole complying with the conditions of overvoltage cat egor...
Страница 6: ...s can destroy the glass Under no circumstances use a steam cleaner to clean the appliance WARNING Before replacing the light bulb ensure the ap pliance is switched off and disconnected from the mains power supply to avoid pos sible electric shock To avoid overheating the ap pliance must not be installed behind a decor door WARNING Never heat food or liquids in sealed containers such as cans or bot...
Страница 7: ...king space Do not store food or any temper ature sensitive or inflammable materials e g cleaning agents oven sprays etc in the cooking space For appliances with a grill Keep the ap pliance door closed while grilling The heat could otherwise damage the oper ating and display elements or the fitted units above Caution Risk of burns The appliance gets very hot when in use The appliance door also gets...
Страница 8: ...oid damaging the appliance Close the appliance door carefully Do not place any protective insert or aluminium foil on the floor of the cook ing space with appliances with no vis ible bottom heating element Do not use objects that can rust in the cooking space Using knives or cutting wheels on the baking tray will visibly damage the sur face To prevent corrosion leave the appli ance door open in th...
Страница 9: ...ther Make the settings and confirm Remove all the accessories from out of the cooking space Start the initial burn in If the initial burn in step is skipped it must be carried out manually after completing the initial set up Heat the empty cooking space without wire shelves baking trays etc to 200 C for about 30 minutes using the application Hot air Burning in removes any oily residues in the cook...
Страница 10: ...ating and display elements 2 Ventilation opening 3 Door handle 4 Appliance door 3 2 Operating and display elements App view 1 3 5 1 7 2 3 List view Here is where you can make all key settings and customize your appliance OK User settings Favourite for bread Grill 1 4 5 1 7 2 6 10 ...
Страница 11: ... List of applications Left function buttons Right function buttons Step back Timer Start screen Cooking space illumination List view Display lock App view Quiet mode Switch off Clock Ready to start Start Hot air 180 C 1 2 3 1 Application 3 Start operation 2 Main value Setting options Options Operating time Application tips End Favourite Symbol V ZUG Home 11 ...
Страница 12: ... Incorrect handling can cause damage Do not use knives or cutting wheels on the accessories Do not store the accessories in the cooking space Remove all non ovenproof ac cessories before use Baking tray Certain foods can damage the surface coating Foods such as lye breads e g pretzels dough or mixture with a high egg white content and chicken can affect the non stick properties of the baking tray ...
Страница 13: ...er is distinguished through a metal plate with a steam symbol For standing roasting and baking tins on For standing meat frozen pizza etc on Ensure that the bar 1 is to the back of the cooking space This enables the food to be removed safely from the cooking space 1 Serves as a cooling rack For large bulky food Place the wire shelf directly on the floor of the cooking space Special accessories Pla...
Страница 14: ... settings appears To permanently change the view go in the user settings to Individual settings and select the desired start screen view see page 39 Displaying quick information The app view displays the names of the apps as well as the two favourite functions Rename and Remove Press and hold the desired app 2 Quick information and the favourites function in Favourites appear above the app see pag...
Страница 15: ... screen appears Selecting an application group Either In the app view touch the desired application group The submenu with the associated applications appears in the display Or In the list view select the desired application group using the CircleSlider or by swiping up or down Press OK or touch the application The submenu with the associated applications appears in the display The food is gently ...
Страница 16: ...h and create a favourite if required see page 21 Starting an application Press Start to start the application The pulsing circle 2 of the CircleSlider indicates that operation has started The actual cooking space temperature is displayed as the cooking space is heating up depending on the application and settings The progress bar 3 in the CircleSlider shows the countdown to the time remaining or t...
Страница 17: ...te preheating time plus the set duration The operating time set only starts to run when preheating has finished Press Start to start the application The application starts and the time remaining is displayed The application ends automatically when the set duration is up see page 26 If subsequent steps are available for an application these can be selected when the set duration is up see page 27 If...
Страница 18: ...itted and the corresponding message ap pears Before setting the delayed start in the value range touch End The colour of the value range changes to amber Set the desired end time using the CircleSlider The desired duration and the set end time ap pear in the display 15min 13 21 Press Start to start the delayed start The time set or remaining to the start of opera tion and the end of operation appe...
Страница 19: ...the switch or touch the value range and set the desired value using the CircleSlider Each defined option is marked with a Confirm the setting with OK Several settings can also be confirmed at once with OK The ready to start screen appears in the display Press Start to start the application 4 7 Checking and changing the settings Values and settings can be changed before and during operation Excepti...
Страница 20: ...ting is shown in the CircleSlider Introducing food As soon as the cooking space has preheated an acoustic signal is emitted and a message is displayed If set the operating time does not start to run until the message has been acknowledged Place the food in the cooking space Close the appliance door and confirm the message with OK The application starts 4 9 Setting to start later With Start later a...
Страница 21: ...the particular applications are shown Hiding application tips To hide tips touch The ready to start screen or the running operation appears in the display 4 11 Favourites Creating a favourite Favourites can be created from all applications with the exception of the cleaning pro grammes And all options with the exception of End can be saved Up to 50 favour ites in total can be created Select the de...
Страница 22: ... Press OK to save the new favourite name Deleting favourites The favourite can only be deleted in the app view If required touch The start screen appears as an app view Press and hold the favourite 1 Quick information appears above the app Touch Clear The following appears in the display Do you really want to clear or reset To keep favourites touch No To delete favourites touch Yes Starting favour...
Страница 23: ...es to white The main value for the desired application is no longer fixed Whenever the application is called up the recommended default value appears To reset all pinned main values go to the user setting Pinned values see page 41 4 13 Timer The timer functions like an egg timer It can be used independently of other functions and applications Setting and starting the timer Touch the Timer function...
Страница 24: ... time The cooking space illumination switches on automatically 3 minutes before the set duration is up If the cooking space illumination is turned either on or off when a Sabbath applica tion is started it will remain unchanged until the end of operation Switching the cooking space illumination on Touch the Illumination function button The colour of the function button changes to amber The cooking...
Страница 25: ...ouch the Quiet mode switch Quiet mode is turned on The colour of the Quiet mode changes to amber in the function bars Turning off the quiet mode Expand the function bar Touch the Quiet mode function button The quiet mode is shown in the display Touch the Quiet mode switch Quiet mode is turned off The colour of the Quiet mode changes to white in the function bars 4 17 Time The clock can be shown at...
Страница 26: ...button to switch the appliance off see page 28 If the application has been running for less than 1 minute when cancelled the ready to start screen appears Sabbath applications can only be cancelled using the function button see page 33 Ending an application before time Press and hold the function button Any running application is ended if turned on the timer or heatable appliance drawer will remai...
Страница 27: ...ssories get hot Use protective gloves or oven cloths Take the food out of the cooking space when done Wipe away traces of water or soiling with a soft cloth to prevent corrosion and un pleasant odours Leave the appliance door open in the airing position until the cooking space has cooled down and dried out 4 20 Subsequent steps Subsequent steps are applications that can be used to continue operati...
Страница 28: ... see page 28 After 3 minutes without interaction The display goes dark and the appliance switches off automatically see page 28 4 21 Switching the appliance off Press and hold the function button Any running application is ended if turned on the timer will remain active If turned on the display lock is deactivated The display goes dark The appliance is in EcoStandby Display after switching off Dep...
Страница 29: ...lts use a dark enamelled tray Place large or bulky food on level 1 5 2 Top Bottom heat humid Temperature range 30 250 C Recommended value 200 C Level 2 The cooking space is heated by the top and bottom heating elements The natural hu midity produced is largely retained in the cooking space The food retains its moisture Uses Bread plaited bread roasts and gratins on one level Low temperature cookin...
Страница 30: ...lassical top bottom heat The temperature is optimized throughout in this application for energy saving cook ing and this is indicated in the display during operation with ECO For crispy results use a dark enamelled tray 5 4 Bottom heat Temperature range 4 levels Recommended value Medium level 2 Level 1 The cooking space is heated by the bottom heating element Uses Finish off baking Preserving bott...
Страница 31: ...nutes using the option be fore introducing the food 5 7 Grill forced convection Temperature range 30 280 C Recommended value 200 C Level 2 The cooking space is heated by the grill element The hot air fan distributes the air evenly in the cooking space Uses Whole chicken Large bulky food for grilling Place the food to be grilled directly on the wire shelf or in porcelain or glass cook ware Line the...
Страница 32: ...ct a lower temperature reduce by approximately 20 C than for as the heat transfer is more efficient 5 10 Hot air eco Temperature range 30 250 C Recommended value 180 C Level 2 or 1 3 This application is particularly energy efficient A heating element behind the back wall of the cooking space heats up the air inside the cooking space which is circulated evenly Any moisture that escapes from the foo...
Страница 33: ...heating or the cooking space il lumination Selecting and starting Long touch the display The start screen appears Select the Sabbath application group and confirm with OK if required see page 15 Select the desired application and confirm with OK The settings for the desired application appear in the display Make any desired settings see page 19 Press Start to start the chosen application The appli...
Страница 34: ...G Home is not available during operation Sabbath top bottom heat Temperature range 30 140 C Recommended value 85 C Level 2 The cooking space is heated by the top and bottom heating elements Uses For heating up or keeping pre cooked crispy food and bakery goods warm on one level Bread pizza and aperitif nibbles Low temperature cooking For crispy results use a dark enamelled tray Sabbath top bottom ...
Страница 35: ...tart if required see page 18 Select a duration of at least 30 minutes Press Start to start Plate warmer The Plate warmer ends automatically when the set duration is up 5 14 Recipe book The following recipe book is available for this appliance Baking With a passion for detail Recipes that are tailored to your appliance can be found in the recipe book They are pre programmed in the appliance and onc...
Страница 36: ...tep 2 Action Preheat 10min Recipe requiring preheating Do not put the food in until the appliance has finished preheating 180 C OK If you want to set a delayed start for a recipe that does not require preheating the first action step must be skipped This only indicates in which shelf position the food should be put As it has to be confirmed with OK this step must be skipped for a delayed start Pro...
Страница 37: ...al set up When establishing a connection stay close to your household appliance and have the password for your wireless network at the ready Installing the app Enable bluetooth and location determination on the smartphone or tablet Search the Google PlayTM Store or the App Store for V ZUG Install and open the V ZUG App Enabling the V ZUG Home mode on the appliance Set to the Display or Operate and...
Страница 38: ...rated after first en tering a code The code is displayed in reverse order when unlocking The childproof lock is activated within 1 minute of the appliance being switched off 7 4 Display Colour scheme It is possible to choose between a light or dark colour scheme for the display Brightness The brightness of the display can be changed Background The background of the display can be changed Choose wh...
Страница 39: ...heit Sabbath mode Activates the Sabbath applications on the start screen 7 7 Assistance functions Illumination If set to On the cooking space illumination pulses when there is a new message dur ing operation Touch the symbol to switch the illumination on or off at any time If the illumination is not switched off it will go off automatically within 3 minutes to save energy Preheat tone If set to On...
Страница 40: ...ation and real time clock RTC 7 9 V ZUG Home Mode It is possible to choose between Off Display and Operate and display To connect the appliance to V ZUG Home Display or Operate and display must be selected Displaying information Displays all relevant information for the connection Restarting interface The interface can be reset if difficulties are experienced establishing a connection Resetting Di...
Страница 41: ...ting Resets all EcoManagement counters except for total consumption 7 13 Customer Services This part of the menu is intended for service staff and is password protected 8 Care and maintenance Risk of burns from hot surfaces Allow the appliance and the accessories to cool down before cleaning Incorrect handling can result in damage to the appliance Use soft cloths only Do not use any abrasive alkal...
Страница 42: ...s without pyrolysis Use a commercially available oven cleaner and follow the manufacturer s instructions 8 3 Cleaning the baking tray Non stick properties can be adversely affected Do not use any abrasive acidic or highly alkaline cleaning agents Do not scour the surface Remove any soiling or residues of cleaning solution immediately 8 4 Cleaning the appliance door Clean the appliance door with a ...
Страница 43: ...ce door will not close properly check the clips 2 Do not force the appliance door closed 3 1 2 Ensure that the appliance door is pushed in as far as it will go otherwise the appli ance could get damaged when it is closed Cleaning the door glass Lay the appliance door on a clean flat surface covered e g with a tea towel with the handle facing down Make sure the handle does not come into contact wit...
Страница 44: ... 2 3 Insert the outer door glass 1 into the door frame and gently push it back towards the hinges The outer door glass 1 can only be put back if positioned correctly with the shiny surface on the outside 1 8 5 Cleaning the door seal Clean the door seal with a soft cloth dampened with water but do not use any clean ing agent Dry with a soft cloth 8 6 Replacing the door seal We generally recommend t...
Страница 45: ...or seal into the groove all around i e at the top bottom left and right 1 2 3 4 X 8 7 Replacing the halogen light bulb WARNING Risk of electric shock Disconnect the appliance from the mains power supply before replacing the halo gen light bulb Risk of burns from hot surfaces Allow the halogen light bulb and the appliance to cool down before replacing the halogen light bulb Do not touch the halogen...
Страница 46: ... 2 back into its fix ture Replace the shelf guides Reconnect the power supply 2 8 8 Cleaning the accessories and shelf guides The wire shelf and shelf guides can be cleaned in the dishwasher The baking tray can be cleaned in the dishwasher however this will affect its non stick properties Removing and putting back the shelf guides When inserting the shelf guides take care not to damage the enamel ...
Страница 47: ...ices UX EXX Disruption in the power supply Acknowledge the error message by touching OK Switch the power supply off for about 1 minute Switch the power supply back on If the error appears again note down the error message in full along with the serial number SN of the appli ance see page 49 Disconnect from the power supply Contact Customer Services 9 2 Other possible problems Problem Possible caus...
Страница 48: ...ded in EasyCook Grill setting is too high Reduce grill setting The appliance makes noises during opera tion Appliance can make noises at any time during operation e g switching pumping and fan noises Such noise is normal Clock is not running cor rectly Irregular mains fre quency Turn off the mains synchronization Or Connect the appliance to the internet The time is automatically synchron ized Inte...
Страница 49: ...he appliance Ordering spare parts is subject to charge except in the event of warranty claims Please give the product family of the appliance and exact designation of the accessory or spare part when ordering parts 10 1 Accessories Baking tray Wire shelf EasyCook brochure Bedienungsanleitung Einstelltipps 10 2 Special accessories Information at www vzug com 10 3 Spare parts Shelf guides left right...
Страница 50: ...itable for checking the accuracy of the temperature 11 4 Product fiche In accordance with EU Regulation No 66 2014 Brand V ZUG Ltd Type of appliance Compact oven Model designation C2T Mass of SMS 55 appliance kg Mass of EURO 60 appliance kg 31 Number of cavities 1 Heat source per cavity Electricity Volume per cavity l 43 Energy consumption in conventional mode 1 kWh cycle 0 74 Energy consumption i...
Страница 51: ...a lower temperature and adjust the operating time If using and check that the levels used corres pond to those recommended in EasyCook Do not push baking tins or bulky foodstuff right to the back of the cooking space The baking has come out lighter on one baking tray than on the other Check that the settings used correspond to those recom mended in EasyCook Some uneven browning is normal More even...
Страница 52: ...sconnect the appliance from the mains With a fixed appliance this is to be carried out by a qualified electrician Then cut the mains cable off flush with the appliance 13 3 Disposal The crossed out wheeled bin symbol requires the separate collection of waste electrical and electronic equipment WEEE Such equipment can contain hazardous environmentally harmful materials These appliances are to be ha...
Страница 53: ...ppliance door 42 Baking tray 42 Cooking space 42 Door glass 43 Door seal 44 Shelf guides 46 Cleaning the exterior 41 Clock 25 Hiding 25 Hiding during operation 18 Showing 25 Showing during operation 17 Clock design 40 Construction 10 Cooking space 12 Temperature measurement 50 D Date and time Automatic summer winter time adjustment CEST CET 39 Clock 40 Clock synchronization 40 Date 39 Date and tim...
Страница 54: ...elements 10 Operating time 17 Setting 17 Operation 14 Options 19 Selecting 19 Starting 19 Other possible problems 47 Overhead illumination 45 P Pinning 22 Main value 23 Resetting a main value 23 PizzaPlus 30 Power failure 48 Power interruption 48 Preheating 20 Turning on 20 Problems 47 Product fiche 50 Q Queries 59 Quick information Displaying 14 Quick instructions 60 Quiet mode 25 Turning off 25 ...
Страница 55: ...49 Temperature sensor 12 Testing institutes 50 Timer 23 Changing 24 Checking 24 Setting 23 Starting 23 Switching off before time 24 Tips and tricks 51 Top bottom heat 29 Top bottom heat eco 30 Top bottom heat humid 29 Type 2 U U and E messages 47 Uneven browning 51 Unsatisfactory cooking results 51 User settings 38 Adjusting 38 Appliance information 40 Childproof lock 38 Customer Services 41 Date ...
Страница 56: ...56 15 Notes ...
Страница 57: ...57 ...
Страница 58: ...58 ...
Страница 59: ...nd appliance designation to register your appliance You will find them on the identification plate of your appliance My appliance information SN __________________________ Appliance ______________________________ Please have this appliance information to hand when contacting V ZUG Thank you Open the appliance door The identification plate is located on the left side panel Your repair order Call th...
Страница 60: ... CircleSlider Adjustable value On Off Touch the display to switch the appliance on Long press and hold the function button to switch the appliance off Operation The appliance is operated using the display Place your finger on the CircleSlider and move it in a circle Favourite V ZUG Ltd Industriestrasse 66 CH 6302 Zug Tel 41 58 767 67 67 Fax 41 58 767 61 61 info vzug com www vzug com Service Centre...