29
Schri� 6: Geben Sie Ihre V-TAC Smart
Light-Login-ID und Ihr Kennwort ein und
�ppen Sie auf „Link Now“.
Schri� 7: Wenn Sie auf Jetzt verknüpfen
klicken, werden Sie auf eine neue Seite
umgeleitet, die Sie zur Autorisierung
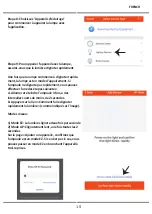
auffordert (Bild unten). Tippen Sie auf
"Authorize".
Schri� 8: Sie erhalten eine Bestä�gung,
daß das Konto erfolgreich verknüp� wurde
(siehe Bild unten).
Schri� 5: Ak�vieren Sie die Fähigkeit.
GERMAN
Содержание SMART LIGHT Series
Страница 37: ...4 V TAC Smart Light Register 5 A Next B Next 6 Con rm BULGARIAN 36 7...
Страница 38: ...BULGARIAN 37 9 A 3 2 B 1 EZ 2 AP 2 EZ EZ WiFi 8...
Страница 39: ...10 9 12 BULGARIAN 38 11...
Страница 41: ...40 6 V TAC Smart Light Link Now 7 Link Now Authorize 8 5 BULGARIAN...
Страница 45: ...7 a b b 8 9 Google Home Account is now Linked a b BULGARIAN 44...
Страница 103: ...4 V TAC Smart Light Register account 5 A Next B Next 6 account Con rm 7 GREEK 102...
Страница 104: ...8 9 3 2 1 EZ 2 AP 2 Wi Fi GREEK 103...
Страница 105: ...10 9 11 12 OFF dimming GREEK 104...
Страница 107: ...5 6 V TAC Smart Light Link Now 7 Link Now Authorize 8 account GREEK 106...
Страница 110: ...GREEK 3 V TAC Smart Light 3 4 V TAC Smart Light V TAC Smart Light 5 V TAC Smart Light 6 V TAC Smart Light 109...
Страница 111: ...Account is now Linked a b GREEK 7 a b b 8 9 Google Home 110...


