background image

Assembly

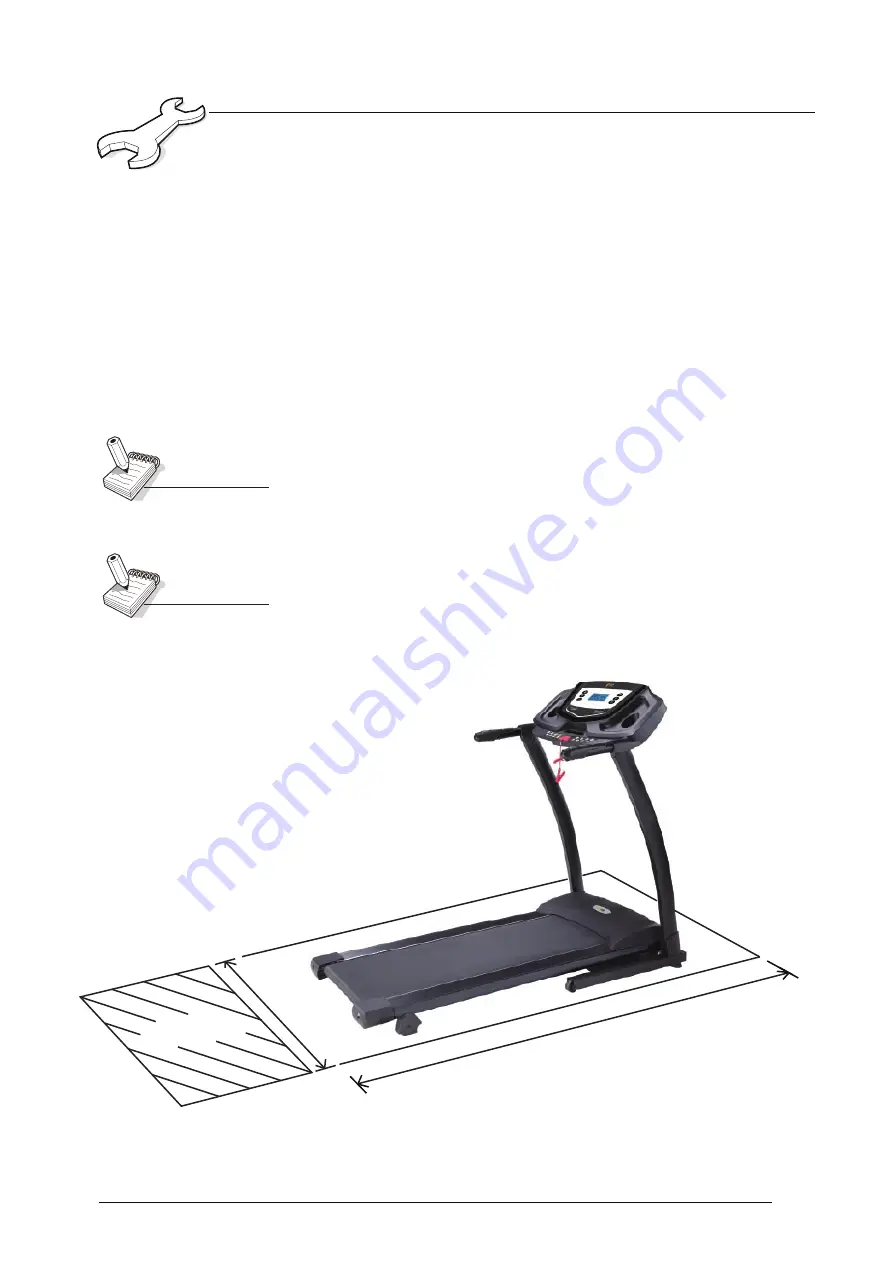
Overview Drawing

The free space required around
your product

Note

The foot print for this product is
1650mm x 800mm.
The assembled weight is 46kg. 

Note

USING THE SAFETY KEY

You will need to install the SAFETY KEY (11) in order to operate your product.  
This acts as an emergency STOP should you encounter any difficulties.

SETTING UP THE SAFETY KEY

With the product switched off, place the Safety Key (11) into the recess in the 
front of the Computer Console.  Extend the Safety Key chord until you can 
stand with both feet on the rear of the Running Belt with your heels on the Rear 
Roller, clip the chord to your clothing and take up the slack in the chord until it’s 
tight.  The idea is if you stumble or fall, the Safety Key will pull out and stop the 
treadmill.  You can test this by standing in the normal position you would use 
the product, take a step backwards and the Safety Key should pull out.

Safety Area

800mm

1650mm

Page 1

0

Содержание PT141

Страница 1: ...KPT2246 UK Assembly User Manual Please ensure that you read this manual carefully before attempting to assemble or use your new product and retain for future use PT141 Motorised Folding Programmable...

Страница 2: ...tents Section Page General Information 3 Before You Start 4 Safety 5 Exercise Information 7 Assembly 10 User Instructions 15 Protect the environment by not disposing of this product with household was...

Страница 3: ...guarantee both given and implied applies to the original purchaser only is not transferable and will be invalidated if used outside of the above criteria This guarantee is valid only in the United Ki...

Страница 4: ...f the components may be large heavy or awkward to handle alone Open the Carton Carefully open the carton that contains your product taking note of the warnings printed on the carton to ensure that the...

Страница 5: ...ou are in any doubt do not use your product but contact CUSTOMER SUPPORT by any of the means listed on the opposite page Before use always ensure that your product is positioned on a solid flat surfac...

Страница 6: ...the manufacturer 4 Never operate this Treadmill if it has a damaged cord or plug if it is not working properly if it has been dropped or damaged or dropped into water Contact Customer Support 5 Do no...

Страница 7: ...pply of oxygen to your muscles via the blood pumped by your heart With regular exercise your cardiovascular system will become stronger and more efficient Your recovery rate i e the time taken for you...

Страница 8: ...nds and then relax Repeat each stretch two or three times Do this before your Aerobic Exercise session and also after you have finished Head Roll Rotate your head to the right for one count feeling a...

Страница 9: ...h Open both arms to the side and gently lift them above your head Reach your right arm as high as you can for one count gently stretching the muscles of the stomach and lower back Repeat the action wi...

Страница 10: ...t switched off place the Safety Key 11 into the recess in the front of the Computer Console Extend the Safety Key chord until you can stand with both feet on the rear of the Running Belt with your hee...

Страница 11: ...comp lete the assembly of your product Item A2 Qty 4 The following accessories are supplied in a pack and should be checked before attempting assembly Assembly Item A17 Qty 4 Item C1 Qty 4 Item A18 Q...

Страница 12: ...bly of your product Please note that some of the parts may be pre fitted to major components so please check carefully before contacting our CUSTOMER SUPPORT team In any event please do not return the...

Страница 13: ...18 A18 C4 C4 13 2 Secure the Left Right Uprights 4 5 to the Base Frame 13 using 4 x M8 x 20mm Allen Bolts A2 and 4 x M8 Flat Washers C1 in front Using 2 x M10 x 50mm Allen Bolts A18 and 2 x M10 Flat W...

Страница 14: ...M ITS FLAT POSITION ON THE FLOOR TO ENSURE THAT THE FRAME TRANSPORTATION WHEELS 37 RUN SMOOTHLY CAREFULLY MANOEUVER THE TREADMILL TO ITS DESIRED POSITION TREADMILL MOVING INSTRUCTIONS Page 14 TO FOLD...

Страница 15: ...weight it will be necessary periodically to lubricate the underside of the Running Belt To ensure that this is done successfully take the 5mm Allen Wrench and adjust the Rear Roller Location Bolts whi...

Страница 16: ...down 3 seconds then the treadmill starts the initial speed is 1 km h The LCD will show the speed accordingly Adjust the speed by pressing speed button on computer The speed will increase by 0 2 km h...

Страница 17: ...ppropriate program for you after processing the data You can press Body Fat to quit the test during operation and return to ready status g Press START STOP to enter program status The time starts to c...

Страница 18: ...User Instructions Page 18...

Страница 19: ...Page 19 Exercise Notes...

Страница 20: ...all position of the Speed Sensor 5mm max away from the Roller Drive or replace the Speed Sensor 2 Replace the Driver or Optocoupler 3 Replace the Driver ER02 Motor Overload Malfunction 1 Overload of i...

Страница 21: ...Page 21 Exercise Notes...

Страница 22: ...1 C2 21 15 14 16 20 19 2 3 A5 C6 2 8 A9 11 27 2 6 3 9 3 4 35 3 6 C7 C3 A6 2 5 29 43 C1 A 3 A8 38 1 B4 C1 B3 A3 C1 18 7 A5 C 6 8 3 1 9 6 A13 2 4 2 17 A13 A4 C1 B 4 A12 B4 C1 A11 C 1 45L A17 B2 4 5 45R...

Страница 23: ...er connecting plate L R 1 42 Adjustable foot pad 2 5 43 Fixed piece A1 M8 x 50mm Allen Bolt 2 A2 M8 x 20mm Allen Bolt 4 A3 M8 x 70mm Bolt 3 1 A4 M8 x 45mm Bolt A5 ST4 2 x 16mm Self Tapping Screw 9 A6...

Страница 24: ...orts Co UK Ltd CUSTOMER SUPPORT is open from 9 00am to 5 00pm from Monday to Friday Tel 01535 637711 E mail support benysports co uk Fax 01535 637722 Unit 8 Riparian Way The Crossings Cross Hills West...

Отзывы: