


© 2008 UTC RETAIL. All rights reserved.
11501020 Rev C
7
Install the Keyboard (M700 Keyboard shown)
1. Remove the keyboard from the box.
2. Remove all packing materials.
3. Turn the keyboard around to access the
keyboard ports. Plug the 6-pin mini-DIN into the
keyboard port located in the back.
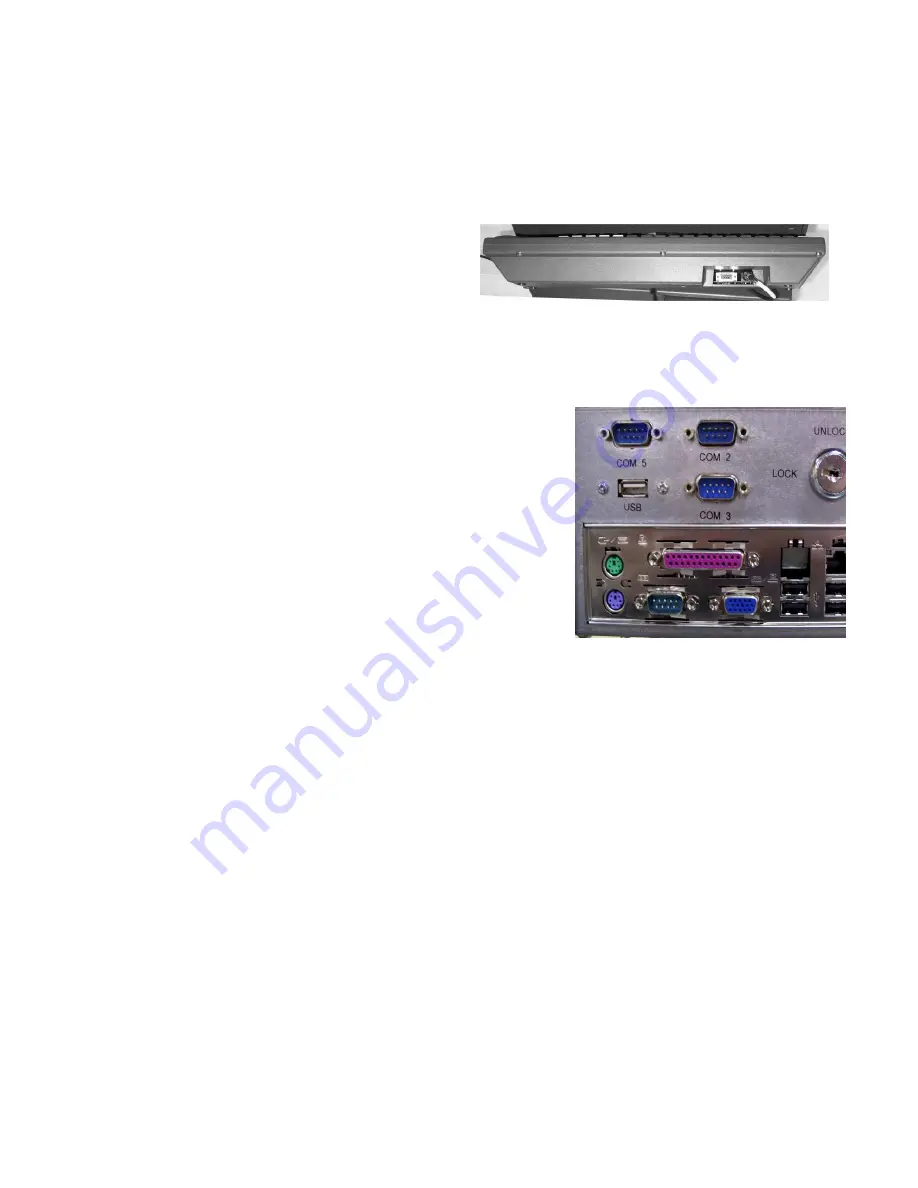
Connect Cables to 2200 Series POS Logic Unit Ports
1. Plug the 6-pin DIN cable into the keyboard port (Lower,
purple or blue port with keyboard icon) on the rear panel of
the unit.
2. Plug the mouse or touch pad into the upper green port which
shows a mouse icon.
3. Plug the printer data cable into COM port 1 (software
dependent).
4. Plug the SVGA LCD data cable into the Blue SVGA port.
5. Plug the touch screen interface cable (optional)
into COM port 2 (software dependent)
6. Plug the pole display data cable into COM3 port (software
dependent).
Complete Installation of 2200 Series POS System
1. Remove the plastic protective sheets from the pole display and the LCD Monitor.
2. Plug the power cord into a dedicated A/C outlet.
3. Turn on the power, using the on/off switch located on the front left-hand side of the 2200 Series
POS System.
4. To activate the printer, turn on the printer switch.
5. To activate the monitor, turn on the monitor switch.
6. To activate the logic unit, push the front ATX power button.
Note: The green LED above the ATX push-button switch begins to glow when the logic module is
activated.
You have completed the installation of UTC RETAIL’s 2200 Series Point of Sale System. If you
experience problems with any of the components of the 2200 Series POS System, see the
“Troubleshooting Procedures” section below.


