background image

Index-9

TCP/IP (IPv6)

11-36

Settings

8-44

Thin Print over SSL

Protocol Settings

8-45

ThinPrint

Protocol Settings

8-45

ThinPrint Option

11-8

Tone Curve Adjustment

8-58

10-41

Toner Container (Black)

2-4

Toner Container (Cyan)

2-4

Toner Container (Magenta)

2-4

Toner Container (Yellow)

2-4

Toner Container Release Lever

2-4

Toner Container Replacement

10-6

Touch Panel

3-4

Transfer Roller

Cleaning

10-5

TWAIN

11-38

Scanning using TWAIN

5-43

U

USB

11-38

USB cable

Connecting

2-9

USB Interface

2-7

USB Interface Connector (B1)

2-4

USB Keyboard

11-8

USB Keyboard Type

8-20

USB Memory

Printing

5-69

Remove

5-73

Save

5-71

USB Port (A1)

2-2

USB Port (A2)

2-4

User Login Setting

9-2

Adding a User

9-8

Changing User Properties

9-11

Group Authorization Set.

9-15

Guest Authorization Set.

9-18

Local Authentication

9-15

Local User List

9-8

Obtain NW User Property

9-21

Simple Login Settings

9-23

User Login/Job Accounting

Job Accounting Setting

9-27

Unknown ID Job

9-42

User Login Setting

9-2

User Property

8-54

W

Waste Toner Box Status

2-4

Waste Toner Tray

2-4

White space

6-51

WIA

11-38

Setting WIA Driver

2-20

Wireless Network Interface Kit

11-7

WSD Print

Protocol Settings

8-45

WSD Scan

Protocol Settings

8-45

X

XPS Fit to Page

Default

8-18

Z

Zoom

6-32

Default

8-17

Содержание 3005ci

Страница 1: ...User manual 3005ci 3505ci 4505ci 5505ci Copy Print Scan Fax A3 Digital Multifunctional Colour System ...

Страница 2: ...s needed so that the machine can always be used in the optimum condition Please read this Operation Guide before using the machine We recommend the use of our own brand supplies Please use our genuine toner containers which have passed rigorous quality control testing The use of non genuine toner containers may cause failure We will not be liable for any damages caused by the use of third party su...

Страница 3: ...ns Printer functions USB memory Send functions Document Box functions Fax functions Original Electronic data Fax data USB memory Output Data Application Security Input Data FAX Operation Guide This function is useful for a variety of purposes including saving data in the machine and in a USB memory stick Printing Data Saved on the Printer page 4 14 Using a Custom Box page 5 54 Embedded Web Server ...

Страница 4: ...nned in separate batches and then copied or sent as one job Continuous Scan page 6 58 Optimize your office workflow Save energy and cost Send one time with multiple sending options Multi Sending You can send a same document to the multiple destinations using a different method You can specify multiple destinations of different send methods such as E mail SMB and Fax You can reduce your workflow by...

Страница 5: ... 6 31 Create attractive documents Create a booklet Booklet It is useful when preparing handout You can create a magazine pamphlet or other booklet from sheet originals Facing page two sided copies of originals can be folded down the center to create a booklet The cover page can be printed onto colored paper or heavy paper Booklet page 6 41 Print a stamp on copies Text Stamp Bates Stamp It is usefu...

Страница 6: ...printing the document from the machine prevents someone takes your document Private Print Stored Job page 4 14 Strengthen security Use functions more efficiently Log in by ID card Card Authentication You can log in simply by touching an ID card You don t need to enter your user name and password Card Authentication Kit B Card Authentication Kit page 11 6 Strengthen security for administrator use V...

Страница 7: ...rint the document from the USB memory by plugging it directly into the machine Original scanned at the machine can be saved in the USB memory also Printing Documents Stored in Removable USB Memory page 5 69 Saving Documents to USB Memory Scan to USB page 5 71 Use functions more efficiently Specify image file format Scan Format You can select the various file formats when sending storing images Fil...

Страница 8: ...as follows For details refer to Color Selection page 6 24 Color mode Description Reference image Before After Auto Color Automatically recognizes whether a document being scanned or printed is color or black white Full Color Scans or prints a document in full color Grayscale Scans a document in grayscale Produces a smooth detailed image Black White Scans or prints a document in black white Single ...

Страница 9: ...more vivid One Touch Image Adjust Landscape Photo Blue page 6 28 Adjust the green landscape Example Change to yellow green One Touch Image Adjust Landscape Photo Green page 6 28 Produce overall image vividly One Touch Image Adjust Vivid page 6 28 Program Vivid Copy page 5 7 Remove dark background or bleed through from the original such as a newspaper Program Newspaper Copy page 5 6 Clearly reprodu...

Страница 10: ...on Saturation page 6 31 Adjust the image quality precisely Emphasize or blur the image outline Example Emphasize the image outlines Sharpness page 6 30 Darken or lighten the background the area with no texts or images of a document Example Lightening the background Background Density page 6 30 Prevent bleed through in 2 sided originals Prevent Bleed through page 6 31 Adjust the scanned image Decre...

Страница 11: ... and perform copy print and scan operations and indicates default settings and other information Use the fax functions FAX Operation Guide Explains how to use the fax function Use the ID card Card Authentication Kit B Operation Guide Explains how to perform authentication using the ID card Strengthen security Data Security Kit E Operation Guide Explains how to introduce and use the Data Security k...

Страница 12: ...for using the machine such as placing originals making copies sending documents and using user boxes 6 Using Various Functions Explains convenient functions that are available on the machine 7 Status Job Cancel Explains how to check the status of a job and the job history and how to cancel jobs being printed or waiting to print Also explains how to check paper and toner levels how to check the dev...

Страница 13: ...setting displayed on the touch panel or computer screen Ready to copy appears You can select from the Print size menu Click to move from the current page to the previously displayed page This is convenient when you want to return to the page from which you jumped to the current page Click an item in the Table of Contents to jump to the corresponding page CAUTION Indicates that personal injury or m...

Страница 14: ...dvanced Setup 㪪㪿㫆㫉㫋㪺㫌㫋㩷㪈 㪪㪿㫆㫉㫋㪺㫌㫋㩷㪋 㪪㪿㫆㫉㫋㪺㫌㫋㩷㪊 㪪㪿㫆㫉㫋㪺㫌㫋㩷㪉 㪪㪿㫆㫉㫋㪺㫌㫋㩷㪍 㪪㪿㫆㫉㫋㪺㫌㫋㩷㪌 Original Zoom Paper 100 Place original 㪧㫉㫆㪾㫉㪸㫄 100 A4 A4 Preview Original Zoom Paper Preview Staple Punch 㪥㫆㫉㫄㪸㫃㩷㪇 㪛㪼㫅㫊㫀㫋㫐 Paper Selection 㪘㫌㫋㫆 㪱㫆㫆㫄 㪈㪇㪇㩼 㪦㪽㪽 1 sided 1 sided 㪛㫌㫇㫃㪼㫏 㪦㪽㪽 㪚㫆㫄㪹㫀㫅㪼 Custom Box No Name Owner Used Add Edit Box 1 1 0001 SALES Anonymous Store File Detail Open Custom Box Search No Search Name Pro...

Страница 15: ...m Menu key Press Common Settings Press twice Press Next in Message Board Settings Press the System Menu key Common Settings twice and then Next in Message Board Settings System Menu Quick Setup Wizard Close Common Settings Copy Document Box Removable Memory Printer System Network Cassette MP Tray Settings Home Send FAX Report 1 2 Press or to scroll up and down User Login Job Accounting User Login ...

Страница 16: ...o indicate original and paper placement orientations on the touch panel Orientation Indicated size Original paper sizes that can be used vary depending on the function and source tray For details refer to Specifications on page 11 23 Vertical orientation Dimension Y of the original paper is longer than X A4 B5 A5 B6 A6 Letter Statement Horizontal orientation R Dimension Y of the original is shorte...

Страница 17: ...xvi About the Operation Guide this Guide ...

Страница 18: ...source Saving Paper 1 13 Environmental benefits of Power Management 1 13 Energy Star ENERGY STAR Program 1 14 2 Installing and Setting up the Machine 2 1 Part Names 2 2 Machine Exterior 2 2 Connectors Interior 2 4 With Optional Equipments Attached 2 5 Determining the Connection Method and Preparing Cables 2 6 Connection Example 2 6 Preparing Necessary Cables 2 7 Connecting Cables 2 8 Connecting LA...

Страница 19: ...unctions Magnifying the View 3 13 Energy Saver function 3 14 Low Power Mode and Auto Low Power Mode 3 14 Sleep and Auto Sleep 3 15 Loading Paper 3 16 Before Loading Paper 3 17 Loading in the Cassettes 3 18 Loading Paper in the Multi Purpose Tray 3 26 Paper stopper 3 29 Specifying Paper Size and Media 3 30 Preparation for Sending a Document to a PC 3 35 Making a note of the computer name and full c...

Страница 20: ... computer 5 20 Copying 5 21 Basic Operation 5 21 Reserve Next 5 23 Interrupt Copy 5 24 Sending 5 25 Basic Operation 5 26 Specifying Destination 5 28 Checking and Editing Destinations 5 36 Confirmation Screen of Destinations 5 37 Sending to Different Types of Destinations Multi Sending 5 38 WSD Scan DSM Scan 5 39 Scanning using TWAIN 5 43 Scanning a document placed in the machine 5 43 Scanning a do...

Страница 21: ... Output 6 22 Density 6 22 Original Image 6 23 EcoPrint 6 24 Color Selection 6 24 Color Balance 6 26 Hue Adjustment 6 27 One touch Image Adjust 6 28 Sharpness 6 30 Background Density Adj 6 30 Saturation 6 31 Prevent Bleed thru 6 31 Zoom 6 32 Combine 6 36 Margin Centering Margin Centering 6 38 Border Erase 6 39 Booklet 6 41 Duplex 6 44 Cover 6 47 Form Overlay 6 48 Page 6 49 Memo Page 6 51 Poster 6 5...

Страница 22: ...ing the Detailed Information of Histories 7 13 Sending the Log History 7 13 Pause and Resumption of Jobs 7 14 Canceling of Jobs 7 14 Priority Override for Waiting Jobs 7 15 Reordering Print Jobs 7 16 Device Communication 7 17 Removing the USB Memory 7 18 Canceling FAX Communication 7 19 Checking the Remaining Amount of Toner and Paper Paper Supplies 7 20 8 Setup and Registration System Menu 8 1 Sy...

Страница 23: ...ault Setting 9 36 Counting the Number of Pages Printed 9 38 Apply Limit 9 41 Copier Printer Count 9 41 Unknown ID Job 9 42 10 Troubleshooting 10 1 Regular Maintenance 10 2 Cleaning 10 2 Toner Container Replacement 10 6 Waste Toner Box Replacement 10 9 Replacing Staples 10 12 Disposing of the Punch Waste 10 16 Troubleshooting 10 18 Solving Malfunctions 10 18 Responding to Messages 10 24 Adjustment ...

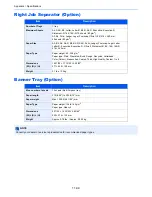
Страница 24: ...apacity Side Feeder 500 1 500 sheet x 2 Option 11 29 Side Feeder 3 000 sheet Option 11 30 1 000 sheet Finisher Option 11 30 4 000 sheet Finisher Option 11 31 Hole Punch Unit Option 11 31 Mailbox Option 11 32 Center Folding Unit Option 11 32 Inner Job Separator Option 11 33 Inner Job Separator JS 732 Option 11 33 Right Job Separator Option 11 34 Banner Tray Option 11 34 Glossary 11 35 Index Index 1...

Страница 25: ... page 6 19 Punch page 6 20 Paper Output page 6 22 Color Image Quality Density page 6 22 Original Image page 6 23 EcoPrint page 6 24 Color Selection page 6 24 Color Balance page 6 26 Hue Adjustment page 6 27 One touch Image Adjust page 6 28 Sharpness page 6 30 Background Density Adj page 6 30 Saturation page 6 31 Prevent Bleed thru page 6 31 Layout Edit Zoom page 6 32 Combine page 6 36 Margin Cente...

Страница 26: ...mp page 6 56 Advanced Setup Continuous Scan page 6 58 Auto Image Rotation page 6 59 Negative Image page 6 59 Mirror Image page 6 59 Job Finish Notice page 6 60 File Name Entry page 6 60 Priority Override page 6 61 Repeat Copy page 6 61 OHP Backing Sheet page 6 62 DP Read Action page 6 63 Skip Blank Page page 6 63 Program page 5 6 ...

Страница 27: ...page 6 12 Mixed Size Originals page 6 14 2 sided Book Original page 6 64 Original Orientation page 6 16 Sending Size page 6 65 File Format page 6 66 File Separation page 6 69 Long Original refer to FAX Operation Guide Color Image Quality Density page 6 22 Original Image page 6 23 Scan Resolution page 6 69 FAX TX Resolution refer to FAX Operation Guide Color Selection page 6 24 Sharpness page 6 30 ...

Страница 28: ...e Entry page 6 60 E mail Subject Body page 6 69 i FAX Subject Body refer to FAX Operation Guide FAX Direct Transmission refer to FAX Operation Guide FAX Polling RX refer to FAX Operation Guide Send and Print page 6 70 Send and Store page 6 70 FTP Encrypted TX page 6 71 Text Stamp page 6 54 Bates Stamp page 6 56 File Size Confirmation page 6 71 FAX TX Report refer to FAX Operation Guide Program pag...

Страница 29: ... Size page 6 72 Prevent Bleed thru page 6 31 Density page 6 22 Original Image page 6 23 Scan Resolution page 6 69 Color Selection page 6 24 Sharpness page 6 30 Background Density Adj page 6 30 Zoom page 6 32 Centering page 6 38 Border Erase page 6 39 Continuous Scan page 6 58 Job Finish Notice page 6 60 File Name Entry page 6 60 Program page 5 6 Detail page 5 49 Custom Box ...

Страница 30: ...age 6 49 Job Finish Notice page 6 60 File Name Entry page 6 60 Delete after Printed page 6 71 Priority Override page 6 61 EcoPrint page 6 24 Zoom page 6 32 Fold page 6 17 Text Stamp page 6 54 Bates Stamp page 6 56 Color Balance page 6 26 Hue Adjustment page 6 27 One touch Image Adjust page 6 28 Saturation page 6 31 Color Image Quality Density page 6 22 Original Image page 6 23 Color Selection page...

Страница 31: ...ansmitted page 6 71 Zoom page 6 32 File Separation page 6 69 Text Stamp page 6 54 Bates Stamp page 6 56 File Size Confirmation page 6 71 FAX TX Report refer to FAX Operation Guide Color Image Quality Density page 6 22 Original Image page 6 23 Resolution page 6 69 Color Selection page 6 24 Sharpness page 6 30 Background Density Adj page 6 30 Prevent Bleed thru page 6 31 Program page 5 6 Join page 5...

Страница 32: ...ffset page 6 18 Staple Punch page 6 19 Staple page 6 19 Punch page 6 20 Paper Output page 6 22 Margin page 6 38 Duplex page 6 44 Job Finish Notice page 6 60 Priority Override page 6 61 EcoPrint page 6 24 Fold page 6 17 Text Stamp page 6 54 Bates Stamp page 6 56 Encrypted PDF Password page 6 72 JPEG TIFF Print page 6 73 XPS Fit to Page page 6 73 Color Image Quality Color Selection page 6 24 Job Box...

Страница 33: ...6 23 Scan Resolution page 6 69 Color Selection page 6 24 Sharpness page 6 30 Background Density Adj page 6 30 Zoom page 6 32 Centering page 6 38 Border Erase page 6 39 Continuous Scan page 6 58 Job Finish Notice page 6 60 File Name Entry page 6 60 File Format page 6 66 File Separation page 6 69 Text Stamp page 6 54 Bates Stamp page 6 56 Delete page 5 50 Detail page 5 49 Memory Information page 5 7...

Страница 34: ...xxxiii Menu Map or Printing Jobs page 7 4 Sending Jobs page 7 6 Storing Jobs page 7 7 Device Communication page 7 17 Paper Supplies page 7 20 Status Job Cancel ...

Страница 35: ...8 9 Default Screen page 8 9 Sound Buzzer page 8 9 FAX Speaker Volume refer to FAX Operation Guide FAX Monitor Volume refer to FAX Operation Guide Keyboard Layout page 8 10 Original Paper Settings Custom Original Size page 8 10 Custom Paper Size page 8 10 Media Type Setting page 8 10 Default Paper Source page 8 11 Auto Detect Original Size page 8 11 Media for Auto Color page 8 11 Media for Auto B W...

Страница 36: ...iginal Orientation page 8 17 Original Image Copy page 8 17 Org Image Send Store page 8 17 Scan Resolution page 8 17 FAX TX Resolution refer to FAX Operation Guide Color Selection Copy page 8 17 Color Select Send Store page 8 17 File Format page 8 17 File Separation page 8 17 Backgrnd Density Copy page 8 17 BackgrndDens Send Store page 8 17 Prevent Bleed thru Copy page 8 17 Prevent Bleed Send Store...

Страница 37: ... 19 DP Read Action page 8 19 OCR Text Recognition page 8 19 Primary OCR Language page 8 19 Auto Image Rotation OCR page 8 19 Repeat Copy page 8 20 Skip Blank Page page 8 20 USB Keyboard Type page 8 20 System Stamp page 8 20 Manual Staple page 8 24 Offset Documents by Job page 8 24 Low Toner Alert Level page 8 25 Display Status Log page 8 25 Message Banner Print page 8 25 Customize Status Display p...

Страница 38: ...or Type page 8 29 Entry Check for New Dest page 8 29 Default Screen page 8 29 Send and Forward page 8 30 New Destination Entry page 8 30 Recall Destination page 8 30 OCR Text Recognition Act page 8 30 HighCompressionPDF Mode page 8 30 Document Box Removable Memory Custom Box page 5 54 FAX Box refer to FAX Operation Guide Job Box Quick Copy Job Retention page 8 34 Repeat Copy Job Retention page 8 3...

Страница 39: ...e page 8 37 Font List page 8 37 Network Status page 8 37 Service Status page 8 38 Optional Network Status page 8 38 Admin Report Settings Outgoing FAX Report refer to FAX Operation Guide Incoming FAX Report refer to FAX Operation Guide Result Report Settings Send Result Report page 8 38 FAX RX Result Report refer to FAX Operation Guide Job Finish Notice Setting refer to FAX Operation Guide RX Resu...

Страница 40: ...estination page 8 42 Subject page 8 42 System Network Network Host Name page 8 43 TCP IP Setting TCP IP page 8 43 IPv4 page 8 43 IPv6 page 8 44 Bonjour page 8 44 IPSec page 8 44 Protocol Settings SMTP E mail TX page 8 45 POP3 E mail RX page 8 45 FTP Client Transmission page 8 45 FTP Server Reception page 8 45 SMB Client Transmission page 8 45 NetBEUI page 8 45 WSD Scan page 8 45 WSD Print page 8 4...

Страница 41: ...ork page 8 48 Network Interface Send page 8 49 Security Level page 8 49 Interface Block Setting USB Host page 8 50 USB Device page 8 50 USB Storage page 8 50 Optional Interface 1 page 8 50 Optional Interface 2 page 8 50 Data Security page 8 50 Document Guard page 8 51 Optional Function page 8 52 Restart Entire Device page 8 52 Edit Destination Address Book page 3 45 One Touch Key page 3 53 Print L...

Страница 42: ... 18 Guest Property page 9 18 Obtain NW User Property page 9 21 Simple Login Settings Simple Login page 9 23 Simple Login Key page 9 23 ID Card Settings Keyboard Login page 9 26 Password Login page 9 26 Job Accounting Setting Job Accounting page 9 29 Job Accounting Access page 9 30 Job Accounting Local Print Accounting Report page 9 31 Total Job Accounting page 9 38 Each Job Accounting page 9 39 Ac...

Страница 43: ... Weekly Timer Settings page 8 56 Adjustment Maintenance Density Adjustment Copy page 8 57 Send Box page 8 57 FAX refer to FAX Operation Guide Background Density Adj Copy Auto page 8 57 Send Box Auto page 8 57 Drum Refresh page 8 57 Correcting Black Lines page 8 57 System Initialization page 8 57 Display Brightness page 8 57 Silent Mode page 8 57 Memory Diagnostics page 8 57 Auto Color Correction p...

Страница 44: ...xliii Menu Map ...

Страница 45: ...entions in This Guide 1 2 Environment 1 3 Precautions for Use 1 4 Laser Safety Europe 1 5 Legal Restriction on Copying Scanning 1 6 EN ISO 7779 1 6 EK1 ITB 2000 1 6 Legal Information 1 7 Energy Saving Control Function 1 13 Automatic 2 Sided Copy Function 1 13 Resource Saving Paper 1 13 Environmental benefits of Power Management 1 13 Energy Star ENERGY STAR Program 1 14 ...

Страница 46: ...tention are indicated inside the symbol General warning Warning of high temperature The symbol indicates that the related section includes information on prohibited actions Specifics of the prohibited action are indicated inside the symbol Warning of prohibited action Disassembly prohibited The symbol indicates that the related section includes information on actions which must be performed Specif...

Страница 47: ...arning for high temperature Adjust the room temperature or Warning for low temperature Adjust the room temperature To use the machine under optimum conditions adjust the temperature and the humidity of your room if the message is displayed Avoid locations near a window or with exposure to direct sunlight Avoid locations with vibrations Avoid locations with drastic temperature fluctuations Avoid lo...

Страница 48: ...ontact a physician If you do happen to get toner in your eyes flush them thoroughly with water If there is any remaining tenderness contact a physician If toner does happen to get on your skin wash with soap and water Do not attempt to force open or destroy parts which contain toner Other precautions Return the exhausted toner container and waste toner box to your dealer or service representative ...

Страница 49: ...he normal operation of the product by user no radiation can leak from the machine This machine is classified as Class 1 laser product under IEC EN 60825 1 2007 Caution Performance of procedures other than those specified in this manual may result in hazardous radiation exposure These labels are attached to the laser scanner unit inside the machine and are not in a user access area The label shown ...

Страница 50: ... Paper money Bank note Securities Stamp Passport Certificate Local laws and regulations may prohibit or restrict copying scanning of other items not mentioned above EN ISO 7779 Maschinenlärminformations Verordnung 3 GPSGV 06 01 2004 Der höchste Schalldruckpegel beträgt 70 dB A oder weniger gemäß EN ISO 7779 EK1 ITB 2000 Das Gerät ist nicht für die Benutzung im unmittelbaren Gesichtsfeld am Bildsch...

Страница 51: ...ess Machines Corporation AppleTalk Bonjour Macintosh and Mac OS are trademarks of Apple Inc registered in the U S and other countries Helvetica Palatino and Times are registered trademarks of Linotype GmbH ITC Avant Garde Gothic ITC Bookman ITC ZapfChancery and ITC ZapfDingbats are registered trademarks of International Typeface Corporation UFST MicroType fonts by Monotype Imaging Inc are installe...

Страница 52: ...openssl org THIS SOFTWARE IS PROVIDED BY THE OpenSSL PROJECT AS IS AND ANY EXPRESSED OR IMPLIED WARRANTIES INCLUDING BUT NOT LIMITED TO THE IMPLIED WARRANTIES OF MERCHANTABILITY AND FITNESS FOR A PARTICULAR PURPOSE ARE DISCLAIMED IN NO EVENT SHALL THE OpenSSL PROJECT OR ITS CONTRIBUTORS BE LIABLE FOR ANY DIRECT INDIRECT INCIDENTAL SPECIAL EXEMPLARY OR CONSEQUENTIAL DAMAGES INCLUDING BUT NOT LIMITE...

Страница 53: ...ou return to Monotype Imaging Under the terms of this License Agreement you have the right to use the Fonts on up to three printers If you need to have access to the fonts on more than three printers you need to acquire a multiuser license agreement which can be obtained from Monotype Imaging Monotype Imaging retains all rights title and interest to the Software and Typefaces and no rights are gra...

Страница 54: ...e or promote products derived from this software without specific prior written permission THIS SOFTWARE IS PROVIDED BY THE COPYRIGHT HOLDERS AND CONTRIBUTORS AS IS AND ANY EXPRESS OR IMPLIED WARRANTIES INCLUDING BUT NOT LIMITED TO THE IMPLIED WARRANTIES OF MERCHANTABILITY AND FITNESS FOR A PARTICULAR PURPOSE ARE DISCLAIMED IN NO EVENT SHALL THE COPYRIGHT OWNER OR CONTRIBUTORS BE LIABLE FOR ANY DI...

Страница 55: ... free irrevocable except as stated in this section patent license to make have made use offer to sell sell import and otherwise transfer the Work where such license applies only to those patent claims licensable by such Contributor that are necessarily infringed by their Contribution s alone or by combination of their Contribution s with the Work to which such Contribution s was submitted If You i...

Страница 56: ...e the Work including but not limited to damages for loss of goodwill work stoppage computer failure or malfunction or any and all other commercial damages or losses even if such Contributor has been advised of the possibility of such damages 9 Accepting Warranty or Additional Liability While redistributing the Work or Derivative Works thereof You may choose to offer and charge a fee for acceptance...

Страница 57: ...used For more information refer to Duplex page 6 44 Printing in duplex mode reduces paper consumption and contributes to the conservation of forest resources Duplex mode also reduces the amount of paper that must be purchased and thereby reduces cost It is recommended that machines capable of duplex printing be set to use duplex mode by default Resource Saving Paper For the preservation and sustai...

Страница 58: ... the standards laid out in the International Energy Star Program ENERGY STAR is a voluntary energy efficiency program with the goal of developing and promoting the use of products with high energy efficiency in order to help prevent global warming By purchasing ENERGY STAR qualified products customers can help reduce emissions of greenhouse gases during product use and cut energy related costs ...

Страница 59: ... 13 Installing Printer Driver in Windows 2 14 Uninstalling the Software 2 16 Installing Printer Driver in Macintosh 2 17 Setting TWAIN Driver 2 19 Setting WIA Driver 2 20 Login Logout 2 21 Login 2 21 Logout 2 22 Default Settings of the Machine 2 23 Setting Date and Time 2 23 Network Setup LAN Cable Connection 2 25 Quick Setup Wizard 2 28 Checking the Counter 2 30 Additional Preparations for the Ad...

Страница 60: ...ator 3 Original Width Guides 4 Cleaning Cloth Compartment 5 Original Table 6 Original eject table 7 Original stopper 8 USB Port A1 9 Slit Glass 10 Original Size Indicator Plates 11 Platen 12 Operation Panel 13 Front Cover 14 Cassette 1 15 Cassette 2 16 Main Power Switch 17 Inner Tray 18 Paper stopper 19 Handles 2 1 13 3 4 5 6 7 8 9 10 11 12 14 15 19 16 1718 19 ...

Страница 61: ... Guide 22 Paper Width Guide Lock 23 Clip Holder 24 Right Cover 1 Lever 25 Right Cover 1 26 Right Cover 2 Lever 27 Right Cover 2 28 Paper Width Guide 29 Multi Purpose Tray 30 Support Tray Section of the Multi Purpose Tray 31 Right Cover 3 Lever 32 Right Cover 3 23 24 25 22 21 20 26 27 28 29 30 31 32 ...

Страница 62: ...tor 2 USB Port A2 3 USB Interface Connector B1 4 Option Interface 5 Toner Container Yellow 6 Toner Container Cyan 7 Toner Container Magenta 8 Toner Container Black 9 Toner Container Release Lever 10 Waste Toner Tray 11 Waste Toner Box 12 Release Button 13 Cleaning Brush 1 2 3 4 5 6 7 8 10 11 12 13 9 ...

Страница 63: ...3 Document Finisher 4 Folding Unit 5 Cassette 3 to 7 5 a Cassette 3 5 b Cassette 4 5 c Cassette 5 5 d Cassette 6 5 e Cassette 7 5 f Cassette 5 5 g Cassette 3 or 6 5 h Cassette 4 or 7 Optional Equipment page 11 2 6 Control Section of the Finisher Manual Staple page 5 74 2 3 5 a 5 b 5 5 f 5 h 5 c 5 d 5 e 5 g 4 6 1 ...

Страница 64: ...ith the optional wireless interface kit attached you do not need to connect the LAN cable Optional Network page 8 47 Administrator s PC Embedded Web Server RX Network settings Scanner default settings User and destination registration Printing Network FAX Option FAX Option USB Network Network Network Network Network Network Network MFP Send E mail Sends the image data of scanned originals to the d...

Страница 65: ...aces Connection Environment Function Necessary Cable Connect a LAN cable to the machine Printer Scanner Network FAX Function available when using optional fax kit For more information on using the Network FAX refer to the FAX Operation Guide Network Interface LAN 10BASE T or 100BASE TX 1000BASE T Shielded Connect a USB cable to the machine Printer USB2 0 compatible cable Hi Speed USB compliant Max...

Страница 66: ...1 Connect the LAN cable to the network interface connector 2 Connect the other end of the cable to the hub 2 Set up the machine Power on the machine and configure the network IMPORTANT If the power is on turn the main power switch off Power Off page 2 11 For details refer to Network Setup LAN Cable Connection on page 2 25 ...

Страница 67: ...tor B1 located on the left side of the body 2 Connect the other end of the cable to the PC Connecting the Power Cable Connect one end of the supplied power cable to the machine and the other end to a power outlet IMPORTANT If the power is on turn the main power switch off Power Off page 2 11 IMPORTANT Only use the power cable that comes with the machine ...

Страница 68: ...e main power switch on IMPORTANT When turning off the main power switch do not turn on the main power switch again immediately Wait more than 5 seconds and then turn on the main power switch NOTE If the optional Data Security Kit is activated a message might display indicating the security function is being activated and time may be taken to start up when the power is turned on Main Power indicato...

Страница 69: ...l be unable to automatically receive print data from computers or faxes 1 Press the Power key Verify that the Power key light has gone out and that the Main Power indicator is lit up Low Power Mode and Auto Low Power Mode page 3 14 Sleep and Auto Sleep page 3 15 IMPORTANT When the Processing indicator or Memory indicator is lit up or blinked the machine is operating Turning off the main power swit...

Страница 70: ...ernight turn it off at the main power switch If the machine will not be used for an even longer period of time e g vacation remove the power plug from the outlet as a safety precaution If the optional Fax kit is installed note that turning the machine off at the main power switch disables fax transmission and reception IMPORTANT Remove paper from the cassettes and seal it in the paper storage bag ...

Страница 71: ...iver This is a Microsoft MiniDriver that supports PCL and KPDL There are some restrictions on the machine features and option features that can be used with this driver TWAIN Driver Scan This driver enables scanning on the machine using a TWAIN compliant software application The machine has two types of TWAIN drivers one for scanning a document placed in the machine and one for reading document da...

Страница 72: ...the screen NOTE Installation on Windows must be done by a user logged on with administrator privileges When connected by USB cable Plug and Play is disabled on this device when in Sleep mode To continue the installation press the Power key to wake the device from Low Power Mode or Sleep before continuing The optional Fax Kit is required in order to make use of fax functionality WIA driver and Prin...

Страница 73: ... Driver page 2 19 NOTE The machine cannot be detected unless it is on If the computer fails to detect the machine verify that it is connected to the computer via a network or USB cable and that it is turned on and click Reload If the Windows security window appears click Install this driver software anyway NOTE When you have selected Device settings in Windows XP the dialog box for device setting ...

Страница 74: ...l Wizard 2 Uninstall the software Place a check in the check box of the software to be deleted 3 Finish uninstalling If a system restart message appears restart the computer by following the screen prompts This completes the software uninstallation procedure NOTE Uninstallation on Windows must be done by a user logged on with administrator privileges NOTE The software can also be uninstalled using...

Страница 75: ... completes the printer driver installation If a USB connection is used the machine is automatically recognized and connected If an IP connection is used the settings below are required NOTE Installation on MAC OS must be done by a user logged on with administrator privileges When printing from a Macintosh computer set the machine s emulation to KPDL or KPDL Auto For details refer to Printer on pag...

Страница 76: ... printer name 3 Select the options available for the machine and click Continue 4 The selected machine is added NOTE When using a Bonjour connection select Default and click the item that appears in Printer Name The driver with the same name as the machine automatically appears in Driver 1 2 1 2 3 The number entered in Address will automatically appear in Name Change if needed 1 2 ...

Страница 77: ...tact Administrator NOTE Click Delete to delete the added machine Click Edit to change names Enter the machine name Select this machine from the list To scan a document stored in a custom box in this machine select a model name with Box from Model Enter the machine s IP address or host name When user login administration is enabled Select the checkbox beside Authentication and enter Login User Name...

Страница 78: ...ngs and enter Scanner in the search box Click View scanners and cameras in the search list then the Scanners and Cameras screen appears 2 Select the same name as this machine from WIA Drivers and press Properties 2 Configure WIA Driver 1 2 Enter the machine IP addresses or host name 1 2 When user login administration is enabled Select the checkbox beside Authentication and enter Login User Name up...

Страница 79: ...ssword In this event login with administrator privileges and change your login user name or login password If the guest authentication setting is enabled the Authentication Logout key must be pressed when logging in For details refer to the Guest Authorization Set on page 9 18 Character Entry Method page 11 11 NOTE Keys can be pressed to enter the number with the numeric keys on the operation pane...

Страница 80: ...lly logged out in the following circumstances When the machine is put to Sleep by pressing the Power key When the Auto Sleep function is activated When the auto panel reset function is activated When Auto Low Power Mode is activated When the machine is placed in Low Power Mode by pressing the Energy Saver key NOTE If a login password is required an input screen will be displayed Simple Login page ...

Страница 81: ...able from System Menu refer to Setup and Registration System Menu page 8 1 NOTE If user login administration is enabled you can only change the settings by logging in with administrator privileges If user login administration is disabled the user authentication screen appears Enter a login user name and password and press Login The factory default login user name and login password are set as show...

Страница 82: ...e West 1 16 11 00 Samoa 10 00 Hawaii 09 00 Alaska 11 00 Universal Coordinated Time 11 08 00 Baja California Cancel OK 2 3 Press or to scroll up and down Date Timer Energy Saver Time Zone Set time zone Select the location nearest you Time Zone 08 00 Pacific Time US Canada 2 16 07 00 Arizona 07 00 Mountain Time US Canada 06 00 Guadalajara Mexico City Monterrey 07 00 Chihuahua La Paz Mazatlan 06 00 S...

Страница 83: ...ed you can only change the settings by logging in with administrator privileges If user login administration is disabled the user authentication screen appears Enter a login user name and password and press Login The factory default login user name and login password are set as shown below NOTE Ask your network administrator for the IP address in advance and have it ready when you configure this s...

Страница 84: ...Next Network Close Optional Network Network Interface Send Security Level Restart Entire Device Interface Block Setting Document Guard Data Security Optional Function Change Start Next Change Next Change Next Next 1 System Network Network Host Name Close TCP IP Setting Protocol Settings Security Settings LAN Interface Restart Network Change Change Next Next Start 2 System Network TCP IP Setting Ch...

Страница 85: ...Memory Printer System Network Cassette MP Tray Settings Home Send FAX Report 1 2 2 System Network Next Network Close Optional Network Network Interface Send Security Level Restart Entire Device Interface Block Setting Document Guard Data Security Optional Function Change Start Next Change Next Change Next Next 1 System Network Network Host Name Close TCP IP Setting Protocol Settings Security Setti...

Страница 86: ...Settings Weekly Timer Settings Schedule Retry Times Retry Interval FAX Setup Configures basic fax settings This function is displayed when the optional fax is installed Refer to the FAX Operation Guide NOTE If the user authentication screen appears enter your login user name and login password and press Login The factory default login user name and login password are set as shown below Model Name ...

Страница 87: ...12 Control Description End Exits the wizard Settings configured so far are applied Previous Returns to the previous item Skip Advances to the next item without setting the current item Next Advances to the next screen Back Returns to the previous screen Complete Register the settings and exit the wizard Quick Setup Wizard FAX Setup Close Next Energy Saver Setup Next End Next Energy Saver Setup Sle...

Страница 88: ...k the number of pages printed in each paper size by pressing Printed Pages by Paper Size 1 Counter Close Print Status Page Printed Pages Black White Total Printer Copy Scanned Pages Originals Total FAX Copy 1800 200 600 FAX Full Color SingleColor Total Others 1000 600 300 100 800 500 200 100 200 100 100 0 2000 1200 600 200 1000 Printed Pages by Paper Size Printed Pages by Layout ...

Страница 89: ...hine is equipped with user authentication function which can be configured to limit the access to this machine to only those who have a registered login name and password For each setting procedure refer to User Authentication and Accounting User Login Job Accounting page 9 1 I want to Function Reference page Restrict the users of the machine User Login page 9 2 Authentication Security page 9 6 Au...

Страница 90: ...ansmission from interception and wiretapping IPP over SSL page 8 45 HTTPS page 8 46 LDAP Security Refer to the Embedded Web Server RX User Guide SMTP Security Refer to the Embedded Web Server RX User Guide POP3 Security Refer to the Embedded Web Server RX User Guide FTP Encrypted TX page 6 71 Enhanced WSD SSL page 8 46 IPSec page 8 44 SNMPv3 page 8 46 Verify the software in the machine Software Ve...

Страница 91: ...ok External Address Book Settings One Touch Key Device Settings Configure the advanced settings of the machine Paper Feed Output Original Settings Energy Saver Timer Date Time System Function Settings Configure the advanced function settings Common Job Defaults Copy Printer E mail Scan to Folder DSM Scan FAX i FAX Send and Forward RX Forward Rules Operation Panel Network Settings Configure the net...

Страница 92: ...erver RX as well as their current status 2 Configure the function Select a category from the navigation bar on the left of the screen When you log in to the machine as an administrator you will see Device Settings Function Settings Network Settings Security Settings and Management Settings NOTE When connecting to Embedded Web Server RX a message may appear that reads There is a problem with the se...

Страница 93: ...Security Settings From the Security Settings menu select the setting you want to configure The configurable settings are Device Security Send Security Network Security and Certificates NOTE The configurable settings within Device Security Send Security and Network Security can also be configured from the machine s System Menu For details see Setup and Registration System Menu page 8 1 For details ...

Страница 94: ...mbedded Web Server RX on page 2 34 2 From the Device Settings menu press System 2 Specify the host name Under Device Settings enter the host name in Host Name and then click Submit IMPORTANT After changing the setting restart the network or turn the machine OFF and then ON To restart the network interface card click Reset in the Management Settings menu and then click Restart Network in Restart 3 ...

Страница 95: ...connect this machine to the mail server A full time connection via a LAN is recommended SMTP settings Use Embedded Web Server RX to register the IP address or host name of the SMTP server If limits have been set on the size of E mail messages it may not be possible to send very large E mails The procedure for specifying the SMTP settings is explained below 1 Display the screen 1 Access Embedded We...

Страница 96: ...the connection to the POP server times outs This can be set when POP before SMTP is selected in Authentication Protocol Connection Test Tests to confirm that the settings are correct Domain Restriction Set whether or not domains are restricted Click the Domain List and enter the domain names of addresses to be allowed or rejected Restriction can also be specified by e mail address POP3 Set to rece...

Страница 97: ...ss Enter the E mail address of the person responsible for the machine such as the machine administrator so that a reply or non delivery report will go to a person rather than to the machine The sender address must be entered correctly for SMTP authentication The maximum length of the sender address is 128 characters Signature Enter the signature The signature is free form text that will appear at ...

Страница 98: ...ded Web Server RX by referring to Accessing Embedded Web Server RX on page 2 34 2 From the Address Book menu click Machine Address Book 3 Click Add 2 Populate the fields 1 Enter the destination information Enter the information for the destination you want to register The fields to populate are the same as when registering on the machine 2 Click Submit Registering Destinations in the Address Book ...

Страница 99: ... Web Server RX by referring to Accessing Embedded Web Server RX on page 2 34 2 From the Document Box menu click Custom Box 3 Click Add 2 Configure the Custom Box 1 Enter the box details Enter the information for the custom box you want to register The fields to populate are the same as when registering on the machine 2 Click Submit Creating a New Custom Box Add Edit Box page 5 54 1 3 2 ...

Страница 100: ...e Address Book The Address Book registered on the machine can be backed up or migrated using the NETWORK PRINT MONITOR on the included DVD For details on operating the NETWORK PRINT MONITOR refer to the NETWORK PRINT MONITOR User Guide Backing Up Address Book Data to PC 1 Launch the NETWORK PRINT MONITOR 2 Create a backup 1 Right click on the model name from which you want to back up the Address B...

Страница 101: ...to back up and click Next 6 Click on Save to file 7 Specify the location to save the file enter the file name and then click Save For Save as type make sure to select XML File NOTE If the Admin Login screen appears enter the Admin Login and Login Password and then click OK The default settings are as follows Upper case and lower case letters are distinguished case sensitive 2 1 3 2 1 Login User Na...

Страница 102: ...that selecting Finish will write the data to the machine s Address Book Writing Address Book Data to the Machine 1 Launch the NETWORK PRINT MONITOR 2 Load the Address Book data 1 Right click on the model name to which you want to transfer the Address Book and select Advanced Set multiple devices 2 Click Next 3 Select Device Address Book and click Next 2 1 2 2 1 ...

Страница 103: ...ings on target device and then click Next Selecting the Overwrite settings on target device checkbox will overwrite the machine s Address Book from entry No 1 5 Click Browse and select the backup Address Book file and then click Next 6 Click Finish The write process of the Address Book data starts 7 Once the write process is complete click Close 2 1 3 2 1 ...

Страница 104: ...2 46 Installing and Setting up the Machine Transferring data from our other products ...

Страница 105: ...de and Auto Low Power Mode 3 14 Sleep and Auto Sleep 3 15 Loading Paper 3 16 Before Loading Paper 3 17 Loading in the Cassettes 3 18 Loading Paper in the Multi Purpose Tray 3 26 Paper stopper 3 29 Specifying Paper Size and Media 3 30 Preparation for Sending a Document to a PC 3 35 Making a note of the computer name and full computer name 3 35 Making a note of the user name and domain name 3 36 Cre...

Страница 106: ... view Displays the FAX screen Select the color mode Auto Color Automatically recognizes whether a document is color or black white and then scans the document Full Color Scans all documents in full color Black White Scans all documents in black white Numeric keys Enter numbers and symbols Clears entered numbers and characters Returns settings to their default states Specifies registered informatio...

Страница 107: ...3 3 Preparation before Use Using the Operation Panel Adjusting the Operation Panel Angle Adjust the angle of the operation panel in two as shown by releasing the operation panel lock lever 1 2 ...

Страница 108: ...out the current user This is displayed when user login administration is enabled 3 Message Displays the message depending on the status 4 Desktop Displays a maximum of 40 function icons including the functions registered in program Icons that are not displayed on the first page will appear by changing the page 5 Screen switching keys Use these buttons to switch between desktop pages NOTE You can a...

Страница 109: ...isplay Select the function to display and press OK Select an icon and press Previous or After to change the display position of the selected icon on the Desktop To delete a icon from desktop select the desired one and press Delete For details refer to Available Functions to Display on Desktop on page 3 6 Customize Taskbar Specify the task icons to display on the taskbar For details refer to Availa...

Страница 110: ...ys the Removable Memory screen page 5 69 FAX Box 2 Displays the FAX Box screen Refer to the FAX Operation Guide Internet Browser Displays the Internet Browser screen page 5 17 Printing System 13 3 Displays the Fiery screen page 11 6 EFI PrintMe 3 Display the EFI PrintMe screen NOTE To use this function turn on the Enable PrintMe option using Configure in Command WorkStation or WebTools page 11 6 S...

Страница 111: ...cessibility Standard Magnifies the text and icons on the screen Pressing the Accessibility icon switches the icon to the Standard icon Press the Standard icon to return to the previous view page 3 13 Language Displays the Language setting screen in System Menu page 8 9 System Menu Displays the System Menu screen page 8 2 Help Displays the Help screen page 3 12 Program Displays the program list scr...

Страница 112: ...that you wish to use is grayed out the settings of the previous user may still be in effect In this case press the Reset key and try again If the key is still grayed out after the Reset key is pressed it is possible that you are prohibited from using the function by user control Check with the administrator of the machine Copy Image Copies 㪚㫆㫃㫆㫉㪆 㪠㫄㪸㪾㪼㩷㪨㫌㪸㫃㫀㫋㫐 Org Paper Finishing 㪨㫌㫀㪺㫂㩷㪪㪼㫋㫌㫇 Layou...

Страница 113: ...e layout press Cancel or the Stop key Change the settings and press Preview again to see a preview image with the new settings Copy Send Copy Image Preview Copies 㪚㫆㫃㫆㫉㪆 㪠㫄㪸㪾㪼㩷㪨㫌㪸㫃㫀㫋㫐 Org Paper Finishing 㪨㫌㫀㪺㫂㩷㪪㪼㫋㫌㫇 Layout Edit Advanced Setup 㪪㪿㫆㫉㫋㪺㫌㫋㩷㪈 㪪㪿㫆㫉㫋㪺㫌㫋㩷㪋 㪪㪿㫆㫉㫋㪺㫌㫋㩷㪊 㪪㪿㫆㫉㫋㪺㫌㫋㩷㪉 㪪㪿㫆㫉㫋㪺㫌㫋㩷㪍 㪪㪿㫆㫉㫋㪺㫌㫋㩷㪌 Original Zoom Paper 100 Place original 㪧㫉㫆㪾㫉㪸㫄 100 A4 A4 Preview Original Zoom Paper Previe...

Страница 114: ...nction Description Drag With the finger touching the touch panel slide the finger to move the position of the displayed preview Pinch in Pinch out With two fingers touching the touch panel widen or tighten the space between the two fingers to zoom in and out on the view Close Preview No 1 6 2007040410574501 Size Resol Color Full Color 300x300dpi A4 In magnified view you can move the range of displ...

Страница 115: ...for a transmission destination or recall a stored program by its program number For more information on speed dialing refer to Specifying Destination on page 5 28 Cancel OK Paper Selection Auto A4 Plain A4 Plain A3 Plain A4 Plain Plain A4 Add Shortcut Copies Cassette Paper Set MP Tray MP Tray Plain A4 100 A4 A4 Preview Original Zoom Paper Plain A4 abcd efg com Destination Detail Address Book Folde...

Страница 116: ...source by choosing a Cassette or MP Tray Selecting Paper Source 1 2 End Setting Procedure 1 Press Org Paper Finishing 2 Press Paper Selection Other Help Displays information about functions and machine operation Help titles Show the screen of the tab that includes the function explained in Help In the case of this screen the screen that appears after step 1 of Setting Procedure is performed will a...

Страница 117: ...l You can also control the screen using the numeric key corresponding to the number in circle Example Press the 2 key on the numeric key pad to zoom Control the functions according to the display on the screen NOTE This function can be used on the Home screen and on the functions that were registered via Copy Send Quick Setup To configure any functions that are not displayed on the Accessibility s...

Страница 118: ... key other than Power and Energy Saver keys Power Saving Recovery Open the platen cover or the optional document processor Power Saving Recovery The machine will be ready to use within 15 seconds for 3005ci 3505ci and 20 seconds for 4505ci 5505ci Note that ambient environmental conditions such as ventilation may cause the machine to respond more slowly Auto Low Power Mode Auto Low Power Mode autom...

Страница 119: ...the machine enters sleep mode it cannot perform printing from a computer connected by USB cable In addition it takes longer for the machine to wake and return to normal operation Also the ID card cannot be recognized For more information on Sleep Rules settings refer to Sleep Rules models for Europe on page 8 55 Sleep Level Energy Saver models except for Europe This mode reduces power consumption ...

Страница 120: ...ose Tray Multi Purpose Tray 2 page 3 26 Option Cassette 3 Cassette 4 Side Feeder 500 sheet x 2 1 1 page 3 18 Large Capacity Feeder 1 500 sheet x 2 3 page 3 21 Cassette 5 Side Feeder 3 000 sheet 4 page 3 25 Side Feeder 500 sheet x 3 1 1 page 3 18 Large Capacity Side Feeder 500 1 1 500 sheet x 2 2 page 3 18 Cassette 6 Cassette 7 Side Feeder 500 sheet x 3 1 page 3 18 Large Capacity Side Feeder 500 1 ...

Страница 121: ... exposing opened paper to high temperatures and high humidity as dampness can be a cause of problems Seal any remaining paper after loading in the multi purpose tray or cassettes back in the paper storage bag If the machine will not be used for a prolonged period protect all paper from humidity by removing it from the cassettes and sealing it in the paper storage bag IMPORTANT If you copy onto use...

Страница 122: ...the length of the paper Paper sizes are marked on the cassette IMPORTANT When using media types other than plain paper such as recycled or colored paper always specify the media type and paper weight settings Specifying Paper Size and Media Type for the Cassettes page 3 30 Media Type Setting page 8 13 The cassettes can hold paper with weight between 60 220 g m2 for 3005ci and 3505ci and 60 256 g m...

Страница 123: ... the guides to fit the paper IMPORTANT If paper is loaded without adjusting the paper length guide and paper width guide the paper may skew or become jammed Load the paper with the print side facing up After removing new paper from its packaging fan the paper before loading it in the multi purpose tray Refer to Before Loading Paper on page 3 17 Before loading the paper be sure that it is not curle...

Страница 124: ...sette back in NOTE If the machine will not be used for a prolonged period protect all paper from humidity by removing it from the cassettes and sealing it in the paper storage bag Select the media type plain recycled etc loaded in the cassette Specifying Paper Size and Media Type for the Cassettes page 3 30 ...

Страница 125: ...otate the Paper Size Guide A clamp and remove Pull the Paper Size Guide A up and out IMPORTANT When using media types other than plain paper such as recycled or colored paper always specify the media type and paper weight settings Specifying Paper Size and Media Type for the Cassettes page 3 30 Media Type Setting page 8 10 The cassettes can hold paper with weights up to 256 g m2 If you are using a...

Страница 126: ...r Size Guide A to verify that it is fixed 3 With the bottom of the cassette pressed all the way down press the hook on the side of the Paper Size Guide B to release it and pull out the Paper Size Guide B 4 Adjust the Paper Size Guide B to the paper size A4 Insert the Paper Size Guide B into the slot marked A4 on the bottom of the cassette and lock the hook it will make a click sound Gently try mov...

Страница 127: ... hook it will make a click sound Gently try moving the Paper Size Guide A to verify that it is fixed Letter The Paper Size Guide B is not attached With the bottom of the cassette pressed all the way down press the hook on the side of the Paper Size Guide C to release it and pull out the Paper Size Guide C 3 Load paper CLICK 2 1 3 2 1 3 Paper Size Guide C ...

Страница 128: ...he paper be sure that it is not curled or folded Paper that is curled or folded may cause paper jams Ensure that the loaded paper does not exceed the level indicator see illustration below NOTE If the machine will not be used for a prolonged period protect all paper from humidity by removing it from the cassettes and sealing it in the paper storage bag Select the media type plain recycled etc load...

Страница 129: ...r into the cassette After loading paper gently push the cassette back in NOTE The default paper size setting is A4 If you need the paper size changed to B5 or Letter contact your service representative IMPORTANT When loading the paper keep the print side facing down Before loading the paper be sure that it is not curled or folded Paper that is curled or folded may cause paper jams Ensure that the ...

Страница 130: ...cial 6 Monarch Youkei 4 Youkei 2 10 sheets Banner paper 470 1 mm 18 51 to a maximum of 1220 0 mm 48 1 sheet manual feed 10 sheets when optional banner tray is attached 1 Open the multi purpose tray When loading paper sizes 12 x 18 and from A3 to B4 and Ledger to Legal extend the support tray section of the multi purpose tray until the mark is fully appeared IMPORTANT When using media types other t...

Страница 131: ...dge if it is curled When loading paper into the multi purpose tray check that there is no paper left over in the tray from a previous job before loading the paper If there is just a small amount of paper left over in the multi purpose tray and you want to add more first remove the left over paper from the tray and include it with the new paper before loading the paper back into the tray If there i...

Страница 132: ...ki How to load envelopes orientation and facing will differ depending on the type of envelope Be sure to load it in correctly otherwise printing may be done in the wrong direction or on the wrong face NOTE When you load envelopes in the multi purpose tray select the envelope type by referring to Specifying Paper Size and Media Type for the Multi Purpose Tray MP Tray Setting on page 3 33 Close the ...

Страница 133: ... side from the machine For the procedure for printing refer to the Printing System Driver User Guide Index paper must meet the following conditions Paper stopper To use the sheet ejection stopper open as shown below Example A3 B4 Ledger Legal Item Description Paper size A4 Letter Paper weight 136 to 256 g m2 Number of tabs 1 to 15 Length of tabs 30 mm or less ...

Страница 134: ...ecial Paper Action on page 8 12 4 To change to a media type other than Plain refer to Media Type Setting on page 8 10 When the paper weight settings shown below are selected the media indicated for each setting cannot be selected Rough Heavy 5 Preprinted Heavy 5 Letterhead Heavy 5 Thick Heavy 5 Custom 1 to 8 Heavy 5 or Extra Heavy On 3005ci and 3505ci the paper of each also cannot be selected when...

Страница 135: ...an use the numeric keys NOTE If the optional FAX kit is installed the available media types for printing received faxes are as shown below Plain Recycled Bond Vellum Color Thick High Quality Rough and Custom 1 to 8 Set the paper size of the cassette used for fax reception as follows Inch models Press Auto and then Inch Metric models Press Auto and then Metric If the above setting is changed it wil...

Страница 136: ...ange of Media Type to select the media type and press OK Common Settings Media Type Select type of paper in Cassette 1 Vellum Plain Preprinted Recycled Bond Letterhead Prepunched Color Custom 2 Custom 1 High Quality Custom 3 Custom 4 Custom 7 Custom 6 Custom 5 Custom 8 Cancel OK Thick Rough 1 2 ...

Страница 137: ...Statement Executive 12x18 Oficio II Standard Sizes 2 Select from the standard sizes 1 not included in Standard Sizes 1 Values Metric models Ledger Letter Letter R Legal Statement Executive 12 x 18 Oficio II 8K 16K 16K R Inch models A3 A4 A4 R A5 R A6 R B4 B5 B5 R B6 R Folio 8K 16K 16K R 216 x 340 mm Others Select from special standard sizes and custom sizes Values ISO B5 Envelope 10 Envelope 9 Env...

Страница 138: ...ress OK Cassette MP Tray Settings Paper Size Set the multi purpose tray paper size Standard Sizes 1 Auto Standard Sizes 2 Others Size Entry A3 A4 A4 A5 A6 B4 B5 B5 Cancel OK B6 216x340mm Cassette MP Tray Settings Paper Size Set the multi purpose tray paper size Standard Sizes 1 X 148 457 297 Auto Keys Y 98 304 210 Keys Standard Sizes 2 Others Size Entry Cancel OK mm mm 1 3 2 Cassette MP Tray Setti...

Страница 139: ...puter Name tab in the window that appears In Windows 8 select the desktop in the Start screen right click Computer from Libraries and then select Properties 2 Check the computer name Check the computer name and full computer name Screen example Computer name PC001 Full computer name PC001 abcdnet com Windows XP If the full computer name does not have a dot the full computer name and the computer n...

Страница 140: ...ton on the Windows select All Programs or Programs Accessories and then Command Prompt In Windows 8 display Apps on Search in charms on the Start screen and select Command Prompt The Command Prompt window appears 2 Check the domain name and user name At the Command Prompt enter net config workstation and then press Enter Check the user name and domain name Screen example User Name james smith Doma...

Страница 141: ... to limit folder access to a specific user or group 1 From Start button on the Windows select Control Panel Appearance and Personalization and then Folder Options In Windows XP click My Computer and select Folder Options in Tools In Windows 8 select Settings in charms on Desktop and select Control Panel Appearance and Personalization and then Folder Options 2 Remove the checkmark from Use Sharing ...

Страница 142: ...ton In Windows XP right click the scannerdata folder and select Sharing and Security or Sharing 2 Configure permission settings 1 Select the Share this folder checkbox and click the Permissions button In Windows XP select Share this folder and click the Permissions button 2 Click the Add button 1 2 Make sure that the Sharing tab is selected 1 2 Make a note of the Share name ...

Страница 143: ...35 is the same as the domain name If the computer name is not shown in From this location click the Locations button select the computer name and click the OK button Example PC001 If the computer name that you made a note of on page Making a note of the computer name and full computer name on page 3 35 is not the same as the domain name If the text after the first dot in the full computer name tha...

Страница 144: ...marks appear on Allow checkbox for the Modify and Read execute permissions and click the Close button In Windows XP make sure that checkmarks appear on Allow checkbox for the Modify and Read execute permissions and click the OK button 2 3 4 Select the Security tab Select the user you entered 1 ...

Страница 145: ...rt used for SMB transmission 1 Check file and printer sharing 1 From Start button on the Windows select Control Panel System and Security and Allow a program through Windows Firewall 2 Select the File and Printer Sharing checkbox NOTE Log on to Windows with administrator privileges NOTE If the User Account Control dialog box appears click the Continue button 1 2 3 ...

Страница 146: ...3 42 Preparation before Use Preparation for Sending a Document to a PC 2 Add a port 1 From Start button on the Windows select Control Panel System and Security and Check firewall status 2 3 4 5 1 2 ...

Страница 147: ...3 43 Preparation before Use Preparation for Sending a Document to a PC 6 Select Specific local ports and enter 445 7 8 Make sure all checkboxes are selected 2 3 1 1 2 1 2 ...

Страница 148: ...er Account Control dialog box appears click the Continue button 2 Click the Exceptions tab and then the Add port button 3 Specify Add a Port settings Enter any name in Name example Scan to SMB This will be the name of the new port Enter 445 in Port Number Select TCP for Protocol 4 Click OK button In Windows 8 1 In charms on Desktop click Settings Control Panel System and Security and then Windows ...

Страница 149: ... group name and select group members from the Address Book Contact A maximum of 2 000 contact addresses can be registered Each address can include the information such as destination name E mail address FTP server folder path computer folder path and FAX No optional 1 Display the screen 1 Press the System Menu key 2 Press in the following sequence Edit Destination Add Edit in Address Book Add Cont...

Страница 150: ...ess OK The screen shown in step 1 reappears NOTE Address Number is an ID for a destination You can select any available number out of 2 000 numbers for contacts and 500 numbers for groups If you specify an address number that is already in use an error message appears when you press Save and the number cannot be registered If you set 0000 as the address number the address is registered under the l...

Страница 151: ...Press Change of E mail Address enter the E mail address and press OK The table below explains the items to be entered NOTE Refer to the Character Entry Method on page 11 11 for details on entering characters Cancel Save Address Name E mail SMB FTP FAX i FAX Back Connection Test Next 㪪㪼㪸㫉㪺㪿㩷㪝㫆㫃㪻㪼㫉 㪽㫉㫆㫄㩷㪥㪼㫋㫎㫆㫉㫂 Path 㪚㪿㪸㫅㪾㪼 pc4050 scannerdata Login Password 㪚㪿㪸㫅㪾㪼 Login User Name 㪚㪿㪸㫅㪾㪼 james smith H...

Страница 152: ...e PC name that you want to specify in the screen that appears and press Next The login user name and login password entry screen appears NOTE For the computer name share name domain name and user name enter the information that you noted when you created the shared folder For details on creating shared folders refer to Preparation for Sending a Document to a PC on page 3 35 Item Description Max No...

Страница 153: ...r the IPv6 address enclose the address in brackets Example 3ae3 9a0 cd05 b1d2 28a 1fc0 a1 10ae 140 NOTE To register a new One Touch Key refer to Adding a Destination on One Touch Key One Touch Key on page 3 53 Item Descriptions Max No of Characters Host Name Host name or IP address of FTP server Up to 64 characters Path Path for the file to be stored For example User ScanData If no path is entered...

Страница 154: ...5 Enter the group name displayed on the Address Book not more than 32 characters and press OK NOTE To add a group you need individually added destinations Register one or more individual destinations as needed before proceeding Up to 100 destinations for the E mail 500 destinations for the FAX and a total of 10 destinations for the FTP and SMB can be registered per group NOTE Address Number is an ...

Страница 155: ...ve Now the group is added to the Address Book To register the registered address in a one touch key press Yes in the pop up screen that appears after Save is pressed NOTE Destinations can be sorted or searched by destination name or address number For details refer to Specifying Destination on page 5 28 NOTE To register a new One Touch Key refer to Adding a Destination on One Touch Key One Touch K...

Страница 156: ...ils 2 After you have completed the changes press Save 3 Press Yes in the change confirmation screen to register the changed destination Editing a Group 1 Change Address Number and Name Refer to Group on page 3 50 for the details 2 Press Member 3 To delete any destination from the group select the destination and press Delete Press Yes on the screen to confirm the deletion To add the destination pr...

Страница 157: ...en and press OK 4 Press Change of Destination The address book appears 5 Select a destination contact or group to add to the One Touch Key number and press OK Pressing Detail shows the detailed information of the selected destination 6 Press Save The destination will be added to the One Touch Key NOTE Refer to Specifying Destination on page 5 28 for use of One Touch Key You can add One Touch keys ...

Страница 158: ...ers depending on the details to be edited 2 Edit and delete the destinations you added to One Touch Key Changing the Registered Information 1 Press Add Edit 2 Select a new destination Contact or group Pressing Detail shows the detailed information of the selected destination 3 Press OK 4 Press Yes on the screen to add the destination to the One Touch Key Deleting the Registered Information 1 Press...

Страница 159: ... 2 Printer driver print settings screen 4 5 Printer Driver Help 4 6 Changing the default printer driver settings Windows 7 4 6 Canceling printing from a computer 4 6 Banner printing 4 7 Printing Data Saved on the Printer 4 14 Private Print Stored Job 4 14 Quick Copy Proof and Hold 4 16 ...

Страница 160: ...d click the Properties button NOTE To print the document from applications install the printer driver on your computer from the supplied DVD Product Library In some environments the current settings are displayed at the bottom of the printer driver When printing the cardstock or envelopes load the cardstock or envelopes before performing the following procedure Refer to When you load envelopes or ...

Страница 161: ... 4 Click OK button to return to the Print dialog box 3 Start printing Click the OK button Registering the Original Size If you loaded a paper size that is not included in the print sizes of the machine register the paper size in the Basic tab of the print settings screen of the printer driver The registered size can be selected from the Print size menu 1 Display the print settings screen 2 Registe...

Страница 162: ...he Source menu 9 Select the type of paper in the Media type menu NOTE If you loaded a postcard or envelope select Cardstock or Envelope in the Media type menu To select the 4 000 sheet Finisher tray or 1 000 sheet Finisher tray for the output tray when printing envelopes select the following 4 000 sheet Finisher 1 000 sheet Finisher 4 5 3 6 2 7 1 8 9 Print paper size Output tray Envelopes other th...

Страница 163: ...luding binding and stapling Imaging tab This tab lets you configure settings related to the quality and color mode of the print results Publishing tab This tab lets you create covers and inserts for print jobs and put inserts between sheets of OHP film Job tab This tab lets you configure settings for saving print data from the computer to the machine Regularly used documents and other data can be ...

Страница 164: ...ollowing procedure is an example of setting the color mode default to Black 1 Click Start button on the Windows and then click Devices and Printers 2 Right click the printer driver icon of the machine and click the Printer properties menu of the printer driver 3 Click the Basic button on the General tab 4 Click the Basic tab 5 Set Color to Black and click OK Canceling printing from a computer To c...

Страница 165: ...s below to set banner paper in the printer driver 1 Display the screen for registering the original size 1 Click the Basic tab 2 Select Custom in the Print size menu 2 Register the original size 1 Click the New button 2 Enter the name length 470 1 mm 18 51 or longer and width of the custom paper size being registered 3 Click the OK button Max number of sheets 1 sheet manual feed 10 sheets when opt...

Страница 166: ...chine s operation panel Place the paper in the multipurpose tray continue to support it so that it does not fall and press Continue To cancel printing press Cancel NOTE When KPDL is used for PDL Settings of the printer driver a length setting of 470 5 mm 18 53 or longer is handled as banner print Use MP tray to print on the following paper Continue Cancel Custom 1 210x800mm Set paper and press Con...

Страница 167: ...to a tray that can be used To print on multiple sheets using the multi purpose tray place each sheet after the previous sheet is printed and press Continue After pressing Continue support the paper with both hands so that it feeds in correctly After printing starts catch the paper when it is output so that it does not fall When using the inner tray as the output location do not stand up the stoppe...

Страница 168: ...er paper can be fed continuously 1 Open the multi purpose tray Open the multi purpose tray until it stops Do not extend the multi purpose auxiliary tray 2 Attach the banner tray 1 Release the paper width guide lock on the banner tray and open to the maximum width NOTE The paper length supported in banner tray is 900 to 1220 mm ...

Страница 169: ...he multi purpose tray and press into place 3 Load paper 1 Open the paper width guides on the multi purpose tray to the maximum width Make sure that the banner tray is attached so that the paper width guides on the banner tray are outside the paper width guides on the multi purpose tray 2 Load banner paper so that it passes under the paper clamp bar Opening Paper clamp ...

Страница 170: ... guides to the width of the paper 5 Adjust the paper width guides on the banner tray to the same width as the paper width guides on the multi purpose tray and lock IMPORTANT If there is a gap between the paper and the paper width guides readjust the guides to fit the paper in order to prevent skewed feeding and paper jams 1 1 2 2 ...

Страница 171: ...banner printing finishes or when you are not using the banner tray NOTE The print confirmation screen can be set in System Menu to not appear when the banner tray is attached This will allow continuous printing on multiple sheets Refer to Message Banner Print on page 8 25 ...

Страница 172: ...uide on how to print a job as Private Print or Stored Job using the printer driver Printing and Deleting the Document Print delete the documents stored in a Private Print Stored Job box The procedure is as follows 1 Display the screen 1 Press Job Box in the home screen 2 Select Private Print Stored Job and press Open 2 Print and delete the document Printing the document 1 Select the creator of the...

Страница 173: ...een will be displayed Enter the password using the numeric keys NOTE If the document is protected by an access code the password entry screen will be displayed Enter the password using the numeric keys 2 3 Detail Close User File File File File File Print Delete 02 02 2013 09 40 02 02 2013 09 45 02 02 2013 09 50 02 02 2013 09 55 02 02 2013 10 00 File Name Date and Time Size MB 30 MB 21 MB 21 MB 36 ...

Страница 174: ...the printer driver Printing and Deleting the Document You can print delete the documents stored in the Quick Copy Proof and Hold box The procedure is as follows 1 Display the screen 1 Press Job Box in the home screen 2 Select Quick Copy Proof and Hold 3 Press Open NOTE To maintain free space on the hard disk you can set the maximum number of stored jobs For details refer to Quick Copy Job Retentio...

Страница 175: ...rmation screen The document is deleted Close 1 2 Open User Name Files Quick Copy Proof and Hold 5 2 1 1 1 User User User User User 1 2 3 4 5 1 2 2 3 Detail Close User File File File File File Print Delete 02 02 2013 09 40 02 02 2013 09 45 02 02 2013 09 50 02 02 2013 09 55 02 02 2013 10 00 File Name Date and Time Size MB 30 MB 21 MB 21 MB 36 MB 30 1 2 3 4 5 User 1 2 1 2 3 Detail Close User File Fil...

Страница 176: ...4 18 Printing from PC Printing Data Saved on the Printer ...

Страница 177: ...upt Copy 5 24 Sending 5 25 Basic Operation 5 26 Specifying Destination 5 28 Checking and Editing Destinations 5 36 Confirmation Screen of Destinations 5 37 Sending to Different Types of Destinations Multi Sending 5 38 WSD Scan DSM Scan 5 39 Scanning using TWAIN 5 43 Scanning a document placed in the machine 5 43 Scanning a document stored in a custom box 5 45 Scanning with FMU Connection 5 47 Usin...

Страница 178: ...over or the optional document processor open as there is a danger of personal injury IMPORTANT Do not push the platen cover or the optional document processor forcefully when you close it Excessive pressure may crack the platen glass When placing books or magazines on the machine do so with the platen cover or the optional document processor in the open position Align it flush against the original...

Страница 179: ...es or creases before loading Failure to do so may cause the originals to jam How to Load Originals Detail Document Processor Automatic 2 Sided Document Processor Dual scan DP Weight 45 to 160 g m2 duplex 50 to120 g m2 35 to 220 g m2 duplex 50 to 220 g m2 Sizes smaller than B6 R are 50 to 105 g m2 one side duplex Sizes Maximum A3 to Minimum A5 R Maximum Ledger to Minimum Statement R Maximum A3 to M...

Страница 180: ...r details on Original Orientation refer to Original Orientation on page 6 16 IMPORTANT Confirm that the original width guides exactly fit the originals If there is a gap readjust the original width guides The gap may cause the originals to jam Ensure that loaded originals do not exceed the level indicator Exceeding the maximum level may cause the originals to jam Originals with punched holes or pe...

Страница 181: ...g the Equipment s Serial Number The equipment s serial number is printed in the location shown in the figure NOTE You ll need the equipment s serial number when contacting your Service Representative Please check the number before contacting your Service Representative 5505ci ...

Страница 182: ...inting to black white with lighter density so that the toner consumption can be reduced Copying Functions Color Black White EcoPrint On Level 5 03 Newspaper Copy Use this when you want to copy a newspaper article or other originals printed on a colored substrate This adjusts the image quality so that the color of the substrate or the text on the reverse side will not show on the copy Copying Funct...

Страница 183: ...Magazine Highlighter On 07 Vivid Copy Use this when you want to make a copy with an overall vivid appearance Copying Functions Color Full Color Original Image Text Photo Book Magazine One touch Image Adjust Vivid NOTE Up to 50 functions combining copying and sending can be registered in the program If user login administration is enabled you can only register functions by logging in with administr...

Страница 184: ...ars proceed to step 2 4 4 Specify the position in which you want to display the icon of registered program 5 Press Save Recalling Programs Use the procedure below to recall a registered program 1 Recall the program 1 Press Program in the Home screen or the key of the registered program Pressing the key of the registered program will recall the program If you pressed Program proceed to step 1 2 NOT...

Страница 185: ... been deleted Check the Document Box NOTE Program can be pressed in each function to call up the program registered for the function No Eco Copy Newspaper Copy Confidential Stamp Highlighter Copy ID Card Copy Vivid Copy Technical Drawing Copy 01 02 03 04 05 07 08 06 10 11 12 09 13 15 14 Edit 㪪㪼㫅㪻㩷㪈 㪝㪘㪯㩷㪈 No Send 1 FAX 1 08 09 10 12 11 13 15 14 㪚㫆㫃㫆㫉㪆 㪠㫄㪸㪾㪼㩷㪨㫌㪸㫃㫀㫋㫐 Org Paper Finishing 㪨㫌㫀㪺㫂㩷㪪㪼㫋㫌㫇 L...

Страница 186: ...e program number 01 to 50 to change 2 Press Edit and refer to Registering Programs on page 5 8 to change the program number and program name 3 Press Save 4 Press Yes in the confirmation screen To delete 1 Press the key s corresponding to the program number 01 to 50 to delete 2 Press Delete 3 Press Yes in the confirmation screen NOTE To modify the settings of a registered program recall the program...

Страница 187: ...ion settings refer to Application on page 8 60 Installing Applications The procedure is as follows 1 Display the screen 1 Press the System Menu key 2 Press and then Application NOTE If the user authentication screen appears enter your login user name and login password and press Login For this you need to login with administrator privileges The factory default login user name and login password ar...

Страница 188: ...edure is as follows 1 Display the screen 1 Press the System Menu key 2 Press and then Application NOTE When the message Removable Memory was recognized Displaying files Are you sure is displayed press No NOTE To install another application repeat steps 2 3 and 2 4 To remove the removable memory press Remove Memory and wait until the message Removable Memory can be safely removed appears Then remov...

Страница 189: ... press Trial without entering the license key 3 Press Yes in the confirmation screen 3 Press the application icon in the Home screen to activate the application Press the application icon The application will start up NOTE To exit the application press Deactivate NOTE If you change the date time while using the trial version of an application you will no longer be able to use the application Icons...

Страница 190: ...sing Detail 2 When the deletion confirmation screen appears press Yes NOTE Be sure to set Deactivate for the application you want to delete Registering Programs on page 5 8 NOTE If the user authentication screen appears enter your login user name and login password and press Login For this you need to login with administrator privileges The factory default login user name and login password are se...

Страница 191: ...configuration screen you want to register 2 Register the shortcuts 1 Select the setting you want to add 2 Press Add Shortcut 3 Press the keys corresponding to the shortcut number 01 to 06 to register 4 Enter the shortcut name and press Save The shortcut is registered NOTE If you select a shortcut number already registered the currently registered shortcut can be replaced with a new one Copies Canc...

Страница 192: ... or delete a shortcut 1 In the setup screen of each function press Add Shortcut in the bottom of the screen 2 Edit the shortcut 1 Press Edit 2 Press the shortcut key you want to edit delete To edit a shortcut 3 Press Change of Shortcut No or Shortcut Name 4 Change the settings and press OK 5 Press Save To delete 3 Press Delete this Shortcut 4 Press Yes in the confirmation screen ...

Страница 193: ... screen The Internet browser starts up 2 Use the browser screen to browse web pages 3 To exit the browser press X Close and then press Yes in the exit confirmation screen NOTE To use the internet browser Internet Browser Setting must be set to On in Internet on page 8 60 For information on how to use the browser screen refer to Using the Browser Screen on page 5 18 NOTE You can specify preferences...

Страница 194: ...a protected page Loader Progress bar Shows the status of page loading When the browser is loading a web page the loader changes to an animated display Menu Displays the browser setup menu You can use this menu to specify the browser s display magnification set the text encoding scheme and check the server certificate Search Search Internet Retrieval in page Displays a search menu in which you can ...

Страница 195: ... Pressing the Stop key will not temporarily stop a job that you have already started sending NOTE If Reserve Next Priority on page 8 29 is set to Off the Copying screen appears in the touch panel In such case pressing the Stop key or Cancel will cancel the printing job in progress Job Cancel Select job to cancel and press Cancel Press Close to resume other jobs Job No Accepted Time Type 438 Job Na...

Страница 196: ...using the printer driver before the printer begins printing do the following 1 Double click the printer icon displayed on the taskbar at the bottom right of the Windows desktop to display a dialog box for the printer 2 Click the file for which you wish to cancel printing and select Cancel from the Document menu ...

Страница 197: ...Select the color mode NOTE For loading instructions refer to Loading Originals on page 5 2 Auto Color Automatically recognizes whether a document is color or black white and then scans the document Full Color Scans all documents in full color Black White Scans all documents in black white To make more detailed settings refer to Color Selection on page 6 24 Copy ...

Страница 198: ...999 6 Press the Start key Copying begins Copy page 6 2 Copy Image Preview Copies 㪚㫆㫃㫆㫉㪆 㪠㫄㪸㪾㪼㩷㪨㫌㪸㫃㫀㫋㫐 Org Paper Finishing 㪨㫌㫀㪺㫂㩷㪪㪼㫋㫌㫇 Layout Edit Advanced Setup 㪪㪿㫆㫉㫋㪺㫌㫋㩷㪈 㪪㪿㫆㫉㫋㪺㫌㫋㩷㪋 㪪㪿㫆㫉㫋㪺㫌㫋㩷㪊 㪪㪿㫆㫉㫋㪺㫌㫋㩷㪉 㪪㪿㫆㫉㫋㪺㫌㫋㩷㪍 㪪㪿㫆㫉㫋㪺㫌㫋㩷㪌 Original Zoom Paper 100 Place original 㪧㫉㫆㪾㫉㪸㫄 100 A4 A4 Preview Original Zoom Paper Preview Staple Punch 㪥㫆㫉㫄㪸㫃㩷㪇 㪛㪼㫅㫊㫀㫋㫐 Paper Selection 㪘㫌㫋㫆 㪱㫆㫆㫄 㪈㪇㪇㩼 㪦㪽㪽 1 sided 1 sided...

Страница 199: ...ority is set to Off The Copying screen appears on the touch panel during printing 1 Press Reserve Next The default screen for copying appears 2 Place the originals onto the machine for reserving copy and configure the copy settings 3 Press the Start key The machine starts scanning the originals When the current print job ends the reserved copy job is printed Copy Image Preview Copies 㪚㫆㫃㫆㫉㪆 㪠㫄㪸㪾㪼㩷...

Страница 200: ... machine is left unused for 60 seconds in interrupt copy mode interrupt copying is automatically cancelled and printing resumes You can change the delay until interrupt copying is canceled Change the delay as required Interrupt Clear Timer page 8 55 The interrupt copy function may be unavailable depending on the status of document finisher usage In this case try the priority override Priority Over...

Страница 201: ...ed as the destination Consult your network administrator concerning destination folder sharing settings Create Register a Custom Box Using a custom box for sending Select detailed transmission settings to select a Document Box as the destination or to print and send the image at the same time Follow the steps below for basic sending The following five options are available Send as E mail E mail Ad...

Страница 202: ...t the color mode Loading Originals page 5 2 Auto Color Automatically recognizes whether a document is color or black white and then scans the document Full Color Scans all documents in full color Black White Scans all documents in black white To make more detailed settings refer to Color Selection on page 6 24 Send ...

Страница 203: ...r Entry 㪝㪘㪯㩷㪥㫆㪅 㪜㫅㫋㫉㫐 WSD Scan DSM Scan Destination TUVW 192 168 188 120 Group1 Group1 EEE Detail Edit Delete Recall Chain Direct On Hook Org Sending Data Format 㪨㫌㫀㪺㫂㩷㪪㪼㫋㫌㫇 㪛㪼㫊㫋㫀㫅㪸㫋㫀㫆㫅 㪚㫆㫃㫆㫉㪆 㪠㫄㪸㪾㪼㩷㪨㫌㪸㫃㫀㫋㫐 㪘㪻㫍㪸㫅㪺㪼㪻 㪪㪼㫋㫌㫇 㪧㫉㫆㪾㫉㪸㫄 Destination Detail ABCD abcd efg com 㪘㪻㪻㫉㪼㫊㫊 㪙㫆㫆㫂 Folder Path Entry 㪜㪄㫄㪸㫀㫃 㪘㪻㪻㫉㩷㪜㫅㫋㫉㫐 No 1 100 AAA BBB CCC DDD FFF GGG HHH III JJJ 0004 0003 0005 0001 0002 0006 0007 0008...

Страница 204: ...he Addr Book pull down menu You can change the order in which the destinations are listed by selecting Name or No from the Sort NOTE You can set the machine up so that the address book screen appears when you press the Send key For details refer to Default Screen on page 8 9 When the optional fax kit has been installed you can specify the fax destination Enter the other party number using the nume...

Страница 205: ...ded Web Server RX User Guide Keys used Search type Subjects searched 1 Search by name Search by registered name 2 Search by number Search by registered address number 3 Advanced search by initial letter Advanced search by initial letter of registered name 4 Advanced search by destination Advanced search by type of registered destination E mail Folder SMB FTP FAX i FAX or Group FAX Only when the op...

Страница 206: ... already been registered Refer to Adding a Destination on One Touch Key One Touch Key on page 3 53 for more information on adding One Touch keys Address Book Cancel OK Group E mail Dest Search Name Search No No Type Name Detail Folder Detail Address Book Sort Addr Book 0001 0002 0005 0004 0003 ABCD abcd efg com TUVW tuvw xyz com Group1 Group2 Group3 Name Add Edit Address Book 1 2 i FAX FAX ABC DEF...

Страница 207: ...r details refer to Sending E mail on page 2 37 Destination Detail 㪘㪻㪻㫉㪼㫊㫊 㪙㫆㫆㫂 Folder Path Entry 㪜㪄㫄㪸㫀㫃 㪘㪻㪻㫉㩷㪜㫅㫋㫉㫐 No 1 100 AAA BBB CCC DDD FFF GGG HHH III JJJ 0004 0003 0005 0001 0002 0006 0007 0008 0009 0010 1 1 i FAX Addr Entry 㪝㪘㪯㩷㪥㫆㪅 㪜㫅㫋㫉㫐 WSD Scan DSM Scan Destination EEE Detail Edit Delete Recall Chain Direct On Hook Org Sending Data Format 㪨㫌㫀㪺㫂㩷㪪㪼㫋㫌㫇 㪛㪼㫊㫋㫀㫅㪸㫋㫀㫆㫅 㪚㫆㫃㫆㫉㪆 㪠㫄㪸㪾㪼㩷㪨㫌㪸㫃㫀㫋㫐 㪘㪻㫍㪸㫅...

Страница 208: ...You can also replace the information for a previously registered destination Entering Characters page 11 13 Destinations can be changed later Refer to Checking and Editing Destinations on page 5 36 E mail Address 㪘㪻㪻㩷㪸㩷㫅㪼㫎㩷㪼㪄㫄㪸㫀㫃㩷㪻㪼㫊㫋㫀㫅㪸㫋㫀㫆㫅㪅 㪧㫉㪼㫊㫊㩷㪲㪜㪄㫄㪸㫀㫃㩷㪘㪻㪻㫉㪼㫊㫊㪴㪃㩷㫋㪿㪼㫅㩷㪼㫅㫋㪼㫉 㫋㪿㪼㩷㪸㪻㪻㫉㪼㫊㫊㩷㫌㫊㫀㫅㪾㩷㫋㪿㪼㩷㫂㪼㫐㪹㫆㪸㫉㪻㩷㫊㪺㫉㪼㪼㫅㪅 E mail Address Entry Enter Destination Destination Cancel OK Next Dest Add to Addr ...

Страница 209: ...a folder Be sure that SMB Protocol or FTP in the Embedded Web Server RX is On For details refer to the Embedded Web Server RX User Guide Entering Characters page 11 13 Destination Detail 㪘㪻㪻㫉㪼㫊㫊 㪙㫆㫆㫂 Folder Path Entry 㪜㪄㫄㪸㫀㫃 㪘㪻㪻㫉㩷㪜㫅㫋㫉㫐 No 1 100 AAA BBB CCC DDD FFF GGG HHH III JJJ 0004 0003 0005 0001 0002 0006 0007 0008 0009 0010 1 1 i FAX Addr Entry 㪝㪘㪯㩷㪥㫆㪅 㪜㫅㫋㫉㫐 WSD Scan DSM Scan Destination EEE ...

Страница 210: ...me PC name that you want to specify in the screen that appears and press Next The login user name and login password entry screen appears After you enter the login user name and login password name of the destination PC the shared folders appear Select the folder that you want to specify and press Next The address of the selected shared folder is set Select the folder from the Search Results list ...

Страница 211: ...e Address Book by pressing Add to Address Book Item Data to be entered Max characters Host Name Host name or IP address of FTP server Up to 64 characters Path Path to the receiving folder For example User ScanData Otherwise the data will be saved in the home directory Up to 128 characters Login User Name FTP server login user name Up to 64 characters Login Password FTP server login password Case s...

Страница 212: ...ess OK When selecting On for Destination Check before Send Dest Check before Send on page 8 29 the confirmation screen appears after pressing the Start key For details refer to Confirmation Screen of Destinations on page 5 37 Host Name Path Login User Name Login Password SMB FTP Folder Path Entry Enter Destination Destination Cancel OK Next Dest Add to Addr Book pc4050 scannerdata james smith PC40...

Страница 213: ...ected destination To delete the destination select the destination you want to delete and press Delete Press Yes in the confirmation screen The destination is deleted To add the destination press Cancel and then return to the destination screen 2 Press Check NOTE Be sure to confirm all destination by displaying them on the touch panel You cannot press Check unless you have confirmed all destinatio...

Страница 214: ...the optional fax kit No of broadcast items E mail Up to 100 Folders SMP FTP Total of 10 SMB and FTP FAX Up to 500 i FAX Up to 100 Also depending on the settings you can send and print at the same time Procedures are the same as used in specifying the destinations of respective types Continue to enter E mail address or folder path so that they appear in the destination list Press the Start key to s...

Страница 215: ...played on the Driver Software Installation screen the installation is completed NOTE To use WSD Scan confirm that the computer used for WSD scanning and the machine is network connected and WSD Scan on page 8 45 is set to On in the network settings For information on operating the computer refer to the computer s help or the operation guide of your software NOTE When Network does not appear in the...

Страница 216: ...n the originals Procedure using this machine 1 Select From Operation Panel and press Next 2 Select the destination computer and press OK Press Reload to reload the computer list You can view information on the selected computer by pressing Detail Loading Originals page 5 2 Send Back OK Cancel Computer Name Select the destination computer and press OK WSD Scan Selecting Computer pc000102 pc000101 1...

Страница 217: ... screen 2 Place the originals NOTE If you are performing DSM scan check the items below The machine is connected to an Active Directory on the network that the scan process can reference DSM Scan and LDAP are set to On in Protocol Settings page 8 45 in Network SSL is set to On in Security Settings page 8 46 in Network Network Authentication is set in User Login page 9 4 If the Active Directory tha...

Страница 218: ...he settings and add destinations as needed Only E mail addresses can be added as destinations In the send base screen press Detail Edit Destination and then Address Book or E mail Addr Entry and add a destination In some scan processes it may not be possible to change settings or add destinations 7 Press the Start key Sending starts Back OK Cancel Scan Process Name Select the scan process and pres...

Страница 219: ...ox The procedure for scanning using the TWAIN driver is explained as an example The WIA driver is used in the same way Scanning a document placed in the machine 1 Display the screen 1 Activate the TWAIN compatible application software 2 Select the machine using the application and display the TWAIN dialog box 2 Configure the scan settings Select scanning settings in the TWAIN dialog box that opens...

Страница 220: ...ll image quality Make sure your selection matches the original that you are scanning Exposure Level This setting specifies the sharpness and clarity of the image If the Auto check box is selected then the slider bar and edit box are unavailable and the exposure level is automatically set to the default setting Contrast This setting specifies the contrast between light and dark areas of the image T...

Страница 221: ...assword and click the OK button When you select a box the document files in the Custom Box appear in Document List 2 Set how to display the document data Click the Setting button to select each item 3 Click OK button NOTE To scan a document stored in a custom box select a model name with Box from Model in the TWAIN driver settings screen NOTE For selecting the machine see the Operation Guide or He...

Страница 222: ...nt data name or the document data name with the same beginning Click the Detail button to display the selected document data When the document data includes multiple pages select the checkbox beside the pages you want to scan The selected pages will be scanned 2 Click the Acquire button The document data is scanned NOTE In this case the scanned page or the selected document data will not be delete...

Страница 223: ...t Utility is installed 2 Place the original 3 Press FMU Connection FMU Connection starts 4 Follow the on screen instructions to enter the necessary information and press Next 5 When the scan settings screen appears press each item and configure the necessary settings The features that can be set depend on File Management Utility 6 Press the Start key Sending starts NOTE The first time you use FMU ...

Страница 224: ...g Print data will be stored in the hard disk after printing This will allow printing of the same print data repeatedly Quick Copy Proof and Hold Box page 4 16 Quick Copy feature facilitates additional prints of a document already printed Activating Quick Copy and printing a document using the printer driver allow the print data to be stored in the Quick Copy Job Box When additional copies are requ...

Страница 225: ... Fax Box stores the fax data received For details refer to the FAX Operation Guide Basic Operation for Document Box This section explains basic operations for document boxes using examples where tasks are carried out with custom boxes Box List NOTE Repeat Copy function is not available when the optional Data Security Kit is installed NOTE In the following explanation it is assumed that user login ...

Страница 226: ...Delete Close 200810101057 Send Print Store File 200810101057 SALES Preview Search Name Detail Listing the documents by name in alphabetical order Listing the documents by time of update in ascending descending order Listing the documents by size in ascending descending order Thumbnail Selecting more than one document at a time Selecting documents by checking checkboxes Selecting more than one docu...

Страница 227: ...e details press Save and then press Yes in the confirmation screen If you do not change the details press No 5 Press Close The display returns to the default Document Box screen NOTE If a custom box is protected by a password enter the correct password Document Box Removable Memory Add Edit Box No Name Owner Used 0001 ABC Anonymous 1 1 㪘㪻㪻 㪛㪼㫋㪸㫀㫃㪆㪜㪻㫀㫋 㪛㪼㫃㪼㫋㪼 Close Search Name Search No 2 1 Box Box...

Страница 228: ...rm the document s and press Close NOTE The preview display can be controlled by moving your finger s on the touch panel Using the Preview Screen page 3 10 Close Preview No 1 6 2007040410574501 Size Resol Color Full Color 300x300dpi A4 Select Pages to Process In multiple page documents you can change pages by entering the desired page number When you have zoomed in you can use these keys to move th...

Страница 229: ...r Copy to Memory Printing Documents Print page 5 58 Sending Documents Send page 5 59 Moving a Document Copying a Document Move Copy page 5 61 File 1 1 Copy to Memory Cancel Send Print Selected Pages Select Range Enter Pages 1 pages Selecting more than one document at a time Displaying the number of pages selected You can specify a range of selection by pressing Select Range You can specify the pag...

Страница 230: ...factory default login user name and login password are set as shown below If user login administration is enabled log in with administrator privileges to perform the following operations They cannot be performed with user privileges Creating a box Deleting a box of which owner is another user Model Name Login User Name Login Password 3005ci 3000 3000 3505ci 3500 3500 4505ci 4500 4500 5505ci 5500 5...

Страница 231: ...rage capacity of the Custom Box in megabytes by pressing or number keys You can enter a limit between 1 and 30 000 MB Box Password User access to the box can be restricted by specifying a password to protect the box Entering a password is not mandatory Enter the same password of up to 16 characters in both Password and Confirm Password Permission Select whether to share the box Auto File Deletion ...

Страница 232: ... on the privileges of the logged in user For details refer to Creating a New Custom Box Add Edit Box on page 5 54 NOTE When you have logged in as a user you can only delete the box whose owner is set to that user When you have logged in as administrator you can edit all boxes Privileges Settings that can be changed Administrator Box No Owner Box Name Usage Restriction Box Password Permission Auto ...

Страница 233: ...nd then press Store File 4 Select the type of originals scanning density etc as necessary For the features that can be selected refer to Custom Box Store File Printing Send page 6 6 5 Press the Start key The original is scanned and the data is stored in the specified Custom Box NOTE Enter up to 32 characters as the file name Custom Box No Name Owner Used Add Edit Box 1 1 0001 SALES Anonymous Store...

Страница 234: ...t you wish to print by checking the checkbox The document is marked with a checkmark 2 Press Print NOTE If a custom box is protected by a password enter the correct password NOTE To deselect press the checkbox again and remove the checkmark Custom Box 1 1 0001 2008101010574501 02 02 2013 09 40 21 Box File Name Date and Time Size MB 2008101010574511 2008101010574521 02 02 2013 09 50 02 02 2013 10 0...

Страница 235: ...hange the print settings press Print after Change Settings 4 Press the Start key Printing of the selected document begins Sending Documents Send The procedure for sending documents in a custom box is explained below 1 Display the screen 1 Press Custom Box on the Home screen 2 Select the box containing the document you want to send 3 Press Open 2 Send the document 1 Select the document you wish to ...

Страница 236: ...riginal image etc as desired For the features that can be set refer to Custom Box Store File Printing Send page 6 6 5 Press the Start key Sending of the selected document begins NOTE Depending on the settings the address book screen may appear NOTE For more information on selecting destinations refer to Specifying Destination on page 5 28 ...

Страница 237: ...containing the document you want to move or copy 3 Press Open 2 Move or copy documents 1 Select the document in the list that you want to move or copy by pressing the checkbox The document is marked with a checkmark 2 Press Move Copy NOTE If a custom box is protected by a password enter the correct password NOTE To deselect press the checkbox again and remove the checkmark Custom Box 1 1 0001 2008...

Страница 238: ...ile size and the file format etc 6 Press Move or Copy and then press Yes in the confirmation screen The selected document is moved or copied NOTE If the box to which the document is to be moved or copied is protected by a password enter the correct password Move Copy Move to Custom Box Copy to Custom Box Copy to Memory Select the required operation and press Next Next Back Cancel 1 2 Move Move to ...

Страница 239: ...ark You can join up to 10 documents 2 Press Join NOTE You can only join a document to other documents in the same custom box If necessary move the documents to be joined beforehand NOTE If a custom box is protected by a password enter the correct password NOTE To deselect press the checkbox again and remove the checkmark Custom Box 1 1 0001 2008101010574501 02 02 2013 09 40 21 Box File Name Date a...

Страница 240: ...oined document and press OK 6 Press Join and then press Yes in the confirmation screen The documents are joined NOTE Enter up to 64 characters as the file name NOTE After joining the original documents are left unchanged Delete the documents if they are no longer needed Next File Name Up Date and Time Size 1 1 Join Down Cancel Confirm the order of documents to combine 2008101010574501 02 02 2013 0...

Страница 241: ...arked with a checkmark 2 Press Delete The delete confirmation screen appears 3 Press Yes The document is deleted NOTE If a custom box is protected by a password enter the correct password NOTE Delete is disabled until a document is selected To deselect press the checkbox again and remove the checkmark Custom Box 1 1 0001 2008101010574501 02 02 2013 09 40 21 Box File Name Date and Time Size MB 2008...

Страница 242: ...explains how to print documents saved by the Repeat Copy function 1 Display the screen 1 Press Job Box on the Home screen 2 Select Repeat Copy box and press Open 2 Print the document 1 Select the document to print and press Print If the document is protected by a password enter the password using the numeric keys 2 Specify the number of copies to print as desired 3 Press Start Print Printing begin...

Страница 243: ... the Home screen 2 Select Form for Form Overlay and press Open 3 Store the forms 1 Press Store File 2 If necessary select the image quality of original scanning density etc before the original is scanned 3 Press the Start key The original is scanned and stored in the Form for Form Overlay box Custom Box Name Files Quick Copy Proof and Hold Open Repeat Copy Form for Form Overlay Private Print Store...

Страница 244: ...orm to delete and press Delete The delete confirmation screen appears 2 Press Yes The form is deleted Custom Box Name Files Quick Copy Proof and Hold Open Repeat Copy Form for Form Overlay Private Print Stored Job 21 21 21 21 1 1 2 1 Form for Form Overlay Name Date and Time Size 2008101000530910 1 1 Detail Print Close Delete Store File 2008101009530900 02 02 2013 09 00 02 02 2013 09 10 MB 30 MB 21...

Страница 245: ...achine Plug the USB memory directly into the USB Port A1 1 Plug the USB memory 1 Plug the USB memory into the USB Port A1 2 When the machine reads the USB memory Removable Memory is recognized Displaying files Are you sure may appear Press Yes Displays the removable memory screen 2 Print the document 1 Select the folder containing the file to be printed and press Open The machine will display docu...

Страница 246: ...Settings may appear in the setting screen for the feature to be used To use the settings saved with the document press Use File Settings If you need to change the print settings select the desired feature 4 Press the Start key Printing of the selected file begins Detail Delete Memory Information 001 999 Name Date and Time Size Remove Memory Print Document MB 1 Document MB 3 Document MB 4 Document ...

Страница 247: ...ads the USB memory Removable Memory is recognized Displaying files Are you sure may appear Press Yes to display the removable memory screen NOTE The maximum number of the storable files is 1000 Refer to Loading Originals on page 5 2 IMPORTANT Use USB memory properly formatted by this machine If a USB memory formatted by any other device is used The removable memory is not formatted may appear To f...

Страница 248: ...tart key The original is scanned and the data is stored in the USB memory Check the USB memory information You can check the USB memory information In the removable memory screen press Memory Information Once you confirm the information press Close Detail Delete Memory Information 001 999 Name Date and Time Size Remove Memory Print Document MB 1 Document MB 3 Document MB 4 Document MB 1 Document M...

Страница 249: ...o follow the proper procedure to avoid damaging the data or USB memory NOTE USB memory can also be removed after checking the status of the device Refer to Removing the USB Memory on page 7 18 Detail Delete Memory Information 001 999 Name Date and Time Size Remove Memory Print Document MB 1 Document MB 3 Document MB 4 Document MB 1 Document MB 2 02 02 2013 09 30 02 02 2013 09 40 02 02 2013 09 50 0...

Страница 250: ...into the manual staple mode 2 Set the staple position Press the stapling position key to select the stapling position Back Front 2 Points Operation is not possible while the stapling position lamps are blinking Operate after the lamps light solidly NOTE If there are no staples when manual stapling is performed the stapling position lamps and stapling position key LEDs all blink Add staples For det...

Страница 251: ...vered to tray A Finishing the manual staple mode Press the stapling position key several times until the stapling position lamps turn off The shutter of the paper exit area closes It means that manual stapling is finished If no operation is performed for approx 10 seconds the manual staple mode will be automatically finished CAUTION Do not insert your hand inside the open shutter NOTE Press the st...

Страница 252: ...5 76 Operation on the Machine Manual Staple ...

Страница 253: ... 6 38 Border Erase 6 39 Booklet 6 41 Duplex 6 44 Cover 6 47 Form Overlay 6 48 Page 6 49 Memo Page 6 51 Poster 6 52 Image Repeat 6 53 Text Stamp 6 54 Bates Stamp 6 56 Continuous Scan 6 58 Auto Image Rotation 6 59 Negative Image 6 59 Mirror Image 6 59 Job Finish Notice 6 60 File Name Entry 6 60 Priority Override 6 61 Repeat Copy 6 61 OHP Backing Sheet 6 62 DP Read Action 6 63 Skip Blank Page 6 63 2 ...

Страница 254: ... Configure the settings for density quality of copies and color balance Density Adjust density using 7 or 13 levels page 6 22 Original Image Select original image type for best results page 6 23 EcoPrint EcoPrint saves toner when printing page 6 24 Color Selection Select the color mode setting page 6 24 Color Balance Adjust the strength of cyan magenta yellow and black page 6 26 Hue Adjustment Adj...

Страница 255: ... 53 Text Stamp You can add a text stamp on the documents page 6 54 Bates Stamp You can add a bates stamp on the documents page 6 56 Configure the settings for continuous scanning mirror image copies and Skip Blank Page function Continuous Scan Scans a large number of originals in separate batches and then produce as one job page 6 58 Auto Image Rotation Automatically rotates the image 90 degrees w...

Страница 256: ...e files page 6 69 Long Original Reads long sized original documents using a document processor Refer to the FAX Operation Guide Configure the settings for density quality of copies and color balance Density Adjust density using 7 or 13 levels page 6 22 Original Image Select original image type for best results page 6 23 Scan Resolution Select fineness of scanning resolution page 6 69 FAX TX Resolu...

Страница 257: ...y Adds subject and body when sending a document by i FAX Refer to the FAX Operation Guide FAX Direct Transmission Sends FAX directly without reading original data into memory Refer to the FAX Operation Guide FAX Polling RX Automatically makes a machine with a stored document send the document to your machine Refer to the FAX Operation Guide Send and Print Allows you to print a copy of the document...

Страница 258: ...ginal Image Select original image type for best results page 6 23 Scan Resolution Select fineness of scanning resolution page 6 69 Color Selection Select the color mode setting page 6 24 Sharpness Adjusts the sharpness of image outlines page 6 30 Background Density Adj Removes dark background from originals such as newspapers page 6 30 Zoom Adjusts the zoom to reduce or enlarge the image page 6 32...

Страница 259: ... originals to 1 sided page 6 44 Cover Adds a cover to the finished copies page 6 47 Form Overlay Copies the original document overlaid with a form or image page 6 48 Page Adds page numbers to the finished documents page 6 49 Job Finish Notice Sends E mail notice when a job is complete page 6 60 File Name Entry Adds a file name page 6 60 Delete after Printed Automatically deletes a document from th...

Страница 260: ...aper different from the original size page 6 38 FAX Delayed Transmission Set a send time Refer to the FAX Operation Guide Job Finish Notice Sends E mail notice when a job is complete page 6 60 File Name Entry Adds a file name page 6 60 E mail Subject Body Adds subject and body when sending a document page 6 69 i FAX Subject Body Adds subject and body when sending a document by i FAX Refer to the F...

Страница 261: ...s page 6 23 Resolution Select fineness of scanning resolution page 6 69 Color Selection Select the color mode setting page 6 24 Sharpness Adjusts the sharpness of image outlines page 6 30 Background Density Adj Removes dark background from originals such as newspapers page 6 30 Prevent Bleed thru Hides background colors and image bleed through when scanning thin original page 6 31 Tab Function key...

Страница 262: ...ion Select the color mode setting page 6 24 Sharpness Adjusts the sharpness of image outlines page 6 30 Background Density Adj Removes dark background from originals such as newspapers page 6 30 Zoom Adjusts the zoom to reduce or enlarge the image page 6 32 Centering Centers the original image on the paper when copying onto paper different from the original size page 6 38 Border Erase Erases the b...

Страница 263: ...sided Print a document to 1 sided or 2 sided sheets page 6 46 Job Finish Notice Sends E mail notice when a job is complete page 6 60 Priority Override Suspends the current job and gives a new job top priority page 6 61 EcoPrint EcoPrint saves toner when printing page 6 24 Fold Folds the finished documents page 6 17 Text Stamp You can add a text stamp on the documents page 6 54 Bates Stamp You can ...

Страница 264: ... or select from the standard sizes Standard Sizes 2 Metric models Ledger Letter Letter R Legal R Statement Statement R 11 x 15 Oficio II 8K 16K 16K R Inch models A3 A4 A4 R A5 A5 R A6 R B4 B5 B5 R B6 B6 R Folio 8K 16K 16K R 216 x 340 mm Select from standard sizes except Standard Sizes 1 Others Hagaki Oufuku hagaki Custom 1 to 4 1 Select from envelope postcard or the custom sized originals 1 Size E...

Страница 265: ...R Folio 8K 16K 16K R 216 x 340 mm Select from standard sizes except Standard Sizes 1 Others ISO B5 Envelope 10 Commercial 10 Envelope 9 Commercial 9 Envelope 6 Commercial 6 3 4 Envelope Monarch Envelope DL Envelope C5 Envelope C4 Hagaki Oufuku hagaki Youkei 4 Youkei 2 and Custom 1 to 4 1 Select from special standard sizes and custom sizes Size Entry Metric X 148 to 457 mm in 1 mm increments Y 98 t...

Страница 266: ...ong Edge Left Short Edge Left Select the original orientation of the first page Item Value Description Off Mixed Size Copies Originals are detected individually for size and copied to the same size paper as originals Same Size Copies Top Page Direction Long Edge Left Short Edge Left Select the original orientation of the first page Item Value Description Mixed Size Originals Off Same Width Scans a...

Страница 267: ...ls Same Size Copies Originals are all copied to the same size paper NOTE Up to 30 sheets can be placed in the document processor When mixing the original sizes as using the following combination A4 R B5 R and Folio make sure to set Auto Detect Original Size to On for Folio For details refer to Auto Detect Original Size on page 8 11 IMPORTANT When placing originals of different width arrange the or...

Страница 268: ...klets Stapling Punch optional feature 2 sided Book Original Text Stamp Bates Stamp NOTE If On is selected in the setting for Orientation Confirmation page 8 16 in System Menu the selection screen for original orientation appears when you select any of the above functions Item Image Top Edge on Top Top Edge on Left NOTE The default setting for Original Orientation can be changed Refer to Orientatio...

Страница 269: ...scape Orientation Portrait Item Bi Fold Saddle Stitch Tri Fold Inside R to L B to T L to R T to B Outside R to L B to T L to R T to B NOTE Folding requires the optional 4 000 sheet finisher and the folding unit For details on paper sizes and numbers of sheets that can be folded refer to Center Folding Unit Option on page 11 32 Copy Org Paper Finishing Custom Box Functions USB Memory Functions ...

Страница 270: ...ng each set or page by 90 degrees NOTE To use offsetting the same size of paper as the selected paper tray must be loaded in a different orientation in a different paper tray The paper sizes supported in Offset are A4 B5 Letter and 16K With Document Finisher Option When offsetting is used printed copies are produced after rotating each set or page by 90 degrees NOTE The optional 1 000 sheet finish...

Страница 271: ... 41 Original Orientation Top Edge on Top Top Edge on Left Select the orientation of the original document top edge to scan correct direction Press Original Orientation to choose orientation of the originals either Top Edge on Top or Top Edge on Left Then press OK NOTE Stapling requires the optional 1 000 sheet finisher or 4 000 sheet finisher Note also that saddle stitching center stapling require...

Страница 272: ...e Punch Unit Option on page 11 31 The inch model provides two hole and three hole punching The metric model provides two hole and four hole punching Item Value Description Punch 2 holes Left Select the position of punch holes For details on original orientation and position of punch holes refer to Original Orientation and Punch Hole Position on page 6 21 2 holes Top 2 holes Right 3 holes Left 3 ho...

Страница 273: ...ginal Orientation and Punch Hole Position Image Original orientation Original Print results Glass platen Document processor NOTE The inch model provides two hole and three hole punching The metric model provides two hole and four hole punching ...

Страница 274: ...t Tray Optional right job separator Job Separator Optional inner job separator Tray 1 to 7 Trays 1 to 7 in the optional mailbox tray 1 is the top tray NOTE The setting for this function can be configured only when the optional job separator and or document finisher 1 000 sheet finisher or 4 000 sheet finisher are installed The default setting for Paper Output can be changed For details refer to Pa...

Страница 275: ...oto documents printed on this machine originally Book Magazine Best for mixed text and photos printed in a magazine etc Photo Printer Output Best for photos printed on this machine originally Book Magazine Best for photos printed in a magazine etc Photo Paper Best for photos taken with a camera Text 1 Off Light Text Fine Line Best for documents that are mostly text and were originally printed on t...

Страница 276: ...ave Level Item Description Auto Color Automatically recognizes whether documents are color or black and white Full Color Prints documents in full color Black White Prints documents in black and white Single Color Cyan Specify one of the colors and produce copies in that color regardless of original type Magenta Yellow Red Green Blue Copy Color Image Quality Custom Box Functions USB Memory Function...

Страница 277: ...te Full Color Prints documents in full color Grayscale Prints documents in grayscale Black White Prints documents in black and white Item Description Auto Color Color Gray Automatically recognizes whether the document is color or black and white and scan color documents in Full Color and black and white documents in Grayscale Auto Color Color B W Automatically recognizes whether the document is co...

Страница 278: ...n be made in 11 levels Example Item Value Description Off On Cyan 5 to 5 Press or on each side of the color Cyan Magenta Yellow Black to adjust each color Magenta Yellow Black NOTE This feature is used with full color and auto color copying Copy Color Image Quality Custom Box Functions More Magenta Original Less Magenta ...

Страница 279: ...adjust the hue Individual Select individual colors to adjust the hue Select Red Magenta Blue Yellow Green or Cyan and then press or to adjust the hue NOTE This feature is used with full color and auto color copying These adjustments are especially useful on rich color images Copy Color Image Quality Custom Box Functions When adjusting yellow to more green blue to more magenta the part Original Whe...

Страница 280: ...lor Item Before After Description Off Portrait Photo Color Shade Portrait 1 Gives skin color a warm rosy look Portrait 2 Gives skin color a tanned look Portrait 3 Gives skin color a whiter look Landscape Photo Blue Color Shade Blue 1 Makes blue more vivid Blue 2 Makes blue a true blue without any green Blue 3 Gives blue a greenish emerald green tint Landscape Photo Green Color Shade Green 1 Makes ...

Страница 281: ...ases contrast for a more pronounced image Smooth Reduces contrast for a softer image Light Makes overall color lighter and less vivid for a bright and light feel Dark Makes overall color darker for a heavier feel NOTE Select from one of the 9 available One Touch Image Adjust types Multiple selections are not possible Item Before After Description ...

Страница 282: ...kground Density Adjust is disabled if Auto Color detects black and white originals If the ground color is obtrusive select Auto If Auto does not remove the ground color select Manual and adjust the density of the ground color Item Value Description All 1 to 3 Sharpen Emphasizes the image outline 1 to 3 Blur Blurs the image outline Can weaken a Moire effect Text Fine Line 0 to 3 Normal Sharpen Make...

Страница 283: ...e bleed through when scanning thin original Value Off On NOTE This feature is used with full color and auto color Saturation is disabled if Auto Color detects black and white originals Copy Color Image Quality Custom Box Functions Original Grayish Vivid Results in paler color Results in more vivid color Copy Color Image Quality Send Color Image Quality Custom Box Functions Color Image Quality USB ...

Страница 284: ... Max 200 STMT Ledger 154 STMT Legal 129 Letter Ledger 121 Legal Ledger 100 78 Legal Letter 77 Ledger Legal 64 Ledger Letter 50 Ledger STMT 25 Min Metric Models Auto 400 Max 200 A5 A3 141 A4 A3 A5 A4 127 Folio A3 106 11 15 A3 100 90 Folio A4 75 11 15 A4 70 A3 A4 A4 A5 50 25 Min Metric Models Asia Pacific Auto 400 Max 200 A5 A3 141 A4 A3 B5 B4 122 A4 B4 A5 B5 115 B4 A3 B5 A4 100 86 A3 B4 A4 B5 81 B4...

Страница 285: ...nctions Zoom Entry Manually reduces or enlarges the original image in 1 increments between 25 and 400 XY Zoom Select vertical and horizontal magnifications individually Magnifications can be set in 1 increments between 25 and 400 Y X ...

Страница 286: ...8 Legal Letter 77 Ledger Legal 64 Ledger Letter 50 Ledger STMT 25 Min Select a preset ratio Press Auto to use Auto Zoom Press or to change the displayed magnification as desired Press Keys to use the numeric keys for entry XY Zoom X 25 to 400 in 1 mm increments Y 25 to 400 in 1 mm increments Select vertical and horizontal magnifications individually Press or to change the displayed magnifications ...

Страница 287: ...he image select the paper size sending size or storing size Paper Selection page 6 13 Sending Size page 6 65 Storing Size page 6 72 Some combinations of original size and paper size or sending size may cause the image to be positioned at the edge of the paper To center the original vertically and horizontally on the page use the Centering function described in Margin Centering Margin Centering on ...

Страница 288: ...lect the orientation of the original document top edge to scan correct direction Press Original Orientation to choose orientation of the originals either Top Edge on Top or Top Edge on Left Then press OK 4 in 1 Layout Right then Down Left then Down Down then Right Down then Left Select the page layout of scanned originals Border Line None Solid Line Dotted Line Positioning Mark Select the boundary...

Страница 289: ...ght then Down Left then Down Down then Right Down then Left NOTE The paper sizes supported in Combine mode are A3 A4 R A4 A5 R B4 B5 R B5 Folio 216 x 340 mm Ledger Letter R Letter Legal Statement R Oficio II 8K 16K R and 16K When placing the original on the platen be sure to copy the originals in page order ...

Страница 290: ...anual For duplex copying press Back Page and select Auto or Manual When Auto is selected an appropriate margin is applied automatically on the rear page depending on a margin specified for the front page and a binding orientation When Manual is set you can set a different margin than the front on the back Set the margin in the screen that is displayed The setting selections are the same as for the...

Страница 291: ...round the single sheet original Border Erase Book Erases black borders around the edges and in the middle of the original such as a thick book You can specify the widths individually to erase the borders around the edges and in the center of the book Individual Border Erase You can specify border erase widths individually for all edges NOTE The default setting for border erase width can be changed...

Страница 292: ... the value by pressing or Press Keys to use the numeric keys for entry Gutter Back Page Same as Front Page Do Not Erase For 2 sided originals press Back Page and then press Same as Front Page or Do Not Erase Individual Border Erase Top Metric 0 mm to 50 mm in 1 mm increments Inch 0 00 to 2 00 in 0 01 increments Set the border erase width Set the value by pressing or Press Keys to use the numeric k...

Страница 293: ...t side The folded copies can be read from left to right Binding on the right side The folded copies can be read from right to left Top binding The folded copies can be read from top to bottom NOTE Using the optional 4 000 sheet finisher and the folding unit enables you to saddle stitch your copies fold them in two with staples in the center Supported paper sizes are A3 B4 A4 R Ledger Legal Letter ...

Страница 294: ...choose orientation of the originals either Top Edge on Top or Top Edge on Left Then press OK 2 sided Booklet Original Binding Left Right Binding Top Select the binding direction of originals Finishing Binding Left Binding Right Binding Top Select the binding orientation of copies Cover Off Cover Front Cover Print Setting Not Print Front Only Back Only Duplex Select whether to add the cover Select ...

Страница 295: ...ly To use saddle stitching press Staple Fold and then press Saddle Stitch Original Orientation Top Edge on Top Top Edge on Left Select the orientation of the original document top edge to scan correct direction Press Original Orientation to choose orientation of the originals either Top Edge on Top or Top Edge on Left Then press OK NOTE The number of sheets that can be folded or Saddle Stitch stap...

Страница 296: ...he top edge facing the same orientation when turning the pages Two sided to One sided Copies each side of a two sided original onto two individual sheets The optional document processor is required The following binding options are available Binding Left Right Images on the second sides are not rotated Binding Top Images on the second sides are rotated 180 degrees Two sided to Two sided Produces t...

Страница 297: ...two sided copies from an open book original with facing pages NOTE The original sizes supported in Book to One sided mode are Ledger Letter R A3 A4 R A5 R B4 B5 R and 8K The supported paper sizes are A4 B5 Letter and 16K You may change paper size and reduce or enlarge copy to match that size NOTE The original sizes supported in Book to Two sided mode are A3 B4 A4 R B5 R A5 R Ledger Letter R and 8K...

Страница 298: ...op Edge on Left Then press OK 2 sided 2 sided Original Binding Left Right Binding Top Select the binding direction of originals Finishing Binding Left Right Binding Top Select the binding orientation of copies Original Orientation Top Edge on Top Top Edge on Left Select the orientation of the original document top edge to scan correct direction Press Original Orientation to choose orientation of t...

Страница 299: ...r the covers Specify a print setting for each cover Item Value Description Front Cover Not Print Front Only Back Only Duplex Different paper is inserted for the first page of the document Select Stop Printing Front Only Back Only or Duplex for the print setting of the inserted paper Front and Back Covers Front Cover Print Setting Not Print Front Only Back Only Duplex Different paper is inserted fo...

Страница 300: ...the form to be overlaid Press or in Density Finishing Image Transparent The form is overlaid on the document Form on Original Image The form is placed on top of the document Original Image on Form The form is placed under the document Select Form Select the form to be overlaid from Job Box Press Select Form to display the document boxes that store documents which can be used as a form Select the d...

Страница 301: ...numbers to the finished documents The available formats for numbering are 1 P 1 and 1 n The format 1 n prints the total number of pages in the place of n Select the numbering format from 1 P 1 or 1 n Copy Layout Edit Custom Box Functions Original 1 P 1 1 n ...

Страница 302: ... of pages counting backwards from the last page and then press OK Specify the desired number up to 10 Press Keys to use the numeric keys for entry Font Size Font sizes registered in Text Text Stamp on page 8 20 are displayed Set the font size of page number Style None Bold Italic Bold Italic Set the font style of page number Font Courier Letter Gothic Set the font of page number Color Black Red Gr...

Страница 303: ...al Border Line None Solid Line Dotted Line Positioning Mark Select the boundary line type Press Border Line to select the page boundary line and press OK Original Orientation Top Edge on Top Top Edge on Left Select the orientation of the original document top edge to scan correct direction Press Original Orientation to choose orientation of the originals either Top Edge on Top or Top Edge on Left ...

Страница 304: ... Select A0 A1 or A2 as finish size Copy is enlarged according to the selected paper size Inch Select 34 44 22 34 or 17 22 as finish size Copy is enlarged according to selected paper size Zoom Priority 100 to 400 in 1 increments Image will be output on the necessary number of copies for the specified zoom size Press or to change the displayed magnification as desired Press Keys to use the numeric k...

Страница 305: ... 00 to 16 99 Y1 0 00 to 11 68 To set the area of the original to be repeated press On for Specify Repeat Area Press or to input the area of the original to be repeated Press Keys to use the numeric keys for entry Y1 Length from top left of platen to top edge of repeat area X1 Length from top left of platen to left edge of repeat area Y2 Height of repeat area X2 Width of repeat area On Area Metric ...

Страница 306: ...ing numeric values and to set the stamp position and angle when a stamp is placed on the back side of the paper in duplex printing Font Size Registered font sizes are displayed For details on registering font sizes refer to Font Text Stamp on page 8 20 Set the font size of text stamp Character Border Off Circle Rectangle Underline Set the character border and underline Style None Bold Italic Bold ...

Страница 307: ... sizes are displayed For details on registering font sizes refer to Font Text Stamp on page 8 20 Set the font size of text stamp Character Border Off Circle Rectangle Underline Set the character border and underline Style None Bold Italic Bold Italic Set the font style of text stamp Font Courier Letter Gothic Set the font of text stamp Color Black Red Green Blue Cyan Magenta Yellow White Set the c...

Страница 308: ...l to set the stamp position using numeric values and to set the stamp position when a stamp is placed on the back side of the paper in duplex printing Font Size Registered font sizes are displayed For details on registering font sizes refer to Font Bates Stamp on page 8 20 Set the font size of bates stamp Style None Bold Italic Bold Italic Set the font style of bates stamp Font Courier Letter Goth...

Страница 309: ...etail to specify the stamp position using numeric values Font Size Registered font sizes are displayed For details on registering font sizes refer to Font Bates Stamp on page 8 20 Set the font size of bates stamp Style None Bold Italic Bold Italic Set the font style of bates stamp Font Courier Letter Gothic Set the font of bates stamp Color Black Red Green Blue Cyan Magenta Yellow White Set the co...

Страница 310: ... documents can be selected from Binding Left Binding Right or Binding Top The following functions can be selected during scanning Item Description Next Copy On Back In duplex copying prints on the back side if the next page is to be printed on the front side Press Next Copy On Back to use this function Next Copy On Front In duplex copying prints on the front side if the next page is to be printed ...

Страница 311: ...ue Off On Mirror Image Copies the mirrored image of the original Value Off On NOTE You can select whether to rotate the image automatically in the default settings For details refer to Auto Image Rotation Copy on page 8 18 When you have enabled this function you can select how the images are rotated For details refer to Auto Image Rotation Action on page 8 28 NOTE This function is only available f...

Страница 312: ...al Info NOTE PC should be configured in advance so that E mail can be used For details refer to Embedded Web Server RX on page 2 33 E mail can be sent to a single destination Item Description Off Address Book Select the notification destination from the address book Detail Information on the selected destination can be viewed Address Book Select the notification destination on the address book scr...

Страница 313: ...to Repeat Copy Job Retention on page 8 34 You can select Repeat Copy as the default setting For details refer to Repeat Copy on page 8 20 Giving a file name to a copy job will facilitate identification of the data when copying Refer to File Name Entry on page 6 60 Repeat Copy The Repeat Copy jobs are stored in the Job Box Refer to Outputting Repeat Copy Jobs on page 5 66 to print out the Repeat Co...

Страница 314: ...rencies on page 11 19 Never load OHP transparencies into trays or cassettes other than the multi purpose tray When OHP Backing Sheet is set the multi purpose tray paper type is automatically set to Transparency If the optional 1 000 sheet finisher or 4 000 sheet finisher is installed you may need to specify the output destination for finished copies For details refer to Paper Output on page 6 22 I...

Страница 315: ... saving unnecessary printing without the need to check for blank pages in the document Select Low Middle or High in Blank Detection Level Item Description Speed Priority Gives priority to scanning speed Quality Priority Gives priority to image quality at a slightly slower scan speed NOTE This function is displayed when the document processor is installed This feature cannot be used when On is sele...

Страница 316: ... top edge to scan correct direction Press Original Orientation to choose orientation of the originals either Top Edge on Top or Top Edge on Left Then press OK Book Binding Binding Left Binding Right Select the binding orientation of originals Original Orientation Top Edge on Top Top Edge on Left Select the orientation of the original document top edge to scan correct direction Press Original Orien...

Страница 317: ...I Select from Same as Original Size or Standard Size Standard Sizes 2 Metric models Ledger Letter Legal Statement 11 15 Oficio II 8K 16K Inch models A3 A4 A5 A6 B4 B5 B6 Folio 8K 16K 216 340 mm Select from standard sizes except Standard Sizes 1 Others Hagaki Oufuku hagaki Select from Hagaki Original size and sending size are the same different Original Size page 6 12 Specify as necessary Specify a...

Страница 318: ...hite Full Color Grayscale Black and White TIFF 1 Low Quality High Comp to 5 High Quality Low Comp Auto Color Color Grayscale Auto Color Color Black and White Full Color Grayscale Black and White JPEG 1 Low Quality High Comp to 5 High Quality Low Comp Auto Color Color Grayscale Full Color Grayscale XPS 1 Low Quality High Comp to 5 High Quality Low Comp Auto Color Color Grayscale Auto Color Color Bl...

Страница 319: ...may be failed The default language can be changed in System Menu For details refer to Primary OCR Language on page 8 19 If the original orientation is not correct texts on the original cannot be recognized as texts or the PDF creation time may be taken Check the following The original orientation is correct When setting the originals with the mixed orientation at once On is selected for Auto Image...

Страница 320: ...n change the page layout except extracting the pages of the PDF file Any except extracting Pages Can conduct all operations except extracting the pages of the PDF file Copying of Text Images Others Disable Enable Restricts the copying of text and objects on the PDF file Item Value Description Password to Open Document Off On Enter the password to open the PDF file Press Password enter a password u...

Страница 321: ... the E mail subject body NOTE A three digit serial number such as abc_001 pdf abc_002 pdf is attached to the end of the file name NOTE The larger the number the better the image resolution However better resolution also means larger file sizes and longer send times NOTE The subject can include up to 60 characters and the body can include up to 500 characters Press Body 1 Body 2 or Body 3 to enter ...

Страница 322: ...ment being sent in a Custom Box Value Off On NOTE When On is selected select the Custom Box in which the copy is to be stored If a password entry screen for the Custom Box appears enter the password You can view information on the selected Custom Box by pressing Detail Send Advanced Setup Send and Print Send Send Advanced Setup Send and Store Send ...

Страница 323: ...only change the settings by logging in with administrator privileges The factory default login user name and login password are set as shown below Click Security Settings and then Network Security in the Embedded Web Server RX Be sure that SSL of Secure Protocol Settings is On and one or more effective encryption are selected in Client side settings For details refer to the Embedded Web Server RX ...

Страница 324: ...15 Oficio II Select from Same as Original Size or Standard Size Standard Sizes 2 Metric models Ledger Letter Legal Statement 11 15 Oficio II 8K 16K Inch models A3 A4 A5 A6 B4 B5 B6 Folio 8K 16K 216 340 mm Select from standard sizes except Standard Sizes 1 Others Hagaki Oufuku hagaki Select from Hagaki Original Size and the size you wish to store as are the same different Original Size page 6 12 Sp...

Страница 325: ...tion XPS Fit to Page Reduces or enlarges the image size to fit to the selected paper size when printing XPS file Item Description Fit to Paper Size Fits the image size to the selected paper size Image Resolution Prints at resolution of the actual image Fit to Print Resolution Fits the image size to the print resolution USB Memory Functions TIFF JPEG USB Memory Functions XPS ...

Страница 326: ... logged in user NOTE To use this function the function icon must be displayed in the home screen Editing the Home Screen page 3 5 An E mail address must be set in user login for the user who logs in Adding a User Local User List page 9 8 NOTE To use this function the function icon must be displayed in the home screen Editing the Home Screen page 3 5 An E mail address must be set in user login for ...

Страница 327: ...Job History 7 11 Checking the Detailed Information of Histories 7 13 Sending the Log History 7 13 Pause and Resumption of Jobs 7 14 Canceling of Jobs 7 14 Priority Override for Waiting Jobs 7 15 Reordering Print Jobs 7 16 Device Communication 7 17 Removing the USB Memory 7 18 Canceling FAX Communication 7 19 Checking the Remaining Amount of Toner and Paper Paper Supplies 7 20 ...

Страница 328: ...llowing job statuses are available Status Display Job status to be displayed Print Job Status Copy Printer FAX reception i FAX reception E mail reception Printing from Document Box Printing data from removable memory Application Job Report List Send Job Status FAX transmission i FAX transmission E mail Folder transmission Application Multiple destination Sending Job FAX using Delayed transmission ...

Страница 329: ...ending Jobs and then Scheduled Job Print Job Status Screen page 7 4 Send Job Status screen page 7 6 Store Job Status screen page 7 7 Scheduled Job Status Screen page 7 8 Log abc def com 438 14 47 1 1 Detail InProcess Status User Name Job Name Type Accepted Time Job No Cancel Job Type All Status Status Scheduled Job Priority Override Close Paper Supplies Device Communicate Storing Jobs Sending Jobs...

Страница 330: ...eption Data from removable memory Application Report List 4 Job Name Job Name or file name 5 User Name User Name for the executed job 6 Status Status of job InProcess The status before starting to print Printing Printing Waiting Print Waiting Pause Pausing print job or error Canceling Canceling the job 7 of Job Type Only selected type of jobs is displayed doc20081010091015 InProcess 000001 doc2008...

Страница 331: ...n the list select the job that you want to move up the job queue and press this key Refer to Reordering Print Jobs on page 7 16 12 Detail Select the job whose detailed information you want to display from the list and press this key Refer to Checking Detailed Information of Jobs on page 7 9 You can press Change in Copies in the detailed information screen to change the number of copies that are pr...

Страница 332: ... of Job Type Only selected type of jobs is displayed 8 Cancel Select the job you want to cancel from the list and press this key 9 Priority Override Select the job to be overridden and press this key Only displayed when the optional fax kit is installed 10 Detail Select the job whose detailed information you want to display from the list and press this key Refer to Checking Detailed Information of...

Страница 333: ...ng Canceling the job Pause Pausing the job 7 of Job Type Only selected type of jobs is displayed 8 Cancel Select the job you want to cancel from the list and press this key 9 Detail Select the job whose detailed information you want to display from the list and press this key Refer to Checking Detailed Information of Jobs on page 7 9 NOTE The job name and user name can be changed to other informat...

Страница 334: ...r the executed job 6 Start Time Time to start the scheduled job 7 Cancel Select the job you want to cancel from the list and press this key 8 Start Now Select the job you want to send immediately from the list and press this key 9 Detail Select the job whose detailed information you want to display from the list and press this key Refer to Checking Detailed Information of Jobs on page 7 9 Status S...

Страница 335: ... NOTE This is displayed when user login administration is enabled and the user has logged in as administrator Log abc def com 438 14 47 1 1 Detail InProcess Status User Name Job Name Type Accepted Time Job No Cancel Job Type All Status Status Scheduled Job Priority Override Close Paper Supplies Device Communicate Storing Jobs Sending Jobs Printing Jobs Detail Job No Close Job No Status Destination...

Страница 336: ...ess Detail to display the list Press or select a destination and press Detail Information on the selected job is displayed for checking 2 To exit from the detailed information press Close Detail Job No Close Job Type Destination Type Status 1 1 User01 doc20070404131415 000081 㪛㪼㫋㪸㫀㫃 All Sending Waiting ...

Страница 337: ...mputer You can show the job log of all users or only your own job log For details refer to Display Status Log on page 8 25 This setting can also be changed from Embedded Web Server RX For details refer to the Embedded Web Server RX User Guide Screen Job histories to be displayed Print Job Log Copy Printer FAX reception i FAX reception E mail reception Printing from Document Box Job Report List Pri...

Страница 338: ...ault login user name and login password are set as shown below Status Log All Job No End Date Type doc20070225141427 User Name Result Completed 000080 01 25 14 14 Status Job Name 1 1 doc20070225142253 Completed 000081 01 25 14 22 doc20070225142310 Completed 000082 01 25 14 23 doc20070225142458 Error 000083 01 25 14 24 doc20070225143034 Completed 000084 01 25 14 30 Job Type Detail Close Paper Suppl...

Страница 339: ...nd the log history by E mail You can either send it manually as needed or have it sent automatically whenever a set number of jobs is reached For details refer to Sending Log History on page 8 39 NOTE To check the information of the next previous page press or Status Log All Job No End Date Type doc20070225141427 User Name Result Completed 000080 01 25 14 14 Status Job Name 1 1 doc20070225142253 C...

Страница 340: ...n doc20081010091015 InProcess 000001 doc20081010091510 Waiting 000002 AAAAA AAAAA Pause All Print Jobs Cancel Priority Override Move Up Status Status Log Job Type All Job No Accepted Time Type Job Name User Name Status 1 1 Detail Paper Supplies Device Communicate Storing Jobs Sending Jobs Printing Jobs 10 10 09 10 10 10 09 15 000003 10 10 09 20 doc20081010092015 Waiting BBBBB Close doc200810100910...

Страница 341: ...e current job in printing is suspended and the job for override printing starts When the Priority Override is completed the printing job that has been suspended will be resumed doc20081010091015 InProcess 000001 doc20081010091510 Waiting 000002 AAAAA AAAAA Pause All Print Jobs Cancel Priority Override Move Up Status Status Log Job Type All Job No Accepted Time Type Job Name User Name Status 1 1 De...

Страница 342: ... further raise the job s priority press Move Up again Each time you press Move Up the priority increases by 1 doc20081010091015 InProcess 000001 doc20081010091510 Waiting 000002 AAAAA AAAAA Pause All Print Jobs Cancel Priority Override Move Up Status Status Log Job Type All Job No Accepted Time Type Job Name User Name Status 1 1 Detail Paper Supplies Device Communicate Storing Jobs Sending Jobs Pr...

Страница 343: ...toner or out of paper and status such as waiting or printing are displayed Hard Disk The information such as formatting overwriting for erasure and error occurrence is displayed Removable Memory USB Memory The usage and capacity of the external media connected to this machine are displayed Press Format to format external media Press Remove to safely remove the external media For details refer to R...

Страница 344: ...he FAX Operation Guide i FAX When Check New FAX is pressed the machine connects to the mail server and starts reception of any new i faxes Removing the USB Memory Follow the steps below to remove USB memory safely 1 Display the screen Press the Status Job Cancel key 2 Press the Device Communicate tab 3 Press Remove in Removable Memory When Removable memory can be safely removed is displayed remove...

Страница 345: ...FAX Port 1 or FAX Port 2 4 Press Yes in the confirmation screen The line is disconnected and the fax communication is canceled Ready Scanner Ready Printer 2GB 16GB Removable Memory Hard Disk Format Remove Line Off Manual RX FAX Port 1 Log FAX Check New FAX i FAX FAX Port 2 Line Off Status Receiving Receiving Overwriting Close Paper Supplies Storing Jobs Sending Jobs Printing Jobs Device Communicat...

Страница 346: ...he status of waste toner box Paper You can check the size orientation type and remaining amount of paper in each paper source The remaining amount of paper is shown by 5 levels as 100 80 50 30 and 0 however the paper in the multi purpose tray is shown by 2 levels as 100 and 0 If the remaining amount of paper cannot be detected appears Others You can check the status of staples and punch waste box ...

Страница 347: ...tings 8 4 Cassette MP Tray Settings 8 7 Common Settings 8 9 Home 8 28 Copy 8 28 Send 8 29 Document Box Removable Memory 8 34 FAX 8 35 Printer 8 35 Report 8 37 System Network 8 43 Edit Destination 8 53 User Login Job Accounting 8 53 User Property 8 54 Date Timer Energy Saver 8 54 Adjustment Maintenance 8 57 Internet 8 60 Application 8 60 ...

Страница 348: ...leep Low Power Timer Sleep Timer Auto Error Clear Panel Reset Timer Change Change Change Change Change Change Change Change 1 2 System Menu Quick Setup Wizard Close Common Settings Copy Document Box Removable Memory Printer System Network Cassette MP Tray Settings Home Send FAX Report 1 2 Displays setting items Press the key of a function to display the setting screen Returns to the previous scree...

Страница 349: ... login password are set as shown below Enter a setting by selecting it Returns to the previous screen without making any changes Accepts the settings and exits Date Timer Energy Saver Time Zone 㪪㪼㫋㩷㫋㫀㫄㪼㩷㫑㫆㫅㪼㪅 㪪㪼㫃㪼㪺㫋㩷㫋㪿㪼㩷㫃㫆㪺㪸㫋㫀㫆㫅㩷㫅㪼㪸㫉㪼㫊㫋㩷㫐㫆㫌㪅 Time Zone 12 00 International Date Line West 1 16 11 00 Samoa 10 00 Hawaii 09 00 Alaska 11 00 Universal Coordinated Time 11 08 00 Baja California Cancel OK Mo...

Страница 350: ...l page 8 16 Color Toner Empty Action Select whether printing is prohibited or the Print in Black and White setting is used for printing once the color toner runs out page 8 16 Function Defaults Defaults are the values automatically set after the warm up is completed or the Reset key is pressed Set the defaults for available settings such as copying and sending Setting the frequently used values as...

Страница 351: ...ure Comm Error Log page 8 42 System Network Configure machine system settings page 8 43 Network Configure network settings page 8 43 Optional Network Configure settings for the optional Network Interface Kit or Wireless Interface Kit page 8 47 Network Interface Send Specify the network interface card to be used for send function and connecting to external address book page 8 49 Security Level The ...

Страница 352: ...achine management For details on User Login refer to User Login on page 9 4 and for details on Job Accounting refer to Job Accounting on page 9 29 User Property Check and change information related to the logged in user page 8 54 Date Timer Energy Saver Configure settings related to the date and time page 8 54 Adjustment Maintenance Adjust printing quality and conduct machine maintenance page 8 57...

Страница 353: ... Letter R Letter Legal Statement 12 x 18 Oficio II 8K 16K R 16K Inch models A3 A4 R A4 A5 R B4 B5 R B5 Folio 216 x 340 mm 8K 16K R 16K Size Entry 2 2 Can be set when cassette 1 or cassette 2 is selected Enter a size not displayed in the standard sizes Value Metric X 182 to 457 mm in 1 mm increments Y 140 to 304 mm in 1 mm increments Inch X 7 17 to 18 00 in 0 01 increments Y 5 51 to 12 00 in 0 01 i...

Страница 354: ...Oficio II 8K 16K R 16K Inch models A3 A4 R A4 A5 R A6 R B4 R B5 R B5 B6 R Folio 8K 16K R 16K 216 x 340 mm Others Select from non standard sizes and custom sizes Value ISO B5 Envelope 10 Commercial 10 Envelope 9 Commercial 9 Envelope 6 Commercial 6 3 4 Envelope Monarch Envelope DL Envelope C5 Envelope C4 Hagaki Oufuku hagaki Youkei 4 Youkei 2 Size Entry Enter the size not included in the standard s...

Страница 355: ... Accessibility Accessibility Copy Accessibility Send Accessibility FAX 1 Internet Browser 2 Application Name 3 NOTE If a screen other than Home is set Power Saving Recovery in EnergySaverRecoveryLevel will not operate if selected Common Settings Item Description Buzzer Set options for buzzer sound during the machine operations Volume Set the buzzer volume level Value 0 Mute 1 Minimum 2 3 Medium 4 ...

Страница 356: ... of four frequently used custom paper sizes To register a custom paper size press On and enter the desired size The custom size option is displayed on the screen to select paper set in the multi purpose tray Up to four custom paper sizes can be added Select media type for each paper size Select Media Type and select paper type Value Custom 1 to 4 Off On Size Entry Metric X 148 to 457 mm in 1 mm in...

Страница 357: ...er is selected the cassette can be switched to another large capacity feeder depending on your usage Value Off On Auto Detect Original Size Available for metric models only Select whether to automatically detect originals of special or non standard size A6 Hagaki As A6 and Hagaki are similar in size select either one of them for automatic detection Value A6 Hagaki Folio Select whether to enable au...

Страница 358: ...capacity side feeder 500 1 500 sheet x 2 is installed Cassette 6 When a side feeder 500 sheet x 3 or large capacity side feeder 500 1 500 sheet x 2 is installed Cassette 7 When a side feeder 500 sheet x 3 or large capacity side feeder 500 1 500 sheet x 2 is installed Special Paper Action When printing on Prepunched Preprint and Letterhead punch holes might not be aligned or the print direction mig...

Страница 359: ...n N Y Y default Y N N N N N N Rough N Y Y Y default Y Y Y Y 3 Y 2 N Vellum N Y Y Y Y default Y Y Y 3 Y 2 N Labels N Y 2 Y 2 Y 2 Y 2 2 The media type cannot be selected for the cassettes Y 2 default Y 2 Y 2 Y 2 N Recycled N Y Y default Y N N N N N N Preprinted N Y Y default Y Y Y Y Y 3 3 On the 3005ci and 3505ci the paper type cannot be selected for the cassette Y 2 N Bond N Y Y Y default Y Y Y Y 3...

Страница 360: ...edia types Value 1 sided Printed in 1 sided Display Error Message to cancel printing is displayed Finishing Error Set alternative actions when finishing Staple Punch Offset Fold Auto Image Rotation is not available for the selected paper size or media type Value Ignore The setting is ignored and the job is printed Display Error Message to cancel printing is displayed No Staple Error Set what to do...

Страница 361: ...ed that the cassette paper size setting does not match the actual paper size that is fed Value Ignore The setting is ignored and the job is printed Display Error Message to cancel printing is displayed Paper Jam before Staple The page from which printing is resumed when a paper jam occurs during a job with stapling can be selected Value Resume at Top of Page Resume printing from the first page of ...

Страница 362: ...ox NOTE Inner Tray cannot be selected when the optional 1 000 sheet finisher or 4 000 sheet finisher is installed When Heavy 3 164 g m2 or higher is set in Paper Weight and Mailbox Option is set for the output destination the output destination is automatically changed to a tray that can be used FAX RX data output can be specified when the optional fax kit is installed Common Settings Item Descrip...

Страница 363: ...g Value Auto Color Full Color Black White Color Select Send Store Select the default color mode for scanning documents Value Auto Color Color Gray Auto Color Color B W Full Color Grayscale Black White File Format Set the default type of the files Value PDF TIFF JPEG XPS High Comp PDF File Separation Select the default file separation setting Value Off Each Page Backgrnd Density Copy Set the defaul...

Страница 364: ...ression method for sending the color documents in the TIFF format Value TIFF V6 TTN2 Image Quality File Format Select the default PDF TIFF JPEG XPS file quality Value 1 Low Quality High Comp to 5 High Quality Low Comp Collate Offset Set the defaults for Collate Offset Value Collate Off On Offset Off Each Set If Off is selected of Collate it is set to Each Page JPEG TIFF Print Select the image size...

Страница 365: ... be displayed OCR Text Recognition Set the default OCR Text Recognition Value Off On NOTE This function can only be used when the optional OCR Scan Activation Kit is installed Scan extension kit A OCR Scan Activation Kit page 11 8 Primary OCR Language Set the default language of the text to be extracted English is selected as a default Value English English German English French English Spanish En...

Страница 366: ...on Settings Item Description USB Keyboard Type Set the type of USB keyboard that is connected Value US English US English with Euro French German Common Settings Item Description Basic Configure settings for stamps Text Text Stamp Press Add Edit to edit the test string for a template Up to 8 templates can be registered Press Delete to delete a template Font Page Set the font size for page numbers ...

Страница 367: ... values and to set the stamp position and angle when a stamp is placed on the back side of the paper in duplex printing Font Set the font of the text stamp Value Size Font sizes registered in Font Text Stamp on page 8 20 are displayed Character Border Off Circle Rectangle Underline Style None Bold Italic Bold Italic Font Courier Letter Gothic Color Black Red Green Blue Cyan Magenta Yellow White De...

Страница 368: ...position using numeric values and to set the stamp angle Font Set the font of the text stamp Value Size Font sizes registered in Font Text Stamp on page 8 20 are displayed Character Border Off Circle Rectangle Underline Style None Bold Italic Bold Italic Font Courier Letter Gothic Color Black Red Green Blue Cyan Magenta Yellow White Density 10 to 100 in 10 increments Display Pattern Transparent Cl...

Страница 369: ...position using numeric values and to set the stamp angle Font Set the font of the text stamp Value Size Font sizes registered in Font Text Stamp on page 8 20 are displayed Character Border Off Circle Rectangle Underline Style None Bold Italic Bold Italic Font Courier Letter Gothic Color Black Red Green Blue Cyan Magenta Yellow White Density 10 to 100 in 10 increments Display Pattern Transparent Cl...

Страница 370: ... setting range is 5 to 60 seconds in 5 second increments Staple Position Set the default Staple Position Value A4 Long Edge Letter Long Edge Common Settings Item Description Offset Documents by Job Select whether to offset documents by Job Value Off On NOTE This function is displayed when an optional 1 000 sheet finisher or 4 000 sheet finisher is installed Common Settings Item Description Offset ...

Страница 371: ...ning toner becomes 5 If On is selected set the amount of remaining toner to alert The setting range is 5 to 100 in 1 increments Common Settings Item Description Display Status Log Set the display method of the Status Log Display Jobs Detail Status Value Show All My Jobs Only Hide All Display Jobs Log Value Show All My Jobs Only Hide All Display FAX Log Value Show All Hide All Common Settings Item ...

Страница 372: ...ob Name User Name Print Pages x Copies Total Printed Pages Color Black White Sending Jobs Column 1 Value Job Name User Name Destination Original Pages Color Black White Sending Jobs Column 2 Value Job Name User Name Destination Original Pages Color Black White Storing Jobs Column 1 Value Job Name User Name Original Pages Color Black White Storing Jobs Column 2 Value Job Name User Name Original Pag...

Страница 373: ...me screen of user login administration Priority Show Displays the message on the message board Value Off On Title Enter a maximum of 30 characters for the title to display on the message board Body Enter a maximum of 300 characters for the body to display on the message board Delete Deletes the message board selected on the list Raise Priority Raise the priority of the message board selected on th...

Страница 374: ...ly enabled when On is selected in Auto Image Rotation on page 6 59 Auto Paper Selection If Auto is selected for Paper Selection set the paper size selection method when the zoom changes 1 Value Most Suitable Size Selects paper size based on the current zoom and the size of the original Same as Original Size Selects paper that matches the size of the original regardless the zoom Auto Priority When ...

Страница 375: ...t Original Image Original Size Original Orientation Color Selection Continuous Scan Background Density Adj Send Item Description Quick Setup Registration Select the functions to be registered for Quick Setup Six keys of the Quick Setup screen are allocated to typical functions but can be changed as necessary Six items in the following options are available Value Original Size 2 sided Book Original...

Страница 376: ...00x300dpi 200x400dpi Super Fine 200x200dpi Fine 200x100dpi Normal File Format Select the file format of forwarded original For details on setting value refer to File format for Send and Forward on page 8 31 File Separation Set whether originals are divided into multiple files before being forwarded Value Off Each Page E mail Subject Enter a maximum of 60 characters for the subject of forwarded E m...

Страница 377: ...Grayscale Black and White TIFF 1 Low Quality High Comp to 5 High Quality Low Comp Auto Color Color Grayscale Auto Color Color Black and White Full Color Grayscale Black and White JPEG 1 Low Quality High Comp to 5 High Quality Low Comp Auto Color Color Grayscale Full Color Grayscale XPS 1 Low Quality High Comp to 5 High Quality Low Comp Auto Color Color Grayscale Auto Color Color Black and White Fu...

Страница 378: ...on and press OK Password to Edit Print Document Off On Enter the password to edit the PDF file Press Password enter a password up to 256 characters and then press OK Press Confirmation to enter the password again for confirmation and press OK When you have entered the password to edit print document you can specifically limit the operation Detail Printing Allowed Not Allowed Allowed Restricts prin...

Страница 379: ... enter the password again for confirmation and press OK When you have entered the password to edit print document you can specifically limit the operation Detail Printing Allowed Not Allowed Disables the printing of PDF file Allowed Low Resolution only Can print the PDF file only in low resolution Allowed Can print the PDF file in original resolution Changes Allowed Not Allowed Disables the change...

Страница 380: ...it is activated When 0 is set Repeat Copy cannot be used Deletion of Job Retention This setting specifies that documents such as Private Printing Quick Copying or Proof and Hold Printing saved temporarily in the job box are automatically deleted after they have been saved for a set time Value Off 1 hour 4 hours 1 day 1 week NOTE This function is valid for documents saved after the function is set ...

Страница 381: ...ording to the data to print Value PCL6 IBM Proprinter Line Printer EPSON LQ 850 NOTE IBM Proprinter Line Printer and EPSON LQ 850 are displayed when the optional Emulation Upgrade Kit is installed KPDL Error Report When an error has occurred during printing in KPDL emulation mode set whether the error report is output Value Off On Color Setting You can choose whether reports are printed in color o...

Страница 382: ... be printed When the preset timeout passes the machine automatically prints the document The options are between 5 and 495 seconds Value 5 to 495 seconds LF Action Set the line feed action when the machine receives the line feed code character code 0AH Value LF Only LF and CR Ignore LF CR Action Set the character return action when the machine receives the character return code character code 0DH ...

Страница 383: ...iption Status Page Prints the status page allowing you to check the information including current settings available memory space and optional equipment installed Font List Prints the font list allowing you to check the font samples installed in the machine Network Status Prints the network status allowing you to check the information including network interface firmware version network address an...

Страница 384: ...dress and protocol NOTE This function is displayed when the optional Network Interface Kit is installed Report Report Item Description Send Result Report Automatically print a report of transmission result when a transmission is complete E mail Folder Print a report of E mail Folder transmission results Value Off On Error Only FAX 1 For details refer to the FAX Operation Guide Canceled before Send...

Страница 385: ...ecify the number of job histories The setting range is 1 to 1 500 Sending Log History You can also send the log history to the specified destinations manually Destination Set the destination to which log histories are sent Only E mail address can be set Job Log Subject Set the subject automatically entered when sending log histories by E mail Value Up to 60 characters Personal Information Select w...

Страница 386: ...nation to which login histories are sent E mail address only can be set as destination NOTE This function is displayed when Login History is set to On Subject Set the subject automatically entered when sending login histories by E mail Value Up to 60 characters NOTE This function is displayed when Login History is set to On Log Reset Resets the recorded login histories NOTE If the user authenticat...

Страница 387: ...n Destination Set the destination to which device log histories are sent E mail address only can be set as destination NOTE This function is displayed when Device Log History is set to On Subject Set the subject automatically entered when sending device log histories by E mail Value Up to 60 characters NOTE This function is displayed when Device Log History is set to On NOTE If the user authentica...

Страница 388: ...ion Set the destination to which secure communication error log histories are sent E mail address only can be set as destination NOTE This function is displayed when Secure Communication Error Log History is set to On Subject Set the subject automatically entered when sending secure communication error log histories by E mail Value Up to 60 characters NOTE This function is displayed when Secure Co...

Страница 389: ...ing is available when TCP IP is set to On IP Address Set the IP addresses Value NOTE When DHCP is set to On this function will be grayed out and the value cannot be entered Subnet Mask Set the IP subnet masks Value NOTE When DHCP is set to On this function will be grayed out and the value cannot be entered Default Gateway Set the IP gateway addresses Value NOTE When DHCP is set to On this function...

Страница 390: ...k Manual Setting Manually specify the IP address prefix length and gateway address of TCP IP IPv6 Value IP Address Manual numbers 128 bit in total separated by colons Prefix Length 0 to 128 Default Gateway NOTE This function is displayed when IPv6 is set to On To enter Default Gateway set RA Stateless to Off DHCP Select whether to use the DHCP IPv6 server Value Off On NOTE This function is display...

Страница 391: ... optional Internet FAX Kit is activated DSM Scan Select whether to use DSM scan Value Off On ThinPrint Select whether to use ThinPrint When selecting On set the SMB default Port Number Use the default port 4000 1 2 Value Off On Port Number 1 to 32767 NOTE This function is displayed only when the optional ThinPrint Option is activated Thin Print over SSL To use Thin Print over SSL press Thin Print ...

Страница 392: ...SL 1 2 Value Off On NOTE Selecting Off will disable the functionality of WIA TWAIN and Network FAX drivers 1 The setting will be changed after restarting the device or network 2 Set SSL to On in Security Settings on page 8 46 IMPORTANT After changing the setting restart the network or turn the machine OFF and then ON Item Description SSL Select whether to use SSL for communication Value Off On Ite...

Страница 393: ... proxy is used Value Enter the domain name System Network NOTE This function is displayed when the optional Network Interface Kit is installed Item Description Host Name Check the host name of the machine Host name can be changed from Embedded Web Server RX Changing Host Name page 2 36 TCP IP Setting For details on setting value refer to TCP IP Setting on page 8 43 NetWare Use NetWare to receive d...

Страница 394: ...rts connection using the PIN code of the access point Enter the PIN code of the access point Custom Setup The detailed settings for wireless LAN can be changed Network Name SSID Set the SSID Service Set Identifier of the wireless LAN to which the machine connects NOTE Up to 32 characters can be entered Connection Mode Set the connection mode Value Ad Hoc Infrastructure NOTE Ad Hoc Directly communi...

Страница 395: ...be used for send function and connecting to external address book Value Standard Optional Network System Network Item Description Security Level Specify the security level Value Low This is the mode in which the service personnel performs maintenance work Do not set to this mode High This is the security setting we recommend Use this setting normally Very High In addition to High setting this sett...

Страница 396: ...r turn the machine OFF and then ON System Network Item Description Hard Disk Initialization Initializes the system and the erasure method for data stored on the machine s hard disk For details refer to the Data Security Kit E Operation Guide NOTE This function is displayed when the optional Data Security Kit is activated Data Sanitization Completely erases address information and image data saved ...

Страница 397: ...al reception forwarding settings Application program Application program added by a user or service representative Trial functions System Network NOTE This function is displayed when the Printed Document Guard Kit is installed Item Description Document Guard When the optional Printed Document Guard Kit is installed careless copying and sending of documents that contain confidential or personal inf...

Страница 398: ...ection is not guaranteed If misdetection occurs contact your service representative Optional Function Restart Entire Device System Network Item Description All functions A message indicating that a confidential document was detected is displayed Scanning of the remaining document pages stops Copying function Printed blank from the point where the guard pattern is detected Sending Functions Stops t...

Страница 399: ...s related to machine management User Login Setting page 9 2 Job Accounting Setting page 9 27 Unknown ID Job page 9 42 Edit Destination Edit Destination Edit Destination Edit Destination Item Description Sort Select the default sort setting of the address for the address book Value No Name Narrow Down This procedure can be used to filter narrow down the types of destination listed when the address ...

Страница 400: ...et the time difference from GMT Choose the nearest listed location from the list If you select a region that utilizes summer time configure settings for summer time Setting Date and Time page 2 23 Auto Panel Reset If no jobs are run for a certain period of time automatically reset settings and return to the default setting Select to use Auto Panel Reset or not Value Off On NOTE The time allowed to...

Страница 401: ... in cassette or Add paper in Multi Purpose tray error occurred when the job was started is automatically skipped after a set period of time elapses Value Off On NOTE When a job is skipped it is moved to the end of the job queue If On is selected set the time until the job is skipped The setting range is 5 to 90 5 second increments Error Clear Timer If you select On for Auto Error Clear set the amo...

Страница 402: ...ediately However this mode saves less energy Normal Recovery In this mode you can select the method from the following enabling the use of all functions immediately or enabling the use of desired functions only If you want to use all functions immediately press the Power key to execute recovery Power Saving Recovery This mode enables the use of desired functions only This mode saves energy most ef...

Страница 403: ...es 331 seconds on 3005ci 282 seconds on 3505ci 218 seconds on 4505ci and 146 seconds on 5505ci 82 4 F 28 C 70 For more information refer to the Drum Refresh on page 10 42 NOTE Drum Refresh cannot be performed while printing Execute Drum Refresh after the printing is done Correcting Black Lines Correct fine lines streaks caused by contamination which may appear on the image when the document proces...

Страница 404: ...ven to print speed NOTE When Custom is displayed as setting item the setting cannot be changed Tone Curve Adjustment After prolonged use or from the effects of surrounding temperature or humidity the printed output tone may differ from the original Perform this function to ensure consistency with the original tone For the procedure refer to Tone Curve Adjustment on page 10 41 Calibration Adjust co...

Страница 405: ...played when an optional 1 000 sheet finisher or 4 000 sheet finisher is installed First Print Position Using this function speeds up either of the first print time of black and white printing or color printing by changing the default start position of the first print In addition the machine can automatically detect the appropriate position depending on your usage Value Standard Black White Priorit...

Страница 406: ...ecifies Internet browser preferences such as your home page setting and how pages are displayed Value Home page Enter the address for Home page Text Size Large Medium Small Display Mode Normal Just Fit Rendering Smart Fit Rendering Cookie Accept All Reject All Prompt before Accepting NOTE This is not displayed if Off is selected in Internet Browser on page 8 60 NOTE To use proxy from Internet Brow...

Страница 407: ...thorization 9 15 Group Authorization Set 9 15 Guest Authorization Set 9 18 Obtain NW User Property 9 21 Simple Login Settings 9 23 ID Card Settings 9 26 Job Accounting Setting 9 27 First Job Accounting Setup 9 27 Job Accounting Setting 9 27 Job Accounting 9 29 Login Logout 9 29 Job Accounting Access 9 30 Job Accounting Local 9 31 Accounting List 9 32 Managing Accounts 9 33 Default Setting 9 36 Cou...

Страница 408: ...same authority This can also be used to reduce operating costs for example by prohibiting color copy in Guest Authorization Set so that only users who log in can use color copying If To use this function press Authentication key and login appears while operating the machine you must press the Authentication Logout key and log in as a user for whom the function is not prohibited First User Login Ad...

Страница 409: ...l User List page 9 8 Local Authorization page 9 15 Group Authorization Set page 9 15 Guest Authorization Set page 9 18 Obtain NW User Property page 9 21 Simple Login page 9 23 ID Card Settings page 9 26 Model Name Login User Name Login Password 3005ci 3000 3000 3505ci 3500 3500 4505ci 4500 4500 5505ci 5500 5500 User Login Job Accounting 㪥㪼㫏㫋 User Login Setting Close 㪚㪿㪸㫅㪾㪼 Unknown ID Job 㪥㪼㫏㫋 Job ...

Страница 410: ...ew function to the home screen appears when OK is pressed To add a new function press Yes The selection screen for functions displayed in the home screen will appear Item Descriptions Local Authentication User authentication based on user properties on the local user list stored in the machine Network Authentication User authentication based on Authentication Server Use a user property stored in A...

Страница 411: ...etwork Authentication setting of the machine User property of the Authentication Server Date and time setting of the machine and the Authentication Server If you cannot login because of the setting of the machine login with any administrator registered in the local user list and correct the settings Up to 10 domains can be registered for network authentication ...

Страница 412: ...m Descriptions Lockout Select whether or not account lockout policy is enabled Value Off On Lockout Policy Specify the conditions and the extent to which the account lockout is applied Value Number of Retries until Locked Specify how many login retries are allowed until the account is locked out 1 to 10 times Lockout Duration Specify how long the account is to be locked out until it is unlocked 1 ...

Страница 413: ...e the settings The following settings can be selected Item Descriptions Password Policy Select whether or not password policy is enabled Value Off On Minimum password length Set the minimum password length of characters for password Value Off On 1 to 64 characters Password complexity Set the password complexity Value No more than two consecutive identical char Off On At least one uppercase letter ...

Страница 414: ...h machine administrator rights and administrator privileges is already stored Each user s properties are Machine Administrator User Name DeviceAdmin Login User Name 3005ci 3000 3505ci 3500 4505ci 4500 5505ci 5500 Login Password 3005ci 3000 3505ci 3500 4505ci 4500 5505ci 5500 Access Level Machine Administrator Administrator User Name Admin Login User Name Admin Login Password Admin Access Level Adm...

Страница 415: ...fer to Job Accounting Setting on page 9 27 NOTE Select Name or ID from the Sort to sort the account list Press Search Name or Search ID to search by account name or account ID E mail Address The user can register his her E mail address The registered address will be automatically selected for subsequent operations that need any E mail function ID Card Information Register ID card information Place...

Страница 416: ...whether only Combine is allowed EcoPrint Restriction Specify whether only EcoPrint is allowed Send Restriction Select whether or not use of the send function is prohibited FAX TX Restriction 2 Select whether or not use of the fax send function is prohibited Storing Restr in Box Select whether or not use of the box store function is prohibited Storing Restr in Memory Select whether or not use of th...

Страница 417: ...ogin setting screen 2 Press Add Edit of Local User List 2 Change the user properties 1 Select the user whose properties you wish to change 2 Change the user properties NOTE To change the user information of the machine administrator you must log in with machine administrator authority You can only view user information if you log in as a regular user The factory default login user name and login p...

Страница 418: ...User Property These users can partially change their own user properties including user name login password and E mail address Although Login User Name Access Level or Account Name cannot be changed the users can check the present status 1 Display the screen 1 Press the System Menu key 2 Press and then User Property NOTE The default user with administrator rights cannot be deleted User User Name A...

Страница 419: ...the user s e mail address Up to 128 characters can be entered NOTE This function appears when Local Authorization is set to On Group Authorization is set to On and Guest Authorization Setting is set to On Authorization Rules Displays the usage restriction that is set for the logged in user NOTE Job Accounting Rules shows the account name set for the logged in user and the usage restrictions that a...

Страница 420: ...rd Authentication Kit is activated Card Authentication Kit B Card Authentication Kit page 11 6 This function does not appear when the server type is set to Ext in Network Authentication and logged in with the user account certificated in the server specified as the Ext server type My Panel Register the language and default screen for each user Once registered the setting will be applied simply by ...

Страница 421: ...n the authentication server Group Authorization Use the group authorization 1 Display the screen 1 Referring to User Login Setting on page 9 2 display the user login setting screen 2 Press Next of Group Authorization Set and then Change of Group Authorization 2 Configure the setting 1 Press On 2 Press OK NOTE When using Local Authorization the user authentication type must be set to Local Authenti...

Страница 422: ...p to 32 characters Access Level Select Administrator or User for group access privileges Print Restriction Select whether or not to reject usage of print functions for the printer Print Restriction Color Select whether or not to reject usage of color print functions for the printer Copy Restriction Select whether or not to reject usage of copy functions Copy Restriction Color Select whether or not...

Страница 423: ... 8 set Print Restriction Color Copy Restriction Copy Restriction Color Copy Restriction Full Color Duplex Restriction Combine Restriction EcoPrint Restriction Send Restriction Fax TX Restriction Storing Restr in Box and Storing Restr in Memory 3 Register the group Press Save A new group is added on the group list NOTE Refer to Entering Characters on page 11 13 for details on entering characters Gr...

Страница 424: ...ins the user information to be registered NOTE To use Guest Authorization Set User Login Administration must be enabled in User Login on page 9 4 Cannot be used when the Key Counter option is used NOTE If the guest authentication setting is enabled the Authentication Logout key must be pressed when logging in In the guest user default settings only monochrome copying can be used If you wish to use...

Страница 425: ...s prohibited Copy Restriction Color Select whether or not use of the copy print function color is prohibited Copy Restriction Full Color Select whether or not use of the copy print function full color is prohibited Duplex Restriction Select whether only duplex printing is allowed Combine Restriction Specify whether only Combine is allowed EcoPrint Restriction Specify whether only EcoPrint is allow...

Страница 426: ... 8 Similar to steps 7 and 8 set Print Restriction Color Copy Restriction Copy Restriction Color Copy Restriction Full Color Duplex Restriction Combine Restriction EcoPrint Restriction Send Restriction Fax TX Restriction Storing Restr in Box and Storing Restr in Memory 9 Press Close 3 Register the guest property Press Save NOTE Select Name or ID from the Sort to sort the account list Press Search N...

Страница 427: ...ication NOTE To obtain the network user property from the LDAP server Network Authentication must be selected for the authentication method in User Login on page 9 4 Select On for LDAP in Protocol Settings on page 8 45 Item Descriptions Server Name 1 Enter the LDAP server name or the IP address up to 64 characters If a server name is not entered user information will be acquired from the server se...

Страница 428: ...nter the LDAP Attribute to obtain the E mail address and press OK 10 If you set the server type to Kerberos press Authentication Type and set the authentication method 11 Press Search Timeout to set the amount of time to wait before time out 12 Press or the numeric keys to enter the time and press OK 13 Press LDAP Security to select the type of encryption according to the type of security employed...

Страница 429: ... Key Register users to use simple login You can add up to 20 users 1 Display the screen 1 Referring to User Login Setting on page 9 2 display the user login setting screen 2 Press Next of Simple Login Settings and then Next of Simple Login Key 2 Enter the user information 1 Press the key to which you want to register a user 2 Press Add Edit NOTE For user registration refer to Adding a User Local U...

Страница 430: ...selected Specifying the user from local users Select the user to be set for simple login NOTE Refer to Entering Characters on page 11 13 for details on entering characters NOTE Destinations can be sorted or searched by destination name or address number For details refer to Specifying Destination on page 5 28 Simple Login Key Display Name Save Icon Password Login 㪚㪿㪸㫅㪾㪼 User 㪚㪿㪸㫅㪾㪼 Change 㪚㪿㪸㫅㪾㪼 C...

Страница 431: ... Login 6 Press On or Off and then press OK 7 Press Change of Icon 8 Select the user icon to be displayed and press OK 3 Register the user Press Save NOTE Refer to Entering Characters on page 11 13 for details on entering characters User Name Domain OK Keys Simple Login Key User Enter login user name and password Cancel Back Login User Name Login Password Keys domain 1 0099 Cancel OK Male 1 Simple ...

Страница 432: ...2 Configure the settings The following settings can be selected NOTE This functions appears when the Card Authentication kit is activated Card Authentication Kit B Card Authentication Kit on page 11 6 This function does not appear when the user logs in as a network authentication user Item Descriptions Keyboard Login When ID card authentication is enabled select whether or not login by keyboard is...

Страница 433: ... of an identical account ID Tracking the print volume for each account and for all accounts combined Restricting the print counter in one page increments up to 9 999 999 copies Resetting the print counter for each account or for all accounts combined First Job Accounting Setup Follow these steps for the first job accounting setup Enable job accounting page 9 29 Add an account page 9 32 Log out pag...

Страница 434: ... password are set as shown below Job Accounting page 9 29 Job Accounting Access page 9 30 Job Accounting Local page 9 31 Apply Limit page 9 41 Copier Printer Count page 9 41 Model Name Login User Name Login Password 3005ci 3000 3000 3505ci 3500 3500 4505ci 4500 4500 5505ci 5500 5500 User Login Job Accounting 㪥㪼㫏㫋 User Login Setting Close 㪚㪿㪸㫅㪾㪼 Unknown ID Job 㪥㪼㫏㫋 Job Accounting Setting User Login...

Страница 435: ...s machine Use the procedure below to login and logout Login 1 In the screen below enter the account ID using the numeric keys and press Login NOTE When the display returns to System Menu default screen logout is automatically executed and the screen to enter the Account ID appears To continue the operation enter the Account ID NOTE If you entered a wrong character press the Clear key and enter the...

Страница 436: ...ID entry would be skipped Refer to Adding a User Local User List on page 9 8 2 Proceed to complete the rest of the steps Logout When the operations are complete press the Authentication Logout key to return to the account ID entry screen Job Accounting Access Set the job accounting access 1 Display the screen 1 Referring to Job Accounting Setting on page 9 27 display the job accounting access scre...

Страница 437: ...ministered When Individual is selected for Managing the Copy Printer Count For the count by paper size the report will be printed by size Use the procedure below to print a job accounting report 1 Prepare paper Check that A4 or Letter paper is loaded in the cassette 2 Display the screen 1 Referring to Job Accounting Setting on page 9 27 display the job accounting access screen 2 Press Next of Job ...

Страница 438: ...count List Item Descriptions Account Name Enter the account name up to 32 characters Account ID Enter the account ID as many as eight digits between 0 and 99999999 Restriction This prohibits printing scanning or restricts the number of sheets to load Refer to Restricting the Use of the Machine on page 9 34 NOTE Refer to Entering Characters on page 11 13 for details on entering characters NOTE Any ...

Страница 439: ...he Machine to change account information 4 Press Save 5 Press Yes in the registration confirmation screen The account information is changed NOTE Select Name or ID from the Sort to sort the account names Press Search Name or Search ID to search by account name or account ID User Login Job Accounting Accounting List 1 2 Add or edit the account Maximum 1000 Search Name Search ID Account Name Account...

Страница 440: ...of sheets used for color and black and white printing Print Restr Full Color Limits the number of sheets used for full color printing Scan Restriction Others Limits the number of sheets scanned excludes copying FAX TX Restriction Limits the number of sheets sent by fax This is displayed when the optional fax kit is installed FAX Port Restriction Restricts the ports used for faxing This is displaye...

Страница 441: ...s 1 Select the restriction mode If Counter Limit is selected press or numeric keys to enter the number of pages 2 Press OK 3 Repeat steps 1 and 2 for other accounts to be restricted 4 Press Save The restricted account is added Item Descriptions Off No restriction is applied Counter Limit Restricts the print counter in one page increments up to 9 999 999 copies Reject Usage Restriction is applied A...

Страница 442: ...ull color copying Copy Restr SingleColor Sets the default restriction on the number of sheets used for single color copying Print Restriction Total Sets the default restriction on the total number of sheets used for color and black and white printing Print Restr Full Color Sets the default restriction on the number of sheets used for full color printing Scan Restriction Others Sets the default res...

Страница 443: ...to Job Accounting Setting on page 9 27 display the job accounting access screen 2 Press Next of Job Accounting Local Next of Default Setting Next of Count by Paper Size Change of Paper Size 1 to 5 2 Configure the settings 1 Press On 2 Select the paper size 3 Press Media Type to specify media type 4 Select the media type and press OK 5 Press OK NOTE Paper size is available in five types 1 to 5 Thes...

Страница 444: ...o use Count by Paper Size and Count by Duplex Combine to check the number of pages used For copying you can check the pages used for black and white full color and single color copying as well as the total pages used For printing you can check the pages used for black and white and full color printing as well as the total pages used You can use Count by Paper Size to check the number of pages used...

Страница 445: ...screen 2 Press Next of Job Accounting Local and then Check of Each Job Accounting 2 Check the number of pages 1 Select the account to check the count 2 Press Detail NOTE Select Name or ID from the Sort to sort the account names Press Search Name or Search ID to search by account name or account ID To display an account other than your own account press Other Account User Login Job Accounting Total...

Страница 446: ...e count The results will be displayed Confirm the count and press Close 4 Press Start of Counter Reset to reset the counter 5 Press Yes in the confirmation screen The counter will be reset Printed Pages Close Scanned Pages Counter Reset FAX Transmission Pages 㪚㪿㪼㪺㫂 㪪㫋㪸㫉㫋 2 20 0 00 10 Account 㪚㪿㪼㪺㫂 FAX Transmission Time Account 06 ...

Страница 447: ... copying and printing page counts are shown either the total of both or each of copying and printing individually The selection may influence restriction on the count and count method For details refer to Restricting the Use of the Machine page 9 34 Counting the Number of Pages Printed page 9 38 and Print Accounting Report page 9 31 1 Display the screen 1 Referring to Job Accounting Setting on pag...

Страница 448: ...et to invalid and Job Accounting is set to valid follow the procedure when the Account ID is unknown The setting items are as follows 1 Display the screen 1 Referring to User Login Setting on page 9 2 display the user login setting screen 2 Press Change of Unknown ID Job 2 Configure the settings 1 Press Reject or Permit 2 Press OK Item Descriptions Permit The job is permitted to be printed Reject ...

Страница 449: ...aning 10 2 Toner Container Replacement 10 6 Waste Toner Box Replacement 10 9 Replacing Staples 10 12 Disposing of the Punch Waste 10 16 Troubleshooting 10 18 Solving Malfunctions 10 18 Responding to Messages 10 24 Adjustment Maintenance 10 39 Clearing Paper Jams 10 44 Clearing a Staple Jam 10 72 ...

Страница 450: ...ing quality Platen Cover Glass Platen Wipe the backside of the platen cover the inside of the document processor and the glass platen with a soft cloth dampened with alcohol or mild detergent CAUTION For safety always unplug the power cord before cleaning the machine IMPORTANT Do not use thinner or other organic solvents ...

Страница 451: ...copies when using the optional document processor clean the slit glass with the supplied cleaning cloth When using the document processor that features dual scanning clean the dual scanning unit also 1 2 3 NOTE Wipe the slit glasses with the dry accessory cloth Do not use water soap or solvents for cleaning ...

Страница 452: ...10 4 Troubleshooting Regular Maintenance Separator Clean the separator regularly at least monthly to ensure optimum printing quality 1 2 3 CLICK ...

Страница 453: ...10 5 Troubleshooting Regular Maintenance Transfer Roller Clean the transfer roller regularly at least monthly to ensure optimum printing quality 1 2 3 CLICK ...

Страница 454: ...er container always use a genuine toner container Using a toner container that is not genuine may cause image defects and product failure The memory chip in the toner container of this product stores information necessary for improving customer convenience operation of the recycling system for used toner containers and planning and development of new products The stored information does not includ...

Страница 455: ...10 7 Troubleshooting Regular Maintenance 3 4 5 6 CLICK ...

Страница 456: ...tenance 7 NOTE Return the exhausted toner container and waste toner box to your dealer or service representative The collected toner container and waste toner box will be recycled or disposed in accordance with the relevant regulations ...

Страница 457: ...st full appears in the touch panel make sure you have a new waste toner box available for replacement When the touch panel shows Check waste toner box immediately replace the waste toner box 1 2 3 CAUTION Do not attempt to incinerate parts which contain toner Dangerous sparks may cause burns 1 2 ...

Страница 458: ...10 10 Troubleshooting Regular Maintenance 4 5 6 7 1 2 CLICK CLICK ...

Страница 459: ...tenance 8 NOTE Return the exhausted toner container and waste toner box to your dealer or service representative The collected toner container and waste toner box will be recycled or disposed in accordance with the relevant regulations ...

Страница 460: ...essage displays indicating that staples have run out the staple cartridge holder need to be replenished with staples Follow the steps below to refill staples 1 000 sheet Finisher Option 1 2 NOTE If the Staple Unit runs out of staples contact your service representative or the place of purchase NOTE The staple cartridge can only be removed when it contains no more staples 1 2 1 ...

Страница 461: ...ntains staple cartridge holders B and C The refill procedure for staple cartridge holders B and C are the same as for staple cartridge holder A Refilling Staple Cartridge Holder A 1 2 NOTE See page 10 14 to refill staple cartridge holder B C of the optional folding unit NOTE The staple cartridge can only be removed when it contains no more staples CLICK 1 2 1 ...

Страница 462: ...ng Regular Maintenance 3 Refilling Staple Cartridge Holders B C Option Follow the steps below to refill staples for the optional folding unit Follow the same procedure to refill staple cartridge holders B and C 1 2 CLICK ...

Страница 463: ...10 15 Troubleshooting Regular Maintenance 3 4 5 NOTE The staple cartridge can only be removed when it contains no more staples 1 2 1 2 1 1 CLICK ...

Страница 464: ...peration panel indicating that the waste punch box is full be sure to empty the scraps in the punch waste box Leave the main power switch on the machine switched ON while performing this procedure 1 000 sheet Finisher Option 1 2 3 NOTE Take care not to spill the waste hole punch scraps when removing the container ...

Страница 465: ...10 17 Troubleshooting Regular Maintenance 4 000 sheet Finisher Option 1 2 3 NOTE Take care not to spill the waste hole punch scraps when removing the container ...

Страница 466: ...p mode page 3 15 Blank sheets are ejected Are the originals loaded correctly When placing originals on the platen place them face down and align them with the original size indicator plates page 5 2 When placing originals in the document processor place them face up page 5 3 Check that the settings of the application software Printouts are totally too light Is the paper damp Replace the paper with...

Страница 467: ... humidity Run Drum Refresh page 10 42 Images are skewed Are the originals loaded correctly When placing originals on the platen align them with the original size indicator plates page 5 2 When placing originals in the document processor align the original width guides securely before placing the originals page 5 3 Is the paper loaded correctly Check the position of the paper width guides page 3 18...

Страница 468: ...the power cord into an AC outlet Is the machine powered on Turn on the main power switch page 2 10 Are the printer cable and network cable connected Connect the correct printer cable and network cable securely page 2 6 Was the machine powered on before the printer cable was connected Power on the machine after connecting the printer cable Is the print job paused Resume printing page 7 4 Cannot pri...

Страница 469: ... appropriate image quality page 6 24 Have you loaded color copy paper into the paper tray Load color copy paper into the paper tray page 3 18 Run Calibration page 10 42 Run Tone Curve Adjustment page 10 41 When making copies Adjust the color balance page 6 26 When printing from a computer Adjust the color using the printer driver Refer to the Printing System Driver User Guide Have you printed out ...

Страница 470: ...ely page 2 6 Have the network settings for the equipment been configured properly Configure the TCP IP settings properly page 8 43 Have the folder sharing settings been configured properly Check sharing settings and access privileges under the folder properties Has the SMB protocol been set to On Set the SMB protocol setting to On page 5 33 Has Host Name been entered properly 1 Check the name of t...

Страница 471: ...g settings of Protocol Settings in System Menu SNMPv1 v2c On WSD Scan On Enhanced WSD On page 8 46 Check the following settings of TCP IP Setting in System Menu TCP IP Off IPv6 Off IPSec On Change the following settings of TCP IP Setting in System Menu TCP IP On IPv6 On IPSec Off page 8 43 Is public entered in Read Community of SNMPv1 v2c in Embedded Web Server RX Enter public in Read Community Re...

Страница 472: ... paper Load paper Select the available paper Press Continue to print page 3 16 Add paper in Multi Purpose tray Is the paper of the selected size loaded in the multi purpose tray Load paper Select the available paper Press Continue to print page 3 26 Adjusting Scanner The machine is under the adjustment to maintain its quality Please wait Adjusting The machine is under the adjustment to maintain it...

Страница 473: ...uter Check the computer Is the machine and the PC to which the scanned image is to be sent connected to the network Check the network and SMB settings The network cable is connected The hub is not operating properly The server is not operating properly Host name and IP address Port number page 2 6 Is the account information user ID password used to access the shared folder to which the scanned ima...

Страница 474: ...d Continue is pressed punch is released Select the available paper Press Continue to print page 6 20 Cannot staple at the specified position Have you selected a position that cannot be stapled If the selected paper is not changed and Continue is pressed staple is released Select the available paper Press Continue to print page 6 19 Cannot staple this paper Did you select a paper size type that can...

Страница 475: ...tte Open the cassette Check inside the machine and remove the paper Error occurred at the multi purpose tray Remove the paper from the multi purpose tray Message Checkpoints Corrective Actions Reference Page Failed to specify Job Accounting When Auto Error Clear is set to On processing resumes automatically after a set amount of time elapses Failed to specify Job Accounting when processing the job...

Страница 476: ...ns Reference Page Incorrect account ID The account ID was incorrect when processing the job externally The job is canceled Press End Incorrect box password The box password was incorrect when processing the job externally The job is canceled Press End Incorrect Login User Name or Password When Auto Error Clear is set to On processing resumes automatically after a set amount of time elapses The log...

Страница 477: ...ference Page Machine failure Internal error has occurred Make a note of the error code displayed on the screen Call service Mailbox tray is full of paper Is the acceptable storage capacity exceeded Remove the paper Printing then resumes Main unit inner tray is full of paper Is the acceptable storage capacity exceeded Remove the paper Printing then resumes Main unit upper left tray is full of paper...

Страница 478: ...inting System Refer to Responding to Printing System Error for the error code and corrective actions page 10 37 Printing System error Press Status Job Cancel key to check error Press Status Job Cancel key Is the Printing System Error message displayed An error has occurred on Printing System Refer to Responding to Printing System Error for the error code and corrective actions page 10 37 Press Sta...

Страница 479: ...ls from the document processor Replace all originals and press Continue Remove originals from the document processor put them back in their original order and place them again Press Continue to resume printing Press Cancel to cancel the job When Auto Error Clear is set to On processing resumes automatically after a set amount of time elapses When Auto Error Clear is set to On processing resumes au...

Страница 480: ...e Page The cover is open Is there any cover which is open Close the cover indicated on the screen The folding unit is open Close the folding unit The password does not meet password policy Is the password expired Change the login password The job is canceled Press End page 9 7 page 9 8 Is the password policy requirement such as password length or required characters changed Confirm the password po...

Страница 481: ...ed toner container our own brand We will not be liable for any damage caused by the use of third party supplies in this machine Unknown Toner Installed PC C M Y K Does the installed toner container s regional specification match the machine s Install the specified container Message Checkpoints Corrective Actions Reference Page Warning for high temperature Adjust the room temperature Print quality ...

Страница 482: ...the Embedded Web Server RX SMTP login user name and login password POP3 login user name and login password E mail size limit Failed to send i FAX Check the following on the Embedded Web Server RX SMTP login user name and login password POP3 login user name and login password Failed to send via FTP Check the FTP settings Login user name and login password NOTE If the sender is a domain user specify...

Страница 483: ...nder address of SMTP on the Embedded Web Server RX page 2 33 1131 Failed to send via FTP Select On of the secure protocol settings on the Embedded Web Server RX page 2 33 1132 Failed to send via FTP Check the following of the FTP server Is FTPS available Is the encryption available page 2 33 2101 Failed to send via SMB Check the network and SMB settings The network cable is connected The hub is no...

Страница 484: ...ating properly 2204 Failed to send the e mail Failed to send i FAX Check the E mail size limit of the SMTP settings on the Embedded Web Server RX 3101 Failed to send the e mail Failed to send i FAX Check the authentication methods of both the sender and the recipient Failed to send via FTP Check the network and SMB settings The network cable is connected The hub is not operating properly The serve...

Страница 485: ...is correctly connected 1031 Failed to connect to the Printing System Check the connection to the Printing System Interface cable connection Check that the interface cable is correctly connected If the error exists Printing System failure has occurred Make a note of the error code displayed on the touch panel Call service 1040 Failed to connect to the Printing System Check the connection to the Pri...

Страница 486: ...stem Make a note of the error code displayed on the touch panel Call service 3000 Failed to connect to the Printing System Check the connection to the Printing System Network settings Both machine and Printing System Turn the main power switch off and on If the error exists Printing System failure has occurred Make a note of the error code displayed on the touch panel Call service Error Code Messa...

Страница 487: ...and then Next of Color Registration 2 Print the chart Press Next in Auto and then Start A chart is printed 3 Perform the color registration 1 As shown in the illustration place the printed side down on the platen with the edge with the arrows toward the back 2 Press Start to scan the chart When scanning is finished color printing position correction starts 3 When color printing position correction...

Страница 488: ...rt for each of M magenta C cyan and Y yellow charts for H 1 to 7 and V 1 to 5 are printed Chart Example 3 Enter the appropriate value 1 From charts V 1 to V 5 read only the values from V 3 center Find the location on each chart where 2 lines most closely match If this is the 0 position registration for that color is not required For the illustration B is the appropriate value 2 Press Next of Regis...

Страница 489: ...m this function to ensure consistency with the original tone Before executing Tone Curve Adjustment execute calibration see page 10 42 If calibration does not improve the tones perform Tone Curve Adjustment A total of 3 pattern pages No 1 to 3 are printed during adjustment The printed patterns are read sequentially during the adjustment 1 Display the screen 1 Press the System Menu key 2 Press Adju...

Страница 490: ...e drum refresh Press Start to perform Drum Refresh Calibration Using this function enables printing in the most appropriate color by adjusting hue and color drift in detail Use Tone Curve Adjustment page 10 41 when the color is not enhanced even after performing calibration If the hue and color are not enhanced use Color Registration page 10 39 1 Display the screen 1 Press the System Menu key 2 Pr...

Страница 491: ...begins Developer Refresh Adjust the printed image that is too light or incomplete even though there is enough toner In addition Black or color dots appear on the white background when white original is scanned can be removed 1 Display the screen 1 Press the System Menu key 2 Press Adjustment Maintenance and then Next of Developer Refresh 2 Perform the developer refresh Press Start Developer Refres...

Страница 492: ...age 10 56 H Document processor Option page 10 57 I Job Separator Option page 10 58 J Bridge Unit page 10 59 K 1 000 sheet Finisher Option page 10 60 4 000 sheet Finisher Option page 10 61 L Mailbox Option page 10 64 M Center Folding Unit Option page 10 65 N Cassette 5 Option page 10 67 O Cassette 6 7 Option page 10 69 JAM Paper jam 08 13 㪈㪅㩷㪩㪼㫄㫆㫍㪼㩷㫋㪿㪼㩷㫇㪸㫇㪼㫉㩷㪽㫉㫆㫄 㫋㪿㪼㩷㫇㪸㫇㪼㫉㩷㪼㫁㪼㪺㫋㫆㫉㪅 㪉㪅㩷㪦㫇㪼㫅㩷㫄㪸㫀㫅㩷㫌㫅㫀...

Страница 493: ...e Scraps of paper left in the machine could cause subsequent jamming After clearing the paper jam close the cassette and cover in the reverse procedure Discard paper that has jammed in the optional document finisher A page affected by a paper jam will be printed again CAUTION The fixing unit is extremely hot Take sufficient care when working in this area as there is a danger of getting burned ...

Страница 494: ...10 46 Troubleshooting Troubleshooting Cassette 1 1 2 NOTE To remove paper which is difficult to get access to the inner part of the cassette can be removed ...

Страница 495: ...10 47 Troubleshooting Troubleshooting Cassette 2 1 2 NOTE To remove paper which is difficult to get access to the inner part of the cassette can be removed ...

Страница 496: ...10 48 Troubleshooting Troubleshooting Optional Cassettes 3 and 4 Paper Feeder 500 sheet x 2 1 2 3 1 2 ...

Страница 497: ...10 49 Troubleshooting Troubleshooting NOTE To remove paper which is difficult to get access to the inner part of the cassette can be removed ...

Страница 498: ...10 50 Troubleshooting Troubleshooting Large Capacity Feeder 1 500 sheet x 2 1 2 3 4 1 2 B1 B2 ...

Страница 499: ...10 51 Troubleshooting Troubleshooting Multi Purpose Tray 1 2 3 4 ...

Страница 500: ...10 52 Troubleshooting Troubleshooting Inside the Right Covers 1 3 and 4 1 2 If you are using the optional document finisher follow step on page 10 59 to remove jammed paper in the optional bridge unit ...

Страница 501: ...10 53 Troubleshooting Troubleshooting Duplex unit 1 2 ...

Страница 502: ...10 54 Troubleshooting Troubleshooting Duplex Unit and Cassette 1 1 2 3 CLICK ...

Страница 503: ...10 55 Troubleshooting Troubleshooting 4 NOTE To remove paper which is difficult to get access to the inner part of the cassette can be removed ...

Страница 504: ...10 56 Troubleshooting Troubleshooting Fixing unit 1 2 3 A1 ...

Страница 505: ...ing Optional Document Processor 1 2 If the original is difficult to remove turn the dial The original will scroll out to a position where it can be removed easily If you are using the document processor Automatic 2 Sided go to step 3 3 ...

Страница 506: ...10 58 Troubleshooting Troubleshooting Optional Job Separator Inner Job Separator 1 2 3 A1 ...

Страница 507: ...10 59 Troubleshooting Troubleshooting Right Job Separator 1 2 3 Bridge Unit Option A1 1 2 ...

Страница 508: ...10 60 Troubleshooting Troubleshooting 1 000 sheet Finisher Option 1 2 3 D1 D2 2 1 D3 ...

Страница 509: ...10 61 Troubleshooting Troubleshooting 4 000 sheet Finisher Option Coupling Section 1 2 Tray A 1 2 D1 D6 ...

Страница 510: ...10 62 Troubleshooting Troubleshooting 3 NOTE If it is difficult to remove the jammed paper turn feed knob D3 until the jammed paper is in a location where it is easy to remove D4 D3 ...

Страница 511: ...10 63 Troubleshooting Troubleshooting Tray B 1 2 3 Tray C 1 D2 D3 ...

Страница 512: ...10 64 Troubleshooting Troubleshooting Conveyor Inner Tray 2 3 Mailbox Option 1 D2 D3 1 2 ...

Страница 513: ...10 65 Troubleshooting Troubleshooting Center Folding Unit Option Ejection Section 1 2 3 2 1 2 1 2 1 D9 D9 ...

Страница 514: ...10 66 Troubleshooting Troubleshooting Conveyor Section 1 2 If there is no paper jam in the conveyor guide D7 proceed to the following step 3 4 D7 D5 D8 ...

Страница 515: ...10 67 Troubleshooting Troubleshooting 5 Cassette 5 Option Side Feeder 3 000 sheet 1 2 2 1 ...

Страница 516: ...Troubleshooting Troubleshooting Side Feeder 500 sheet x 3 or Large Capacity Side Feeder 500 1 500 sheet x2 1 2 3 NOTE When a paper jam occurs in Cassette 6 or 7 refer to Cassette 6 7 Option on page 10 69 2 1 ...

Страница 517: ...ubleshooting Troubleshooting Cassette 6 7 Option Side Feeder 500 sheet x3 1 Referring to Side Feeder 500 sheet x 3 or Large Capacity Side Feeder 500 1 500 sheet x2 on page 10 68 remove the jammed paper 2 3 4 2 1 ...

Страница 518: ...10 70 Troubleshooting Troubleshooting NOTE To remove paper which is difficult to get access to the inner part of the cassette can be removed ...

Страница 519: ...hooting Troubleshooting Large Capacity Side Feeder 500 1 500 sheet x2 1 Referring to Side Feeder 500 sheet x 3 or Large Capacity Side Feeder 500 1 500 sheet x2 on page 10 68 remove the jammed paper 2 3 4 5 2 1 B1 B2 ...

Страница 520: ...10 72 Troubleshooting Troubleshooting Clearing a Staple Jam 1 000 sheet Finisher 1 2 3 2 1 CLICK ...

Страница 521: ...10 73 Troubleshooting Troubleshooting 4 000 sheet Finisher Staple cartridge holder A 1 2 3 2 1 CLICK ...

Страница 522: ...10 74 Troubleshooting Troubleshooting Staple cartridge holder B C 1 2 3 4 2 1 CLICK ...

Страница 523: ...r functions 11 26 Scanner functions 11 27 Document Processor Option 11 28 Paper Feeder 500 sheet x 2 Option 11 28 Large Capacity Feeder 1 500 sheet x 2 Option 11 29 Side Feeder 500 sheet x 3 Option 11 29 Large Capacity Side Feeder 500 1 500 sheet x 2 Option 11 29 Side Feeder 3 000 sheet Option 11 30 1 000 sheet Finisher Option 11 30 4 000 sheet Finisher Option 11 31 Hole Punch Unit Option 11 31 Ma...

Страница 524: ...x 2 can be used on the 4505ci or the 5505ci 2 If neither a document finisher nor a side feeder is installed on the 3005ci or the 3505ci the toppling prevention kit must be installed Hole Punch Unit Hole Punch Unit 1 DP 770 B 1 DP 772 3 DF 790 C 4 DF 770 C 12 PF 770 6 PF 730 B 2 7 PF 740 B 2 10 JS 731 13 PF 730 B PF 780 B 1 14 PF 740 B PF 780 B 1 2 MT 730 B 8 JS 730 5 BF 730 1 PLATEN COVER TYPE E 9...

Страница 525: ...ion Kit B 16 Printed Document Guard Kit B Other Optional Equipment 25 Internet FAX Kit A 26 Data Security Kit E 27 UG 33 28 UG 34 29 Scan extension kit A 30 USB Keyboard 24 DT 730 20 Fax System W 19 MM 16 128 21 IB 50 22 IB 51 17 Keyboard Holder B 15 Printing System 13 ...

Страница 526: ...ilable as options 4 DF 770 C 1 000 sheet Finisher This is a document finisher capable of holding large print runs and of separating and offsetting multiple copies of a printout into individual copies It can also staple or hole punch optional the offset printouts 5 BF 730 Folding Unit Folds printed output at the center or in tri fold to enable the creation of simple booklets Installs on the 4 000 s...

Страница 527: ...tendency to curl and may jam in the paper eject unit If the ejected paper slips or stacks unevenly turn the paper in the cassette over and try again NOTE To ensure that paper is delivered to the Inner Job Separator select the output destination or change the default setting For details refer to the Paper Output on page 6 22 IMPORTANT Note that some paper types have a tendency to curl and may jam i...

Страница 528: ... is installed the regular print function of a machine can be replaced with the print function of the Fiery Controller The Fiery Controller print functions enable a variety of printing features that are not possible on a regular machine such as advanced color management that reproduces the true color of the image by reading each machine s color display method and characteristics at the time of prin...

Страница 529: ...ith the utilities supplied settings are possible for a variety of OS and network protocols 23 Key Counter Key Counter Use the key counter to monitor machine usage The key counter offers a convenient solution for centralized management of copy volume for different departments in a large company Inserting the Key Counter Insert the key counter securely into the key counter slot 24 DT 730 Document Ta...

Страница 530: ...Line Printer and EPSON LQ 850 emulation 29 Scan extension kit A OCR Scan Activation Kit This option enables the use of the OCR function in the applications of the machine 30 USB Keyboard USB Keyboard A USB keyboard can be used to enter information into the text fields on the operation panel A special mount is also available to install the keyboard on the MFP Please contact your dealer or service r...

Страница 531: ...Internet FAX Kit Card Authentication Kit ThinPrint Option Emulation Upgrade Kit OCR Scan Activation Kit NOTE Restrictions such as the number of times the application can be used during the trial period differ depending on the application If you change the date time while using the trial version of an application you will no longer be able to use the application NOTE If the user authentication scre...

Страница 532: ...1 Press the System Menu key 2 Press System Network and Next of Optional Function 3 Select the desired application and press Detail You can view detailed information on the selected application NOTE Icons of activated application are displayed in the Home screen NOTE If the user authentication screen appears enter your login user name and login password and press Login For this you need to login wi...

Страница 533: ...ys entered characters 2 Limit Display Displays maximum number of characters 3 Cursor Key Press to move the cursor on the display 4 Backspace Press to delete a character to the left of the cursor 5 Keyboard Press a character to enter 6 Upper case Press to use upper case letters 7 Lower case Press to use lower case letters 8 No Symbol Press to enter numbers and symbols 9 Space Press to insert a spac...

Страница 534: ...scroll the screen to view other numbers or symbols to enter Use the keyboard to enter Backspace Upper case Lower case No Symbol Space Cancel OK Lower case _ Q W E R T Y U I O P A S D F G H J K L Z X C V B N M Input characters Limit characters 0 128 Use the keyboard to enter Backspace Upper case Lower case No Symbol Space Cancel OK Lower case 1 2 3 4 5 6 7 8 9 0 _ Input characters Limit characters ...

Страница 535: ... correct Press OK Use the keyboard to enter Backspace Upper case Lower case No Symbol Space Cancel OK Lower case L _ Q W E R T Y U I O P A S D F G H J K L Z X C V B N M Input characters Limit characters 1 32 Use the keyboard to enter Backspace Upper case No Symbol Space Cancel OK Lower case 1 2 3 4 5 6 7 8 9 0 q w e r t y u i o p a s d f g h j k l z x c v b n m _ List Input characters Limit charac...

Страница 536: ... Poor quality paper may result in unsatisfactory output Basic Paper Specifications The following table lists the specifications of paper that is supported with this machine Refer to the subsequent sections for further details We are not responsible for the problems occurred from the use of paper that does not conform to our specifications Criteria Specifications Weight Cassettes 60 to 220 g m2 300...

Страница 537: ...tains at least 80 pulp i e not more than 20 of the total paper content consists of cotton or other fibers Supported Paper Sizes Paper of the following sizes is supported by the machine Measurements in the table take into account a 0 7 mm dimensional accuracy for length and width Corner angles must be 90 0 2 Multi Purpose Tray Cassette or Multi Purpose Tray A6 R 105 148 mm A3 297 420 mm B6 R 128 18...

Страница 538: ...ow the paper is supplied the electrostatic chargeability of the paper and how the toner adheres Paper moisture content varies depending on the relative humidity in the room High relative humidity causes paper to become damp making the edges expand so it appears wavy Low relative humidity causes paper to lose moisture making the edges tighten and weakening print contrast Wavy or tight edges may cau...

Страница 539: ...ess Paper whiteness affects print contrast Use whiter paper for sharper brighter copies Quality Machine problems may occur if sheet sizes are not uniform or if corners are not square edges are rough sheets are uncut or edges or corners are crushed In order to prevent these problems be especially careful when you cut the paper yourself Packaging Choose paper that is properly packaged and stacked in...

Страница 540: ... g m2 to 64 g m2 or less Letterhead Colored paper Prepunched paper Envelopes Cardstocks Hagaki Thick paper from 106 g m2 to 300 g m2 or less Labels Coated paper High quality paper Index Tab Dividers When using these paper and media choose those that are designed specifically for copiers or page printers such as laser printers Use the multi purpose tray for transparencies thick paper envelopes card...

Страница 541: ...that we are not responsible for any harm to the user or damage to the machine caused by moisture or specifications of special paper Select a cassette or multi purpose tray for special paper Transparencies Transparencies must be able to withstand the heat of printing Transparencies must meet the following conditions To avoid problems use the multi purpose tray for transparencies and load transparen...

Страница 542: ...d by the force applied in the machine The carrier sheet bears the top sheet until the label is used This composition of labels may cause more problems The label surface must be covered completely with the top sheet Gaps between labels may cause peeling of labels resulting in a serious failure Some label paper has large margins on the top sheet When using such paper do not peel these margins from t...

Страница 543: ...e in which the adhesive is exposed after the top layer is peeled off Serious damage may be caused if the paper covering the adhesive comes off in the machine Do not use envelopes with certain special features For example do not use envelopes with a grommet for winding a string to close the flap or envelopes with an open or film covered window If paper jams occur load fewer envelopes at once To pre...

Страница 544: ...provides higher printing quality than plain paper Coated paper is used for particularly high quality printing The surface of high quality or medium quality paper is coated with special agents that improve ink adhesion by making the paper surface smoother These agents are used either to coat both sides of the paper or just one side The coated side appears slightly glossy NOTE Before purchasing recy...

Страница 545: ... 2 A3 B4 A4 A4 R B5 B5 R A5 R Ledger Legal Oficio II 12 18 Letter R Letter Statement R Folio 8K 16K 16K R 216 340 mm Size Entry Metric X 182 to 457 mm in 1 mm increments Y 140 to 304 mm in 1 mm increments Inch X 7 17 to 18 00 in 0 01 increments Y 5 51 to 12 00 in 0 01 increments Multi Purpose Tray A3 B4 A4 A4 R B5 B5 ISO B5 R A5 R B6 R A6 R Oufuku hagaki Hagaki Envelope DL Envelope C5 Envelope C4 ...

Страница 546: ... USB Interface Connector 1 USB Hi Speed Network interface 1 10 BASE T 100 BASE TX 1000 BASE T USBPort 2 Hi Speed USB Option Fax 2 Network interface 1 10 BASE T 100 BASE TX 1000 BASE T A maximum of two interface options can be installed Only one network interface can be installed When a network interface is installed only one fax line can be installed Operating Environment Temperature 10 to 32 5 C ...

Страница 547: ...eets min 27 sheets min Legal 21 sheets min 21 sheets min B5 45 sheets min 45 sheets min B5R 24 sheets min 24 sheets min A5R 24 sheets min 24 sheets min A4 Letter 55 sheets min 50 sheets min A4 R LetterR 24 sheets min 24 sheets min A3 Ledger 27 sheets min 25 sheets min B4 33 sheets min 30 sheets min Legal 21 sheets min 21 sheets min B5 55 sheets min 50 sheets min B5R 24 sheets min 24 sheets min A5R...

Страница 548: ...m Cassette Black and White 3005ci 7 3 seconds or less 3505ci 6 2 seconds or less 4505ci 5 4 seconds or less 5505ci 4 9 seconds or less Full color 3005ci 9 5 seconds or less 3505ci 8 0 seconds or less 4505ci 6 6 seconds or less 5505ci 6 2 seconds or less Resolution 600 600 dpi Operating System Windows XP Windows Server 2003 Windows Vista Windows 7 Windows 8 Windows Server 2008 Windows Server 2012 M...

Страница 549: ...her RAM 300 MB or more Resolution 600 dpi 400 dpi 300 dpi 200 dpi 200 100 dpi 200 400 dpi Resolution in FAX mode included File Format PDF high compressive encrypted PDF A JPEG TIFF XPS Scanning Speed 1 3005ci 3505ci 1 sided B W 70 Images min Color 70 Images min 2 sided B W 100 Images min Color 100 Images min A4 landscape 300 dpi Image quality Text Photo original 4505ci 5505ci 1 sided B W 80 Images...

Страница 550: ...maximum When originals have different widths 30 sheets 50 to 80 g m2 maximum 175 sheets 50 to 80 g m2 maximum When originals have different widths 30 sheets 50 to 80 g m2 maximum Dimensions W D H 22 23 32 21 13 64 7 5 64 577 534 180 mm 23 5 8 20 13 64 6 45 64 600 513 170 mm Weight 32 lbs or less 14 5 kg or less Item Description Paper Supply Method Feed reverse roller method No Sheets 500 80 g m2 2...

Страница 551: ...ettes Paper Size A3 B4 A4 A4 R B5 B5 R A5 R Folio Ledger Legal Oficio II 12 18 Letter Letter R Statement R 8K 16K 16K R 216 340 mm Supported Paper Paper weight 60 256 g m2 Media types Plain Recycled Thick Coated Dimensions W D H 23 35 64 28 11 32 21 7 64 598 720 536 mm Weight Approx 114 6 lbs Approx 52 kg Item Description Paper Supply Method Feed reverse roller method No Sheets 500 sheets 80 g m2 ...

Страница 552: ...r Legal Oficio II 12 18 Statement R Folio 8K 16K 16K R 216 340 mm Oufuku hagaki Cardstock Envelope DL Envelope C5 Envelope C4 Envelope 10 Commercial 10 Envelope 9 Commercial 9 Envelope 6 Commercial 6 3 4 Envelope Monarch Youkei 2 Youkei 4 Statement R Executive Foolscap A3 Wide 310 433 mm Ledger Wide 310 440 mm 13 19 Custom 98 148 mm to 297 432 mm 100 sheets Supported Paper Weight Stapling 90 g m2 ...

Страница 553: ...30 sheets 52 to 90 g m2 30 sheets 91 to 105 g m2 2 cover sheet only 106 g m2 to 256 g m2 A4 A4 R B5 Letter Letter R 16K 65 sheets 52 to 90 g m2 55 sheets 91 to 105 g m2 2 cover sheet only 106 g m2 to 256 g m2 Media types Plain Recycled Prepunched Preprinted Bond Letterhead Color Coated Thick High Quality Rough Vellum Transparency Labels Envelope Cardstock Custom 1 to 8 Dimensions W D H 23 29 32 26...

Страница 554: ...Number of Sheets Bi Fold 5 sheets 60 to 90 g m2 3 sheets 91 to 120 g m2 1 sheet 121 to 256 g m2 Saddle Stitch 16 sheets 60 to 90 g m2 13 sheets 91 to 105 g m2 1 cover sheet only 106 g m2 or heavier Tri Fold 5 sheets 60 to 90 g m2 3 sheets 91 to 120 g m2 Maximum Number for Storage 80 g m2 Bi Fold 5 sheets or less per set 30 sets or more 6 to 10 sheets per set 20 sets or more 11 to 16 sheets per set...

Страница 555: ...or Colour Prepunched Coated Thick High Quality Custom 1 to 8 Dimensions W D H 17 7 16 15 7 16 4 1 64 443 392 102 mm Weight 1 76 lbs 0 8 kg Item Description Number of Trays 1 tray Maximum Sheets 100 sheets 80 g m2 Paper Size A3 B4 A4 A4 R B5 B5 R A5 R Folio Ledger Foolscap Legal Letter Letter R Executive Executive R Oficio II Statement R 8K 16K 16K R 216 340 mm Paper Type Paper weight 60 256 g m2 P...

Страница 556: ...K 16K 16K R 216 340 mm Paper Type Paper weight 60 256 g m2 Paper type Plain Preprinted Bond Rough Recycled Letterhead Color Colour Prepunched Coated Thick High Quality Custom 1 to 8 Dimensions W D H 14 27 32 17 13 32 5 29 32 377 442 150 mm Weight 5 1 lbs 2 3 kg Item Description Max number of sheets 10 sheets Multi Purpose tray Paper length 210 8 26 to 304 8 12 mm Paper weight Max 1220 0 48 1 64 mm...

Страница 557: ...n Sleep mode power consumption is kept to a minimum Bonjour Bonjour also known as zero configuration networking is a service that automatically detects computers devices and services on an IP network Bonjour because an industry standard IP protocol is used allows devices to automatically recognize each other without an IP address being specified or DNS server being set Bonjour also sends and recei...

Страница 558: ... sort are typically composed of shades of gray varying from black at the weakest intensity to white at the strongest without any other colors Gray levels are displayed in numerical levels that is white and black only for 1 bit 256 gray levels including white and black for 8 bits and 65 536 gray levels for 16 bits Help A Help key is provided on this machine s operation panel If you are unsure of ho...

Страница 559: ...age developed by Adobe Systems It enables flexible font functions and highly functional graphics allowing higher quality printing The first version called Level 1 was launched in 1985 followed by Level 2 that enabled color printing and two byte languages e g Japanese in 1990 In 1996 Level 3 was released as an update for the Internet access and PDF format as well as gradual improvements in implemen...

Страница 560: ...o define the way computers and other devices communicate with each other over a network TCP IP IPv6 TCP IP IPv6 is based on the current Internet protocol TCP IP IPv4 IPv6 is the next generation Internet protocol and expands the available address space which resolves the problem of the lack of addresses under IPv4 while also introducing other improvements such as additional security functionality a...

Страница 561: ...11 35 Auto IP Settings 8 43 Automatic 2 Sided Copy Function 1 13 B Background Density Adj 6 30 8 57 Default 8 17 Banner printing 4 7 Banner Tray 11 6 Bates Stamp 6 56 Bonjour 11 35 Settings 2 27 8 44 Booklet Binding Left 6 41 Binding Right 6 41 Binding Top 6 41 Border Erase 6 39 C Calibration 10 42 Canceling Jobs 5 19 Cassette Paper Size and Media 8 7 Loading Paper 3 18 Cassette 1 2 2 Cassette 2 2...

Страница 562: ...tation Action 8 28 Auto Paper Selection 8 28 Paper Selection 8 28 Preset Limit 8 28 Quick Setup Registration 8 29 Reserve Next Priority 8 29 Correct Paper Curl 8 59 Counting the Number of Pages Printed Count by Paper Size 9 37 Counter 2 30 Each Job Accounting 9 39 Print Accounting Report 9 31 Total Job Accounting 9 38 Unknown ID Job 9 42 Cover 6 47 Custom Box Creating a New Box 5 54 Delete 5 65 Ed...

Страница 563: ...d 6 71 Delete after Transmitted 6 71 Density 6 22 Density Adjustment 8 57 Destination Address Book 5 28 Address Book Type 8 53 Check before Send 8 29 Checking and Editing 5 36 Confirmation Screen of Destinations 5 37 Entering a New E mail Address 5 31 Entry Check for New Dest 8 29 Multi Sending 5 38 Narrow Down 8 53 Search 5 29 Sort 8 53 Specifying a New PC Folder 5 33 Speed Dial 5 31 Developer Re...

Страница 564: ... 71 First Copy Time 11 25 First Print Position 8 59 First Print Time 11 26 Fixing unit 10 56 FMU Connection 5 47 Fold 6 17 Folding Unit 2 5 11 4 Form Overlay Storing a Form 5 67 Front Cover 2 2 2 5 FTP 11 36 G Gigabit Ethernet Board 11 7 Glossary 11 35 GPL LGPL 1 8 Grayscale 11 36 Group Authorization Set 9 15 Group Authorization 9 15 Group List 9 16 Guest Authorization Set 9 18 Guest Authorization...

Страница 565: ...ng 10 43 LDAP Protocol Settings 8 46 Legal Information 1 7 Legal Restriction on Copying 1 6 Legal Restriction on Scanning 1 6 Limitations 8 52 Loading Originals Loading Originals in the Document Processor 5 3 Placing Originals on the Platen 5 2 Local Authorization 9 15 Combine Restriction 9 16 Copy Restr Full Color 9 16 Copy Restriction 9 16 Copy Restriction Color 9 16 Duplex Restriction 9 16 EcoP...

Страница 566: ...ult 8 17 Orientation Confirmation 8 16 Original Preview 3 9 Original Size 6 12 Original Size Indicator Plates 2 2 Original SSLeay License 1 8 Original stopper 2 2 Original Table 2 2 Original Width Guides 2 2 P Page 6 49 Paper Checking the Remaining Amount of Paper 7 20 Appropriate Paper 11 15 Cassette 8 7 Custom Paper Size 8 10 Default Paper Source 8 11 Index Tab Dividers 3 29 Loading Envelopes 3 ...

Страница 567: ...rd 2 28 R RA Stateless 11 37 Settings 8 44 Recycled Paper 11 22 Regarding Trade Names 1 7 Regular Maintenance 10 2 Disposing of the Punch Waste 10 16 Replacing Staples 10 12 Toner Container Replacement 10 6 Waste Toner Box Replacement 10 9 Release Button 2 4 Remaining amount of toner 7 20 Repeat Copy Default 8 20 Printing 6 61 Repeat Copy Job Retention 8 34 Replacing Staples 1 000 sheet Finisher 1...

Страница 568: ... Hole Punch Unit 11 31 Inner Job Separator 11 33 Inner Job Separator JS 732 11 33 Large Capacity Feeder 11 29 Large Capacity Side Feeder 500 1 500 sheet x 2 11 29 Mailbox 11 32 Paper Feeder 500 sheet x 2 11 28 Printer functions 11 26 Right Job Separator 11 34 Scanner functions 11 27 Side Feeder 500 sheet x 3 11 29 Specifying Destination 5 28 SSL 8 46 Staple 6 19 Staple Jam 10 72 1 000 sheet Finish...

Страница 569: ...Keyboard 11 8 USB Keyboard Type 8 20 USB Memory Printing 5 69 Remove 5 73 Save 5 71 USB Port A1 2 2 USB Port A2 2 4 User Login Setting 9 2 Adding a User 9 8 Changing User Properties 9 11 Group Authorization Set 9 15 Guest Authorization Set 9 18 Local Authentication 9 15 Local User List 9 8 Obtain NW User Property 9 21 Simple Login Settings 9 23 User Login Job Accounting Job Accounting Setting 9 27...

Страница 570: ...Index 10 ...

Страница 571: ......

Страница 572: ...Rev 1 2013 8 2N4GEEN001 TA Triumph Adler GmbH Betriebsstätte Norderstedt Ohechaussee 235 22848 Norderstedt Germany ...

Отзывы: