background image

5

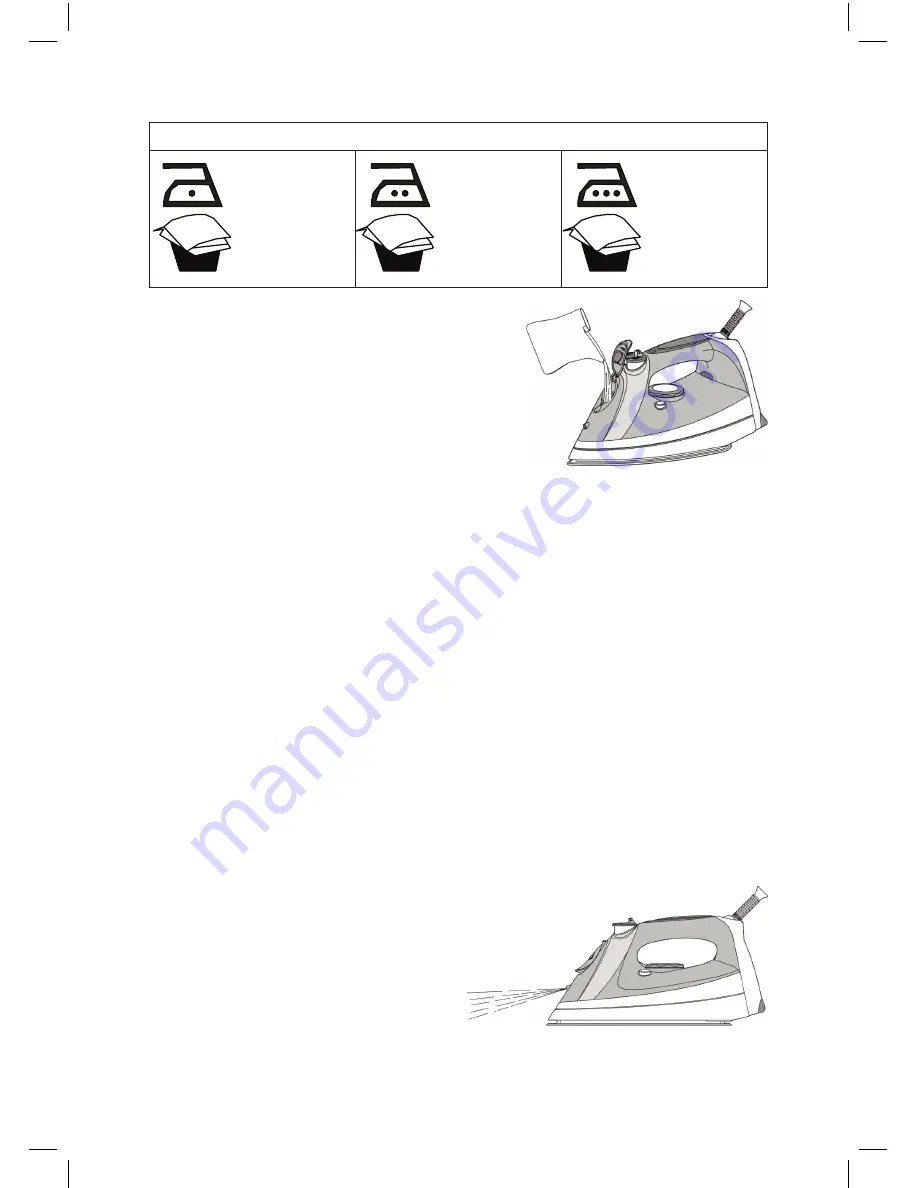
HOW TO FILL WATER IN THE TANK

1.  Disconnect the iron from mains supply outlet.
2.  Move the Steam Control Knob to position.
3.  Fill water through the water inlet hole.
4.  Fill up to the ‘Max’ level marked on the side of 
water tank.

Note:

 For best result, it is advisable to use de-mineralized water or distilled water. Do 

not use chemically de-scaled water or any other liquids.

FIRST TIME IRONING

1.  Remove any protective films or stickers from the sole plate and the cabinet.
2.  Unwind and straighten the power cord.
3.  Fill the water tank. (See How To Fill Water)
4.  Connect the iron to a suitable mains supply outlet.
5.  Turn the Temperature Dial in clockwise direction to maximum position; pilot light 

glows.

6.  Pilot light goes off when the required temperature is reached.
7.  Move the Variable Steam Control Knob to position; steam starts coming out from the 

holes in the sole plate.

8.  Begin first time ironing with an old towel.
9.  When the water tank is empty and there is no more steam produced; the preparation 

work is completed. The iron is now ready for proper use.

SPRAYING FUNCTION 

1.  This function can be used any time 

and is not affect any setting

2.  Fill the water tank as described in 

How To Fill Water.

3.  Aim the nozzle to the garment.
4.  Press the Spray Button.

Note:

 It may be necessary to press the spray button a few times to start this function

Temperature Control Setting

• 

Acetate

• 

Elastsne

• 

Polyamide

• 

Polypropylene

• 

Polyester

• 

Silk

• 

Triacetate

• 

Viscose

• 

Wool

• 

Cotton

• 

Linen

Содержание Techne 1000

Страница 1: ...STEAM IRON Techne 1000 INSTRUCTION MANUAL...

Страница 2: ...Innovatively designed using only the highest quality material and components your Usha Household Electronic Steam Iron is designed for years of trouble free performance Please read this Instruction M...

Страница 3: ...at the surface on which the stand is placed is stable 9 If the power cord or supply cord is damaged it must be replaced by the authorised company service centre or its service agent 10 Empty the water...

Страница 4: ...ht TIPS FOR IRONING 1 Sort out the articles to be ironed according to the type of fabric This will minimize the frequency of temperature adjustment for different garments 2 Test ironing a small area o...

Страница 5: ...al in clockwise direction to maximum position pilot light glows 6 Pilot light goes off when the required temperature is reached 7 Move the Variable Steam Control Knob to position steam starts coming o...

Страница 6: ...mperature Dial in clockwise direction to 3 dots setting For optimum steam quality do not use 1 dot or 2 dots setting for steam ironing 4 Pilot light glows indicating the iron is switched on 5 Pilot li...

Страница 7: ...s very high This function provides extra amount of steam to remove wrinkles on delicate garments in hanging position hanging curtains or other hanging fabrics 1 Fill the iron as described in the secti...

Страница 8: ...required temperature is reached 7 Wait for one more cycle pilot light glows and goes off 8 Turn the Temperature Dial in anti clockwise direction to Min 9 Disconnect the iron from mains supply outlet 1...

Страница 9: ...ompletely store it vertically in a safe place Note Set the Steam Control Knob to position before storing the iron CLEANING MAINTENANCE 1 Disconnect the iron from the mains supply outlet 2 Use a damped...

Страница 10: ...10 NOTES...

Страница 11: ...1 Damages due to chipping peeling plating and denting 2 Breakage or damage to components made out of Bakelite Urea ABS SAN and such plastic materials rubber parts and cord 3 Normal wear and tear of p...

Страница 12: ......

Отзывы: