background image

 User Manual & Assembly Instructions

Notes: 
This is not the full manual, the assembly instructions have been removed. 
The 17" wide double pages have been spit to a screen readable 8.5 x 11".

Содержание Laserpoint II

Страница 1: ...User Manual Assembly Instructions Notes This is not the full manual the assembly instructions have been removed The 17 wide double pages have been spit to a screen readable 8 5 x 11...

Страница 2: ...ware setup but for most users the COM port will be COM1 You will need to download and install drivers for the USB connection to work properly Go to www uscuttersupport com mh support page and select t...

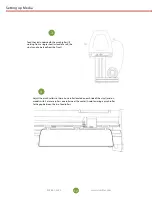
Страница 3: ...top of the stand rollers Release the pinch rollers release levers If you are going to cut from a scrap or single sheet instead of a roll then skip the next step on placing a vinyl roll All other step...

Страница 4: ...eet instead of a roll the vinyl can also be feed from the front Adjust the pinch rollers so there is one roller located on each side of the vinyl and on models with 3 or more rollers one roller near t...

Страница 5: ...gap of between 1 2 11 2 from the edge of the roller and the edge of the vinyl on both sides Engage the Pinch Rollers by pushing down on the Pinch Roller Release Levers 5 6 If the cutter is not alread...

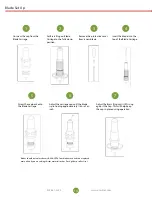
Страница 6: ...s Ring until it fits snug against the Cap This will help keep the cap in place during operation Set Brass Ring on Blade Carriage to the fully down position Remove the protective cover from a new blade...

Страница 7: ...e Origin for LaserPoint2 To set the Origin of where the LaserPoint2 cutter will begin cutting from press the Enter button on Local while on the Home Screen using the Select button to highlight it if n...

Страница 8: ...material roll and adjust the pinch rollers Remember to make sure the top roller is placed so that there is a bottom roller called the grit roller beneath it Remember to line the material up so that it...

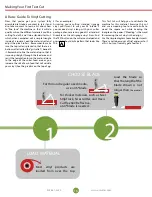
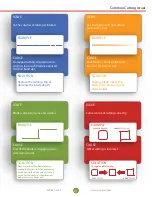
Страница 9: ...rs per second small intricate designs DECREASE CUT SPEED large simpler de signs INCREASE CUT SPEED FORCE PRESSURE This setting determines how hard the blade comes down onto the material outer square w...

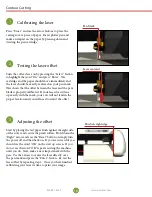
Страница 10: ...the mark your cuts will not land in the proper lacation and you will need to adjust the offset 2 Testing the laser offset Start by placing the test paper flush against the right side of the cutter an...

Страница 11: ...r has enough room to find all the registration marks located on the media To set the position press Enter with Local highlighted and use the Arrow keys to position the carriage When the pen is in it s...

Страница 12: ...your fingers while the release button of the Blade Carriage is pressed Adjust the blade depth of the Blade Carriage page 17 and Force setting on the cutter page 8 until you are getting solid uniform c...

Страница 13: ...ip or too much blade is exposed friction build up Part of the blade is dragging on its side during turns Offset setting is incorrect Dull blade or blade holder isn t secured properly in slot Replace t...

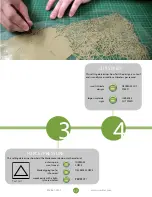
Страница 14: ...hair dryer to heat the strip up as you squeeegee it into place Use a knife to trim the ends of the strip so that it fits in the channel Cutting Blades wear out with use and the tips of the blades can...

Отзывы: