- 44 -
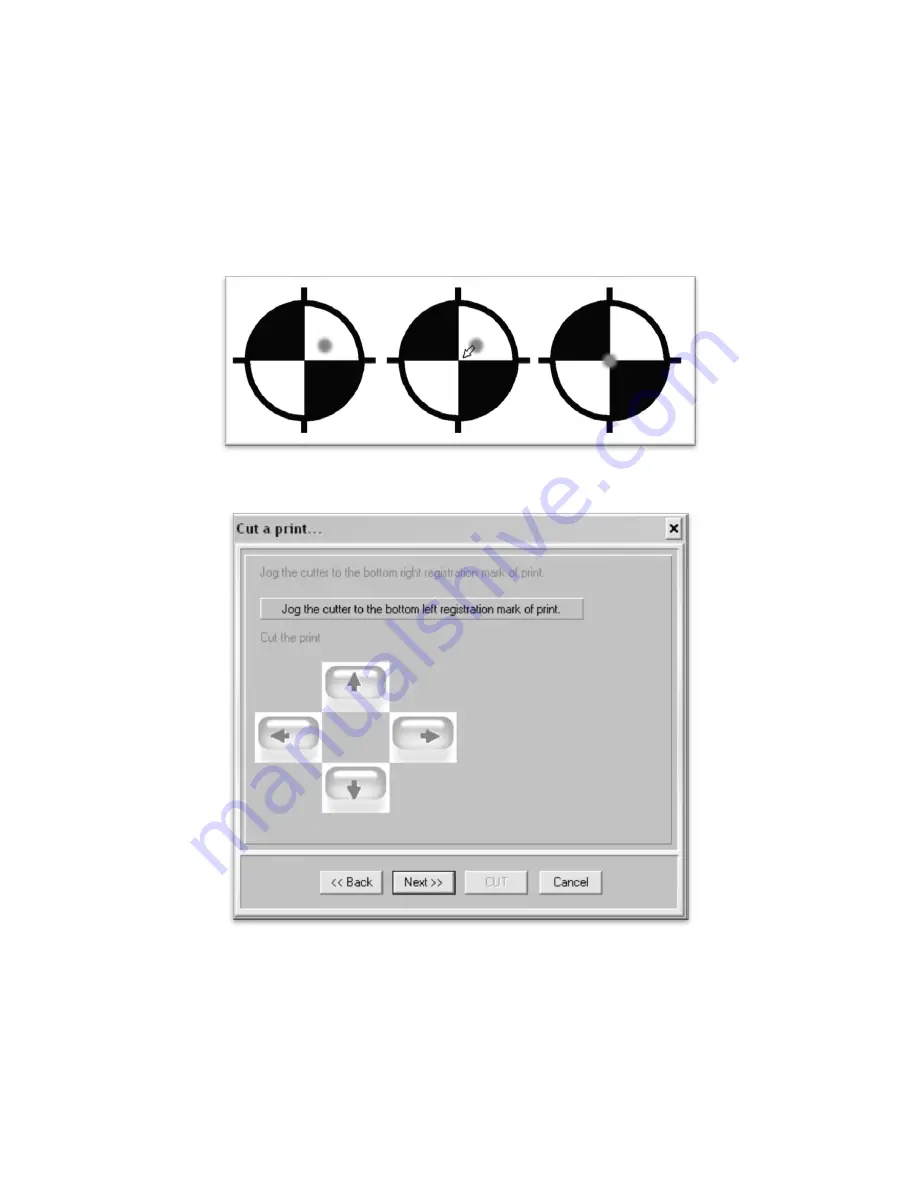
You are telling the cutter where exactly the image falls by letting it “see” where the registration marks lay.
You will move the laser until it falls in the center of the registration marks, first on the right registration
mark, then the left.
You can either click the on screen arrows or use the numeric key pad on your keyboard to move the
cutting blade, laser, and rollers to adjust where your print will start. Make sure your Number Lock is
engaged on your keyboard if you decide to use it. If using the numeric key pad on your keyboard, you can
switch between a more precise
(but slower
) movement of the laser and a faster (
but less precise
) movement by
pressing the 5 key. Try to make the laser fall as close to the center of the registration mark as possible.
Now, click the next button, and you will need to do the same for the left registration mark.
After you have registered the left mark, click next and the cutter will prepare for the cut.
The last Cut A Print window will appear.
Since all cutters vary slightly, you can make adjustments if you find that the cut is slightly off of where it is
intended. Since we are assuming that this is your first contour cut with this software and machine, we will
leave the options to their default settings, but you can change them on subsequent cuts, if you find that the
cutter is consistently off of its intended mark.
Содержание LaserPoint
Страница 1: ......
Страница 3: ... 2 Contour Cutting 34 Specifications 46 Troubleshooting 47 ...


