6
DS4501-002
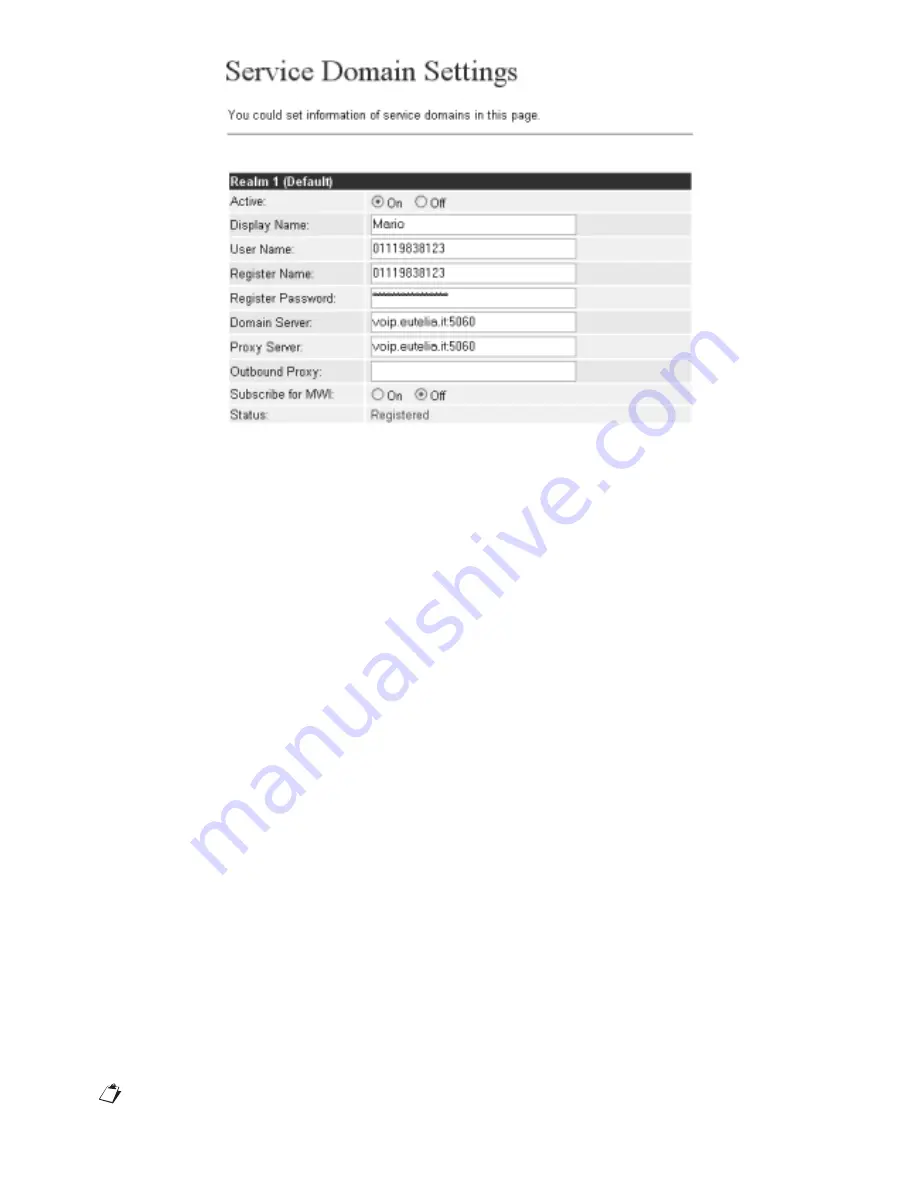
9. The “Display name” programmed during SIP server registration will appear on the LCD if this was successful.
STEP 4: CONFIGURATION VIA KEYPAD
The confi gurations seen in the paragraph above via PC can also be performed using the keypad.
How to program Password and SIP account via the keypad:
1. Press Menu followed by the sequence 7_4, the message ‘Password’ will appear on the display.
2. Enter the password using the telephone keypad in alphanumeric test mode (press button 8 twice, 3 three times, 7 fi ve times, 8 twice, Enter).
Important: enter the password before access other parameters.
3. Press Menu followed by the sequence 5_Enter for confi guring the fi rst SIP account (realm).
How to confi gure IP address via the keypad:
1. IP address for WAN and LAN ports: Press Menu followed by 4_5 sequence.
2. WAN port status: Press Menu followed by the sequence 4_1_1.
3. LAN port status: Press Menu followed by the sequence 4_2.
Example: Static IP network settings via keypad (M=Menu; E=Enter).
For the WAN IP parameters there are three possibilities: static IP, DHCP, and PPPoE. In case of static IP, program the static IP, the Subnet
Mask, the IP addresses of the IP Gateway and the DNS server.
1. Static IP: Key in the sequence M_4_E_1_E_M_M_M to select static IP and then switch the telephone off and back on.
2. IP address setting: Key in sequence M_4_E_2_1, then 192*168*101*112 followed by the sequence E_M_M_M_M_M to switch the telephone
off and back on again.
3. Subnet Mask setting: Key in sequence M_4_E_2_2, then 255*255*255*000 followed by the sequence E_M_M_M_M_M to switch the
telephone off and back on again.
4. Gateway IP address setting: Key in sequence M_4_E_2_3, then 192*168*101*001 followed by the sequence E_M_M_M_M_M to switch the
telephone off and back on again.
5. Server DNS IP address setting: this is not usefully needed, unless you want to use a specifi c address provided by the provider.
6. Switch the telephone off and on again by disconnecting and reconnecting the power cord.
STEP 5: HOW TO MAKE POINT-POINT SIP CALLS
1. Select one of the three SIP servers. Pick up the handset: you will hear the dial tone.
2. Key in 123456# to call number 123456 registered to the SIP server. Note that # is used to forward the call immediately. You will hear the
calling tone. Wait for the called party to pick up.
3. For other applications, refer to the user manual for other VoIP application examples.
STEP 6: HOW TO MAKE PSTN CALLS
1. Press the PSTN button to key 0* to engage the line.
2. Dial the required number.
How to put a call on hold
Press the HOLD button to put a call on hold. Press it again to resume the communication.
How to transfer a call
To transfer a call to a PSTN line, press the TRANSFER button and then the PSTN button and then the number to which you want to transfer the
call.
If you have diffi culties in confi guring VoIPhone, please refer to the chapter 10 for trouble shootings.


