VI.
REPAIRING THE FINAL DRIVE AND THE DRIVESHAFT
1. DISMANTLING AND REASSEMBLING THE FINAL DRIVE AND THE DRIVE
SHAFT (WITH THE FINAL DRIVE REMOVED FROM THE MOTORCYCLE)
Removing and Reinstalling the Drive Shaft
To disconnect the drive shaft from the final drive proceed as follows:
- Uncotter the nut of the wedge bolt, unscrew the nut and using a soft mandrel knock the wedge
bolt out;
- Remove the splined fork of the shaft from the driving gear shank (by slightly knocking with a
rubber or a bronze hammer).
Having disconnected the drive shaft, wash it and inspect. If necessary, dismantle the universal
joint. Check and take measurements, replace worn-out parts (refer to Repairing the Drive Shaft).
To reassemble the drive shaft, reverse the sequence of the operations given above, paying special
attention to proper joint of the splined fork to the pinion gear shank. The slot in the pinion gear
shank is made inclined to its axis for tightening with the wedge bolt. Therefore, when fitting the
splined fork on the shank match them in such a way that the boss with the hole on the fork lies
on that side of the slot edge which is nearer to the shank end face. Insert the wedge from the side
of the boss with the shear facing the shank end. With the nut tightened up, the wedge bolt head
should not sink in the boss. This is achieved by using shims of different thickness to be placed
between the splined fork end face and the double-row radial-thrust ball bearing. The tightening
torque of the wedge bolt should be 6.86
-
8.82 Nm.
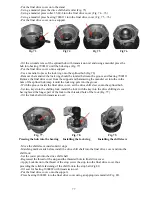
To dismantle the universal joint:
- Remove the lock rings from the drive shaft holes and from the splined fork (for the universal
joint cross pins)
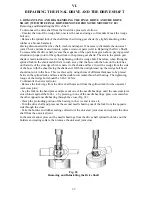
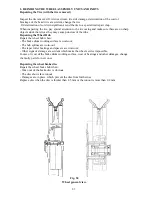
- Lay the fork on the hand press and press out one of the needle bearings, until the universal joint
cross thrusts against the fork, i. e. by pressing-in one of the needle bearings, press out somewhat
the other opposite needle bearing through the cross (Fig. 65);
- Clamp the protruding portion of the bearing in the vice and remove it;
- Turn the drive shaft and press out the second needle bearing out of the fork from the opposite
side through the cross;
- Take the holders and rubber sealing collars from the universal joint cross and separate the drive
shaft from the universal joint.
In the same manner press out the needle bearings from the drive shaft splined fork, take out the
holders and sealing collars, then remove the universal joint cross.
Fig. 65
Removing and Reinstalling the Drive Shaft
69
Содержание 750cc Series
Страница 1: ...Repair Manual 750cc All Models www imz ural com ...
Страница 2: ......
Страница 50: ...Fig 40 Removing the valve springs Fig 41 Measuring the side play between the valve and bush guide 50 ...
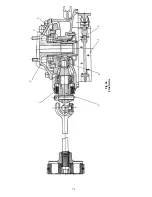
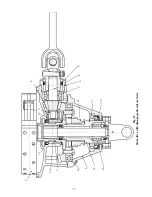
Страница 71: ...1 2 3 4 5 6 7 8 Fig 66 Final drive 71 ...
Страница 75: ...1 2 3 4 5 6 7 8 9 10 11 12 13 14 15 16 17 18 Fig 67 Final drive with disengageable sidecar drive 75 ...
Страница 98: ...Fig 11 iring Diagram 9 W 98 ...


