Page 10
TL38 Service & Parts
Transportation
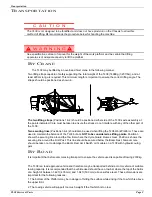
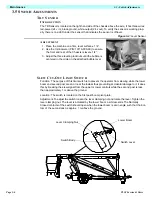
Care should always be taken while towing the TL38 on an uneven or sloped surface. It is recom-
mended that the set of procedures that follow should be incorporated into a normal working prac-
tice for towing the TL38 Work Platform. The Procedures which should be followed when
transporting the TL38 are
1.The Platform is to be fully lowered, retracted and slewed in the correct position.
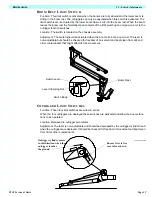
2.The Platform is to be securely stowed by closing the boom lockdown.
3.The Jockey Wheel that is fitted to the Towhitch is to be extended until the Receiver is close to the height
of the vehicle’s tow bar.
4.The Hand Brake is pulled to engage the brakes (important if the machine is not on a level surface).
5.The Outriggers are to be fully retracted and secured in position.
6.The key is turned to the off position.
7.Move the vehicle as close as possible to the Receiver.
8.Lift the Towhitch on to the tow bar and make sure the Receiver is properly secured.
9.Release the Hand Brake and retract the Jockey Wheel.
It is important that the Jockey Wheel is retracted as fully as possible so that the wheel will not slew (turn)
while being transported. Failure to do so could result in damage to the Jockey Wheel.
10.The tailboard harness is connected to the vehicle’s braking system by means of a 7 Pin Plug.
11.Attach the Breakaway Safety Cable to the towing vehicle.
The TL38 may then be towed.
If the TL38 is to be transported by other means then it must be securely tied down to the transporting unit
at several points.
Recommended securing points are the four outrigger support members on the Chassis and the Tow Bar-
weldment. Further securing points should be used if the terrain on which the unit is travelling is rough or
uneven. Care should be taken when using tie downs that sensitive parts of the TL38 (i.e. hosing, cabling
etc.) are not affected.
ALWAYS ensure that the Hand Brake is fully applied, that all the booms are FULLY stowed and that the
Boom Lock Down Pin is in place.
H
O U R
M
E T E R
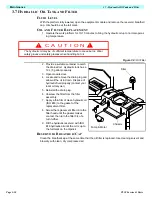
To access the hour meter function perform the following steps.
1. Climb into the basket (with the machine powered up)
2. Push the platform emergency stop button.
3. Hold down the following buttons, Jib and Upper Boom Lift.
4. While holding the buttons twist the emergency stop button to return power to the machine.
5. “hr” will now be displayed on the readout, Pressing the right turn button will scroll through the accumu-
lated hours two digits at a time. For example, if pressing the right turn button once displays “20”, pressing
it a 2nd time displays “58”, and pressing it a 3rd time displays “hr”, the elapsed time of operation is 2058
hours.
Содержание TL38
Страница 1: ...ERVICE PARTS MANUAL POWERED ACCESS WORK PLATFORM TL38 ...
Страница 2: ......
Страница 4: ......
Страница 51: ...Page 3 28 Maintenance 3 17 Torque Specifications TL38 Service Parts NOTES ...
Страница 59: ...Page 5 2 Schematics 5 1 Introduction TL38 Service Parts ...
Страница 60: ...Page 5 3 Schematics 5 1 Introduction TL38 Service Parts ...
Страница 61: ...Page 5 4 Schematics 5 1 Introduction TL38 Service Parts ...
Страница 62: ...Page 5 5 Schematics 5 1 Introduction TL38 Service Parts ...
Страница 63: ...Page 5 6 Schematics 5 1 Introduction TL38 Service Parts Notes ...
Страница 66: ...Page 6 3 Illustrated Parts Breakdown General Assembly TL38 Service Parts ...
Страница 70: ...Page 6 7 Illustrated Parts Breakdown Booms Posts Assembly TL38 Service Parts ...
Страница 72: ...Page 6 9 Illustrated Parts Breakdown Platform Assembly TL38 Service Parts ...
Страница 84: ...Page 6 21 Illustrated Parts Breakdown Outrigger Cylinder Assembly TL38 Service Parts NOTES ...
Страница 86: ...Page 6 23 Illustrated Parts Breakdown Electrical Assembly TL38 Service Parts ...
Страница 92: ...Page 6 29 Illustrated Parts Breakdown Decal Assembly TL38 Service Parts ...
Страница 94: ...Page 6 31 Illustrated Parts Breakdown Decal Assembly TL38 Service Parts ...
Страница 95: ...Page 6 32 Illustrated Parts Breakdown Decal Assembly TL38 Service Parts NOTES ...


