System Function Inspection
TL38 Service & Parts
Page 7
S
YSTEM
F
UNCTION
I
NSPECTION
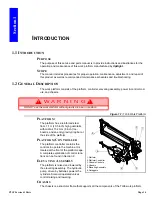
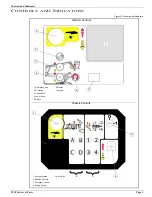
Refer to Figure 2 for the locations of various controls and indicators.
W A R N I N G
!
!
STAND CLEAR of the work platform while performing the following checks.
Before operating the work platform, survey the work area for surface hazards such as holes, drop-offs,
bumps and debris.
Check in ALL directions, including above the work platform, for obstructions and electrical conductors.
1. Move the machine, if necessary, to an unobstructed area to allow for full elevation.
2. Pull Chassis Emergency Stop Switch to the ON position.
3. Pull Platform Emergency Stop Switch to the ON position.
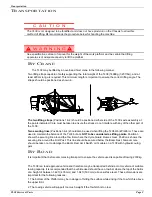
4. Deploy the Outriggers, this is done from the lower control panel, an audible warning will sound until the
outriggers are fully deployed and the machine is level, ensure that all four individual outrigger lights are
illuminated. Fine tuning of the chassis inclination can be achieved by holding each individual outrigger
button and using the analog rocker. (ref: chassis controls illustration on page 5)
5. Visually inspect the elevating assembly, lift cylinder, cables, and hoses for cracked welds and structural
damage, loose hardware, hydraulic leaks, loose wire connections, and erratic operation. Check for miss-
ing or loose parts.
6. Test each machine function (Lift, Slew, Jib) from the lower control station by pressing and holding the
desired function button then moving the Analog Rocker to the Up or Down position (ref: chassis controls
illustration on page 5)
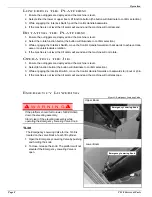
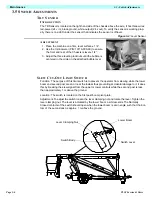
7. Open the Emergency Lowering Valve (see Figure 3) by pulling the knob out to check for proper opera-
tion. When the platform is lowered, release the knob.
8. Push the Chassis Emergency Stop Switch to check for proper operation. All machine functions should
be disabled. Twist the Chassis Emergency Stop Switch to resume.
9. Climb onto the cage.
10. Check that the route is clear of obstacles (persons, obstructions, debris), is level, and is capable of sup-
porting the outrigger loads.
11. Mount the platform and properly close the drop bar.
12. Test each machine function (Lift, Slew, Jib) from the upper control station by pressing the desired func-
tion button then moving the Joystick to the Forward or Back position (ref: platform controls illustration on
page 5)
13. Push the Platform Emergency Stop Switch to check for proper operation. All machine functions should
be disabled. Pull out the Platform Emergency Stop Switch to resume.
O
PERATION
Before operating the work platform, ensure that the Pre-Operation Safety Inspection has been completed
and that any deficiencies have been corrected.
Never operate a damaged or malfunctioning machine.
The operator must be thoroughly trained on this machine.
E
L E V A T I N G
T H E
P
L A T F O R M
1. Ensure the outriggers are deployed and the machine is level.
2. Select either the lower or upper boom lift function button (the button will illuminate to confirm selection).
3. While engaging the Interlock Switch, push the Control Handle forward.
4. If the machine is not level the tilt alarm will sound and the machine will not lift.
Содержание TL38
Страница 1: ...ERVICE PARTS MANUAL POWERED ACCESS WORK PLATFORM TL38 ...
Страница 2: ......
Страница 4: ......
Страница 51: ...Page 3 28 Maintenance 3 17 Torque Specifications TL38 Service Parts NOTES ...
Страница 59: ...Page 5 2 Schematics 5 1 Introduction TL38 Service Parts ...
Страница 60: ...Page 5 3 Schematics 5 1 Introduction TL38 Service Parts ...
Страница 61: ...Page 5 4 Schematics 5 1 Introduction TL38 Service Parts ...
Страница 62: ...Page 5 5 Schematics 5 1 Introduction TL38 Service Parts ...
Страница 63: ...Page 5 6 Schematics 5 1 Introduction TL38 Service Parts Notes ...
Страница 66: ...Page 6 3 Illustrated Parts Breakdown General Assembly TL38 Service Parts ...
Страница 70: ...Page 6 7 Illustrated Parts Breakdown Booms Posts Assembly TL38 Service Parts ...
Страница 72: ...Page 6 9 Illustrated Parts Breakdown Platform Assembly TL38 Service Parts ...
Страница 84: ...Page 6 21 Illustrated Parts Breakdown Outrigger Cylinder Assembly TL38 Service Parts NOTES ...
Страница 86: ...Page 6 23 Illustrated Parts Breakdown Electrical Assembly TL38 Service Parts ...
Страница 92: ...Page 6 29 Illustrated Parts Breakdown Decal Assembly TL38 Service Parts ...
Страница 94: ...Page 6 31 Illustrated Parts Breakdown Decal Assembly TL38 Service Parts ...
Страница 95: ...Page 6 32 Illustrated Parts Breakdown Decal Assembly TL38 Service Parts NOTES ...


