Page 7
G
EXAMPLE:
Email:
Account:
SMTP server:
smtp.gmail.com
Secure Type:
SSL/TLS
SMTP Port:
465
Important! Gmail account settings change:
You have to 'Allow Less Secure Apps Access to your Gmail Account' - otherwise Gmail
will block the footage being transmitted.
When you are logged in to your own Gmail e-mail account
(e.g. from
your
PC)
, please go
to your Account / Settings
page
www.google.com/settings/security/lesssecureapps
Navigate to 'Less Secure App Access' and t
hen click: "enable"
Now your camera is able to use your own Gmail account as a sending e-mail
address and photos/videos
can be sent
using your own Gmail account.
Sending via Email:
(a)
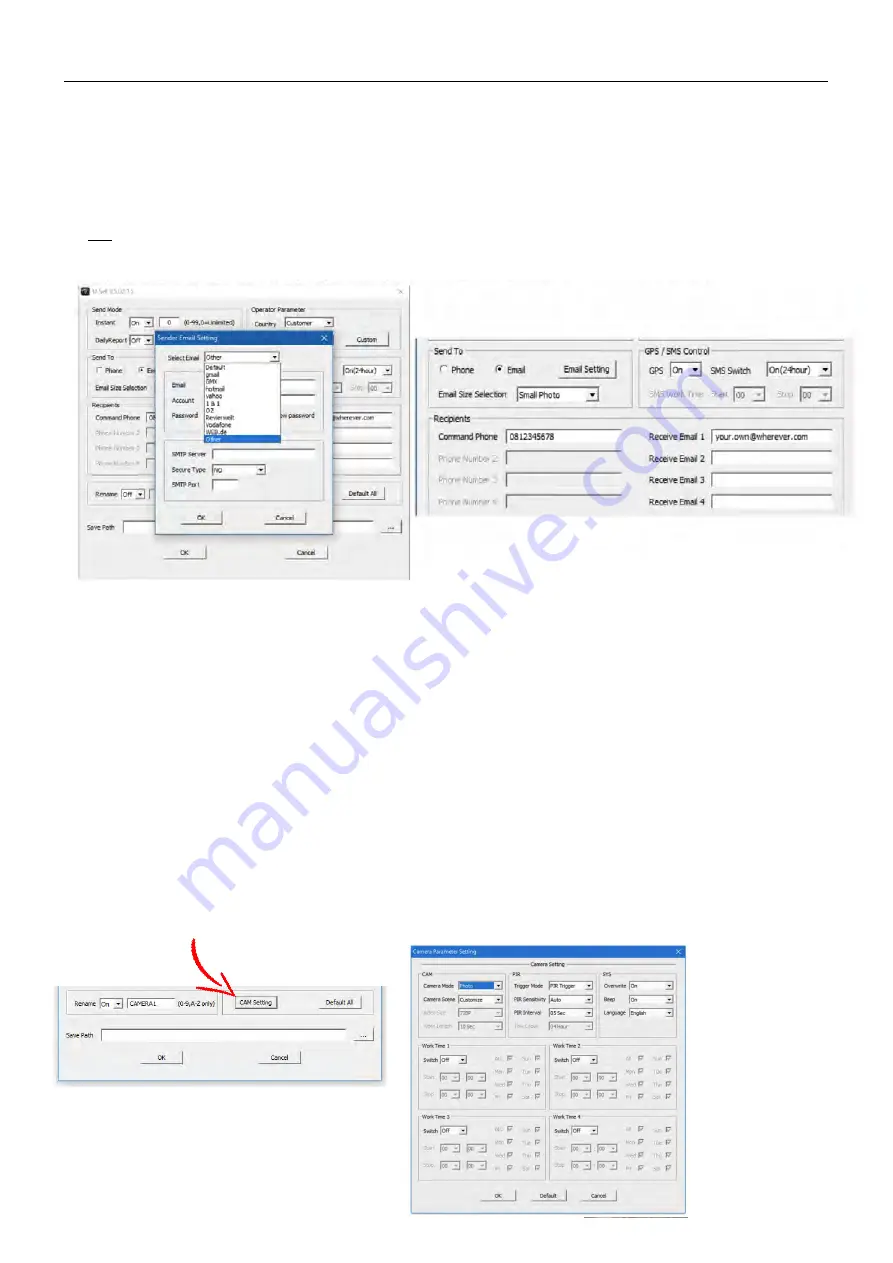
Select the Send To 'Email' option and then click the 'Email Setting' button and a separate window will open
allowing you to input the SENDING parameters for the camera footage.
Some of the main service providers are also
listed here.
(b)
Input your SENDING Email parameters and click 'OK' to save.
(c)
Now input your RECEIVING Email address (up to 4).
You
can
input the same
SENDING
Email address as a
RECEIVING
Email address too
Rename:
(a)
Here you can type a name for your camera which will be stamped on each photo and will also be the subject title of
each MMS / Email. This is handy if you have more than 1 camera as you know immediately from which camera the
notification has come from before viewing the footage (max of 8 characters).
CAM Setting:
For efficiency,
you can
click the 'CAM Setting' button and
custom
many
camera settings
to suite your requirements (these can
also be done through the camera Menu Options).
Email Parameter Settings


