Arrow Manual
Hardware Controls & Connectors
33
Rear Panel
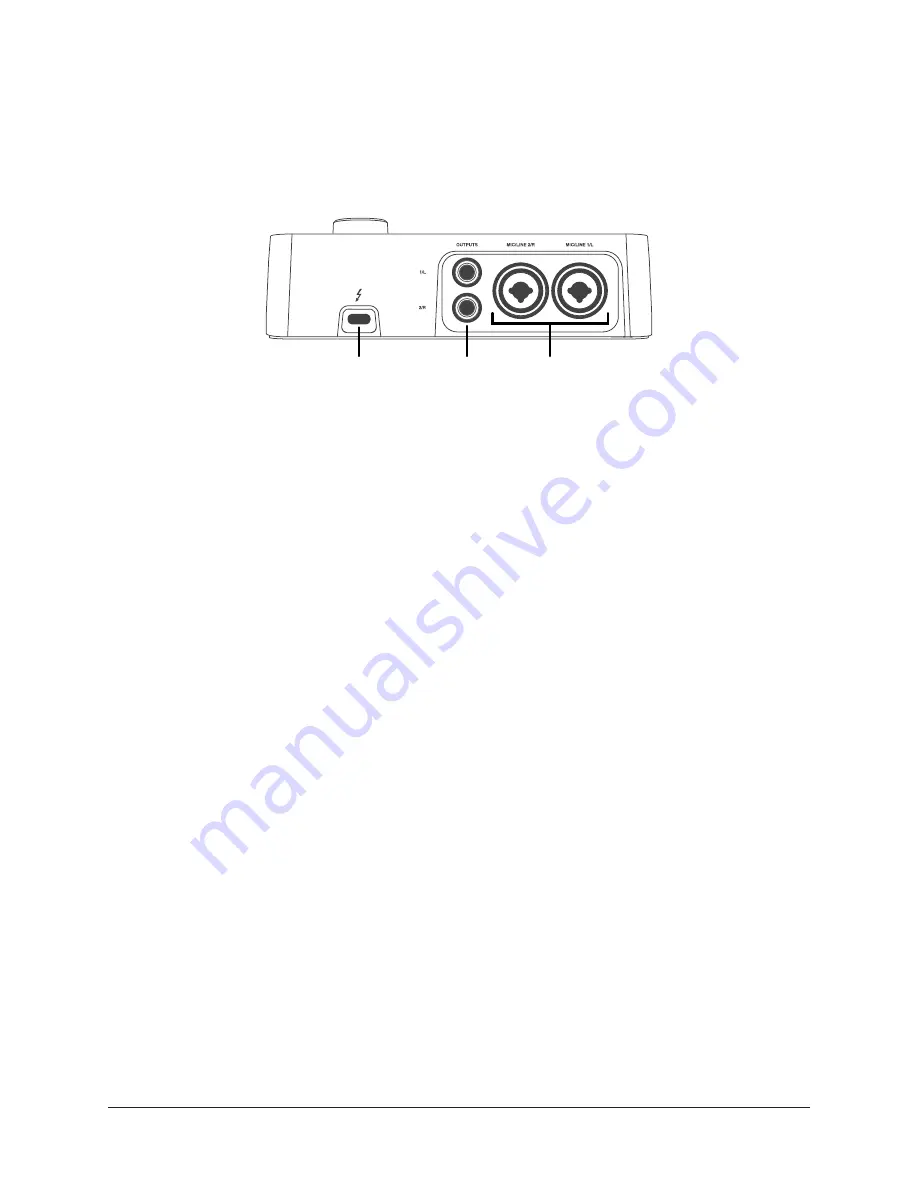
Refer to the illustration below for control descriptions in this section.
Note: All rear panel ¼” jacks can accept unbalanced TS (tip-sleeve) or balanced
TRS (tip-ring-sleeve) connections.
Rear panel connectors
(16) Thunderbolt 3 Port
Connect the Thunderbolt 3 cable (not included) here. A Thunderbolt 3 connection to the
host computer is required to use Arrow.
Thunderbolt 3 Port Notes:
• Arrow requires a built-in Thunderbolt 3 via USB-C port for the computer
connection.
• Although Thunderbolt 3 always uses USB-C connectors, not all USB-C computer
ports are Thunderbolt 3 ports.
• Arrow is incompatible with Thunderbolt 1 and Thunderbolt 2 computer ports, even
if an adapter is used.
• See
and
About Thunderbolt 3 Ports and Cables
for
related information.
(17) Monitor Outputs
Connect powered monitor speakers (or an amspeaker system) here. Volume is set
with the LEVEL knob (1) when MONITOR is selected (10) with the MONITOR button (3).
Caution:
Before powering Arrow, lower the volume of the monitor speakers and
remove headphones from your ears.
(18) Mic/Line Inputs 1 & 2
The female combo jacks for channels 1 & 2 accept either a male XLR plug for
connecting to the mic input, or a ¼” phone plug for connecting to the line input.
The input jack that is used for the channel (MIC or LINE) is specified with the Input
Select button (5-a).
Caution:
To avoid potential equipment damage, d48V phantom power on
the channel before connecting or disconnecting its XLR input.
16
17
18
Содержание Arrow
Страница 272: ...www uaudio com ...


