


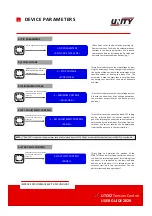


10-) DEVICE START-STOP
10-DEVICE START-STOP
< START ZAMANI=0 sn. >
< STOP ZAMANI = 0 sn. >
11-) TARE WEIGHT
11– TARE WEIGHT
< TARE: 0.0 Kg >
(Menu key 3 SEC. press and
hold the up arrow key to
move forward.)
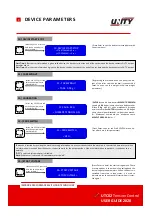
12-) CALİBRATION
12-CALİB. 5 KG
< CURRENT TENSION: 0.0 >
(Menu key 3 SEC. press and
hold the up arrow key to
move forward.)
8
DEVICE PARAMETERS
IMPROVE PERFORMANCE WITH OUR TECHNOLOGY
USER GUIDE 2020
UTC02
Tension Control
MENU
MENU
MENU
(Menu key 3 SEC. press and
hold the up arrow key to
move forward.)
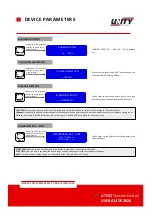
13 -) PROX SWITCH
13– PROX SWITCH
< OFF >
(Menu key 3 SEC. press and
hold the up arrow key to
move forward.)
MENU
14 -) START VOLTAGE
14– START VOLTAGE
< STOP VOLTAGE >
((Menu key 3 SEC. press and
hold the up arrow key to
move forward.)
MENU
Start Time:
After the start information is given to the device, the device starts at the end of the set time and the device contacts OUT 2 output
becomes active.
Start Time:
after the start information is given to the device, the device starts at the end of the set time and the device contacts OUT 2 output
(Press Enter to set the device start-stop times with
the arrow keys. )
(By pressing the tare button on the panel, the we-
ight of the roller to which loadcell is connected is
reset. You can see this weight in the tare weight
parameter.)
(
ENTER
tuşuna bir kere basınız
MEVCUT GERGİNİN
yanındaki
0.0
değeri yanıp sönmeye başlayacaktır.
Kilosu
5 kg
olan bir yükü merdanenin ortasına
asınız ve tekrardan
ENTER
tuşuna basınız 0.0 değeri
yanıp sönme işlem bitecektir ve işlem sona erecek-
tir. Merdaneni üzerindeki yük alındıktan sonra
MEVCUT GERGİ=0.0
olur. )
(Press Enter to enter the ProX SWITCH menu. Se-
lect off or time in this parameter.)
The device is started by receiving the machine turning information via a sensor connected to the machine. In the selected time interval, when
no information is received from the sensor, the device waits for the output position. When the information comes back, it continues to run
normally.
“OFF”
is selected, this parameter is disabled.
Note:
if the sensor is not used, this parameter must be “off”.
(Press Enter to enter the start voltage menu. There
are two options in this menu: stop voltage and the
last voltage value parameters. When the device is
switched from start to stop status, it is used to
indicate where the output will start when it is star-
ted again.)


