background image

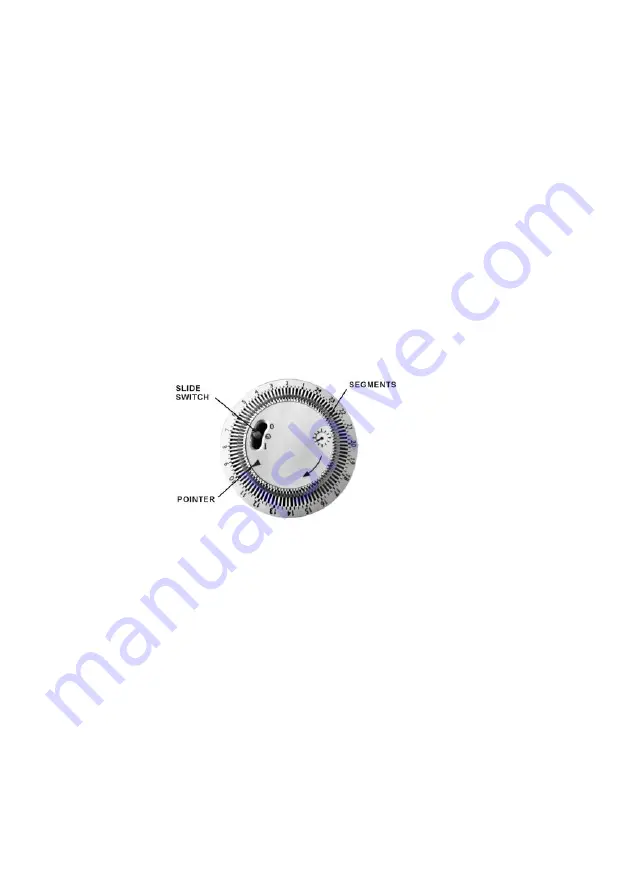
number 18 is in line with the arrow pointer. 

3.  Set the time the heater is required to run by pulling the 

segments around the outer ring outward appropriate to the 
running period(s) required. 

4.  When set, the heater will operate each day during the time 

programmed.    Note, the heater must always be plugged into a 
power socket, the element switches must be in the “on” position 
and the thermostat must be suitably set to ensure the heater will 
come on. 

5.  If the heater is required to run continuously, the slide switch on 

the timer should be set to the “I” position. 

6.  If it is subsequently required to revert back to timer operation, 

the slide switch on the timer should be set to the central (clock) 
position. 

7.  Note:-  When using in timer mode, due consideration should be 

given to the fact that the heater may come on whilst unattended.   


TIMER 


Fan Operation 

1.The fan can be switched on by means of the push button on the 
fan unit within the control panel.    The fan is switched on when the 
push button is in the inward position and off when the button is in the 
outward position.   
2.Note:- The fan will only operate when the timer must either be in the 
override position (slide switch next to the “I” symbol) or at some point 
during the timed “on” position. 
 

STORING YOUR OIL-FILLED RADIATOR 

1. Save the box for off season storage. 
2. Clean the heater following the cleaning instructions above. 
3. Remove the wheel base assemblies. 

Содержание UHR-840

Страница 1: ...Oil Filled Radiator INSTRUCTION MANUAL Model UHR 840 DO NOT TURN HEATER UPSIDE DOWN DURING OPERATION...

Страница 2: ...using the U bolts and wing nuts supplied 4 Tighten the wing nuts 5 Turn the heater the right way up PARTS DESCRIPTION 1 Power switch 2 Thermostat knob 3 Handle 4 Oil filled fins 5 Castors 6 Cord stor...

Страница 3: ...heater is fitted with a 24hr timer which has 96 segments around its circumference each segment being equivalent to 15 minutes of time With the aid of this timer it is possible to preset the time and...

Страница 4: ...ack to timer operation the slide switch on the timer should be set to the central clock position 7 Note When using in timer mode due consideration should be given to the fact that the heater may come...

Страница 5: ...as or electric burner 11 Never use the appliance with a damaged cord or plug or after the appliance has malfunctioned or been damaged in any way 12 Never attempt to open any part or dismantle the cont...

Страница 6: ...ildren with reduced physical sensory or mental capabilities or lack of experience and knowledge unless they have been given supervision or instruction concerning use of the appliance by a person respo...

Страница 7: ...e environment we live in DECLARATION OF CONFORMITY This product is in compliance with the standards of the below regulations EMC Directive 14 30 EU Low Voltage Directive 14 35 EU RoHS2 Directive 11 65...

Отзывы: