U N I Q U E U G P 1 3
22
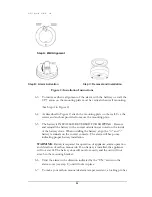
Step A: Wall Alignment
Step B: Alarm Activation Step C: Removal and Installation
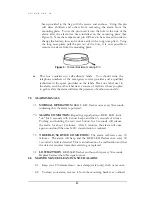
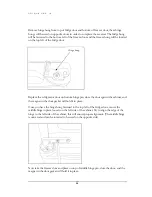
6.3 To insure aesthetic alignment of the alarm with the hallway or wall, the
UP
↑
arrow on the mounting plate must be vertical when wall mounting:
(See Step A in Figure 2)
6.4 As described in Figure 2, attach the mounting plate on the wall. Use the
screws and anchors provided to secure the mounting plate.
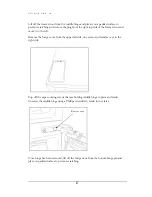
6.5 The battery is INSTALLED REVERSED FOR SHIPPING. Remove
and reinstall the battery in the correct orientation as noted on the inside
of the battery door. When installing the battery, align the “+” and “-“
battery terminals on the correct contacts. The alarm will beep once
indicating proper battery installation.
WARNING
: Battery is required for operation of appliance, alarm operation
and detection of carbon monoxide. If no battery is installed, the appliance
will not stay lit. The battery door will not close easily and the unit will not
attach to the mounting bracket.
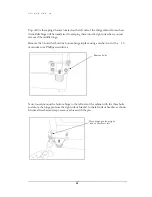
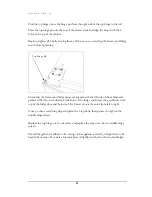
6.6 Twist the alarm in the direction indicated by the “ON” arrow on the
alarm cover (see step C) until it locks in place.
6.7 To make your carbon monoxide alarm tamper resistant, a locking pin has
Figure 2: Installation Instructions


