background image

112 


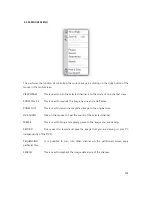
ZOOM IN                  ZOOM OUT                    FOCUS IN                FOCUS OUT 

4.2 Uniplayer Pro 


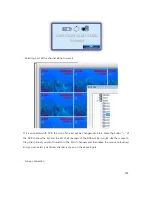
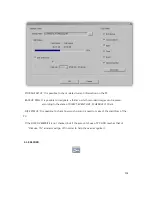
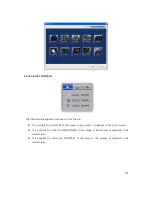
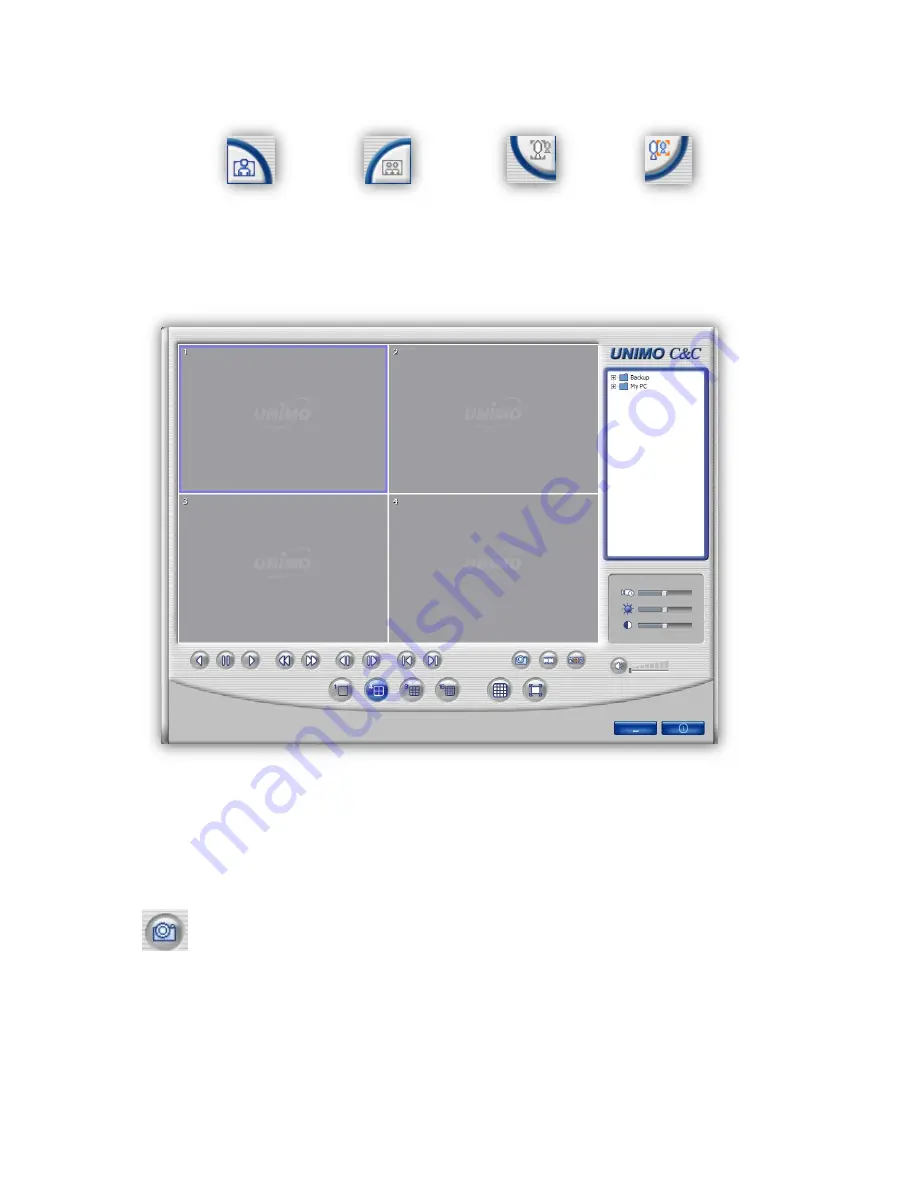
UNIPLAYER pro is a program that is used to play back a recorded image. It is together created in 

the process of backup in USB, CD, or DVD, in DVR. Each function of UNIPLAYER pro is the same as 

RAMS pro, except for the functions below.   


  :  PRINT  &  SAVE  -  After  capturing  a  channel  you  are  viewing  or  all  channels  or  all 

partitioned images, you can save or print them out.   

Содержание UDR-808

Страница 1: ...1 UDR 816 808 FULL MANUAL H 264 FULL D1 REAL TIME DVR ...

Страница 2: ...er Supply ON OFF 15 2 1 1 Power Supply ON 15 2 1 2 Power Supply OFF 15 2 1 3 Setting the Time Date Time 15 2 1 4 Setting an ID and Password 15 2 1 5 Setting a Network 15 2 2 Video Recording 16 2 2 1 Setting a Video Recording related Menu 16 2 2 2 Setting a Video Recording Conditions 16 2 3 Playback 16 2 3 1 Using the button PLAY for Playback 16 2 3 2 Audio Playback 16 2 4 Search 16 2 4 1 Search Mo...

Страница 3: ...Setting the PTZ 22 3 1 3 Setting the SPOT 24 3 1 4 Setting the SEQUENCE 25 3 1 5 Setting the PRIVATE ZONE 26 3 2 RECORD Setting Menu a 27 3 2 1 Setting the RESOLUTION 28 3 2 2 Setting the SCHEDULE 29 3 2 3 Setting the RECORD 30 3 2 4 Setting the MANUAL 31 3 2 5 Setting the AUDIO 32 3 2 6 PRE POST 32 3 3 EVENT Setting Menu 33 3 3 1 Setting the MOTION 33 3 3 2 Setting the EVENT ALARM IN 37 3 3 3 Set...

Страница 4: ...Setting the SERIAL 50 3 6 3 Setting the DDNS 51 3 6 4 Setting the E MAIL 52 3 6 5 Setting the NET FRAME 55 3 7 SYSTEM Setting Menu 56 3 7 1 Setting the GENERAL 56 3 7 2 Setting the ALARM OUT 60 3 7 3 Setting the DISK 61 3 7 4 Setting the ACCOUNT 64 3 7 5 Setting the CONFIG 65 3 7 6 Setting the SHUTDOWN 66 3 8 BACKUP Setting Menu 67 3 9 SYSTEM LOG Setting Menu 69 3 10 INFO Setting Menu 72 3 10 1 Se...

Страница 5: ...GE Setting Menu 80 3 12 1 Setting the ADJUSTMENT 81 3 12 2 Setting the CAMERA CHANGE 82 3 12 3 Setting the PLAYBACK 82 3 12 4 Setting the FREEZE 83 3 12 5 Setting the SEQUENCE 83 3 12 6 Setting the PTZ 84 3 12 7 Setting the ZOOM 2 4 86 3 12 8 Setting the AUDIO ON OFF 86 3 13 PLAYBACK 87 3 13 1 Playing Video recorded images 87 3 13 2 Playback Method 87 3 13 3 Method of Operation in the process of p...

Страница 6: ...3 13 4_1 LIVE CHANGE 90 3 13 4_2 PLAY CHANGE 90 3 13 4_3 PANORAMA 90 3 13 4_4 SMART 91 3 13 4_5 ZOOM 2 4 91 3 13 4_6 JPEG EXPORT 91 3 13 4_7 Audio ON OFF 91 4 PC Client Introduction 92 4 1 RAMS PRO 92 4 1 1 Setting RAMS PRO 93 4 1 2 Connecting to RAMS PRO 97 4 1 3 Controlling Screen Partition 101 4 1 4 Minimization Button 101 4 1 5 Ending Button 101 4 1 6 FULL SCREEN 101 4 1 7 SETUP 102 4 1 8 RECO...

Страница 7: ...PRO 112 4 3 Web Client 113 4 3 1 Downloading Active X Control 113 4 3 2 Connecting with DVR 113 4 3 3 Screen Showing Connecting with DVR 114 4 4 Mobile Viewer Introduction 115 4 4 1 i RAMS pro a RAMS pro 115 4 4 2 Search 115 4 4 3 Connection List 116 4 4 4 Connection 118 4 4 5 Screen Partition and Conversion 119 4 4 6 Upper Menu 119 4 4 7 Lower Menu 120 5 Appendix 122 5 1 Appendix A Firmware Upgra...

Страница 8: ...ns on NETWORK When connected to the network the green light turns on 3 USB 2EA This terminal is used to backup images in the HDD and captures still images are made A USB mouse can be used for convenient DVR operation 4 Function Buttons LOCK This function is to prevent an unlicensed person from performing system operation If it is pressed one time the DVR is converted into Lock After converting if ...

Страница 9: ...tons for Selection of the Direction UP This is used to move the cursor upward to select the detailed items to be controlled in the state of Menu and to move the camera upward in the state of PTZ control It performs the function of changing the channel in the state of Playback DOWN This is used to move the cursor downward to select the detailed items to be controlled in the state of Menu and to mov...

Страница 10: ...essive direction or is in progress PAUSE This button temporarily freezes the playback if the button is pressed during the state of Playback EXIT This conducts the function of exiting in the state of Menu If the button Exit is pressed while playback is in progress it is converted into live images MENU This button starts the menu and plays the role of returning it into a higher stage menu during the...

Страница 11: ... Power ON OFF Switch 4 AC Inlet AC 100V 220V 50 Hz 60 Hz 60W 5 Ethernet 10 100 1000 Mbps RJ 45 Connector 6 ALARM Output NO COM NC This provides four alarm outputs in total It uses a relay to provide contact outputs while an alarm is off The user can select NO COM or NC contacts to use according to the methods of operating the connected alarm devices NO Normal Open is a contact where it is separate...

Страница 12: ...des in Menu and establish a relationship of connect input channels 8 RS 232 RS 232 SERIAL TYPE This can use RS 232 SERIAL communications to control the outer controller 9 RS 485 RS 485 SERIAL TYPE This can use RS 485 SERIAL communications to control the outer controller 10 AUDIO Input 16CH 1 16 8CH 1 8 AUDIO Output 1EA INPUT 16CH 1 16 8CH 1 8 and one OUTPUT is provided through an extension port 11...

Страница 13: ... as follows 1 3 1 Method of Using the Remote Controller ID It is possible to set a DVR ID and control the DVR according to the setting of the remote controller The methods of use are as follows 1 The SYSTEM_GENERAL Unit address should be set in the DVR before the ID is set default 0 ...

Страница 14: ...button FRZ to unlock the state of FRZ PTZ This button is used to activate the FRZ camera The function of PTZ should be set on the DVR camera ZOOM This button is used to enlarge the images in a selected channel It functions as the button Zoom on the front side of the DVR SEQ This has the same function as the button SEQ on the front side of the DVR MULT This has the same function as the button Multi...

Страница 15: ...een successfully completed Then the user can now operate the DVR freely 2 1 2 Power Supply OFF In order to end the DVR press the button Shutdown in the menu Setup and the window for entering the password will open Enter the user set password Default value 111111 and the DVR will end normally After the message Normally ended is in view turn off the Power Switch at the backside 2 1 3 Setting time da...

Страница 16: ...g See the 3 2 Record setting Menu for details 2 2 2 Setting the recording conditions You have 4 choices of REC1 REC2 REC3 NONE for recording condition according to the setting value of SCHEDULE ting See the 3 2 Record setting Menu for details 2 3 Playback 2 3 1 Direct playback by using the button Play Press the button Play for playback The playback starts to work depending on the set channel playb...

Страница 17: ...lendar search Press the button Search and the four search modes will be viewed Select Calendar on the menu and the window for selecting Year Month and Date will be viewed Select it and the screen will move to the other screen to select time and minute Finally select time and minute and the channels will work at the set time Event search Press the button Search and the four search modes will be vie...

Страница 18: ...uded in the CD enveloped with the DVR 2 5 2 USB memory stick The backup can be made by connecting the USB memory stick with the USB terminal After a user can connect the USB device with the terminal he or she can set the system and use the backup menu to make a backup of motion pictures in the USB device from the HDD the USB can recognize up to 32G Connect the USB memory stick on the USB port and ...

Страница 19: ...ed After generating a group to Connect enter DVR Name Address Port ID and Password then press the button for storing The default values are as follows PORT 7000 ID ADMIN PASSWORD 111111 2 6 2 Uniplayer PRO This is a program that has the function to playback files recorded in RAMS PRO or captured in the backup files 2 6 3 Mobile viewer This is a program that uses wireless Internet based mobile devi...

Страница 20: ... will come into view SEARCH SETUP BACKUP 1CH 4CH 9CH 13CH 16CH SEARCH This is an icon for recorded data search SETUP This is an icon for DVR setting BACKUP This is an icon for Backup setting 1CH This is an icon to display Channel 1 4CH This is an icon to display Channel 4 9CH This is an icon to display Channel 9 16CH This is an icon to display Channel 16 ...

Страница 21: ...21 3 1 Camera setting Menu Fig 3 1 Screen of Camera Menu 3 1 1 Setting the camera Fig 3 1 1 Screen of Camera setting ...

Страница 22: ...s as possible at night when it is not in use NAME This performs the function of changing the camera name of each channel INSTALL This performs the function of turning off the camera of each channel turning off the camera HIDDEN This performs the function of hiding the camera of each channel with the camera ON but the function is hidden 3 1 2 Setting the PTZ Fig 3 1 2 Screen of PTZ setting ...

Страница 23: ...ID This makes it possible to select the number of the device in the values 0 to 256 It can identify this number internally when the PTZ is controlled and only when the ID and the PTZ device coincide with each other then it is possible to delete it TYPE Select a PTZ model if you want to use it but select None if you don t want to use it ...

Страница 24: ...t one of the channels when Sequence is set as OFF and Split 1 CAMERA It is possible to select a channel concerned at each SPOT monitor SPLIT It is possible to view a selected channel in 1 partition screen or in 4 partition screen SEQUENCE It is possible to view selected channels by converting them in sequence ...

Страница 25: ...elayed time up to 256 seconds POPUP This gives popup information on an event on the SPOT monitor 3 1 4 Setting the SEQUENCE Fig 3 1 4 SEQUENCE PAGE DWELL TIME It is possible to turn the screen to all channels in a unit of pages the time delays if the set period of time delayed ...

Страница 26: ...he screen alone of the selected channel is converted 3 1 5 Setting the PRIVATE ZONE Fig 3 1 5 PRIVATE ZONE ZONE ENABLE It is possible to set LIVE PLAYBACK LIVE PLAYBACK ZONE COLOR This performs the function of selecting a color that shows a zone that is to be hidden ...

Страница 27: ...After clicking on a zone use the mouse or the front direction key to set the zone to be hidden Then use the right mouse key or the front menu key to save 3 2 Record Setting Menu Fig 3 2 Screen of RECORD menu ...

Страница 28: ...the RESOLUTION Fig 3 2 1 RESOLUTION RESOLUTION This makes it possible to set the resolution of an individual channel or all channels NTSC CIF 360ⅹ240 Half D1 720ⅹ240 D1 720ⅹ480 PAL CIF 360ⅹ288 Half D1 720ⅹ288 D1 720ⅹ576 ...

Страница 29: ...is possible to use the mouse to click on and drag REC2 to select what you want or it is possible to select a zone you want by using the direction key or the remote controller to select REC2 The recording is made in FPS and picture quality set in REC2 is in Record REC3 It is possible to use the mouse to click on and drag REC3 to select what you want or it is possible to select a zone you want by us...

Страница 30: ... when an event takes place in REC1 REC2 It is used for setting Record in Schedule REC2 TIME It is possible to set FPS and picture quality at a set time in REC2 EVENT It is possible to set FPS and picture quality when an event takes place in REC2 REC3 It is used for setting Record in Schedule REC3 TIME It is possible to set FPS and picture quality at a set time in REC3 EVENT It is possible to set F...

Страница 31: ...n each channel It is possible to set 1 2 3 4 5 6 7 5 10 15 30 FPS It is possible to record up to 480 frames in case of 16 channel DVR 8 channel 240 frames QUALITY This is the function of setting a record quality to each channel as NORMAL LOW HIGH HIGHEST and so on It is possible to set 4 stage quality AUDIO This is used to set the audio to ON OFF for each channel ...

Страница 32: ... the AUDIO Fig 3 2 5 AUDIO AUDIO This is used to select the audio record to ON OFF for each channel The audio will not be included in the recorded file if it is turned OFF 3 2 6 Setting the PRE POST Fig 3 2 6 PRE POST ...

Страница 33: ...ore the set time begins if each channel has a recording condition POST RECORD It performs the function of do recording in each channel from a time when recording ends when the set time passes 3 3 Event Setting Menu Fig 3 3 Screen of EVENT Menu 3 3 1 Setting the MOTION ...

Страница 34: ... This is used to set motion sensitivity It is possible to set it in five stages 1st stage to 5th stage AREA This is used to select the zone of motion sensitivity Press the left key of the mouse and drag it to set it or use the direction key on the front side to set it Save it and the motion zone is set ...

Страница 35: ...N ACTION It is possible to interlock when an event takes place at a position where Motion is set RECORD It performs the function of do recording in the selected channel when an event takes place at a position where Motion is set ...

Страница 36: ...event takes place at a position where Motion is set BUZZER The buzzer can be turned ON or OFF if an event takes place at a position where Motion is set PRESET This is used to move the camera to the designated place in the SET Preset if an event takes place at a position where Motion is set ...

Страница 37: ...37 E MAIL This is used to send log to the selected e mail address if an event takes place at a position where Motion is set 3 3 2 Setting EVENT ALARM IN ...

Страница 38: ...s the function of setting the name to ALARM IN TYPE It performs the function of setting the type of ALARM INPUT NO Normal Open NC Normal Close Fig 3 3 2 1 ALARM IN_ACTION ACTION It provides the same function as Motion Action interlocking if an event takes place in a position when Alarm Input is set ...

Страница 39: ...39 3 3 3 Setting VIDEO LOSS Fig 3 3 3 VIDEO LOSS INPUT ACTIVE It performs the function of turning ON or OFF the functions in an event when Video loss takes place ACTION ...

Страница 40: ...L This is a cycle of checking the environment of the SYSTEM selecting one from 1 hour to 24 hours DISK WARNING This performs the function of giving a warning when a problem takes place in the disk selecting one among POPUP BUZZER POPUP OFF THRESHOLD It performs the function of setting temperature for warning C 0 100 F 32 212 CURRENT TEMP It shows the current temperature ...

Страница 41: ...of warning The alarm goes off when it is lower than the designated speed 3 3 5 Setting the DISPLAY Fig 3 3 5 DISPLAY DISPLAY It performs the function of showing Popup or icons at an intervals in a designated period time EVENT ICON It performs the function of selecting ON OFF in showing icons when an event takes place EVENT POPUP It performs the function of setting Popup ON OFF when an event takes ...

Страница 42: ...42 3 4 PLAYBACK Setting Menu Fig 3 4 Screen for PLAYBACK Menu 3 4 1 PLAYBACK SETUP Fig 3 4 1 Playback ...

Страница 43: ...in which the play starts in case of direct playback You can select the following items before 5 minutes 30 minutes 1 hour 6 hours 12 hours 24 hours AUDIO This is used to decide whether or not to play the audio in case of direct playback It is possible to select either ON or OFF If it is ON it is possible to play along with the audio but if it is OFF the audio will not be played At this time it is ...

Страница 44: ...44 3 5 1 Setting the DISPLAY Fig 3 5 1 DISPLAY DISPLAY SETUP This has the function of setting RESOLUTION BORDER COLOR and ALPHA BLENDING ...

Страница 45: ...4 1920 1080i 60Hz 5 1920 1080i 50Hz 6 1920 1080p 60Hz 7 1920 1080p 50Hz WARNING A monitor with low resolution will fail to show images with high resolution although the resolution of the DVR is set as high In this case press the keys 123 123 123 on the front side and at the same time press the key OK and it will be changed as Default 1280 1024P 60Hz to show high resolution images ...

Страница 46: ...46 BORDER COLOR It designates the line colors of the channel partition screen GRAY BLACK ALPHA BLENDING This is used to control transparency on the menu screen ...

Страница 47: ...47 3 6 NETWORK Setting Menu Fig 3 6 1 Screen of NETWORK Menu ...

Страница 48: ... host name for users convenience IP ADDRESS This is used to set IP address when the stable IP is used SUBNET MASK This is used to set Subnet Mask when a stable IP is used GATEWAY This is used to set Gateway when a stable IP is used DNS SERVER This is used to set DNS when a stable IP is used CHECK INTERNET This performs the function of checking if the network is normally connected But check it afte...

Страница 49: ... is used to set the scope of selection in the IP addresses when RANGE is selected BEGIN ADDRESS This is used to set IP address at the starting point when RANGE is selected when ALL is selected this is not used END ADDRESS This is used to set IP address at the ending point when RANGE is selected when ALL is selected this is not used CMS PORT This is used to set the RAMS access port number WEB PORT ...

Страница 50: ...E This is used to control the outer controller by means of RS 232 SERIAL communications MODEL This is used to select protocol of the outer controller GSC 3000J HITRON HID2404CEN HUNT HKB 300 7323 DKB 06 05 255 VIDO KB3N TV KBD1000 PORT This is used to select communications BAUD RATE DATA bit Parity STOP bits RS 485 SERIAL TYPE This is used to control the outer controller by means of RS 485 SERIAL ...

Страница 51: ...KBD1000 PORT This is used to select communications BAUD RATE DATA bit Parity STOP bits 3 6 3 Setting the DDNS Fig 3 6 3 DDNS DDNS SERVER is used to set DDNS server dyndns com changeip com ddnsdvr com videotrend eu exddns com no ip com HOST NAME This is used to enter the Host name that the user visits on the DDNS server website to register ...

Страница 52: ... ROUTER IP This is used to send IP information to the DDNS server website ON OFF If a router is used select as ON STATUS This is used to check whether the network is normally linked But it is necessary to check it after saving the set of information 3 6 4 Setting the E MAIL Fig 3 6 4 E MAIL ADDRESS This is a menu to set an E mail SEND MAIL It is possible to decide whether or not to send an e mail ...

Страница 53: ...he time in which an e mail is sent ON OFF E MAIL ADDRESS This is used to enter information on receivers e mail addresses SERVER In case of setting an E mail Server in the DVR system MAIL SERVER This is used to select the e mail server ...

Страница 54: ... SERVER USER NAME This is used to set user name USER E MAIL This is used to set users e mail addresses SERVER ADDRESS This is used to set the address of SMTP server SERVER PORT This is used to set SMTP server port LOGIN ID This is used to set user ID LOGIN PASSWORD This is used to set user password ...

Страница 55: ...FPS This is used to set network transmission FPS by channels It is possible to set 1 2 3 4 5 6 7 5 10 15 30 FPS QUALITY This performs the function of setting transmission quality by channels It is possible to set four stages NORMAL LOW HIGH and HIGHEST ...

Страница 56: ...56 3 7 SYSTEM Setting Menu Fig 3 7 Screen of SYSTEM Menu 3 7 1 Setting the GENERAL Fig 3 7 1 GENERAL ...

Страница 57: ...on setting a domain 1 minute 10 minutes Forced Deletion This is used to select the day when the recorded data is saved setting a domain 0 day 99 days EX it is impossible to play back data that were recorded 3 days earlier if the domain was set for 3 Days BACKUP CONFIRM This performs the function of checking whether or not to confirm a user when a backup is made ON OFF HDD OVERWRITES This performs ...

Страница 58: ...date MM DD YYYY DD MM YYYY and YYYY MM DD TIMEZONE This is used to set the standard time zone in DVR It is automatically set as OFF in a city where DST is not used DATE DISPLAY This is used to turn ON or OFF the function of showing date and time DATE TIME This is used to set the date and time NTP This is used to set whether or not to use NTP ...

Страница 59: ...he basic server AUTO SYNC It performs the function of automatic synchronization every day SYNC NOW This performs the function of immediate synchronization ADD This performs the function of setting the date of holidays DEL This performs the function of deleting the date of holidays ...

Страница 60: ...ARM OUT 4EA ALARM OUT Setting Menu SIGNAL This is used to turn on or off the designated Alarm Out ALARM TEST ON This is used to set and test the device linked with Alarm Auto ALARM TEST OFF This is used to clear and test the device linked with Alarm Auto ...

Страница 61: ...61 3 7 3 Setting the DISK Fig 3 7 3 DISK_INSTALL DISK INSTALL This is used to install while showing the state of the device linked with DVR ...

Страница 62: ...he button Start is pressed it shows the first and last recorded information in the disk USB RESET This performs the function of resetting the USB link USB FORMAT This performs the function of formatting what is contained in the USB ...

Страница 63: ...F DISK STATUS This is used to display the state of HDD RAID STATUS This is used to display the state of RAID RATE This is used to display the rate of progress WARNING At least 2 3 HDDs are necessary according to the RAID levels It is necessary to use the same model of HDD of the same size If the HDD is different in size and model there appears a Disk error ...

Страница 64: ...g the RAID level If the function of RAID is used it takes longer than usual to boot it up 3 7 4 Setting the ACCOUNT Fig 3 7 4 ACCOUNT DVR Each user can set an access authority ADMIN The ADMIN user has all DVR authorities The initial password of ADMIN is 111111 USER The user has a limited DVR authority WARNING It is possible to revise the initial user name but impossible to delete it ...

Страница 65: ...5 Setting the CONFIG Fig 3 7 5 CONFIG SLOT It is possible to save and read a set value in the DVR memory It is possible to save up to 4 memories EXPORT It is possible to use an outer device USB to save the set value of the DVR IMPORT It is possible to read in the set value of the DVR from an outer device USB ...

Страница 66: ...66 3 7 6 Setting the SHUTDOWN Fig 3 7 6 SHUTDOWN RESTART This performs the function of re booting the DVR SHUTDOWN This performs the function of turning off the DVR ...

Страница 67: ...67 3 8 BACKUP Setting Menu Fig 3 8 Screen of BACKUP Menu Fig 3 8 1 BACKUP ...

Страница 68: ... setting is USB memory stick DVD RW FROM TO Enter the time and date when a backup is made BACKUP TITLE This is used to set the name in the backup file SELECT CAMERA This is used to select a channel whose backup is made REQUIRE SPACE This is used to calculate the capacity of the set backup data ...

Страница 69: ...p HIDE If the button is pressed the menu bar in progress is hidden If it is converted into a small icon on the wallpaper it is possible to perform another work at the same time 3 9 SYSTEM LOG Setting Menu Fig 3 9 Screen of SYSTEM LOG Menu ...

Страница 70: ...mark 1 DVR System Started 2 DVR System Shutdown 3 Login Success ID 4 Login Failed ID 5 Logout 6 Password Changed 7 Recording Start 8 Recording Stop 9 General Setup Changed 10 Monitor Setup Changed 11 Resolution Setup Changed 12 Raid Setup Changed 13 Record Setup Changed 14 Schedule Changed 15 Camera Setup Changed 16 IP Camera Setup Changed 17 Spot Setup Changed ...

Страница 71: ...as bad sectors Bad sector Count 39 HDD Format Disk Num 40 SATA ERROR 41 Disk Fault HDD Num unmounted due to I O error 42 INFO DISK IS FULL Num 43 RAID INIT COMPLETED 44 USB Backup Failed 45 erase CD 46 Erase CD complete 47 Erase CD fail RETURN CODE Result 48 Backup Start Image of Count 49 Backup Done Ok or Fail 50 Protect Date Time DST 51 Camera Screen Sequence Changed 52 Video Loss Camera Num 53 ...

Страница 72: ...69 NET Restart DVR 70 NET Reject Restart Request 71 E Mail Address does not respond 72 Message Failed Address 73 E Mail Failed Invalid Addr Domain 74 E Mail Failed Check Domain or DNS 75 Load Slot Num Config File 76 Weak Camera Signal Num 3 10 INFO Setting Menu Fig 3 10 Screen of INFO Menu ...

Страница 73: ...ISK This is used to display user information in the Disk EARLIEST RECORD LATEST RECORD DISK CAPACITY USED SPACE AVAILABE SPACE HDD OVERWRITE HDD INFORMATION This displays the environment of HDD disk HDD size bad sectors temperature and usability ...

Страница 74: ...74 3 10 2 Setting the RECORD Fig 3 10 2 RECORD RECORD This is used to display the state of recording in use 3 10 3 Setting AUDIO Fig 3 10 3 AUDIO This displays the state of Audio in use ...

Страница 75: ...75 3 10 4 Setting the VERSION Fig 3 10 4 VERSION This displays VERSION Video Format and MAC address 3 10 5 Setting the UPGRADE ...

Страница 76: ...and the upgrade will be conducted Notice Re booting after upgrading S W means that the system works well 3 11 SEARCH Setting Menu Fig Screen of SEARCH Menu If the buttons Search Button and DVR Front Button of the main icons and the button Search Button on the remote controller are pressed the following screen is in view ...

Страница 77: ...77 HDD This is used to select the device to be searched 3 11 1 Setting the TIME SEARCH QUICK SEARCH If the Time is selected in the higher menu it is possible to enter YY MM DD and to do quick search ...

Страница 78: ... is used to display the date when the recording is made If the date to be searched for is selected it displays the recorded data of the day If the time and minute when data that you want to search for is selected it can display the information you want ...

Страница 79: ...her menu is selected it is possible to search according to MOTION ALARM IN VIDEO LOSS selection ON And it is possible to play the searched event 3 11 4 Setting the OVERLAPPED SEARCH OVERLAPPED LIST It is possible to search for overlapped data according to temporal change ...

Страница 80: ...turn the screen in a channel which the user wants If the mouse is put on the selected channel and the right key is pressed it displays the menu window of Camera Change If the Front key and Remote Key are in operation the channel is selected then press the key OK and the same window will be viewed ...

Страница 81: ...81 3 12 1 Setting the ADJUSTMENT ...

Страница 82: ...ged into REC it is saved in the changed condition brightness contrast saturation and sharpness 3 12 2 Setting the CAMERA CHANGE CAMERA CHANGE It is possible to replace the camera in the selected channel with a camera on other place If you are to change back into the initial state press DEFAULT 3 12 3 Setting the PLAYBACK PLAYBACK This is the function to play the selected channel The playback is in...

Страница 83: ...his performs the function of converting in sequence depending on the setting value of CAMERA_SEQUENCE CAM SEQUENCE This performs the function of converting cameras in sequence depending on the setting value of CAMERA_SEQUENCE ON PAGE SEQUENCE This performs the function of converting a unit of page depending on the setting value of CAMERA_SEQUENCE ON CANCEL SEQUNCE This performs the function of can...

Страница 84: ...ssible to use the Front Direction Key and the mouse to move upward downward leftward and rightward after activation press the key Menu to control PTZ Z Z It is possible to use ZOOM IN OUT to control the camera F F It is possible to use FOCUS IN OUT to control the camera I I It is possible to use Iris IN OUT to control the camera EXIT The user can exit after finishing PTZ CANECEL The user can exit ...

Страница 85: ...of PAN TILT in advance It is possible to save from 1 to 50 and move to a set place PRESET TOUR It is possible to make a list of the presets and make a PRESET TOUR depending on the ON OFF function PATTERN SETUP This performs the function of saving the patterns the user wants PATTERN TOUR This performs the function of moving the camera in a pattern that the user sets OSD MENU This performs the funct...

Страница 86: ...12 7 Setting the ZOOM 2 4 ZOOM 2 4 It is possible to depend on ZOOM magnification to watch the images 3 12 8 Setting the AUDIO ON OFF AUDIO ON It is possible to turn ON OFF the audio in the selected channel ...

Страница 87: ...playback a searched image press the button Search to select a method of search and then select an image you want and play it back 3 13 3 Method of operation in the process of playback 3 13 3_1 Stopping playback If you are to stop playing in the process of playback press the button Exit on the remote controller or on the front side of DVR and the playback will stop and the system will move back to ...

Страница 88: ...on is pressed quickly the slow playback double speed is changed 1 2 1 4 1 8 double speed 3 13 3_4 Changing the direction of playback The directions of playback include the regressive reverse direction and the progressive direction If you want to play back in the regressive direction while it is in operation in the progressive direction press the button R Play Reverse Play to change the direction o...

Страница 89: ...seen on the lower left part Press the key SEQ one time and E time minute second will be seen for section repetition If you want to exit from the Section Repetition press the button Exit or the mouse button X and the function of section repetition will disappear 3 13 4 Other functions in the process of playback Select the channel in the process of playback press the right button of the mouse or use...

Страница 90: ... possible to change the selected channel in the process of playback into other live channel mode Press the button Play Change and the window in which to select a channel that you want to change will be in sight Select a channel you want among them and it will be changed into the live screen 3 13 4_3 PANORAMA This is used to change the selected channel in the process of playback into the Panorama m...

Страница 91: ... still images in a saving device of the channel in the process of playback 3 13 4_7 Audio ON OFF If you want to playback a file with a recorded audio linked you should select the channel with the mouse and click on the button Right to view audio related menu Click on the button Playback after turning on the audio and the audio will be played back If you are to use the key on the front side of DVR ...

Страница 92: ...ion 4 1 RAMS PRO The RAMS Pro is an integrated software for controlling the DVR a PC program to support 64 channels making it possible to control REAL TIME VIDEO MONITORING DVR SYSTEM SETTING DVR BACKUP AVI CONVERT from a remote place ...

Страница 93: ...ro exe and then press the button Next to continue the process of setup Designate a place in which to set up the program and the name of a new folder C RAMS_Pro is set as a default value Press the button Next to continue the process of setup ...

Страница 94: ... program to be created in the list of Start Programs at the bottom of Windows If you do not want it select the button for checking Don t create a Start Menu folder and then press the button Next to continue the process of setup ...

Страница 95: ...nt to create a Shortcut on the wallpaper select the icon Create a desktop icon And if you want to add RAMS pro to the toolbar select Create a quick Launch icon Press the button Next to continue the process of setup ...

Страница 96: ...96 After all the program is set up select a program you want to execute If you do not want press the button Finish to finish setting it up with nothing selected ...

Страница 97: ...97 4 1 2 RAMS PRO Access CONNECT Control button Additional function button Ending button Multi Screen PTZ PRESET CONTROL Screen partition Volume control Screen minimization button ...

Страница 98: ...Select the name of the DVR you want and you will identify the value of NAME IP PORT USER ID PASSWORD in the right enter window Change the information on items you want to revise and then press the button DVR MODIFY and the change will be made DVR DELETE Select the name of the DVR you want in the window of connection list and you will identify information on the value of NAME IP PORT USER ID and PA...

Страница 99: ... of the group that you want to change and then press the key OK and the name of the group will be changed GROUP DELETE Select a group you want to change from the list and then press the button GROUP DELETE and the selected group will be deleted DVR CONNECT Enter accurately the information of the connection to the DVR you have and then press the button CONNECT and the window below will be in view a...

Страница 100: ...nged into blue Press the button of the DVR to show the list and the list of all channels of the DVR will be in sight Use the mouse to drag the channel you want to watch in the list of channels and then leave the mouse untouched and you can select a particular channel as seen on the above Figure Group connection ...

Страница 101: ...hannels to the selected DVR 4 1 3 Screen partition control It is possible to make a partition with the number of multi screens at a maximum of 64 channels 4 1 4 Minimization button This is used to minimize a program and hide it in the monitor screen If you want to maximize it back select RAMS pro from the list on the lower part of the Windows 4 1 5 Ending button This is used to end a program by pr...

Страница 102: ... of full screen to make a partition of the channels 1 4 9 16 6 7 10 10 36 49 and 64 HIDE This is used to hide the control If you are to exit from the Hide mode right click the mouse EXIT This makes it possible to exist from the full screen mode 4 1 7 SETUP Press the button Setup out of the control buttons and the window Client Setup below will appear ...

Страница 103: ...images can be saved according to the state of DIRECT EVENT LIVE SCHEDULE of Client DISK STATUS It is possible to check how much current is used to make of the Hard Disc of the PC If the DISK OVERWRITE is not checked but if the amount of use of PC HDD reaches that of Disk use an alarm will go off in order to help the user recognize it 4 1 8 RECORD ...

Страница 104: ...ge will begin to be recorded in the designated place through Backup Path 4 1 9 DVR PLAYER If you want to view the recorded image in Record click on this button and the program DVR Player will be executed independently from RAMS pro 4 1 10 SEARCH You can search for an image recorded on the previous days in the DVR Click on the above icon and the window Search will be created ...

Страница 105: ...d in your PC 4 1 11 REMOTE BACKUP Click on the above icon and you will save the recorded data in the DVR in your PC If you select a date you want you will view the recorded data Select the section for backup from the starting to the ending position and press the button Backup Start Then a backup of the data will be made ...

Страница 106: ...to view the backup data see 4 2 4 1 12 REMOTE SETUP Click on the above icon to depend on RAMS PRO to revise the parameter of DVR All menus are comprised in the same way as those in DVR You can do work you want in the same way as the work setting in the DVR ...

Страница 107: ... possible to control FPS of the image in the process of playback in the multi screen It is possible to control the BRIGHTNESS of the image in the process of playback in the multi screen It is possible to control the CONTRAST of the image in the process of playback in the multi screen ...

Страница 108: ... CONTROL It is possible to control such other devices like a siren linked with the DVR 4 1 15 AUDIO CONTROL It is possible to use a speaker linked with DVR through a microphone linked with the PC to send sound messages ...

Страница 109: ... times ZOOM OUT This is used to return the magnified image to the original size LIVE AUDIO Click on the mouse to hear the sound of the selected channel FREEZE This is used to bring a temporary pause to the image you are viewing RECORD This is used to record and save the image that you are viewing in your PC independently of the DVR SEQUENCING It is possible to turn into other channel on the partit...

Страница 110: ...ate you want and then press the key OK SEARCH CONTROL It is possible to playback in a reverse direction bring a temporary pause play back rewind quickly play back quickly move backward by one frame move forward by one frame move to the initially recorded date and move to the finally recorded data from a time when you select on the lower progress bar PRINT SAVE ...

Страница 111: ... is possible to save a selected channel or all channels or print them out 4 1 17 PTZ Control It is possible to click on the arrows upward downward rightward and leftward to move the camera linked with the DVR ...

Страница 112: ... back a recorded image It is together created in the process of backup in USB CD or DVD in DVR Each function of UNIPLAYER pro is the same as RAMS pro except for the functions below PRINT SAVE After capturing a channel you are viewing or all channels or all partitioned images you can save or print them out ...

Страница 113: ...ss to be connected in the address window of the Explorer When connecting with DVR if you view the following message press the button Setup and it will be set up If you press the button No Setup it will not be set up Fig 4 3 1 Window for Checking Active X Setup 4 3 2 Connecting with DVR Enter IP address or DDNS address of the DVR you want to in the address window of the Internet Explorer ...

Страница 114: ...nnection with DVR Enter the network password of DVR in the login window on the lower right The method of its use is the same as RAMS pro See 4 1 2 RAMS PRO Connection for details You can use a variety of functions including screen partition live search playback and others in Active X like RAMS PRO ...

Страница 115: ...AMS pro The i of i RAMS pro stands for i Phone and an application exclusively for i Phone The a of a RAMS pro stands for Android Phone and an application exclusively for Android Phone 4 4 2 Search Android You can search for a RAMS pro on the Android market ...

Страница 116: ...ap on the above button in the connection list and it will be changed into EDIT screen on which to enter new address Enter DVR information on the window for entering information and then press the button and the information will be saved and the screen will return to the connection list ...

Страница 117: ...fferent as mentioned above It is possible to use the button Delete to delete the DVR information Changing order With the above icon pressed and your finger attached to the left mouse drag upward or downward and the order of the selected DVR information will be changed Connection information change If you want to change the address and login information on DVR to be connected tap on the above icon ...

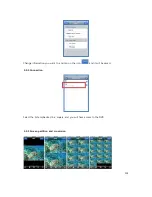
Страница 118: ...8 Change information you want to and tap on the icon and it will be saved 4 4 4 Connection Select the list emphasized in a square and you will have access to the DVR 4 4 5 Screen partition and conversion ...

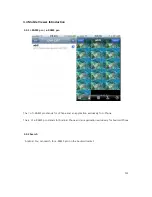
Страница 119: ...reen touched with two fingers make them closer to each other the screen will be converted in sequence 1 2 8 16 partition make the fingers become distant from each other and the screen will be converted in sequence 16 8 2 1 partition 4 4 6 Upper menus Done The mobile viewer can be stopped Search It is possible to search for a recorded image in the DVR by dates Select a date you want to search for a...

Страница 120: ... mode of 1 screen partition Tap double on a channel to capture and tap on the above icon and the image will be saved in a JPEG file Temporary Freeze It is possible to bring a temporary Freeze to a real time image viewing The icons will look different as seen below Screen partition It is possible to do conversion by means of 2 8 16 screen partition Tap double on the channel and you can view in a on...

Страница 121: ...ey and the position of the camera will be changed HELP Tap on the above icon and the Help Patch for simple screen makeup will appear Tap slightly on the screen you can exit from the Help page Chapter 5 Appendix 5 1 Appendix A Firmware Upgrade 1 Put copied firmware files in the USB memory stick Connect it with the USB terminal on the front side of DVR ...

Страница 122: ...cations Model 8ch DVR 16ch DVR Image System NTSC PAL AUTO selectable Multi tasking Quadplex Video Channel 8CH Composite 8CH Loop through BNC 16CH Composite 16CH Loop through BNC Video Output HD Output 1EA VGA 1EA CVBS 1EA SPOT 3EA Video Compression H 264 Display Resolution 1280x1024 50hz 60hz 1440x900 60hz 1920x1080p 50hz 60hz 1920x1080i NTSC 1280x1024 50hz 60hz 1440x900 60hz 1920x1080p 50hz 60hz ...

Страница 123: ... 16 NO NC Selectable Alarm Output Relay 4 NO NC Relay 4 NO NC Relay Audio In Out In 8ch Out 1ch In 16ch Out 1ch Network 10 100 1000 Base T Static DHCP E mail DDNS 3G iPhone iPad android Private Function 22x18 NTSC 22X18 PAL Motion Detection 22x18 NTSC 22x18 PAL 5 Level Sensitivity Hard Disk 3EA ESATA PORT 1EA Hard Status SMART Function Hard status Backup USB Ver2 0 CD RW DVD RW Network PTZ Control...

Страница 124: ...7 5 1058 2 2116 4 4232 8 4 1409 1 2818 2 5636 3 1 5636 3 11272 7 22545 4 High 30 304 9 609 8 1219 5 15 609 8 1219 5 2439 0 7 5 1219 5 2439 0 4878 0 4 1656 7 3313 5 6626 9 1 6626 9 13253 8 26507 6 Normal 30 367 6 735 3 1470 6 15 735 3 1470 6 2941 2 7 5 1470 6 2941 2 5882 4 4 1932 6 3865 2 7730 4 1 7730 4 15460 7 30921 5 Low 30 431 0 862 1 1724 1 15 862 1 1724 1 3448 3 7 5 1724 1 3448 3 6896 6 4 197...

Страница 125: ...1 11272 7 22545 4 45090 7 High 30 609 8 1219 5 2439 0 15 1219 5 2439 0 4878 0 7 5 2439 0 4878 0 9756 1 4 3313 5 6626 9 13253 8 1 13253 8 26507 6 53015 2 Normal 30 735 3 1470 6 2941 2 15 1470 6 2941 2 5882 4 7 5 2941 2 5882 4 11764 7 4 3865 2 7730 4 15460 7 1 15460 7 30921 5 61842 9 Low 30 862 1 1724 1 3448 3 15 1724 1 3448 3 6896 6 7 5 3448 3 6896 6 13793 1 4 3940 7 7881 5 15762 9 1 15762 9 31525 ...

Страница 126: ...8 37537 5 75075 1 High 30 1027 0 2054 1 4108 1 15 2054 1 4108 1 8216 3 7 5 4108 1 8216 3 16432 5 4 5531 0 11061 9 22123 9 1 22123 9 44247 8 88495 6 Normal 30 1255 0 2509 9 5019 8 15 2509 9 5019 8 10039 7 7 5 5019 8 10039 7 20079 3 4 6436 7 12873 3 25746 7 1 25746 7 51493 3 102986 6 Low 30 1498 8 2997 6 5995 2 15 2997 6 5995 2 11990 4 7 5 5995 2 11990 4 23980 8 4 6613 8 13227 5 26455 0 1 26455 0 52...

Отзывы: