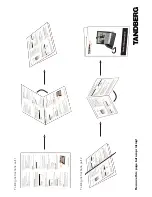
[ 6 ]
MOUNTING THE BASE UNIT ON A WALL
You can mount your base directly to the wall. Before doing this, consider the following:
• Avoid electrical cables, pipes, or other items behind the mounting location that could cause a hazard when
inserting screws into the wall.
• Mount your phone within distance of a working phone jack.
• Make sure the wall material is capable of supporting the weight of the base and handset.
• Use screws with anchoring devices suitable for the wall material where the base unit will be placed.
1) Insert two mounting screws into the wall (with their appropriate anchoring device),
100mm apart. Allow about 3mm between the wall and screwheads for mounting
the phone.
2) Plug the AC adapter into the
DC IN 9V
jack on the telephone
and then into a Standard AC wall outlet.
3) Plug the telephone line cord into the
TEL LINE
jack on the
telephone and then into the telephone socket on the wall.
4) Raise the antenna to a vertical position.
5) Align the mounting slots on the base with the mounting posts
on the wall.
6) Then push in and down until the phone is firmly seated.
This phone also can be mounted on any standard telephone wall plate
(for Australia).
3mm
100mm
35mm
UP388BH(WD3) OM 3/23/05 10:56 AM Page 6
Содержание WDECT 2355+3
Страница 1: ...WDECT 2355 3 Wide Band Digital Technology provides the clearest sound and the best privacy e...
Страница 4: ...slide the e rear of the ttery wires phone case for clicks r by sliding it Red Wire Black Wire le...
Страница 10: ...s work only if you subscribe to the service...
Страница 13: ...7 s when in DirectLink mode harger after each phone call on a ndset Lo w B at te ry...
Страница 21: ...15 This is an example if you have handset 1 and 2 Monitor t 2 itor set 2...
Страница 23: ...17 nner ___ 1 Answer uch Tone ty Code For Answering Setup menu you can also set them from the base see page 45...
Страница 27: ...21 e to ster HS Handset t 1 t 2 e base Make sure to perform the Replacing Base after de register the handset...
Страница 35: ...29 s in played...
Страница 41: ...35 page 34 dialed ns SPD1 SPD0 e press and one number eed dial SPD1 035 ven9 SPD1...
Страница 49: ...43 cement be illuminated e the clock and you must ime function...
Страница 67: ...61 ndset and the n that you an change et and age 21 in the display Try the steps ADDITIONAL INFORMATION...
Страница 74: ......
Страница 75: ...69...


