background image

22

Using the Scanner Memories

HOLD icon. Then, select a memory by pressing 

s

 or 

t

 to go to the memory or 

input the memory number then press 

HOLD

.

Scanning Memory Banks

To scan the memories you have programmed, press 

SCAN

. The scanner scans 

all unlocked programmed memories in enabled memory banks, stopping on 
a memory when it detects a transmission. To turn on/off memory banks while 
scanning, press the number button that corresponds to the memory bank you 
want to enable or disable.

Locking/Unlocking Memories

You can lock memories so that they are not scanned, even if their bank is turned 
on. Simply press 

L/O

 when the scanner stops on a transmission on the frequency 

or manually select the memory, then press 

L/O

. The scanner turns on the 

L/O


icon when it is set to a memory that is locked out.

To unlock a memory, manually select the memory, then press 

L/O

. The scanner turns 

off the 

L/O

 icon and includes the memory when scanning its bank.

To unlock all memories, press and hold 

L/O

 for 2 seconds, the scanner beeps 

twice and the 

L/O

 icon disappears.

Using Priority Scan

You can set one memory in each bank as a priority memory. If you turn on the 
Priority feature, the scanner will check the priority memories in enabled banks 
every 2 seconds, even if it has stopped on a transmission on another memory.

To set the memory in a bank to be the priority memory, manually select the 
memory then, while holding on the memory, press 

E/PGM

 to put the scanner 

in program mode and press 

PRI

. The scanner turns on the PRI icon when it is 

stopped on a memory designated as priority.

To turn on Priority Scan, press 

PRI

 while the scanner is scanning or holding 

on a memory (but not in program mode). You will notice a short break in audio 
every 2 seconds as the scanner checks the enabled priority memories. If there 
is a transmission on a priority memory, the scanner will immediately tune to that 
memory.

Using the Scanner Memories

UBC330CRS OM.indd   22

10/9/09   12:42:19 PM

Содержание UBC330CRS

Страница 1: ...UBC330CRS UBC330CRS OM indd 1 10 9 09 12 42 11 PM...

Страница 2: ...ollowing EARPHONE WARNING Use only a genuine Uniden earphone An incorrect earphone may be hazardous to your hearing Turn down volume before connecting the earphone and then adjust volume to suit Preca...

Страница 3: ...rty of their respective holders Important If you use the supplied AC adapter to power the scanner but have not installed batteries in the scanner never turn the scanner off by disconnecting the AC ada...

Страница 4: ...Using AM FM TV Channel Memory 19 Using the Scanner Memories 20 Programming Memories 20 Selecting a Memory 21 Scanning Memory Banks 22 Locking Unlocking Memories 22 Using Priority Scan 22 Setting Chann...

Страница 5: ...Location 26 Cleaning 26 Repairs 26 Birdies 26 Resetting the Scanner Clearing all Memories 26 Technical Specifications 27 One Year Limited Warranty 29 Contents ts UBC330CRS OM indd 4 10 9 09 12 42 11 P...

Страница 6: ...r Unpacking Your Scanner B UBC330CRS Scanner Note If any of these items are missing or damaged contact your place of purchase This Owner s Manual Other Printed Material AM Loop Antenna AC Adapter Tele...

Страница 7: ...9 AM Broadcast 2 25 00000 27 99500 AM 5 AM Band 3 28 00000 50 74500 FM 5 10 6 Meter Amateur Band 4a 51 7500 62 7500 69 7500 TV 7000 TV Broadcast AUS Mode Ch 0 2 4b 50 7500 60 7500 67 7500 TV 7000 TV...

Страница 8: ...n New Zealand Mode Air Band separate search setting for Air band 118MHz to 136 9875MHz Priority Channel Designate a specific frequency as a Priority Channel Then the radio scans and checks that channe...

Страница 9: ...r disable the LCD back lighted display Key Touch Tone a tone sounds to confirm you have made a valid key input while a different tone sounds to alert you to an invalid entry EEPROM Memory Backup the s...

Страница 10: ...9 Introduction Air U B C 3 3 0 C R S 1 2 3 4 5 6 7 8 9 10 11 12 13 14 15 16 17 18 19 21 20 Controls Scanner UBC330CRS OM indd 9 10 9 09 12 42 15 PM...

Страница 11: ...Use to select your desired operation Alarm Set Clock Set Clock 7 Hold press to temporarily stop scanning limit searching or AIR scanning and remain on the channel The scanner displays the channel on...

Страница 12: ...0 9 keys 16 SVC DIR In Scanner mode press to change to Service Search mode In AM FM mode press to change to Direct Entry mode to allow channel frequency selection using the up down arrows or 0 9 keys...

Страница 13: ...ates the designated Priority channel 9 HOLD Indicates a hold in Scan Search AIR and Direct Entry mode 10 POLICE Indicates a Police service search 11 MARINE Indicates searching commercial and private w...

Страница 14: ...he back of the scanner Then plug the Adapter into a standard household outlet that supplies 240V AC 50Hz Do not plug the adapter into a switch controlled outlet Open the battery compartment and insert...

Страница 15: ...ast stations and an external telescopic antenna to receive all other signals Connect the supplied rod antenna by pushing the antenna s connector onto the antenna jack on the back of the scanner and tw...

Страница 16: ...alia New Zealand The UBC330CRS is set to the Australian mode by default Australian mode Australian service search frequencies and TV channel frequencies New Zealand mode New Zealand service search fre...

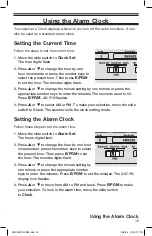
Страница 17: ...PGM AM PM flashes 4 Press s or t to select AM or PM To make your selection move the slide switch to Clock The scanner exits the clock setting mode Setting the Alarm Clock Follow these steps to set th...

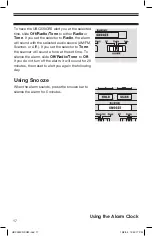
Страница 18: ...o source AM FM Scanner or AIR If you set the selector to Tone the scanner will sound a tone at the set time To silence the alarm slide Off Radio Tone to Off If you do not turn off the alarm it will so...

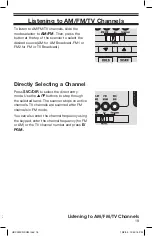
Страница 19: ...r FM2 for FM or TV Broadcast Directly Selecting a Channel Press SVC DIR to select the direct entry mode Use the s t buttons to step through the selected band The scanner stops on active channels TV ch...

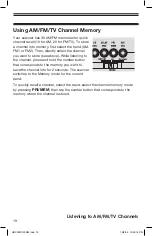
Страница 20: ...listening to the channel press and hold the number button that corresponds to the memory you want to save the channel into for 2 seconds The scanner switches to the Memory mode for the current band To...

Страница 21: ...your geographic area There are many frequency reference sources available on the internet that can get you started One such source http www radioreference com has a diverse listing of many conventiona...

Страница 22: ...ces the previous memory contents If you enter a frequency you have already stored in a different memory in Step 3 the scanner beeps and displays the channel where you have previously stored the freque...

Страница 23: ...nner turns off the L O icon and includes the memory when scanning its bank To unlock all memories press and hold L O for 2 seconds the scanner beeps twice and the L O icon disappears Using Priority Sc...

Страница 24: ...useful to help prevent missed replies Delay is turned on by default when you program a memory To turn Delay off or back on first select the channel Then press DELAY The scanner turns on the DELAY ico...

Страница 25: ...rch frequency 2 Enter one of the range limits then press E PGM Press s or t then enter the other range limit and press E PGM Searching the Selected Range After entering the limits or use the default l...

Страница 26: ...frequency then press E PGM to store the frequency into the memory Search Lockouts If the scanner stops on a frequency that you don t want to hear you can lock it out When locked out the scanner won t...

Страница 27: ...efore cleaning Clean the outside of the scanner with a mild detergent To prevent scratches do not use abrasive cleaners or solvents Be careful not to rub the LCD window Do not use excessive amounts of...

Страница 28: ...9 7500 0 2 AUS 1 3 NZ 70 0000 to 87 9875 12 5 kHz FM VHF Low Band 88 0000 to 107 9000 100 kHz WFM FM Broadcast 108 0000 to 136 9875 12 5 kHz AM Aircraft Band 137 0000 to 147 9950 5kHz FM 2 Meter Amate...

Страница 29: ...th at normal temperature 25 C 5 C Audio Output normal 0 9W Max Power Requirements 240V AC 10 50Hz Antenna Telescoping included AM Radio Loop Antenna included External Jacks Antenna jack AM Radio Anten...

Страница 30: ...ble and necessary B Modified altered or used as part of any conversion kits subassemblies or any configurations not sold by Uniden C Improperly installed D Repaired by someone other than an authorized...

Страница 31: ...reight pre paid with evidence of original purchase e g a copy of the sales docket to the warrantor at UNIDEN AUSTRALIA PTY LIMITED SERVICE DIVISION 345 Princes Highway Rockdale NSW 2216 Fx 02 9599 327...

Страница 32: ...2009 Uniden Australia Pty Limited Uniden New Zealand Limited Printed in PRC UBZZ01337BZ 0 UBC330CRS OM indd 31 10 9 09 12 42 19 PM...

Отзывы: