- 18 -
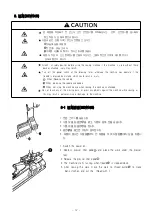
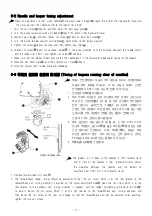
3. Loosen the looper holder screw④, and them move the looper holder⑤ in the direction of the arrow to adjust so that
the clearance between the tip of the looper and the center of the needle is 0.05-0.1mm when the two are aligned.
At this time, do not move the looper holder in any direction except the direction indicated by the arrow. If it is
moved in another direction, carry out the adjustments given in "9-2. Adjusting the needle and looper timing" .
4. Install the forward feed arm cover①.
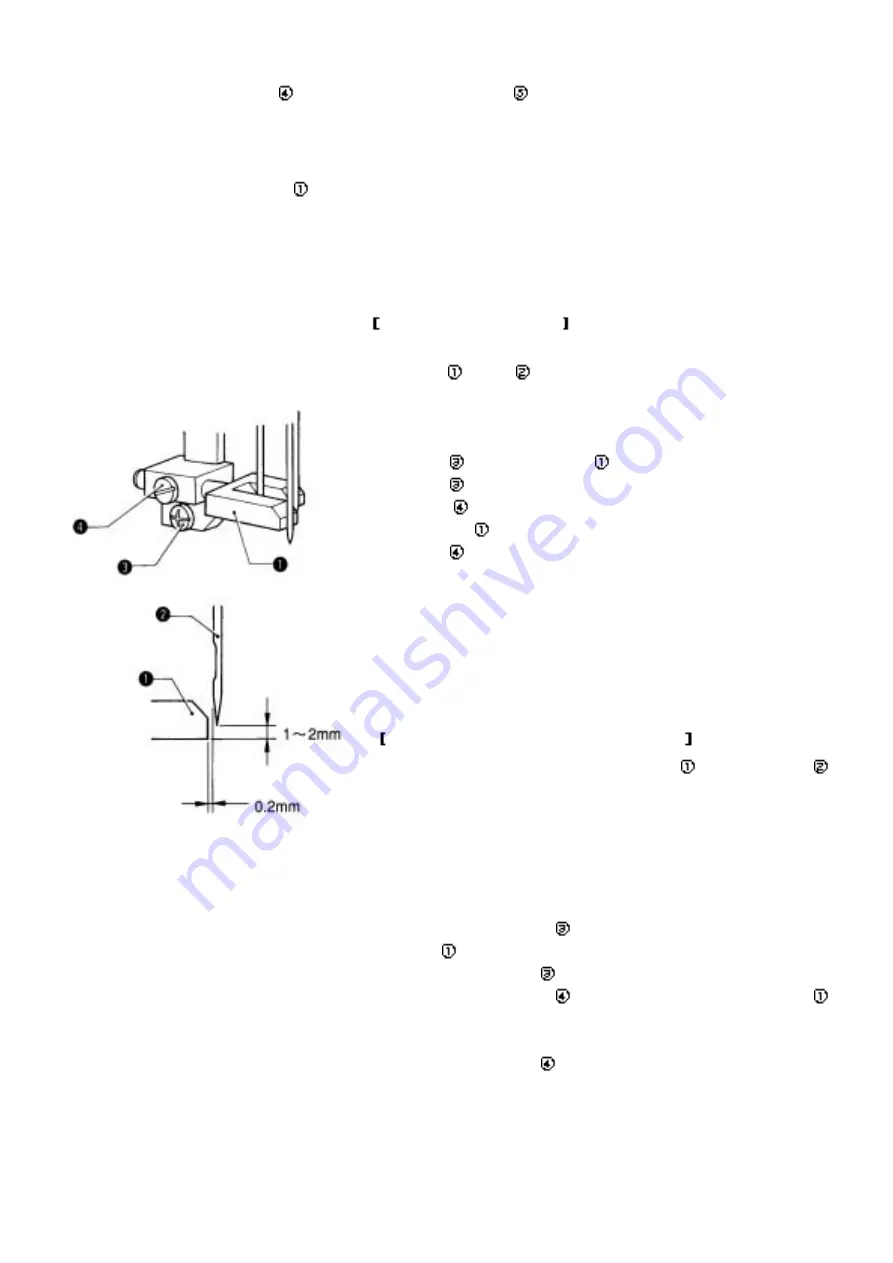
9-4 바늘 안내대의 조정
[이동 바늘 안내대의 경우]
☞
봉목길이 최소의 상태에서, 루퍼가 전진하고 바늘과 만날 때, 바늘
안내대①와 바늘②의 간격을 0.2mm 열어둡니다. 높이는 루퍼를
막지 않는 정도에서 제한하지만, 낮은 쪽으로 조정합니다.
1. 봉목길이를 최소로 합니다.(p12참조)
2. 풀리를 자기 앞쪽으로 돌려서, 루퍼선단을 바늘 중심에 일치시킵니다.
3. 고정나사③를 풀고, 바늘 안내대①를 상하로 움직여서 조정합니다.
. .. 4. 고정나사③를 체결합니다.
5. 고정나사④를 풀고, 바늘 안내대와 바늘의 간격은 0.2mm 되도록
바늘 안내대①를 좌우로 움직여서 조정합니다.
... 6. 고정나사④를 체결합니다.
(주의) 재봉천, 실의 종류 사용은 실제 봉목 길이를 일치시킨 상태에서
바늘 받침대가 바늘과 약간 접촉하도록 조절하면, 좋은 결과를
얻게 됩니다.
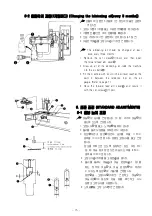
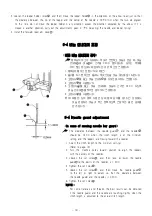
9-4 Need le guard adjustment
[In case of mo vin g ne edle bar gu ar d]
☞
The clearance between the needle guard① and the needles②
should be 0.2mm when the stitch length is at the minimum
setting and the loopers are moving toward the needles.
1. Adjust the stitch length to the minimum setting.
(Refer to page 12)
2. Turn the machine pulley toward yourself to aligh the loopers
with the centers of the needles.
3. Loosen the set screw③, and then raise or lower the needle
guard①to the points of the needles is 1-2mm.
4. Tighten the set screw③.
5. Loosen the set screw④, and then move the needle guard①
to the left or right to adjust so that the clearance between
the needle guard and the needles is 0.2mm.
6. Tighten the set screw④.
NOTE :
For some materials and threads, the best results can be obtained
if the needle guard and the needle are touching slightly when the
stitch length is adjusted to the actual stitch length.
Содержание DT6-H892?3
Страница 2: ......
Страница 4: ...5 off A S 31 2 40 25 OFF A S A S...
Страница 32: ...22 10 1 13 19 2 9 16 16 20 16 3 13 19 4 19 13...
Страница 34: ...24 5 9 9 10 11 13 20 9 16 6 9 9 16 18 9...

