7. Using Kronos
7.1 Setting Up Kronos
The Kronos is initialized by follow the steps below:
1.
Connect Kronos to the PC via a USB cable.
2.
Wait until Windows recognizes the new USB device.
3.
Start the Kronos software. Refer to the Appendix if Kronos does not initialize the correct COM
port.
7.2 Preparing Kronos for Experiments
Before performing any experiments, look for a white glow in the Kronos interior. This means Kronos
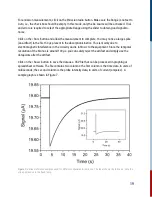
is powered up. Remove any samples and allow the LED probe light to be incident on the photodiode
and check that the photodiode meter displays a value. This will be I0, i.e., the baseline intensity
before any pump-induced changes.
In absorption mode during data acquisition, the Kronos will wait for approximately 2 sec between
flashes to allow enough time for the flash capacitors to recharge.
7.3 Choosing the Excitation and Detection Wavelengths
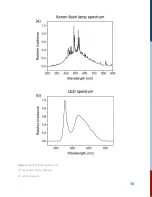
Kronos uses a Xe lamp and LED for the pump and probe light, respectively. Both are broadband
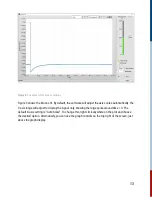
light sources and their spectra is shown in Figure 4. By using an appropriate filter, one of the
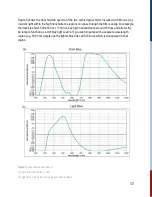
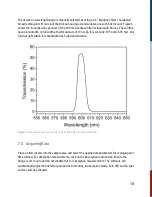
square colored glass filters, you can select which wavelength to pump (excite) the sample with,
and what range of wavelengths is measured by the detector. The filters isolate the wavelength of
interest by transmitting said wavelengths and blocking the others.
15
Содержание KRONOS
Страница 1: ......
Страница 17: ...Figure 4 Spectra of Kronos light sources a Xenon fl ash lamp for the pump b LED for the probe 16...
Страница 39: ......

