- 19 -
B.
Optical Alignment (Ultracollimator)
When the ULTRACOLLIMATOR is installed or after the ULTRAPOL advance system has been moved or
reseated, the following procedure should be followed:
1.
Mount a sample with a reflective surface onto work holder (puck).
2.
Mount work holder into quick release holder.
3.
Turn machine ON, turn monitor ON.
4.
Flip the switch to the lap and table to OFF position.
5.
Flip the switch to the rotation to ON position.
6.
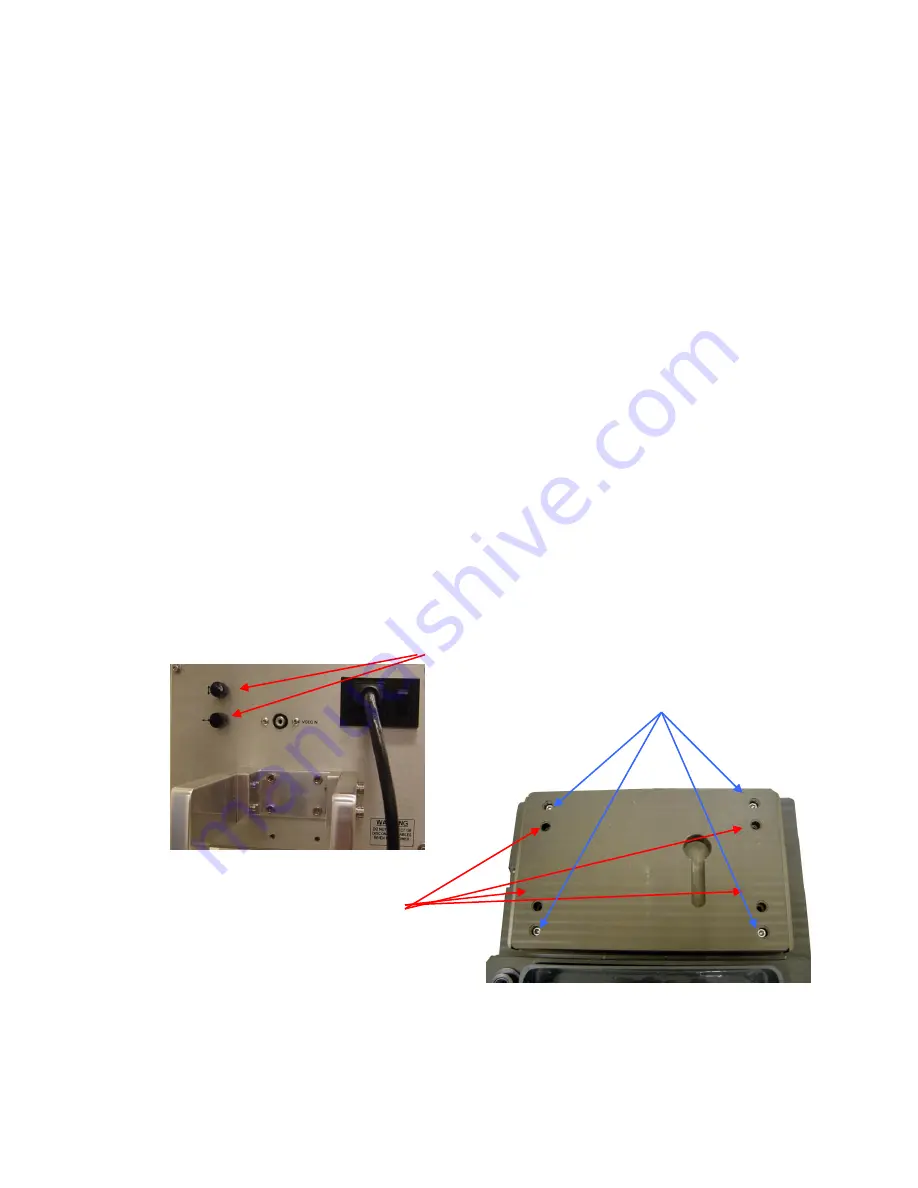
Use the set screws on the top of the monitor to adjust get a reflection dot if not already visible.
7.
Press the START button and allow the spindle to rotate.
8.
Observe the DOT on the screen moving in an orbit.
9.
Adjust the TILT KNOBS until the dot is stationary when the spindle is rotating.
10.
Use the set screws on the top of the monitor to adjust the location of the DOT to the center.
11.
Once DOT is in the center, tighten the screws on the back of the monitor.
12.
Place CALIBRATING crosshairs (adjusted on the back with a flat head screwdriver) directly over the
DOT.
Note:
Do not move the CALIBRATING crosshairs from this point forward; otherwise the machine will be
removed from calibration.
13.
Remove the sample and work holder from the quick release holder.
14.
Place optical flat on the lap. Observe location of DOT on screen.
15.
If no DOT appears, tilt the flat until a reflection is observed. Note the position of the tilt.
16.
Loosen the tightening screws on the back base plate.
17.
Use the base plate set screws to adjust for tilt on the mast. Adjust until the DOT is at the center of the
CALIBRATING crosshairs.
18.
Once centered, tighten the back base plate screws.
19.
System is now calibrated.
IV.
PREPARATION FOR FLAT POLISHING
A.
Mounting a Bare Die Sample
Set Screws
(Base Plate)
Tighten Screws
(Base Plate)
CALIBRATING
Crosshairs
Содержание 3250.1
Страница 2: ... Note System shown above is complete with the Ultracollimator system ...
Страница 35: ... 31 APPENDICES ...


