17
3.2.2 STARTUP WITH TRACER
EXTERNAL BATTERY
1.
Attach the battery cable to the battery.
The connector of the battery cable can
be attached to the battery output
connector only one way. Push the
connector downwards all the way.
2.
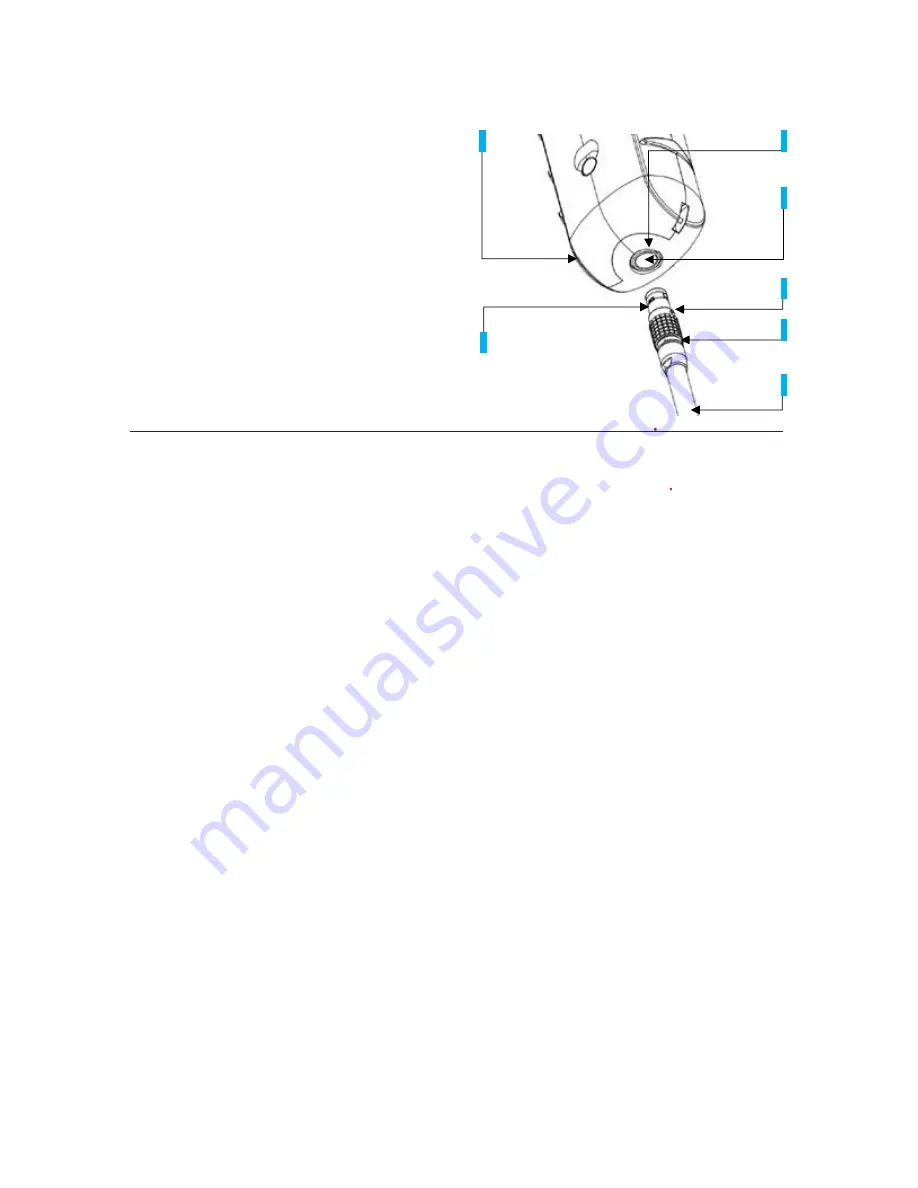
Attach the connector to the UltraView by
following instructions in
Image 8
, with
the orientation markings facing the same
way:
1.
Input Connector
2.
Battery Cable Connector
3.
Battery Cable
4.
Camera’s Handle
5.
Connector Lock Ring
6.
Input Orientation Marking
7.
Cable Orientation Marking
Both the UltraView and the battery cable have
red orientation markings
(
Image 8
). They
indicate the position of the key and the slot of the connectors which ensures the proper
connection orientation.
Hold the battery cable connector by the locking ring
(
Image 8
)
and make sure that the orientation markings of both connectors are aligned before inserting the
battery cable.
Then carefully insert the battery cable connector into the UltraView
. The
connectors should lock audibly.
When the power is on, the red Power LED is lit. The system starts after approximately
10 to 15 seconds. The UE Systems logo will appear on the screen. When the system
setup is complete, the UltraView’s interface will start automatically, and you are ready
to make sound visible!
!! NOTE: Hold the UltraView firmly by the handle!!
The UltraView has internal system backup batteries which are charged by the main battery while
in use.
At the first system start up
, it is recommended that the camera stays powered by the
main battery for at least 45 minutes, so the internal backup batteries are charged fully.
3.3
Device setup wizard
The first time the UltraView is powered up, the device setup wizard is shown. The wizard will help
you set up the settings needed for using the device. These settings can be changed later through
the settings menu. Please see section
4.7 Settings
for more details.
3.3.1 DEVICE REGISTRATION
To be able to upload snapshots to the Cloud and browse them, the device must first be registered
with the cloud service. Please follow the on-screen instructions during the setup wizard in order to
Image 8.
Different parts to consider when starting the UltraView.
0
4
0
2
0
6
0
1
0
7
0
0
5
0
0
3
0
Содержание ULTRAVIEW
Страница 1: ...1 UE SYSTEMS INC ULTRAVIEW MANUAL ...


