UDO Super 6 — Owner’s Manual
19
Saving a Sound as a Patch
Saving a sound as a patch is similar to selecting patches. Be aware that
saving a sound will overwrite the sound previously saved to that memory
location. The Super 6 allows you to compare your modified or newly
created sound to the original patch by using the compare function (see the
following paragraph “Comparing an Edited Patch to a Saved Patch”).
To save a sound as a patch:
1. Choose and press a bank select button on the right. If you wish to
access the other bank associated with the bank select button press
it again. You can toggle between banks associated with each bank
select button by pressing that bank select button.
A solidly lit LED in the button means that the first bank associated
with that bank select button is selected. A flashing LED in the
button means that the second bank associated with that bank
select button is selected.
2. Press and hold a patch select button of your choice on the left for
3 seconds. All of the patch and bank select button LEDs will flash
once to signal that your sound is now saved.
Comparing an Edited Sound to a Saved Patch
Comparing an edited sound to a saved patch can be very useful during
the creation of sounds. This option allows you to compare sounds before
committing to saving and overwriting any patches you might still have
good use for.
To compare an edited sound to a saved patch:
1. Press a patch select button to load a saved patch.
2. Press the same patch select button again to return to the sound
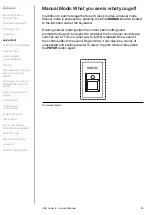
you were editing. Pressing the
PATCH
button next to the
SHIFT
button will also toggle between the saved patch and the sound you
were editing. Editing any saved patch will cause its corresponding
patch select button LED to flash.

