45
Appendix B: Standalone Mode
UniFi Video User Guide
Ubiquiti Networks, Inc.
Appendix B: Standalone Mode
Standalone mode lets you directly access a UniFi Video
camera via a web browser, without using the UniFi Video
software. Use standalone mode to set up a camera right of
the box, and to view a live video feed via RTSP streaming.
Using Standalone Mode
Note:
To use standalone mode on a UniFi Video
camera, the camera’s firmware must be updated to
version 3.9. To download the latest firmware for the
UniFi Video camera, go to
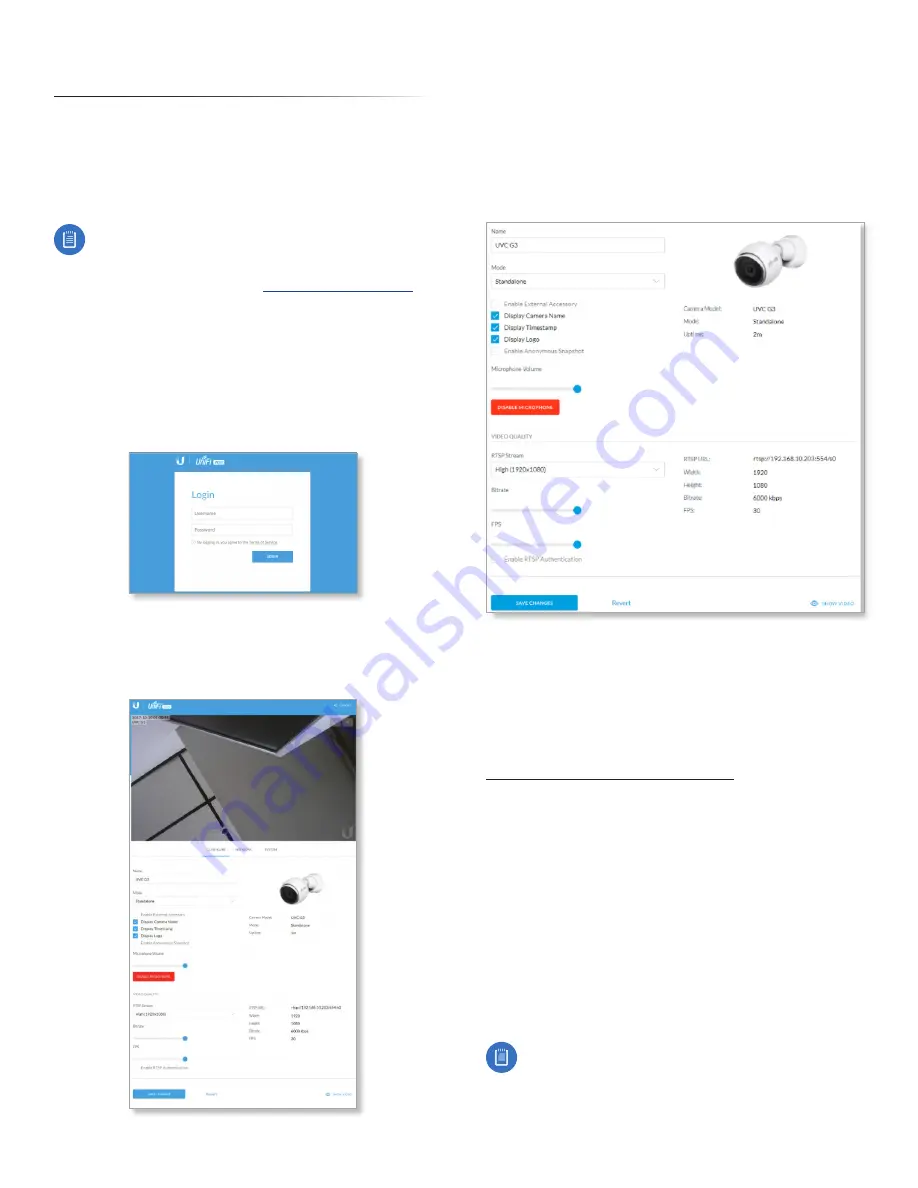
To use standalone mode on a UniFi Video camera:
1. Enter
https://<camera_IP>
in your browser’s address
field (where
camera_IP
is the IP address of the camera
you want to access). Press
Enter
(PC) or
Return
(Mac).
2. The camera’s login screen will appear. Enter your
Username
and
Password
(
ubnt
for both if this is the
initial login to the camera). Then click
Login
.
3. If you want to set up the camera, click
Continue
and
follow the prompts. Otherwise, click
Skip
.
4. The camera’s standalone mode window will appear,
displaying a live video feed and camera information.
Below the live video display, the window has three tabs:
Configure
,
Network
, and
System
. Edit the settings on each
tab as needed.
Configure Tab
The
Configure
tab displays basic camera settings and
allows you to configure certain settings. The top section of
the
Configure
tab provides the following information:
Name
Displays the local device name and a thumbnail
image of the camera.
Mode
The mode of the camera:
UniFi Video
or
Standalone
.
The
UniFi Video
setting indicates that the camera is being
managed by UniFi Video. To go into standalone mode,
select
Standalone
and click
Save Changes
. (If you are
prompted to unmanage the camera, do so as described in
“Unmanaging a Camera” on page 49
.)
UniFi Video Server
(Available in UniFi Video mode only.)
Displays the IP address of the UniFi video server.
Display Camera Name
Used to enable or disable the
camera name display in the video feed. Default is
Disabled
.
Display Timestamp
Used to enable or disable the
timestamp in the video feed. Default is
Enabled
.
Display Logo
Used to enable or disable the logo display
in the video feed. Default is
Enabled
.
Microphone Volume
Move the slider left or right to
adjust the microphone volume for recording audio.
Disable Microphone
To disable the microphone, click
Disable Microphone
and then click
Continue
to confirm.
Note:
To re-enable the microphone, you will have
to manually reset the camera to factory defaults by
pressing its reset button.
Содержание UniFi G3 Dome
Страница 2: ......
Страница 24: ...20 Chapter 5 Timeline UniFi Video User Guide Ubiquiti Networks Inc...
Страница 28: ...24 Chapter 7 Alerts UniFi Video User Guide Ubiquiti Networks Inc...
Страница 36: ...32 Chapter 9 Settings UniFi Video User Guide Ubiquiti Networks Inc...
Страница 54: ...50 UniFi Video User Guide Ubiquiti Networks Inc...


