background image

19

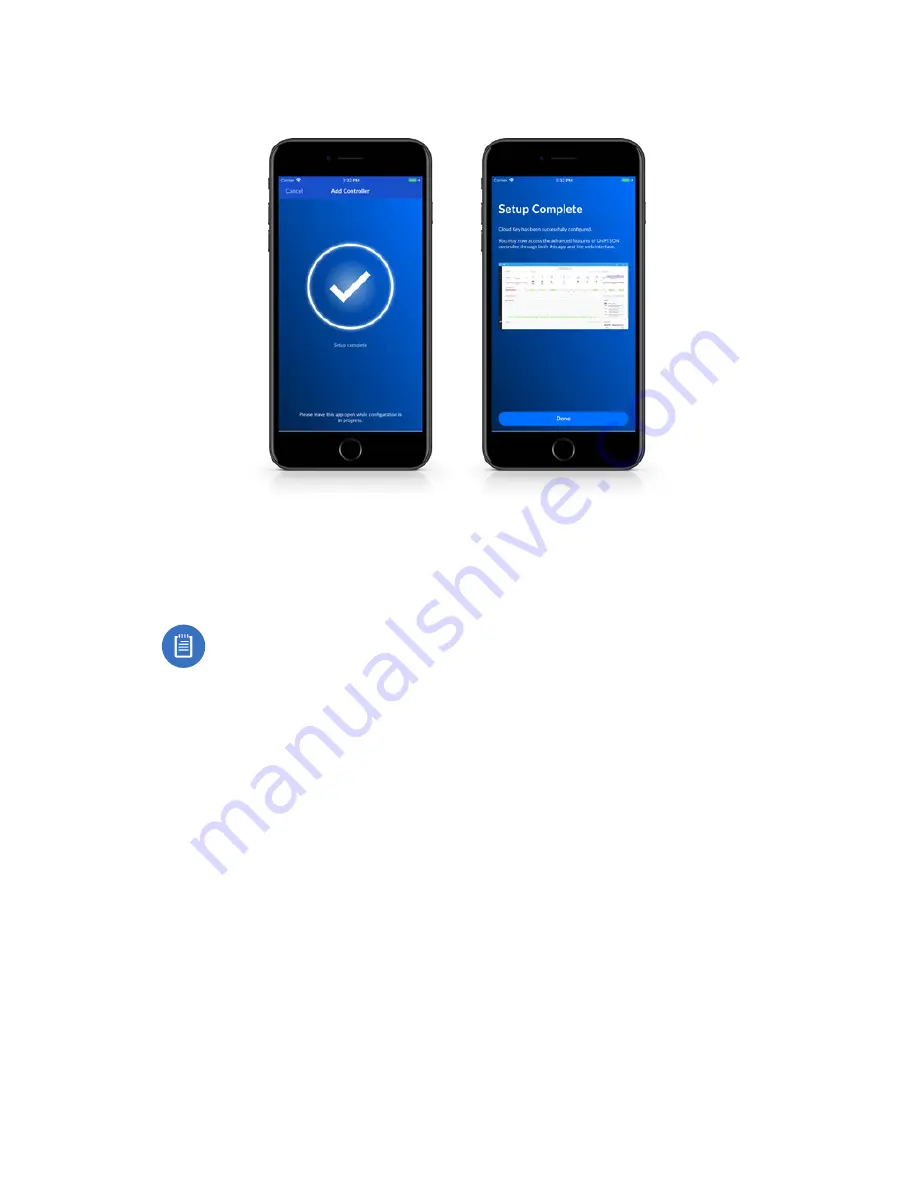
9.  Installation is now complete. When the Setup Complete 

screen appears, tap Done.


Pre-installed Software

The UniFi SDN Controller and UniFi Protect software 
applications come pre-installed on the Cloud Key Gen2 Plus.

Note:

 You can run the UniFi SDN Controller or UniFi 

Protect software individually, or you can run both 
applications simultaneously.

Содержание UCK-G2-PLUS

Страница 1: ...Model UCK G2 PLUS...

Страница 2: ...2 Setting Up UniFi SDN via App 14 Pre installed Software 19 Setting Up UniFi Protect via App 20 Chrome Instructions 26 Setting Up UniFi SDN 27 Setting Up UniFi Protect 31 Cloud Key G2 Settings 36 HDD...

Страница 3: ...UniFi Cloud Key Gen2 Plus System Requirement Web Browser Google Chrome Other browsers may have limited functionality TERMS OF USE All Ethernet cabling runs must use CAT5 or above It is the professiona...

Страница 4: ...ork Topology A DHCP enabled network for the Cloud Key Gen 2 Plus to obtain an IP address UniFi PoE Switch UniFi Security Gateway DHCP Server Internet LAN WAN UniFi Cloud Key Gen2 Plus Sample Network D...

Страница 5: ...gured and ready Flashing Main power has been lost and device is counting down If power is restored within 10 seconds the device will return to its previous state If power is not restored within 10 sec...

Страница 6: ...iFi Protect Display LCD Display for UniFi SDN Icon Description UniFi SDN Controller name and bandwidth Status of Cloud Access Number of managed UniFi Access Points Number of client devices on the netw...

Страница 7: ...five seconds until the status LED begins flashing white Power Button Press to turn the Cloud Key Gen 2 Plus on or off USB Type C Power Port Used for power if PoE is not available Quick Charge 2 0 or...

Страница 8: ...nts removal of the HDD while the device is in use Rack Mount Notch Secures the Cloud Key Gen2 Plus into the docking bay of the optional Rackmount Accessory model CKG2 RM sold separately The Rackmount...

Страница 9: ...Gen2 Plus and allows you to install it in a standard 19 rack Note Out of the box the 13 Pin Connector is covered with a black sticker to protect it from dust and dirt Only remove the sticker if using...

Страница 10: ...ct an Ethernet cable not included to the Ethernet Port 2 Connect the other end of the Ethernet cable to a port on a network switch such as a UniFi PoE Switch 1 3 5 7 9 11 13 15 17 19 21 22 2 4 6 8 10...

Страница 11: ...can be powered by a UniFi PoE Switch or other 802 3af compliant switch 1 3 5 7 9 11 13 15 17 19 21 22 2 4 6 8 10 12 14 16 18 20 22 24 SF P1 SF P2 UniFi Switch Power Connection Diagram USB Power Source...

Страница 12: ...ount Accessory follow these instructions 1 Attach the Rackmount Accessory to the rack using four Mounting Screws If the rack has square slots then use Cage Nuts with the Mounting Screws 2 Connect an E...

Страница 13: ...rom the 13 pin connector 3 Insert the Cloud Key Gen2 Plus into the docking bay once the following three conditions are met a The 13 pin connector is face up b The LCD screen is face forward c There is...

Страница 14: ...configure the Cloud Key Gen2 Plus Note Ensure that Bluetooth is enabled on your mobile device You will need to set up the Cloud Key Gen2 Plus with your mobile device and be within 1 5 m 5 from where...

Страница 15: ...er is detected swipe through the app screens horizontally until you locate the correct Cloud Key Gen2 Plus Then tap Set up this controller 3 Once connected the corresponding Controller Setup screen wi...

Страница 16: ...Cloud Access Allow Local Login with SSO and Enable UniFi Protect When you are finished tap Next Note To ensure continuous accessibility to the Cloud Key Gen2 Plus once setup is complete turn the Cloud...

Страница 17: ...each device you wish to adopt To skip the adoption process tap Finish and proceed to step 8 6 Once you ve selected one or more UniFi Access Points to adopt an additional step will be added to the setu...

Страница 18: ...ate a wireless network name and password When you are finished tap Finish Note You may also create an optional guest network by tapping the Enable Guest Access toggle switch to on and following the on...

Страница 19: ...tap Done Pre installed Software The UniFi SDN Controller and UniFi Protect software applications come pre installed on the Cloud Key Gen2 Plus Note You can run the UniFi SDN Controller or UniFi Prote...

Страница 20: ...Key Gen2 Plus Note When you first launch UniFi Protect the app will prompt you to enable Bluetooth and other relevant features necessary to provide the best user experience possible Please allow thes...

Страница 21: ...the status of the cloud services and version information for each To add a new controller tap Add Controller Note If your app was previously connected to a controller it will automatically connect to...

Страница 22: ...Next 5 When the second Device setup screen appears select the services you wish to enable by tapping the toggle switch to on for each of the following items Enable Cloud Access which is currently ena...

Страница 23: ...screen appears tap each camera in the list you would like to add to your UniFi Protect system Tap Set up cameras to continue Note If you don t see any cameras listed check for proper connectivity to e...

Страница 24: ...you selected in step 7 Enter a name for each camera and tap Next repeating this process until all cameras have been named 9 If necessary any camera requiring a firmware upgrade will update at this tim...

Страница 25: ...ers to view add or delete users in UniFi Protect c Tap System Settings to view configuration information or to reset your controller d Tap Sign Out to log out of UniFi Protect e Tap Add Cameras to add...

Страница 26: ...ller can be found on the front panel LCD of your Cloud Key Gen2 Plus 3 When the following splash screen appears a Click Launch under UniFi SDN to set up your UniFi SDN controller Then proceed to the f...

Страница 27: ...ck Next 2 Select each of the devices you would like to configure and click Next 3 If configuring a UniFi access point during setup a Configure WiFi screen will prompt you to create a wireless network...

Страница 28: ...ck Finish To update any of these settings click Back to visit a previous section and make the necessary changes When you return to this screen click Finish 6 Enter the login credentials for your UBNT...

Страница 29: ...ps 192 168 1 8 2 When the splash screen appears click Launch under UniFi SDN 3 Enter the username and password credentials associated with your UBNT or cloud access account and click Sign In 4 The Das...

Страница 30: ...lists detailed information about local and surrounding wireless networks client and device statistics security and connection detail and other controller access information The Release Notes window pr...

Страница 31: ...Click End User License Agreement to view the license and click the checkbox to accept the license agreement d Click Next 2 Create a system admin account for your NVR a Enter a username in the Usernam...

Страница 32: ...mera you would like to add Click Select All to add all of the cameras listed b Enter a name to identify each camera you ve selected c Click Add Selected Cameras to continue 4 Click Allow to link your...

Страница 33: ...33 6 When the setup process finishes click Continue 7 The UniFi Protect system is now complete...

Страница 34: ...ash screen appears click Launch under UniFi Protect 3 Enter the username and password credentials associated with your UBNT or cloud access account and click Submit 4 The Cameras screen lists all of t...

Страница 35: ...o create a new live view Review events recorded by UniFi Protect Customize your events by selecting a camera from the drop down list and creating a specific date range of recordings to view You can al...

Страница 36: ...ment Portal 1 The UniFi Management Portal opens up to the Overview section of the Cloud Key Gen2 Plus settings and configuration To view system statistics click System Stats To view the current config...

Страница 37: ...workload temperature and memory usage 4 From the Overview screen click Configure to access the system settings and application services information 5 Use the Configuration screen to update the system...

Страница 38: ...our data from the drive 2 Power off the Cloud Key Gen 2 Plus to prevent any software disruption 3 On the bottom of the Cloud Key Gen 2 Plus slide the HDD Latch to release the HDD tray WARNING Do not r...

Страница 39: ...into the tray first at a slight angle 6 Press the other side down into place and ensure the drive is fully seated and secure on both sides 7 Slide the HDD tray back into the drive bay and press firmly...

Страница 40: ...de UniFi SDN Protect Up to 20 UniFi Cameras Up to 15 UniFi Cameras and 50 UniFi Devices eMMC Memory 32 GB Networking Interface 1 10 100 1000 Ethernet Port Buttons 1 Power 1 Reset LEDs 1 Power White Bl...

Страница 41: ...shall be free from defects in material and workmanship for a period of one 1 year from the date of shipment by UBIQUITI NETWORKS under normal use and operation UBIQUITI NETWORKS sole and exclusive obl...

Страница 42: ...USES QUIET ENJOYMENT FITNESS FOR A PARTICULAR PURPOSE AND NON INFRINGEMENT AND ANY WARRANTIES ARISING FROM ANY COURSE OF DEALING USAGE OR TRADE PRACTICE IN CONNECTION WITH SUCH PRODUCTS AND SERVICES B...

Страница 43: ...TS ARISING OUT OF THE USE INABILITY TO USE OR THE RESULTS OF USE OF THE PRODUCT WHETHER BASED IN WARRANTY CONTRACT TORT OR OTHER LEGAL THEORY AND WHETHER OR NOT ADVISED OF THE POSSIBILITY OF SUCH DAMA...

Страница 44: ...dio communications Operations of this equipment in a residential area is likely to cause harmful interference in which case the user will be required to correct the interference at his own expense Thi...

Страница 45: ...e install pour fournir une distance de s paration d au moins 20 cm de toutes les personnes et ne doit pas tre situ ou op rant en conjonction avec une autre antenne ou un autre metteur sauf dans les ca...

Страница 46: ...tronische Ger te ber die daf r zust ndigen und von der Regierung oder rtlichen Beh rden dazu bestimmten Sammelstellen zu entsorgen Ordnungsgem es Entsorgen und Recyceln tr gt dazu bei potentielle nega...

Страница 47: ...ics locaux le service de traitement des d chets ou l endroit o vous avez achet le produit Italiano La direttiva europea 2012 19 UE richiede che le apparecchiature contrassegnate con questo simbolo sul...

Страница 48: ...atimustenmukaisuusvakuutuksen t ysimittainen teksti on saatavilla seuraavassa internetosoitteessa www ubnt com compliance Fran ais French Le soussign UBIQUITI NETWORKS d clare que l quipement radio le...

Страница 49: ...om n Romanian Prin prezenta UBIQUITI NETWORKS declar c tipul de echipamente radio UCK G2 PLUS este n conformitate cu Directiva 2014 53 UE Textul integral al declara iei UE de conformitate este disponi...

Страница 50: ...logo TOUGHCable UniFi UniFi Protect and UniFi SDN are trademarks or registered trademarks of Ubiquiti Networks Inc in the United States and in other countries Apple and the Apple logo are trademarks...

Отзывы: