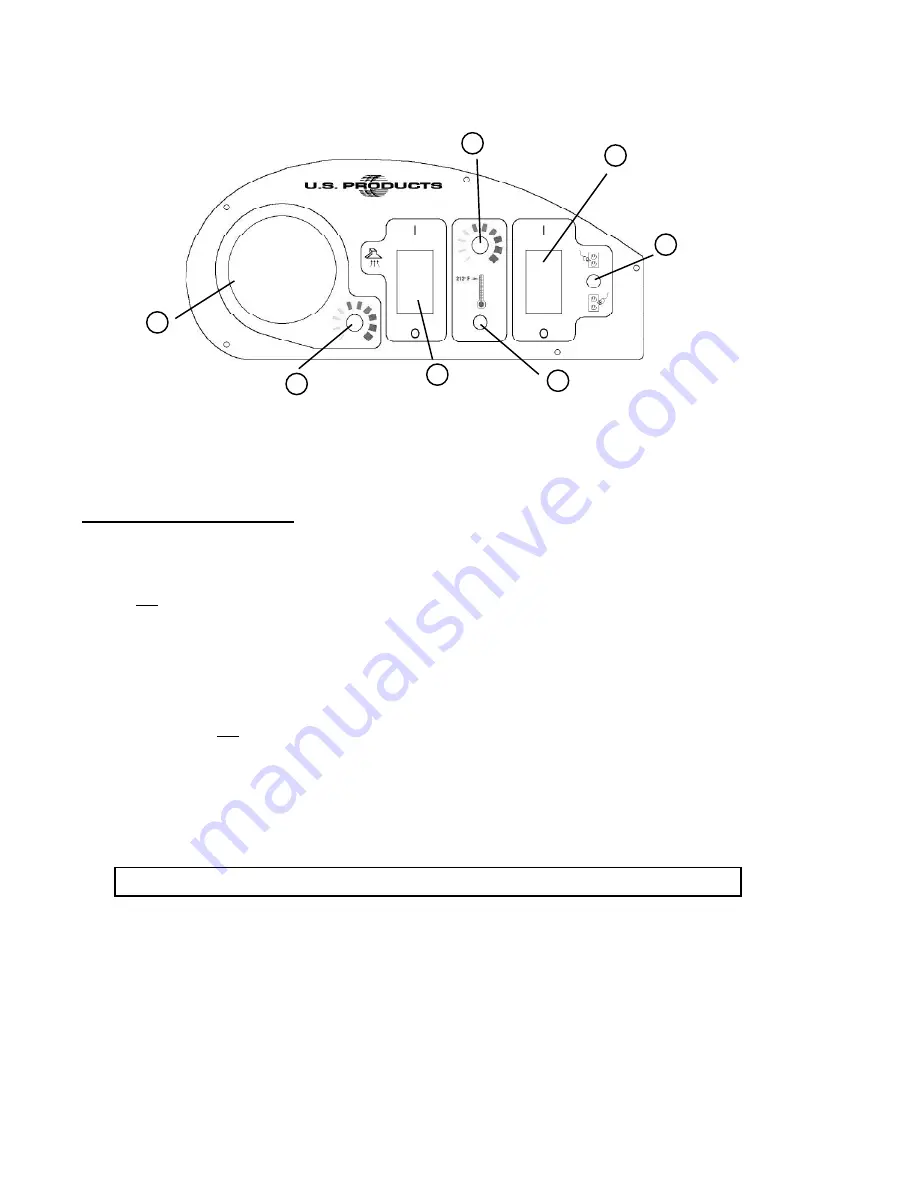
SWITCH PLATE
PUMP
PRESSURE
ADJUST
TEMPERATURE
ADJUST
CIRCUIT LOCATOR
LIGHT INDICATES
TWO CIRCUITS.
HEATER WILL
AUTOMATICALLY
TURN ON
BYPASS SWITCH.
TURNS THE HEATER ON
WHEN GREEN LIGHT IS
NOT ON
1
2
3
VACUUM
ON/OFF
SWITCH
4
5
6
INDICATES
SPRAYING
PRESSURE
PRESSURE
GAUGE
7
RED LIGHT INDICATES
HEATER IS HEATING
SET-UP and OPERATION
4
1.
Before each use, inspect the machine, hoses, and cleaning tools for cleanliness and completeness.
Make sure hoses are in good condition and the spray nozzles are tight.
2. If not using the auto-dump feature, just make sure the brass cap is on the drain hose connector on
the dump pump on the rear of the base of the machine.
If you choose to use the auto-dump feature, remove the brass cover on the hose connector on
the dump pump outlet, on the rear of the machine, attach the dump hose, and place the open end
of the hose in a drain. Make sure the recovery tank drain hose is capped tightly, and the lid is tight
on the recovery tank.
3. If you choose not to use the auto-fi ll feature, just fi ll the tank with water and cleaning chemical.
Follow chemical directions regarding dilution and mixing. Do not use harsh chemicals; they may
damage seals in pumps and valves.
If you choose to use the auto-fi ll feature, connect the fi ll hose to the auto-fi ll hose connector
(located over the Solution tank fi ll hole). Turn on the water source -- HIGH PRESSURE IS NOT
NECESSARY -- and allow the tank to fi ll with water. When using the auto-fi ll system, the auto-fi ll
fl oat will automatically turn on and turn off as the tank empties and then fi lls.
NOTE: Never put water with a temperature exceeding 130
°
F / 54
°
C in the solution tank
4. Pre-spray the area to be cleaned with a pump-up sprayer, while the tank is fi lling, if you are not using
cleaning chemicals in the solution tank. Follow chemical directions.
5. Plug in the two power cords. Do not connect both cords to the same outlet. The green, ‘separate
circuit’ locator light (1) on the switch plate should light up. If the locator light does not come on,
check the circuit breaker box in the wall, and/or try different outlets until it does turn on. Although
all systems in the machine may work correctly if you are not on two circuits, a circuit breaker in a
wall panel may trip. If you make sure the green light is turned on, you will prevent tripped circuit
breakers. When the red light is on, the heater is actively heating the water.


