PAGE 3 OF 9
0521 IH-8520
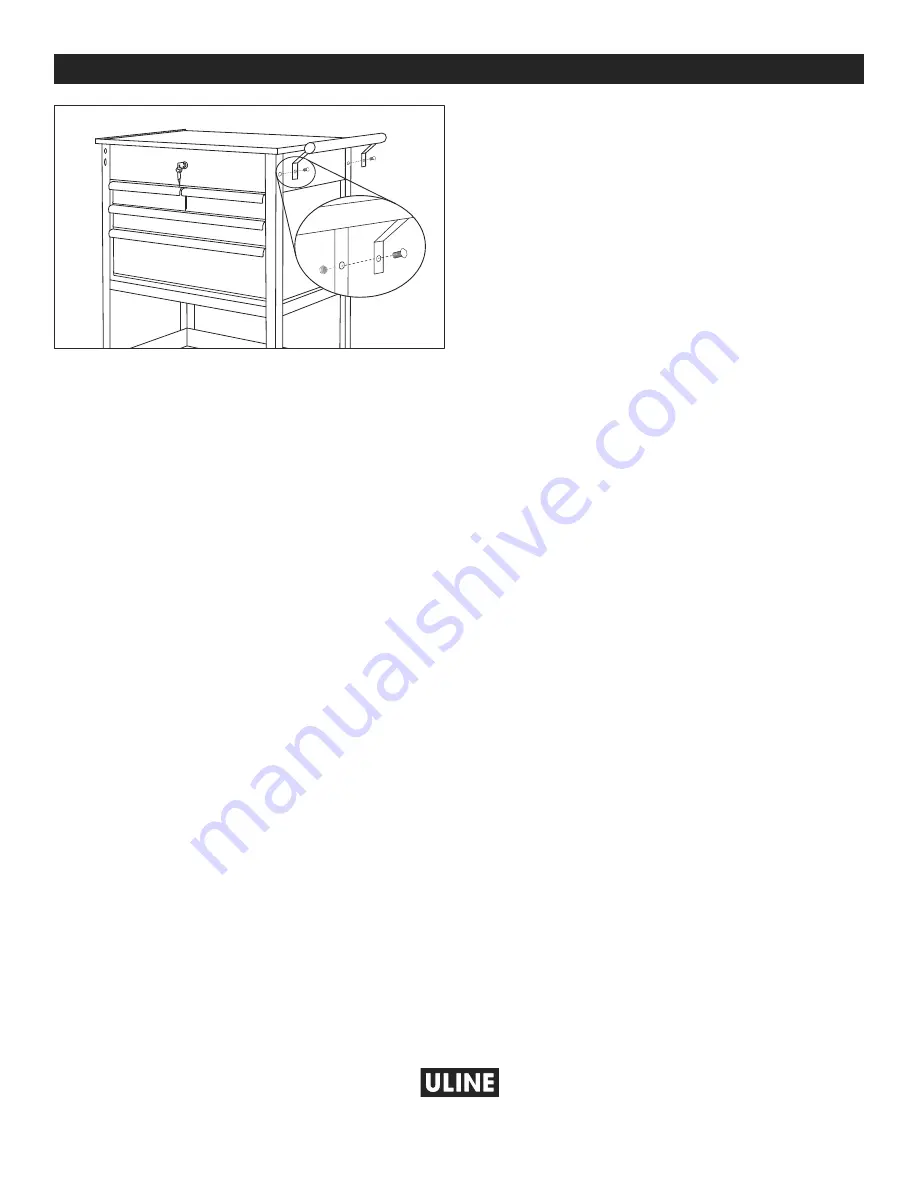
ATTACH HANDLE
1. Align handle with remaining open holes from last
step. (See Figure 5)
2. Attach handle with the two 5/16 x 5/8" bolts and two
13 mm nuts. Tighten nuts from inside the chest.
ASSEMBLY CONTINUED
Figure 5
1-800-295-5510
uline.com


