PAGE 6 OF 27
0921 RH-8754
SETUP CONTINUED
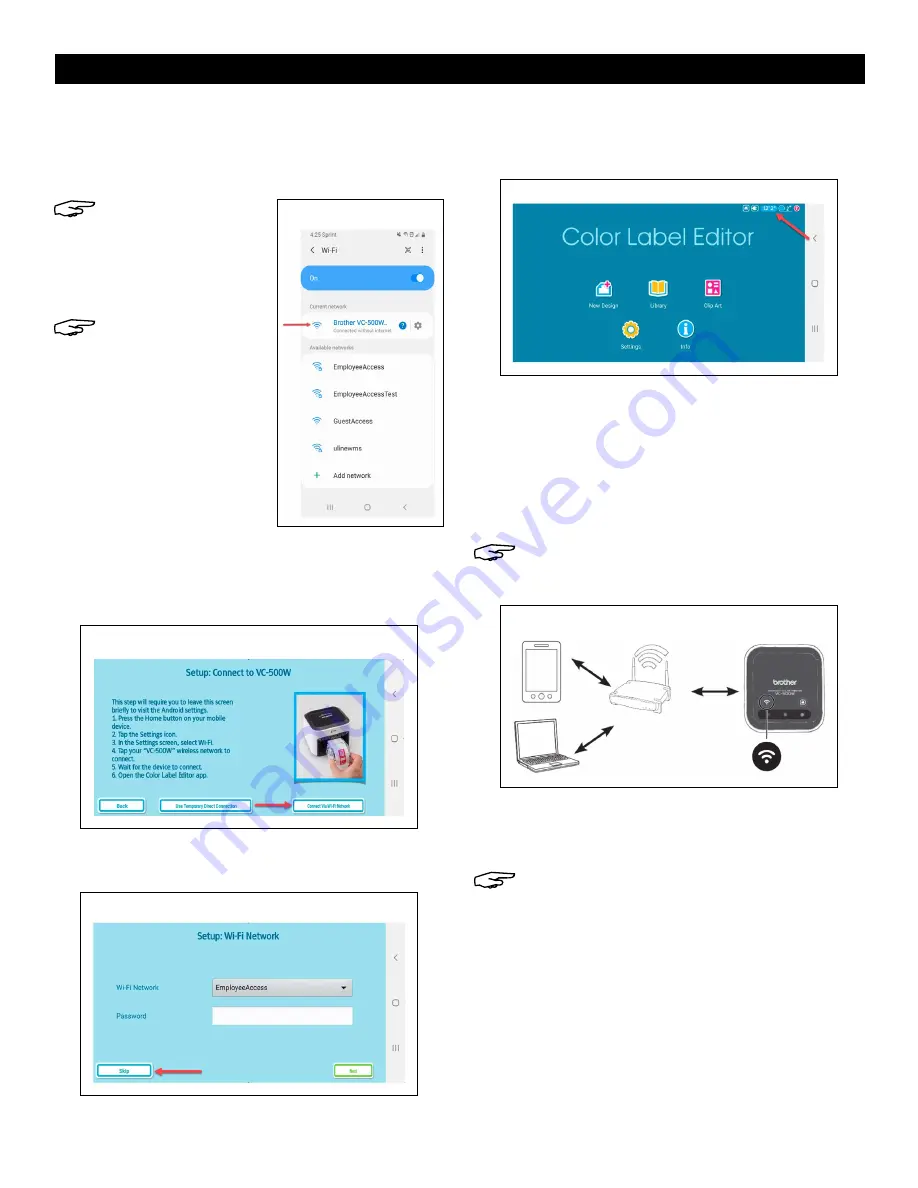
11. Minimize
Brother Color Label Editor
app and go
to
Settings
on device. In
Settings
, go to
WiFi
and
ensure it is turned on. Select
Brother VC-500W ####
network. (See Figure 23)
NOTE: Last four digits
of network name
(####) are the last
four digits of serial
number on bottom of
printer.
NOTE: Device has no
internet access while
connected directly to
printer.
12. Return to
Brother Color Label Editor
app. Once
device is connected, Connect Via Network WiFi will
turn green. Click Connect Via Network WiFi.
(See Figure 24)
13. WiFi setup is complete. Click
Skip
to go to home
screen and start designing labels. (See Figure 25)
14. On home screen, check that label size is displayed
in top right corner to verify printer is connected. To
design a label, click
New Design
. (See Figure 26)
COMPUTER: SOFTWARE SETUP AND
NETWORK WIFI CONNECTION
1. On printer, press and hold WiFi button (1) for two
seconds to activate
Infrastructure Mode
. In
Infrastructure Mode
, WiFi button LED is blue.
(See Figure 27)
NOTE: Infrastructure Mode allows printer to
connect to WiFi-enabled devices through
Network WiFi.
2. Connect printer to computer using micro USB
cable (12). Open web browser and go to
support.brother.com
NOTE: Website defaults to United States
(English). For other languages, click on Change
Countries or Regions (Language) in top left
corner.
Figure 23
Figure 24
Figure 25
Figure 26
Figure 27


