


Doc
No.
FM0665
issue
D
Page
16
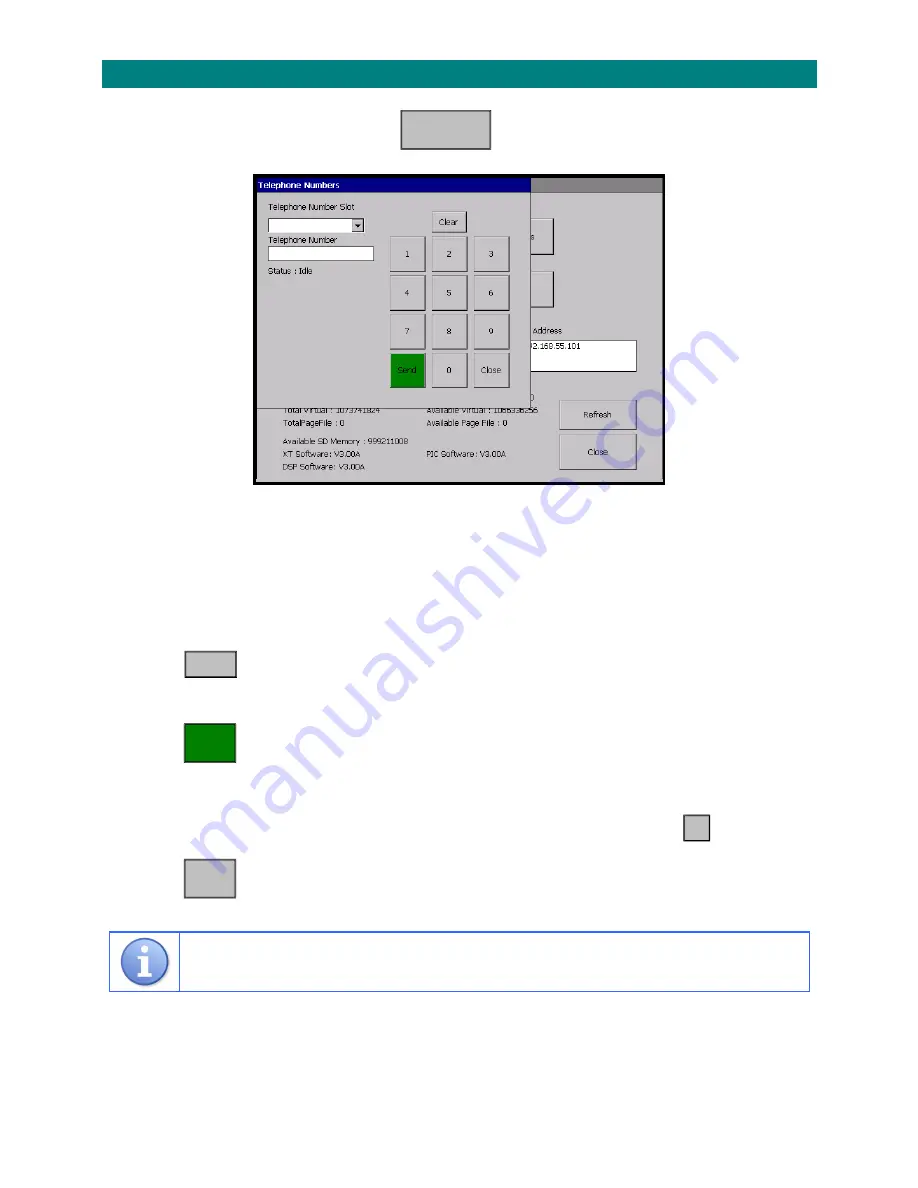
6.2
CHANGE
TELEPHONE
NUMBERS
From
the
System
Utility
screen
touch
the
button
and
the
screen
will
display;
Touch
the
Telephone
Number
Slot
list
box
and
select
the
number
to
add
or
change
Status:
Requesting
will
be
displayed
for
a
moment
Status:
No
Number
Assigned
will
be
displayed
if
there
is
no
number
in
this
location
Status:
Received
will
be
displayed
and
the
current
number
will
be
in
the
Telephone
Number
box
Touch
the
button
to
delete
the
current
number
(if
applicable)
Enter
the
new
telephone
number
using
the
0
–
9
buttons
and
check
it
is
correct
Touch
the
button
Status:
Transmitting
will
be
displayed
for
a
moment
Message
from
xt:
“
The
number
has
been
changed
”
window
will
appear,
touch
the
button
Touch
the
button
to
exit
Always
perform
a
test
call
to
confirm
the
new
telephone
number
is
correct
Tel. Numbers
Clear
Send
Close
OK


