


Doc
No.
FM0665
issue
D
Page
14
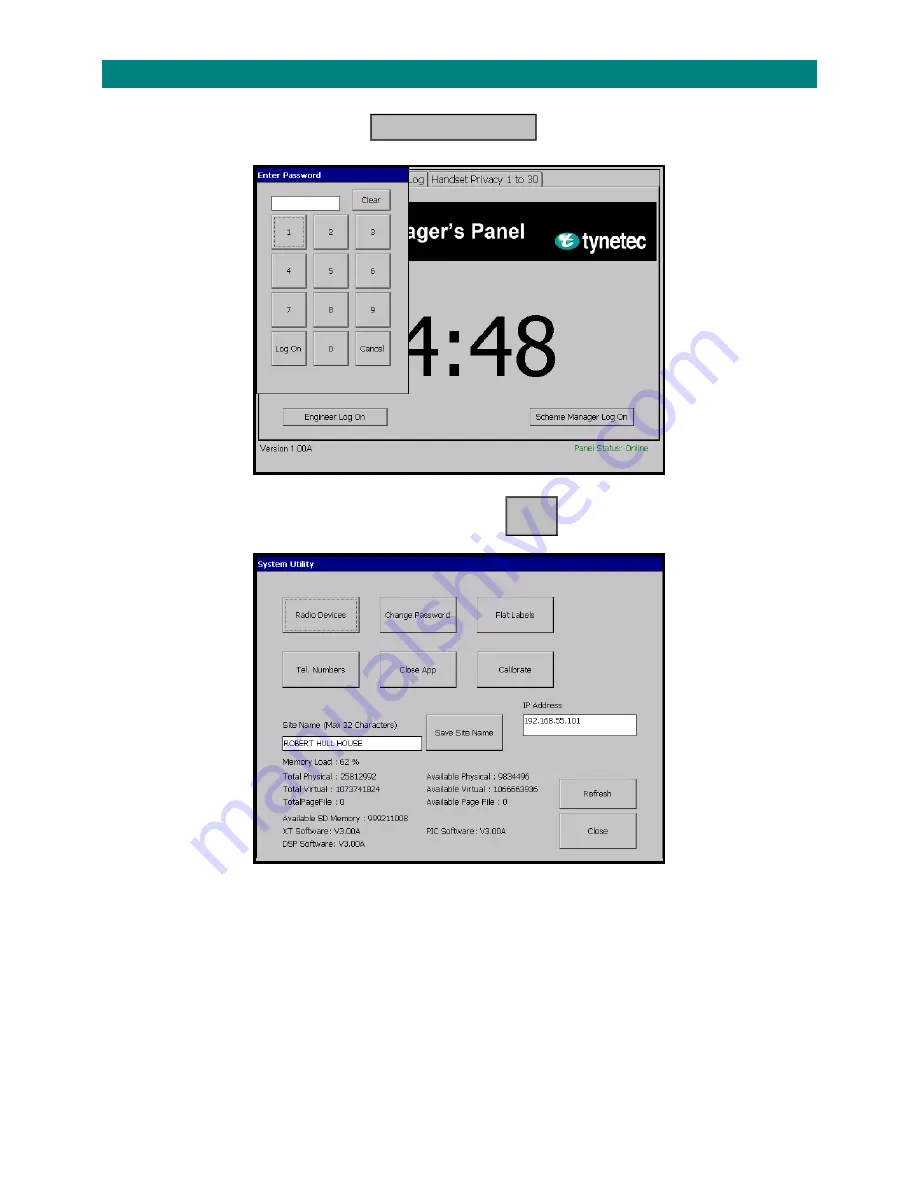
6.
ENGINEER
LOG
ON
From
the
Welcome
screen
touch
the
button
and
the
screen
will
display;
Enter
the
Engineers
password
(default
2371
)
then
touch
and
the
screen
will
display;
See
section
5.1
to
Add
a
Radio
Device
See
section
5.2
to
Remove
a
Radio
Device
See
section
5.3
to
Change
Password
See
section
6.1
to
Change
Flat
Labels
See
section
6.2
to
Change
Telephone
Numbers
See
section
6.3
to
Change
Site
Name
See
section
6.4
to
Close
the
Application
See
section
6.5
to
Calibrate
the
Touchscreen
Engineer
Log
On
Log On


